|
| AVATAR: IN-DEPTH REVIEW |
|
Hello and welcome to the first part of our exclusive in-depth review of Stern's new Avatar game. As usual, we'll be dividing this in-depth review into two parts. This first part looks at the game's hardware - the cabinet, the playfield, the mechanisms and the artwork - while the second concentrates on the rules, the sounds, the lights and the display effects, before summarising our conclusions on the game and its constituent parts. To be strictly accurate we should probably call it "James Cameron's Avatar", but nobody is going to call it that, just like everyone misses the 'Pro' off the end of Big Buck Hunter Pro. So, Avatar it is.
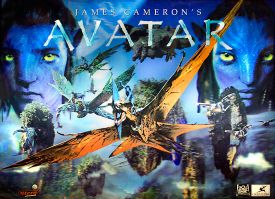
Avatar stands out from the crowd from the very first glance, thanks to its unusual and highly-effective 3D backglass image. We've tried to give you a sense of it in the image above (try staring at it for a few seconds) but in real life it looks much more impressive. If you crouch over the machine to peer at the backglass you start to see the limitations, but who's going to stand that close anyway?
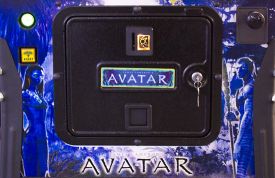
There is one slight problem with these 3D translites - they don't roll up. So shipping or transporting one is a little tricky. Avatar is also the first game to feature the new Stern Pinball logo. It's on the translite, the apron decals, the manual, a sticker on the front molding and on the dot matrix display amongst other places. While the backglass image is eye-catching, the rest of the exterior artwork also looks rather nice.
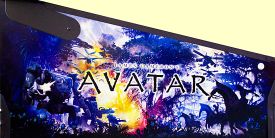
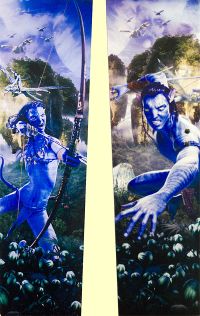
The opposite side uses the same image, the same way round, with the Direhorses on the right and the AMP suits on the left. However, the two sides of the backbox use different images, showing Neytiri on the left and Jake on the right.
If they are on separate sides of the backbox, the cabinet front reunites them, placing them either side of the coin door.
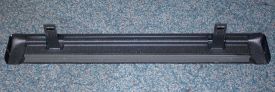
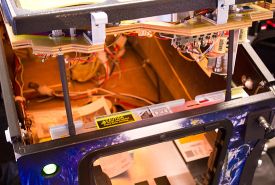
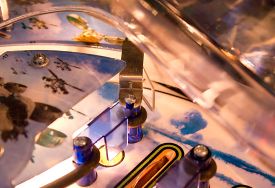
The strong blue and white theme initially looks a little odd when blended with natural vegetation colours, but you soon get used to it. In addition, these images appear to have been composited especially for the pinball which is a nice change from using standard publicity shots, as we saw on some previous games. So let's take a look inside the cabinet to see what we find. The first problem any new owner is likely to face is taking the glass off. Even seasoned pinball pros are going to come a cropper the first time they encounter Avatar because the system for securing the lock bar has changed. Don't go reaching for the lever to slide to the left because there isn't one. Instead, there are two latches screwed to the left and right sides of the cabinet front.
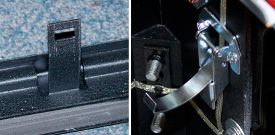
To use these latches requires a redesign of the lock bar itself, and sure enough, the tabs which slot into the front molding have changed too, with new cutouts for the latches to grab onto.
We should probably be grateful the lock bar isn't also now made of plastic but presumably security concerns ruled out that change.
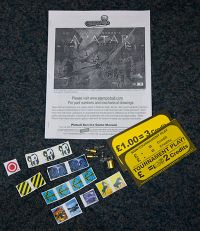
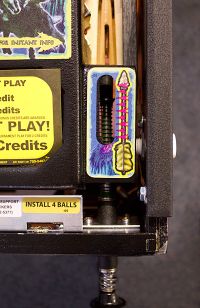
There are two drawbacks to the latches used in new system. First of all, you need to fumble around inside the dark cabinet to find them, and secondly, when you release the latches they have a tendency to spring back and rap you across the knuckles. You have to wonder why they changed the previous system which had worked well for many years. The latches are presumably generic parts but do they really save that much? One thing's for sure though, Stern lock bars are no longer interchangeable with those from older games. Once you do get inside the game, you'll find the usual goodie bag stapled to the left side of the cabinet. Inside the bag is a rather thin paper manual, some pricing cards, two #44 lamps, two #555 lamps and one #89 flasher lamp along with spares for all the stickers used in the game.
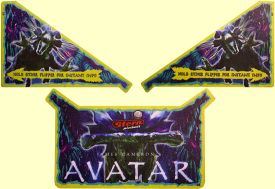
The other recent changes - the plastic apron and the playfield support posts - are also to be found on Avatar.
There are three Avatar-specific stickers on the apron.
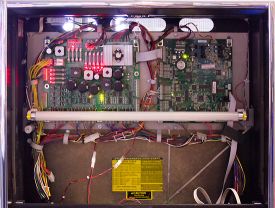
Inside the silver-trimmed backbox we find the two boards which make up the SAM system; the power driver board on the left and the CPU board on the right.
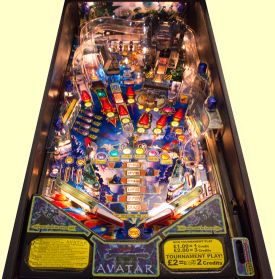
OK, now it's time to go where all the fun stuff happens and have a look at the playfield in detail.
We'll start our tour in the usual place - down at the flippers - and work our way around clockwise, examining each feature in turn.
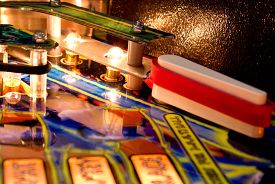
There's nothing unusual going on here. The two red-rubbered, standard white flippers point at the shoot again insert which is a reassuring shade of orange. The flippers are well-defined against the blue and yellow background and include the alignment holes at the tip in case you're not sure where they should be pointing. On the left we have something a little different - 2 inlanes and 1 outlane.
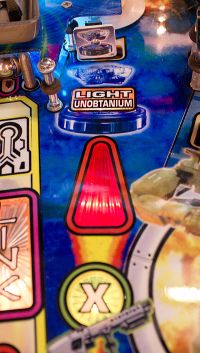
The outlane can be lit for an unobtainium, which awards some consolation points when your ball drains. There's no kickback on the left side (or the right side either), so the unobtainium points are the best you can hope for. The two inlane switches both work identically and light their respective 'The Bond' inserts when triggered. We'll look at what you get for completing them in the second part of this review. The slingshot is the low-budget version, with just a single level of construction and no flasher lamp mounted on top.
There is a single spot lamp which helps keep the central playfield illuminated, and like the rest of the game (except the flippers) it uses black rubber rings. Above the left outlane is the width adjuster which has the regular 3 holes to choose from.
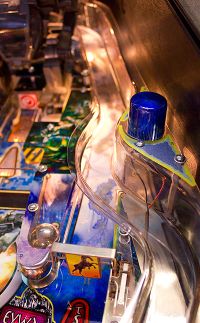
Above the adjuster is a dead area of the playfield populated by a few posts and seemingly designed to help guide any wayward balls towards the outlane. It's quite effective. Despite the adjuster being in its lowest (easiest) position, the left outlane still consumed the ball on a regular basis. Mounted above this post and ring arrangement is the first of the game's blue flashers. There is another slightly further up the playfield and a matching pair on the opposite side. These are used quite effectively to throb and strobe, in some ways acting much like those flasher globes in Scared Stiff, only in blue.
Between the two flashers is the first of the game's main shots - the N-A-V-I target bank.
The positioning of this target bank is now a familiar feature on recent Stern games, be it the A-L-L bank from NBA, Pappy's Porch from Big Buck Hunter (Pro) or the I-R-O-N targets from Iron Man. The role of the targets is beefed-up a little in Avatar as you can see by the big red arrow pointing at them. As usual, big red arrows indicate the major shots in the game which can be lit for jackpots, and that's the case here too. Apart from scoring jackpots in certain features, the N-A-V-I targets also start Na'vi scoring and lead to their own multiball mode as we shall see in part two.
The apostrophe in "Na'vi" is included in the text on the plastic but not shown on the playfield between the arrow inserts nor does it appear on the dot matrix display, although that's easily fixed in the software. Next, we come to the left orbit lane.
Sporting a spinner over its entrance, the left orbit - rather predictably - traverses the top of the playfield and exits at the right orbit lane. The switch to register a successful shot is quite some way up the lane, so although you can be credited with making the orbit shot without going all the way to the very top, you do need to make it most of the way.
Unlike Iron Man where the spinner is mounted some way in front of the lane to increase its difficulty, here it straddles the two lane guides and cannot be missed if you shoot the orbit.
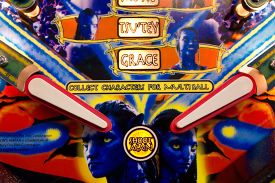
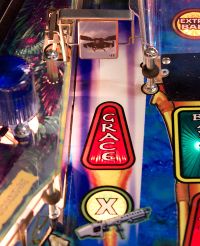
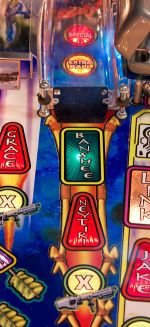
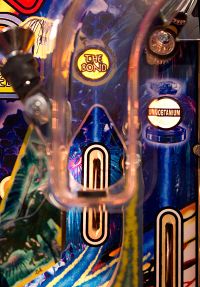
The red arrow pointing at the left orbit shows it can be lit for jackpots, but the name printed on it shows it's also the place to collect one of the six characters from the movie included in the game, when lit.
Beneath the red arrow is the first of seven lime green multiplier inserts on the playfield. When lit, this doubles the value of all shots made to the left orbit, and when flashing, triples the value instead. As you might guess, these are rather important in maximising your score. To the right of the left orbit is the game's only ramp.
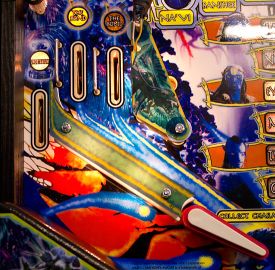
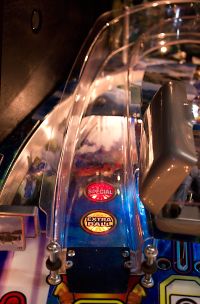
As you can see, the ramp is the place to collect the special and extra ball awards but it is also another of the game's major shots as well as having its own Ride The Banshee mode and collecting another of the game's characters. So it has several inserts in the lead-in to show when these features - and the shot multiplier - are available.
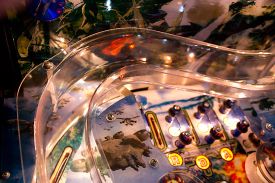
As we travel up the clear plastic ramp, it curves to the right and spans the top of the playfield...
...before taking another right turn and continuing down the right side of the game to terminate at the right inlane.
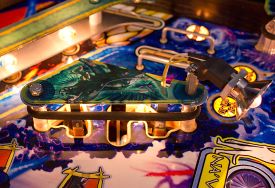
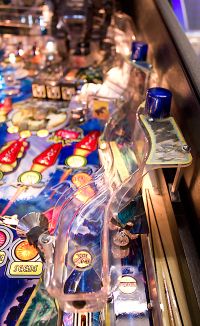
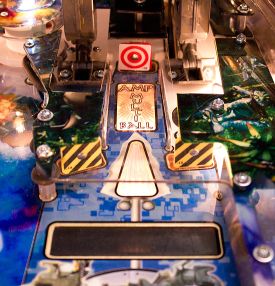
The ramp has a steep entrance and only an accurate shot will make it all the way to the top. Weaker shots roll back down and hit the rubber ring on the post to the left of the entrance. This deflects the ball over to the right side of the game, preventing straight-down-the-middle drains. Although the ramp twists and turns as it heads down to the right inlane, it doesn't rise and fall, so there's no need for an escape cutout just in case the ball loses momentum. The next feature on the game looks like one of those sensory-deprivation tanks but is in fact Jake's pod in which he links with his avatar.
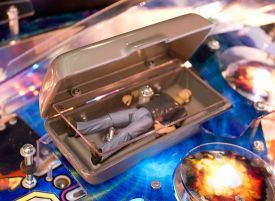
A clear plastic sheet covers the interior to prevent any stray balls becoming lodged inside and to hold the Jake toy in place. Sadly, the pod is totally static and doesn't open and close like the suitcase bomb in 24, although the dot matrix display shows an animation of it closing. The functionality of the shot takes place beneath, where we find the link ball lock lane.
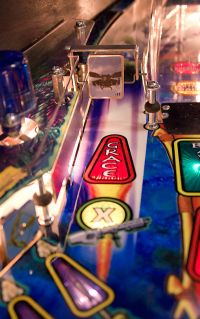
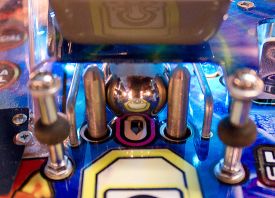
The link shot consists of a short lane with a rollover switch and two pins which can rise to trap the ball.
When the rollover switch is triggered, the posts pop up to hold the ball and turn it into a captive ball, much like the 'ace in the hole' shot in World Poker Tour.
The ball sits on the rollover switch, so registering a successful hit on the ball requires it to roll back far enough to release the switch. The link lane can be lit for link multiball as well as jackpots, and can also be multiplied if the green X insert is lit. It also collects Jake as one of the six movie characters when lit.
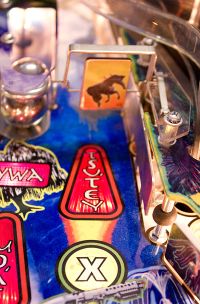
On the right side of the link lane is the unobtainium standup target.
Although a rather unobtrusive target, it plays quite an important role in completing the multiball modes as you can see from the big red arrow. The green multiplier insert doubles or triples the value when lit or flashing. Outside multiball, it lights the unobtainium inserts on the outlanes for points awards when the ball drains. Because of the design and its placement, the unobtainium target is only ever hit from the front or the right side which, as you can see in the picture above, does mean it can end up leaning to the left. On the right side of the unobtainium target is the exit from the pop bumpers, so let's take a look at that whole area along with the R-D-A rollover lanes which feed into it.
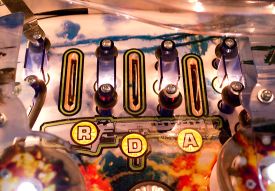
RDA? Recommended Daily Allowance? No, it stands for the Resources Development Administration, the organisation in Avatar which is responsible for the mining and importation of all off-Earth products from Pandora and other planets. The R-D-A rollover lanes are largely fed from the right orbit. They can be reached from the left orbit as well, but only if the ball is too weak to make it all the way around. Right orbit shots are almost guaranteed to hit the R-D-A lanes thanks to a one-way gate at the top left which always prevents a complete anti-clockwise orbit.
As expected, the lit R-D-A lanes can be rotated with the flipper buttons but the placement of the rollover switches means they are triggered just as the ball starts to roll through the lane, giving you little time to change your selection. Once through the lane, the ball hits the pop bumpers.
The three pop bumpers are in the standard formation and have a clear insert in the centre. This only has a single flash lamp beneath so it doesn't exactly flood the area with light but it does its best. The pop bumpers themselves have white LEDs on top which poke out in rather haphazard angles due to the oversize holes through which they emerge. The upper two bumpers are underneath clear plastic covers to prevent hangups from air-balls but the lower one is uncovered while the area of the playfield surrounding the pop bumpers is protected by mylar. The ball exits from the pop bumpers to the right of the unobtainium target, but there is a curious area opposite the lower bumper which looks as though it could have once been part of another feature. Or maybe it's just another escape lane for air-balls.
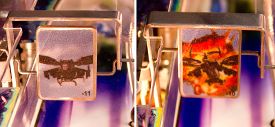
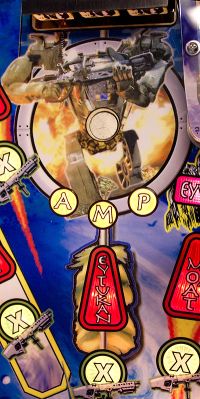
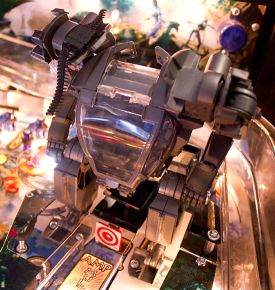
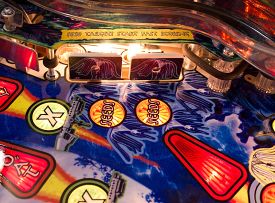
The next feature we'll look at is the major toy in the game, the AMP (Amplified Mobility Platform) suit. It consists of two parts. The first is a motorised 3-bank like the ones found in Attack from Mars and Spider-Man, but unlike those it also has a disrupter/grabber magnet in front to add some randomness to the ball's movement.
It is functionally the same as the motorised target bank in Spider-Man, where the A-M-P inserts strobe and hitting the lit one lowers the bank immediately. Hitting an unlit target lights it, but cancels the single-shot option to lower the bank. Because of the position of the magnet, the A-M-P inserts are quite some distance from the target bank which doesn't make them obviously associated with it, but you soon work it out. As with most of the other shots, the A-M-P 3-bank can be lit for jackpots, to collect another character and multiplied. When the inserts are completed, the 3-bank drops down to reveal the shot to the AMP suit toy behind.
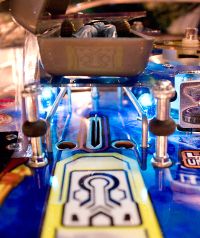
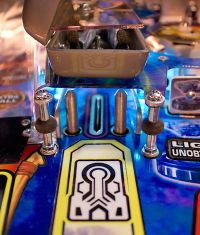
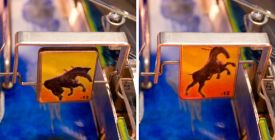
There are two yellow striped side targets and one bulls eye target at the end of a shot lane. For the build up to multiball, any of the three targets advances towards the feature, but later only the bulls eye target will suffice. When multiball is ready, a flasher under the rectangular starburst insert starts going crazy, along with two more under circular inserts either side. The side targets are no longer good enough and you have to shoot the bulls eye target instead. What you're really shooting at of course, is Colonel Quaritch in his AMP suit whose feet are firmly planted either side of the lane.
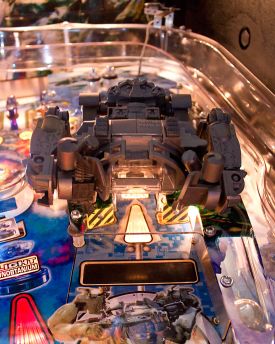
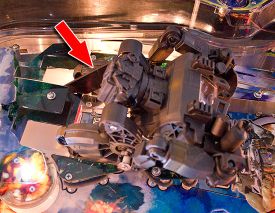
Home owner may be interested in this site which shows how to make the suit more realistic. They may also want to open up the suit and add the Colonel as he's oddly missing. Adding LEDs to light it up would also improve its looks. The AMP suit is not static, however. When multiball begins, the suit is lowered into a crouching position, covering the lane to the bulls eye target.
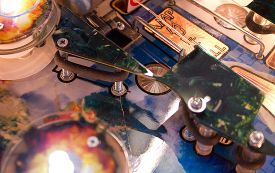
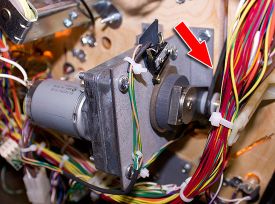
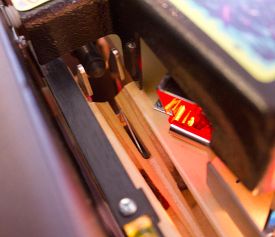
The AMP suit is driven by a motor and gearbox mounted under the playfield. The cam mounted on the gearbox is connected to a metal arm which connects to the AMP suit model.
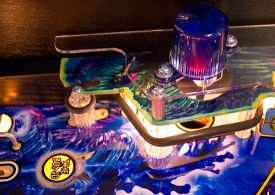
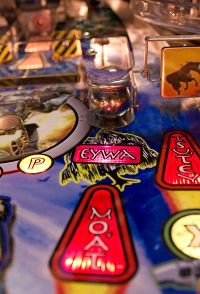
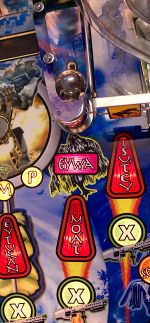
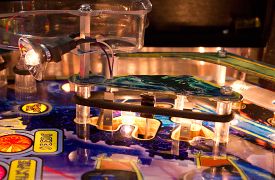
When multiball ends, or the super jackpot is collected, the AMP suit returns to its upright position. That's about as far as the AMP suit's involvement in the game goes. It doesn't interact with the ball at all, so its movement is purely for dramatic effect. The next feature on our playfield tour sits to the right of the AMP suit lane - it's the Eywa captive ball.
Eywa is the mystical guiding force and deity for the Na'vi. In Avatar, that means she gives out equally mystical awards, such as points, multipliers and feature advances. The captive ball is a double ball arrangement with a second ball sitting behind the first on a rollover switch. That means you don't need an especially powerful shot on the fixed front ball to dislodge the second and register a hit.
The captive ball shot can also be multiplied for jackpots and mystery awards (though only the points awards are multiplied), plus it can collect another of the games six characters when the red arrow is flashing. Next to the captive ball is the right orbit.
Like its counterpart on the opposite side, the right orbit has a spinner over the entrance, can be multiplied, collects jackpots and can be lit to collect the last of the six movie characters.
The right orbit sends the ball up to the top rollover lanes and into the pop bumpers - thanks to that one-way gate. A weak shot or a really strong shot can come back down the right orbit lane, and like the left orbit, the switch to sense a successful shot is a long way up the lane.
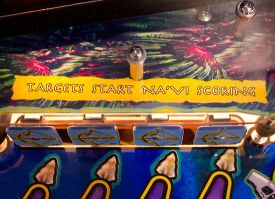
The right orbit lane itself travels under the ramp return and this is also the point where the shooter lane feeds the ball onto the playfield. The final shot on the playfield is pair of standup targets which go to make up the seeds feature.
When hit, these count down towards the start of the next fast scoring mode and, as you may have noticed by the big red arrow, they also form one of the jackpot shots in some of the multiball modes. Although there are two targets and two inserts, they act as one for all intents and purposes. Moving on, we pass another area of dead space filled with posts and a rubber ring to reach the right inlane/outlane combo.
There is just a single inlane on this side, but it too builds towards completing 'the bond' while the outlane can also be lit for a consolation unobtainium points award. The right inlane is rather hidden by the ramp mounted overhead, making it difficult to judge when to nudge and save the ball from the outlane. However, the right outlane seemed nowhere near as voracious as its partner over on the left side, so it's not such a big problem. The right slingshot is also a single storey affair, with the same solitary spot lamp as adornment.
And so, we return to the flippers, pausing briefly to note that despite the left side having two inlanes, both inlane guides have two #44 lamps mounted inside to provide illumination to their respective areas.
The game uses a regular dual-action plunger; manually plunged at the start of each ball, automatically plunged for ball saves, multiballs or whenever another ball is added to the play.
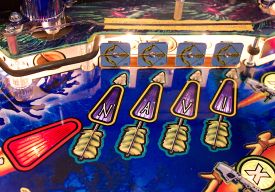
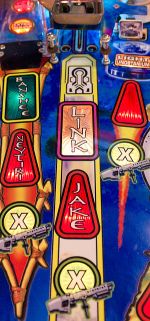
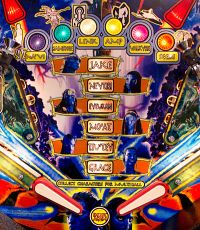
One playfield items we haven't considered yet is the progress ladder - the array of inserts which show which features have been completed and which are yet to light. The Avatar progress ladder arrangement is much like that found on Iron Man; consisting of a vertical ladder for one set of features, and a horizontal one for another.
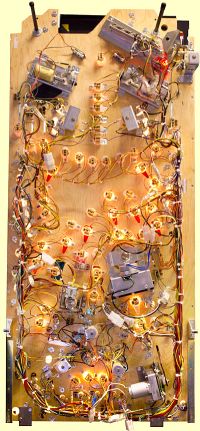
Running up the centre of the playfield are the six movie characters we spoke about earlier. These can be collected through the game and getting them all is one of your goals. Across the top of those are six features which have to be played to complete the horizontal ladder. As with Iron Man, starting a feature generally lights its corresponding insert, while excelling in it starts the insert flashing. More about those in the rules section, but that completes our look at the playing surface. Before we end this first part of our in-depth review, let's take a look under the playfield to see how all the components and mechanical devices are arranged.
And so we come to the end of this first part of our exclusive Pinball News In-Depth Review of Stern's new Avatar. We'll be back soon with part two, where we examine the rules, each aspect of the game's design and give our conclusions on the the overall game along with our rankings. Until then, we leave you with the main theme from the game's soundtrack. Get the Flash Player to see this video clip.
Got problems hearing the audio? Consult our help page for assistance.
Why not give us your thoughts about the game? What do you think about what you've seen? Have you played it? Have you bought it? Share your comments with other readers by sending us your thoughts with the message box below: Your comments:
© Pinball News 2010 |