|
|
CRIME SCENE INVESTIGATION IN-DEPTH REVIEW |
|
Hello and welcome to this first part of our exclusive in-depth review of Stern's new CSI: Crime Scene Investigation game.
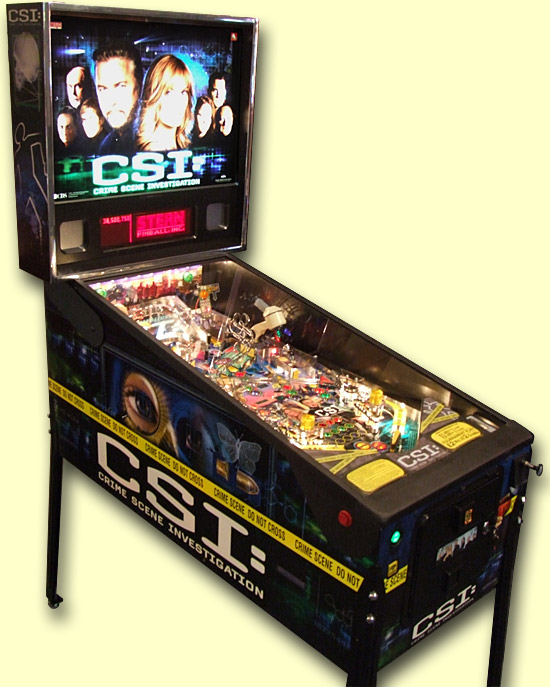
The format for this review will be the same as before with this part looking at the game's hardware - the cabinet, backbox and playfield - while the second part will concentrate on the rules and bring together all the different aspects of the game to form an overall conclusion. So without any further ado, let's take a look at the game.
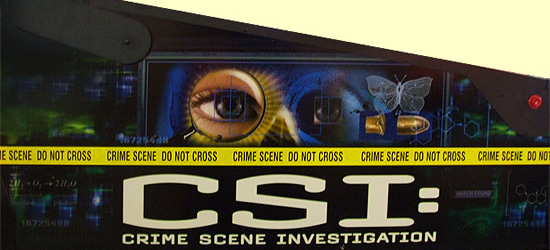
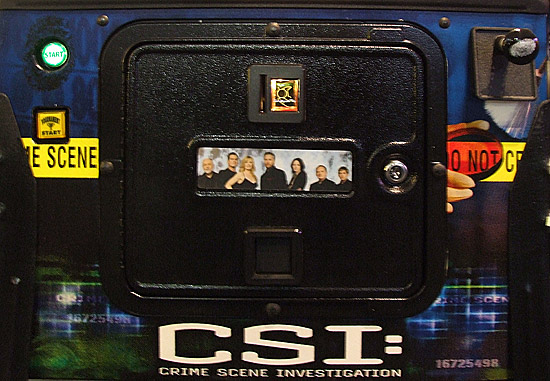
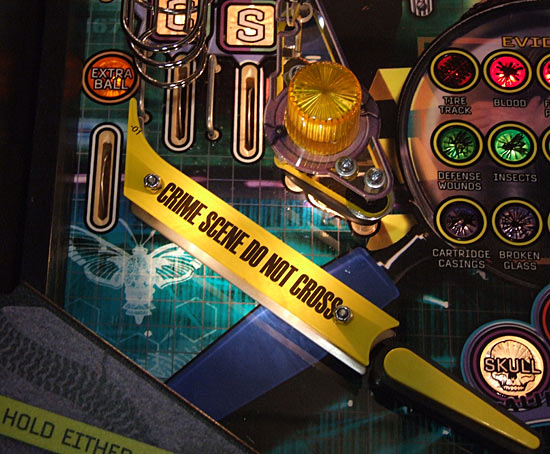
The overall exterior colour scheme is somewhat reminiscent of Stern's previous game - Batman - with dark hues of blue picked out with highlights of green. With CSI though, the logo is the most direct tie to the licence. So that is big and bold while the remaining imagery is somewhat generic, so it is knocked back into the background. The slightly cheesy police tape motif cuts across the cabinet and gives a clue to the rather less subtle colours awaiting us inside the game.
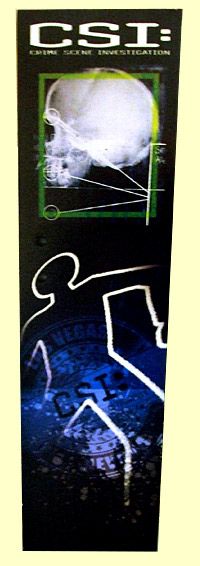
The backbox sides are less interesting with the anachronistic chalk outline, but they do introduce the skull motif of which we'll see more later in this review.
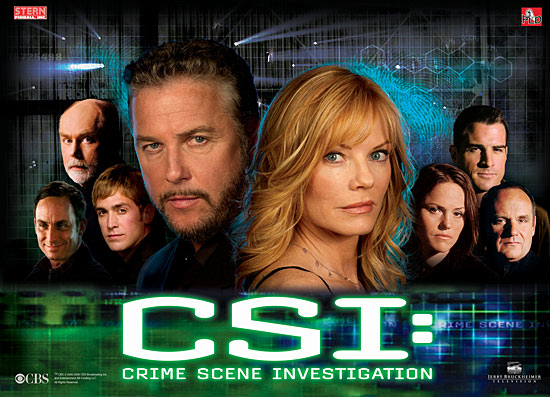
We should also mention the backglass image you saw at the top of this review. CSI is rooted in the characters and the crimes they solve. It is reasonable therefore to play to the licence's strengths and lead the backglass design with the characters and the logo. The two leads are well represented and nicely balanced. The supporting cast look rather creepy and overtly arranged to fit the space available. Stern seems to have featured rather a lot of floating heads in their recent backglass designs. It's worth pointing out here that the left and right sides both feature the same artwork, so while we've only shown you the left side, it's the same on the opposite side. The front is unique though.
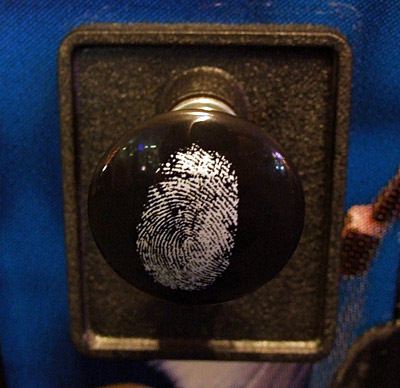
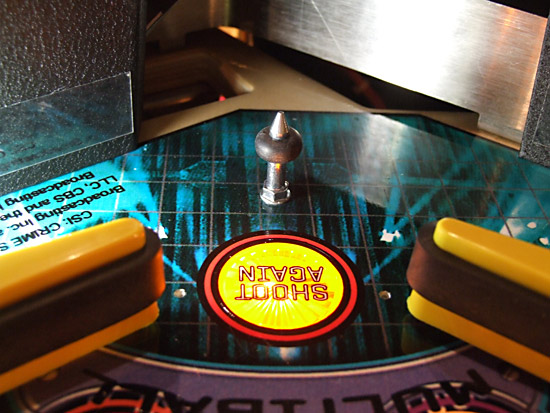
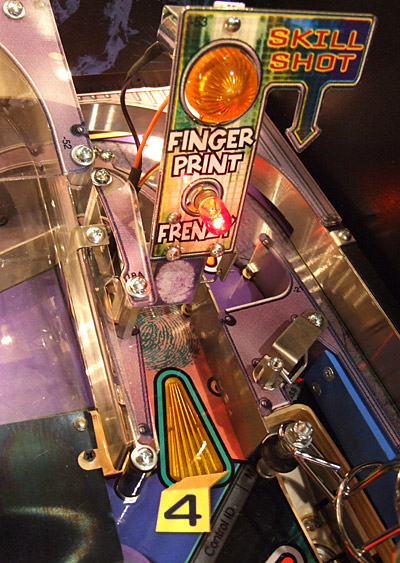
It's unique not just for the artwork but for a customised part of the game we usually take for granted.
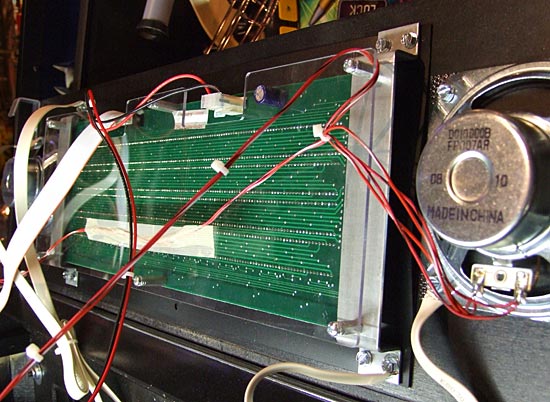
Yes, CSI has a customised "dusted" shooter rod, though you won't find too many people plunging the ball with their thumb or finger. But it's a nice touch and something usually costed out of a pinball design. The remaining game hardware is otherwise unexceptional. This is a European machine we are reviewing so it has a low voltage LED display and lacks the high voltage driver board in the backbox.
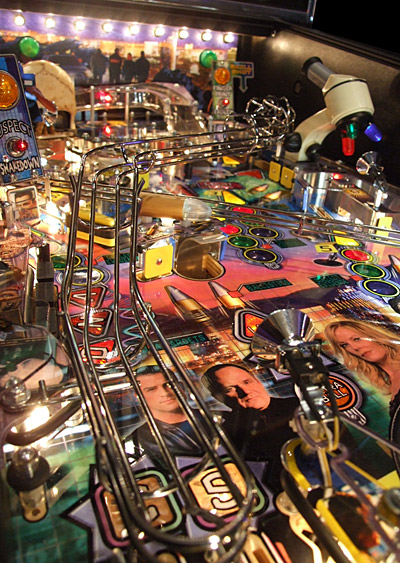
So that takes a look at the outside of the machine. Let's move on and see what Pat Lawlor and the Stern team have given us to play with on the inside.
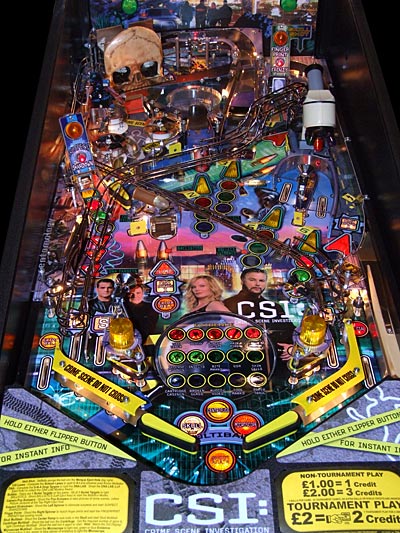
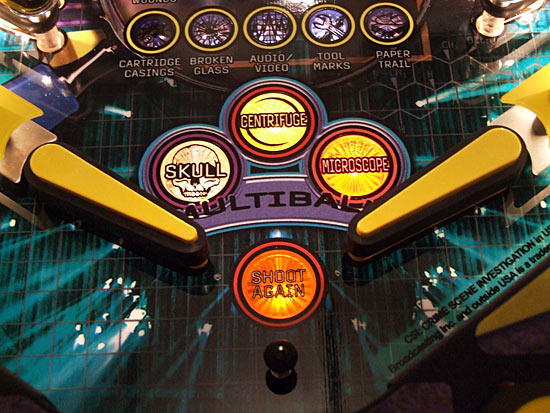
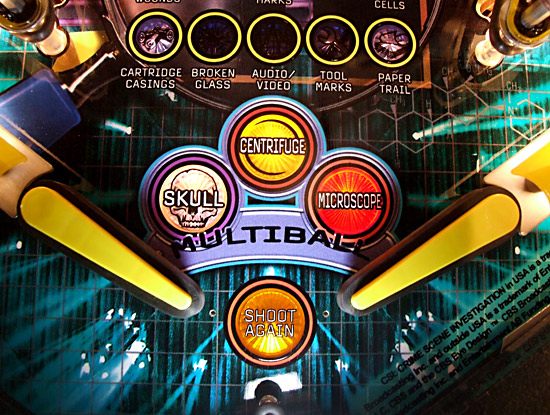
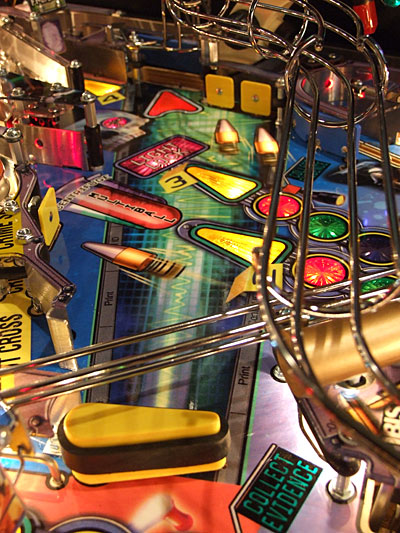
As you can see there's a veritable riot of colour on the playfield and the array of inserts makes the game appear very busy and complicated. Whether that's a true impression we'll see in part two of this review but crowded mix of feature inserts, characters from the show, the logo, numbered markers, bullets and progress meters could leave a newcomer feeling overwhelmed before they've even started a game. To find out what everything does we'll examine each area of the playfield in turn, starting at the flippers and working clockwise around the game.
In keeping with the crime scene tape theme, the flippers are bright yellow with black rubbers. The yellow aids definition against the dark background and that is aided by the good light levels in the flipper area. Flipper alignment holes are drilled at the tips of the bats but there is no provision for biff bars. Between the flippers is the shoot again/ball saver insert while below that is a centre post designed to save balls draining down the centre.
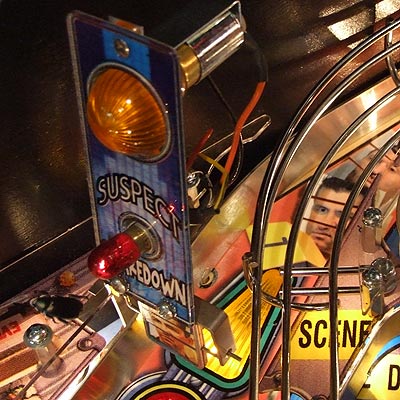
This post is a little further back than usual, making it of limited use for anything other than absolute centre drains. It also hinders death saves, possibly obviating the need for the biff bars. Above the flippers are three inserts showing your progress through the game's three multiball modes.
You need to reach a certain level in each multiball to light its corresponding insert while lighting all three leads to a special wizard mode. As Grissom says at the start of the game, it's all about the rule of threes. Three balls, three pop bumpers, three multiballs. Funny, didn't Williams have a thing about threes too? As we move on, we come to the left inlanes and outlane. Being a Pat Lawlor design this has two inlanes, each lighting a letter towards completing C-S-I; the third letter being in the right inlane. The lit C-S-I letters cycle with the flippers (lane change) and completing them all advances the bonus multiplier and resets them.
The left outlane can be lit for extra ball although thankfully it's not the only extra ball award in the game, so there's no need to lose one ball to win another as we'll see shortly. It may have been the set up of this game, but the left outlane was incredibly hungry in the review model, racking up about 95% of all ball drains. The inlane ball guides acted as though they were made of rubber rather than metal and easily dumped the ball down the side at the slightest provocation. So while you might think two inlanes will help prevent ball drains, in reality the opposite can be true. The left-most inlane is also the destination for a wireform leading from the photo up-kicker which we'll take a look at a little later.
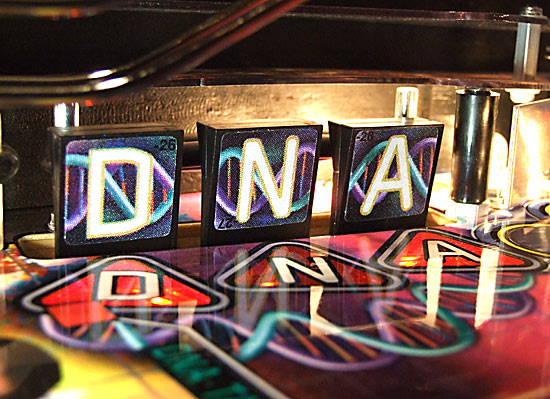
The left slingshot is a three-layer version just like the one in Batman with the same flasher and the resultant cutout in the middle layer to accommodate the lamp socket. Thankfully, with just one spot lamp mounted to the top corner, the wiring is pretty unobtrusive. The slingshot rubbers - like all the rubber rings in CSI - are black, so the game is not overly bouncy like it would be with white rubber. It's all reasonably conventional so far, but as we move up the table we come to the first game-specific feature, the D-N-A drop targets.
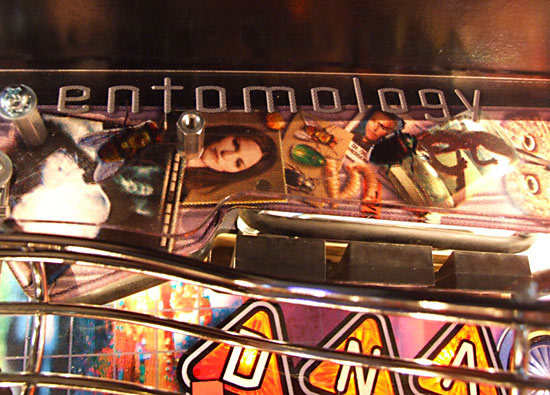
These three drop targets light their associated inserts in front to form the entomology zone. When completed they light the mystery award at the ballistics scoop.
Although they're just above the left outlane, they're not much of a sucker shot because there are few reasons to shoot for them. The targets tend to get knocked down fairly regularly during normal game play anyway and they don't play much of a role in the game. Although it's good to see drop targets, in truth these could just as easily been standups. Probably the most exciting thing about the Entomology Zone is how the person who applied the drop target stickers in the factory put the "N" on upside down. I guess you could say that was bugging us. So moving quickly along, we come to the first real shot in the game, the left orbit.
We've called this the left orbit but in truth, most of - if not all - the time, the ball never actually makes it all the way around. The lane curves as it nears the top of the playfield and sends the ball above the pop bumpers. It is here that the ball is stopped by one of a pair of up-posts.
These two stop the ball and let it roll down through a one-way gate into the bumpers. The right post stops left orbit shots and vice-versa. So while we're up here let's take a look at those pop bumpers.
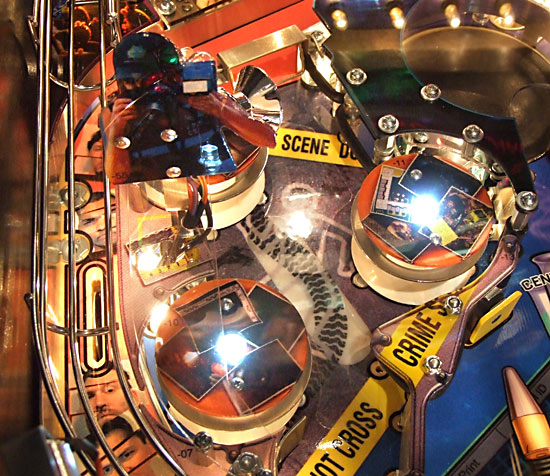
The aforementioned three pop bumpers are of the skinny design now regularly employed on Stern games and they perform the function of taking photographs of the crime scene. The bumper caps are adorned with such pictures while the dot matrix display shows one of the game's few video clips with bumper hits shown as flashes with scores in them. There's a strangely severed body of a police photographer hovering over the scene although it's a very dark image and we've had to lighten it in the shot above so you can see what it is. There is a flasher and a couple of spot lights hidden behind him. The flasher helps supplement the white LEDs on top of the bumpers. These LEDs have proved to be fairly rubbish in some previous games but there are no complaints about their brightness here other than the bluish tint to them. The bumpers are quite lively, usually holding the ball for several seconds each time before it escapes either to the left into the left orbit lane, or more usually through the exit lane at the bottom. The latter is what you'll be hoping for since it gives you more options and the chance of super or mega jackpots during multiball. Just occasionally though, the ball will pass between the bumpers and manage to miss them all entirely. Obviously this usually happens during a frenzy mode when you really need those switch hits. If the ball leaves the pop bumpers through the bottom exit lane, it is served to the game's third flipper.
This is a mini-flipper which sits at the entrance to the left orbit and shoots the ball across the playfield to some targets on the right side. There's a gap below the flipper which is large enough for a ball to pass through and this is where the ball will go if you don't flip it. If you do flip it though, your choice of shots is somewhat limited.
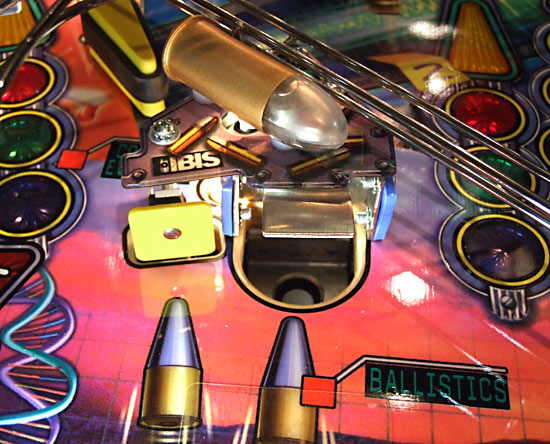
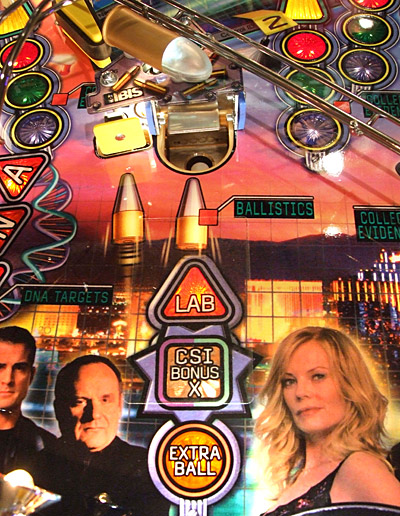
If you miss the up-kicker hole there is some assistance given by the nearby rubber-sheathed posts which can bounce the ball into the scoop after all. Otherwise, the bullet targets can be worthwhile to build towards and then complete ballistics mode but overall the upper flipper feels under-utilised with none of the available shot options being particularly exciting most of the time. You probably noticed that bullet-shaped object below the upper flipper, so let's pay a visit to the Ballistics (or as Grissom likes to say, "Ball-istics") Lab.
The Ballistics Lab and the yellow standup to its left are another two of the five bullet targets which build towards ballistics mode. Collect all five and the bullet above the ballistics scoop lights to show the mode is ready to start. Shoot the ball into the scoop and it begins.
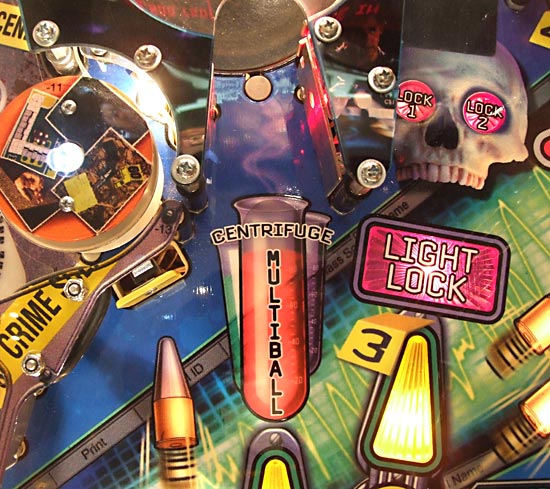
In case you're wondering what the "IBIS" written on the plastic next to the ballistics scoop is all about, it's the Integrated Ballistics Identification System. Just thought you'd like to know. Continuing on our clockwise tour, the next feature on the playfield is the centrifuge.
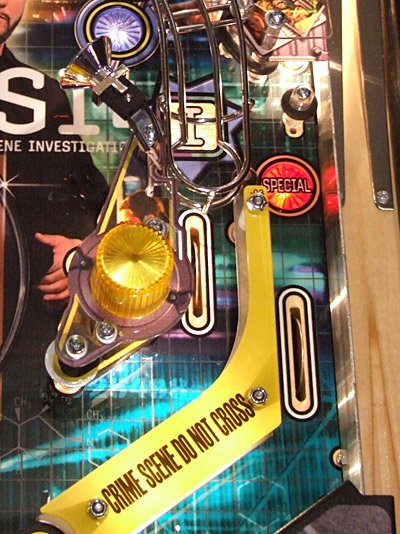
This is a turbo-charged but simplified version of the Tortuga spinning disc found in Pirates Of The Caribbean. Shoot the ball through the entrance and the black disc starts spinning. It's turbo-charged because it spins at a much faster rate than in Pirates and it's simplified because instead of having six standup targets around the edge to rack up hits, it has a single opto beam by the entrance to count the number of times the ball spins round the centrifuge. Each completed spin counts down towards starting centrifuge multiball.
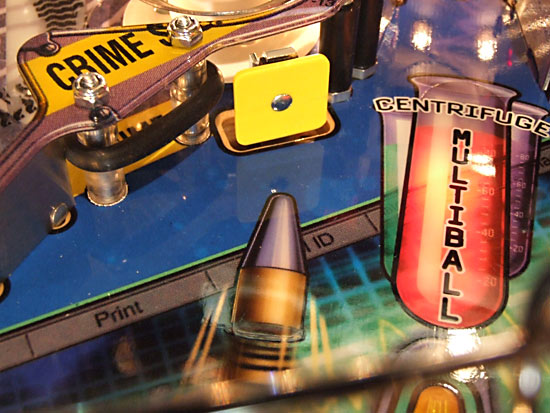
Although there was little control over which targets were struck in the Pirates version, you could try to nudge the game to get additional hits and generate some feeling of interaction. The Centrifuge is a more passive device for most of the game, requiring no player involvement other that shooting the ball inside and waiting for it to be released. The ball follows the same path all the time as can be seen by the track on the black rubberised coating. It does have a trick up its sleeve though. There is a pop-up post at the entrance to the centrifuge and you might think its job is to stop the ball falling out as the disc spins. In fact, the ball spins round fast enough not to need the post to keep it in. No, the post is there for when the centrifuge acts as a ball lock. After sufficient spins have been completed the disc come to a stop, the released ball can now be shot back in and the post will rise to lock it inside. You can then shoot another ball at the raised post to drop it and release the locked ball for multiball. This is made possible by a second opto beam in the centrifuge entrance lane just in front of the post, which tells the game when the first ball has rolled past so it can raise the post and also when the post is hit by the second ball. Balls released from the centrifuge can head straight down the middle but a small nudge on the way out easily fixes that and it's better than relying on the centre post behind the flippers to save you and being disappointed (or laughed at) when it doesn't. This ball lock function gives the centrifuge more interactivity than is immediately apparent and helps restore some fun to what would otherwise be a fairly unexciting device. The centrifuge is the second major shot in the game and so is graced with a yellow #2 evidence card and a yellow arrow to show is can be lit for jackpots during multiball. To the left of the centrifuge entrance is another yellow bullet standup.
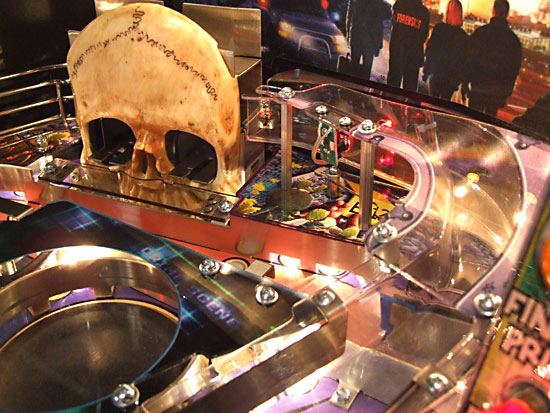
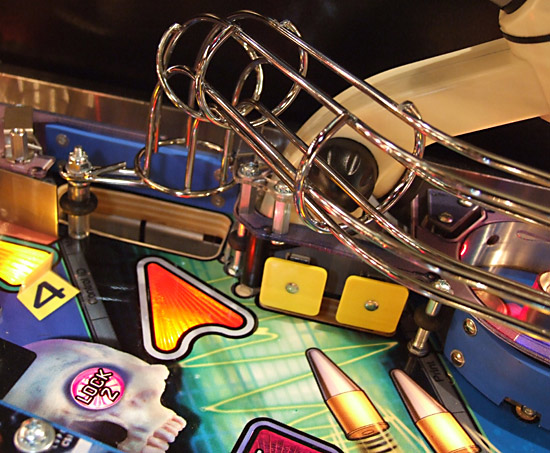
Like the others, this builds up towards ballistics mode and then is one of the shots needed to complete it. To the right of the centrifuge is the game's only ramp which feeds the skull to lock balls, so we'll call it the skull lock ramp.
There are three inserts at the entrance of the ramp to show your progress.
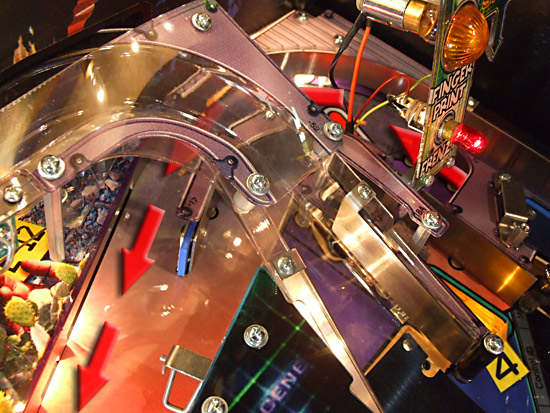
As the ball travels up the ramp it curves to the left and "heads" for the skull - the third major shot in CSI.
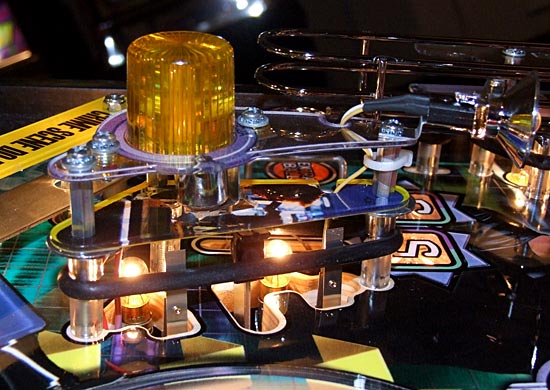
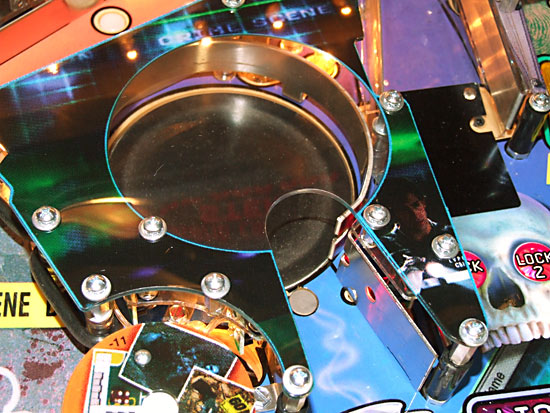
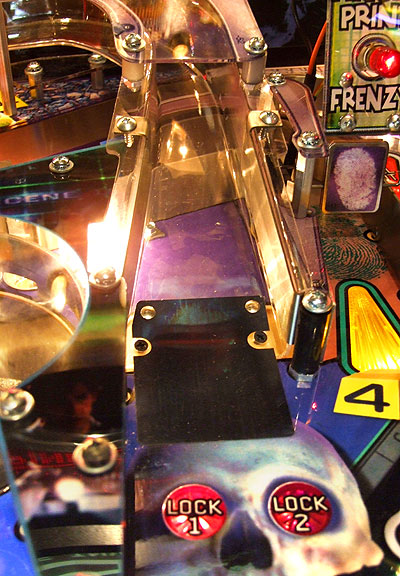
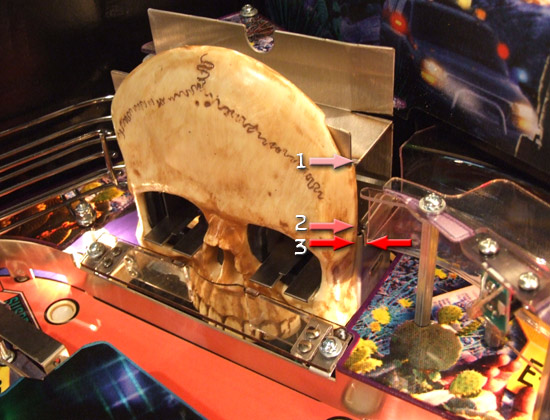
This is probably the main toy in the game and its operation is simple but effective. The skull is motorised and can be moved vertically to one of three positions.
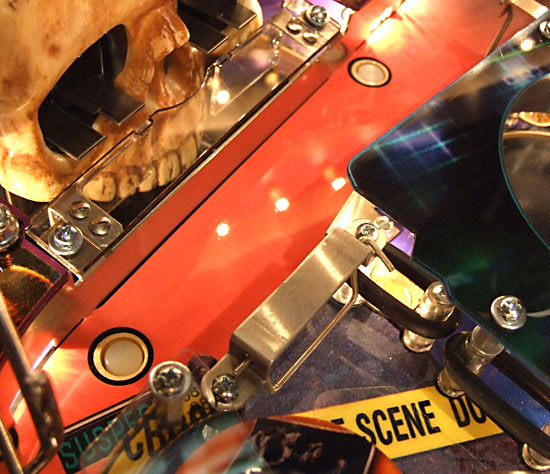
In the first position - numbered 1 in the picture above - the ball leaves the plastic ramp, rolls across the top of the skull on a metal ball guide and continues onto a wireform which leads to the right inlane.
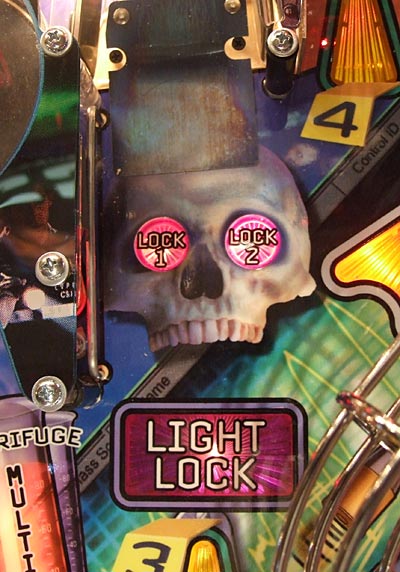
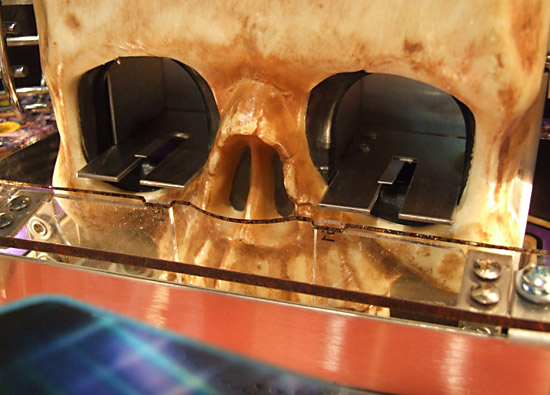
If this causes lock to be lit, the skull rises to the second position which lines up the skull entrance with the ramp. This allows the next ball up the ramp to drop inside the skull and into one of the two eye sockets. It then rolls forward on a metal tongue until the clear plastic strip across the front stops the ball and prevents it rolling out of the socket.
There is a mechanism inside the skull which ensures balls end up in alternate sockets and each socket contains a microswitch to check the ball has arrived correctly. Depending on the difficulty level and multiball number, the skull may then drop down to the first position to await one or more shots over the top to relight lock and raise the skull again. The clear plastic strip extends down to ensure the ball stays in the eye socket if the skull is lowered. When a second ball is locked, both eye sockets contain balls and multiball begins. The skull rises to the third position which puts the balls above the clear plastic strip and with nothing keeping them in place any longer, they roll over the strip and drop into the orbit lane to end up in the pop bumpers.
The skull itself is a fairly flat object and any illusion of depth is somewhat negated by the copious amounts of silver metalwork bolted onto it. Nevertheless, it does the required job and is nicely painted with good lighting from the associated spotlights and flashers. The device's simplicity should also ensure reliable operation as long as the motor and gearbox hold up. As with all motor-driven devices though, you shouldn't push it down or pull it up, or you run the risk of damaging the gears. Continuing our journey around the playfield, the next shot is just to the right of the skull lock ramp and it is the inner orbit.
The inner orbit is quite a tight shot but that makes it all the more satisfying to make, especially since it is the fourth major shot and so scores jackpots when lit during the three multiball modes. Unlike the other five major shots though, the inner orbit is not used to collect evidence and so doesn't feature the red/green/blue inserts.
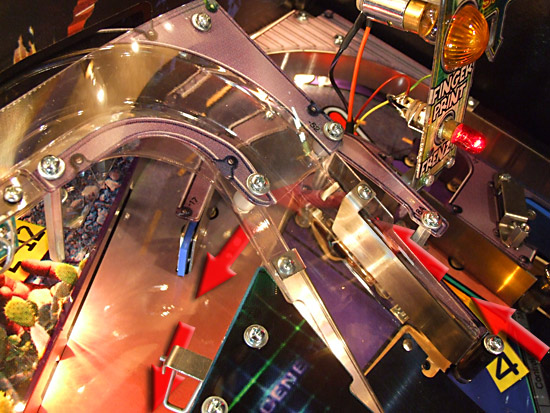
As the inner orbit heads under the ramp and joins the main orbit, there is a one-way gate designed to stop weak left orbit shots sneaking their way back down the lane. We'll look at the final part of the orbit in a few moments but we have a few other features to look at first. On the right side of the entrance to the inner orbit are the two bullet standups and the photo up-kicker we examined earlier.
The up-kicker is quite a large hole but because you have to use the mini-flipper to shoot it, it's not a guaranteed shot by any means. As we noted earlier though, the rubberised posts either side combine with other adjacent posts to help a few wayward shots find their mark after a few bounces. The ball is then kicked up onto a wireform which crosses the playfield to end up at the outer left inlane.
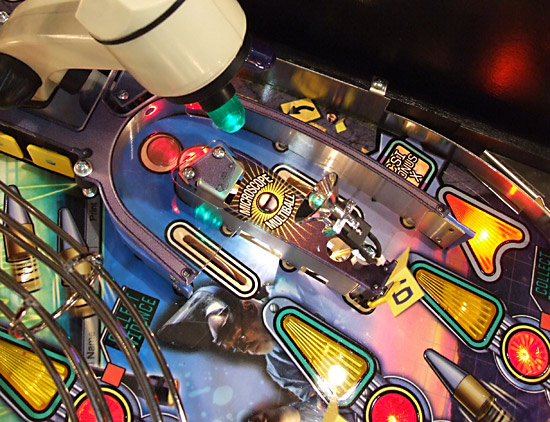
The two yellow bullet standups help build towards ballistics mode and while the upper target can be shot from the main left flipper, the lower one is much harder to hit with anything other than the mini-flipper. It is interesting to see the use of blue rubber extending to form the back wall of the photo up-kicker hole and the side wall below the yellow standups. Rubber not only gets ingrained dirt, it also wears and frays and both these pieces are riveted onto their respective metal supports, making replacement that much trickier than conventional rubber rings. The blue rubber does have the advantage of taking up much less space though, something which is at a premium in these areas. Moving down the playfield a little we come to the microscope feature. The microscope feature consists of two parts, the microscope itself and the short loop lane beneath it.
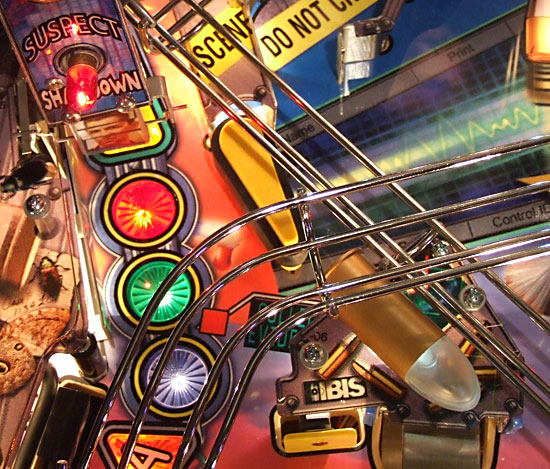
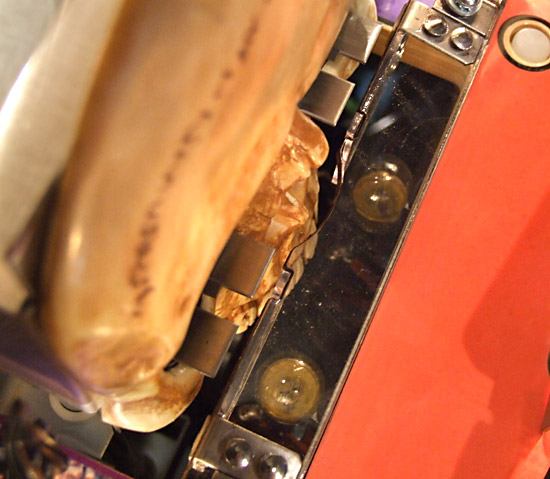
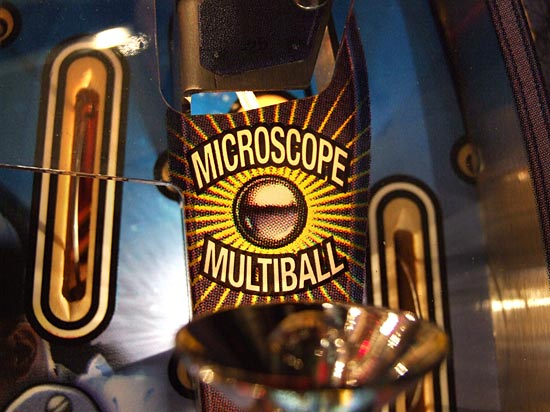
First and foremost, the microscope is a static object. It has no moving parts and its sole gameplay function is to indicate which of the three sets of evidence you are currently collecting (red, green or blue). The three coloured LEDs - which simulate different lenses - cycle until you shoot the loop shot.
You could be forgiven for thinking there are only two switches in the microscope loop but that faint red glow at the top of the loop indicates the presence of an opto beam. This stretches across a magnet which is used to stop the ball in the loop at the start of evidence collection while the selected colour is announced, and again at the start of microscope multiball - the third of the three multiball modes in CSI.
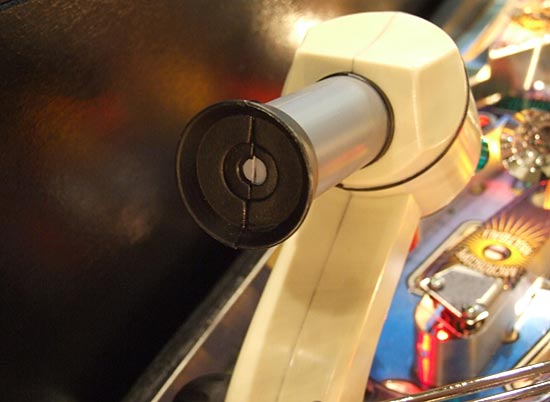
There are no tricks played with the magnet to throw the ball around, it's simply a stop-and-go device. The loop uses the two directions to create two different shots - the fifth and sixth major shots used for multiball jackpots and collecting evidence. Registering a shot requires the entire loop to be made. Merely triggering the switch at the entrance is not enough. Finally in this section, in case you were wondering what you see when you look through the microscope...
To the right of the microscope is the final shot in the game, the right orbit.
Probably the best use of the right orbit is as the skill shot at the start of each ball.
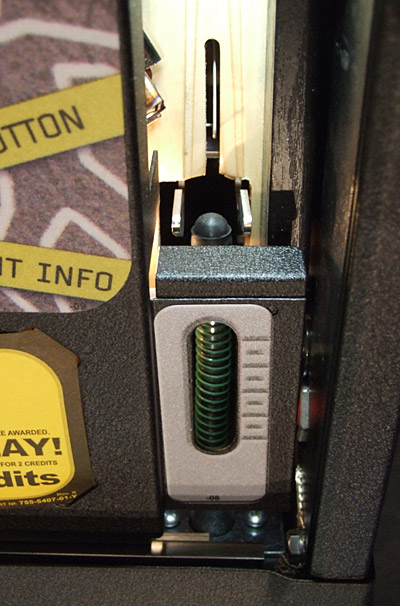
If you do plunge too hard, you just might be lucky and avoid any pop bumper hits as the ball rolls through them, down to the mini-flipper. If that happens you can still use the mini-flipper to shoot the ball into the photo up-kicker and get the skill shot award. Finally, although the game doesn't advertise the fact or give you much time, if you can beat the auto-launcher and manually plunge the new ball after a skull ball lock, you can still earn yourself a skill shot. This isn't available at the start of multiball though, only after you've locked a ball. Since we've just been talking about it, the plunger on CSI is a standard combined manual/auto plunger, complete with a natty green spring on the shooter rod.
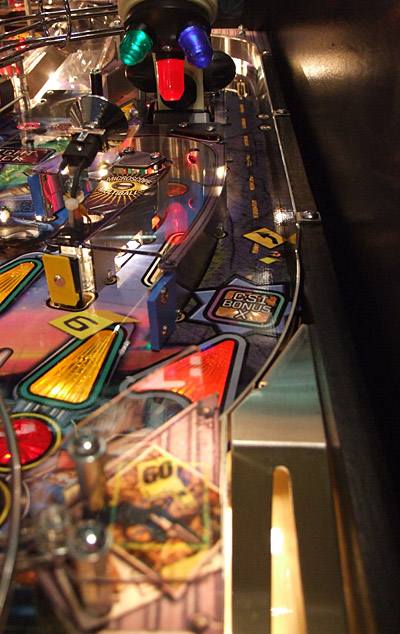
Finally in this look at the playfield design we come to the bottom right corner where we find the customary single inlane and a single outlane.
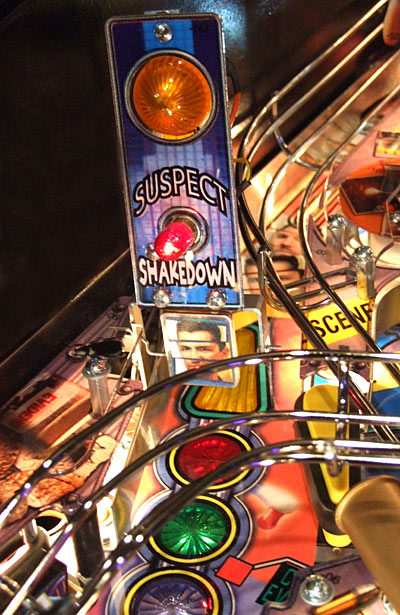
You could almost say there's nothing special about this, were it not for the special lamp in the right outlane. Since the game is quite multiball-heavy with the associated ball saver, that's not too much of an inconvenience but it still requires you to drain a ball to earn a free game. The inlane lights the third C-S-I letter for bonus multipliers and is the return for the skull lock ramp when it's not locking balls for multiball. Which brings us back to the flippers, or in this case just above them to look at the place where you'll usually find something to indicate your progress through the game.
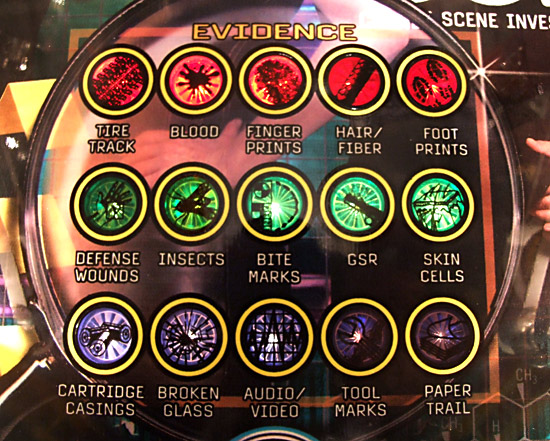
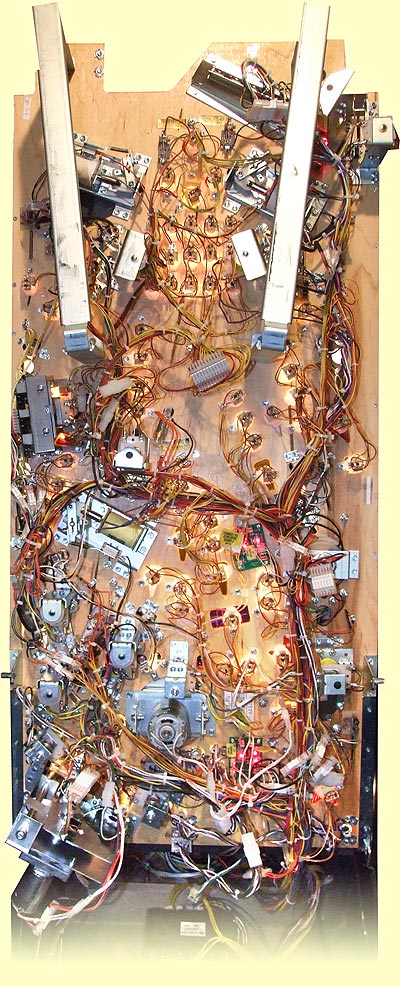
In CSI's case though you'll find a grid showing the evidence you have collected by shooting the lit traffic lights. We'll examine just how this works in the next section. So that concludes our look at the playfield, but before we move on to the second part, let's have a quick look at what goes on underneath.
The motors for the centrifuge and the skull can be clearly seen at the bottom of this picture with the three-bank drop targets half-way down on the left side, while elsewhere there are no unusual devices or surprises in store.
That brings this first part of the in-depth review to a close. We'll be back with part two soon where we'll look at the rules, the sounds, the lighting, the display effects, the music and the overall game art, wrapping them all up with our conclusions and overall ratings. So until then, we'll leave you with the main music theme. Get the Flash Player to hear this audio clip.
Got problems hearing the audio? Consult our help page for assistance.
Got a slow connection? Want to print out this review without each image taking up a whole page? Well, we've got a special treat just for you. Just click here for an alternative version of this review with much smaller images. © Pinball News 2008 |