|
| IRON MAN: IN-DEPTH REVIEW |
|
Hello and welcome to the first part of our exclusive in-depth review of Stern's new pinball, Iron Man. We'll be following our regular format in which this part looks at the game's build, the artwork, the playfield layout and the toys, while the second part picks apart the ruleset to explain how everything works and gives our overall conclusions about the game. When the first Iron Man movie went on general release in May 2008, it proved to be an unexpected hit. The combination of cool special effects, the general disdain of the lead character, Tony Stark, and his self-deprecating humour paved the way for a sequel which, at the time of writing, has just been released. The official launch of the Iron Man game coincided with the US opening of the new Iron Man 2 movie on May 7th, but in reality the game appeared at distributors, in arcades and in private homes several weeks earlier. It's unusual for Stern to be in the desirable position where they have the game ready ahead of the movie's release, but the simpler designs and rulesets of recent games such as NBA and Big Buck Hunter appear to have resulted in shorter development times and the ability to meet these kinds of deadlines. Not only that, they seem to have found time to sneak out an update to Batman which would seem to address many of the shortcomings we highlighted in our review of that game. But back to Iron Man, and let's start our look at the game, beginning with the first thing most people will see; the exterior artwork.
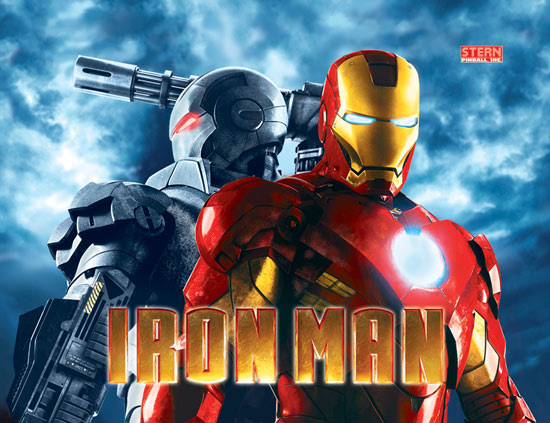
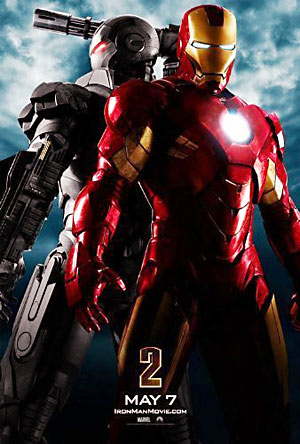
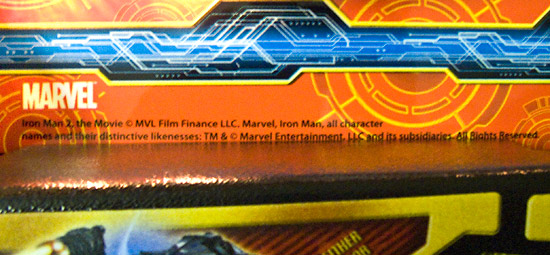
The translite image is an unusual one for a pinball movie licence, as it doesn't depict any of the actors from either film, concentrating instead on the besuited characters of Iron Man and War Machine. It's unusual too not to see several paragraphs of copyright, trademark and other legal warnings along the bottom of the image, but what little ownership information there is, is reserved for the playfield, keeping the translite remarkably clean. It would be nice if - like Batman - the translite art was unique to the pinball, but this image actually comes from a teaser poster for Iron Man 2.
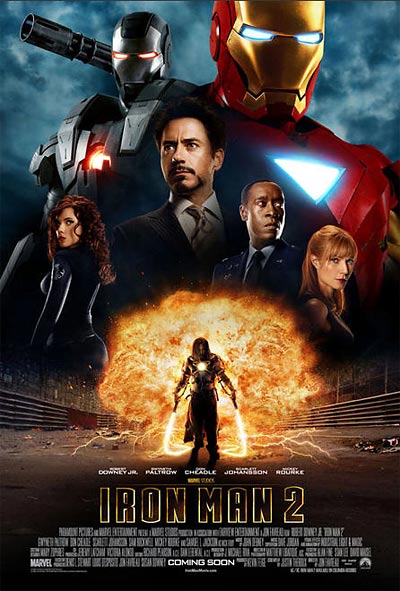
The - excuse the pun - stark simplicity of the translite prevents it feeling cluttered or overcrowded, which can easily happen once you start including images of all the big name actors in the two movies, as we've seen happen with Batman. So we should be thankful we didn't get this piece of bad Photoshopping from the international Iron Man 2 poster:
The backbox also features a new type of trim - a reflective gold with a black rubber inlay - rather than the more usual solid silver colour.
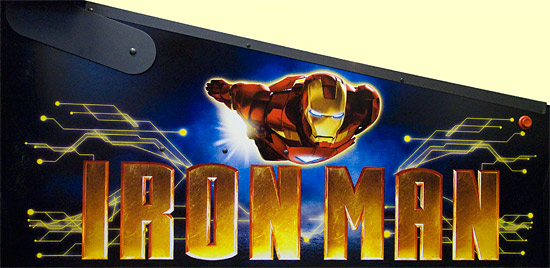
The clean, minimalist approach of the translite continues onto the cabinet artwork too.
The logo takes up half the space, leaving just enough room for Iron Man to fly above it, while the electronic circuit-style design hints at the connections between Tony Stark's body and the embedded arc reactor which keeps him alive. The two sides of the cabinet feature the same design, unlike the backbox sides which introduce two characters from the second movie.
Scarlett Johansson is on the left as Natasha Romanoff (a.k.a. the Black Widow) and Mickey Rourke is on the right as Ivan Vanko (a.k.a. Whiplash, a.k.a. Backlash). The electronic design from the cabinet has now moved on to resemble a circuit board layout and is coloured blue to push it more into the background. The cabinet front meanwhile, re-unites Iron Man and War Machine with the Iron Man logo.
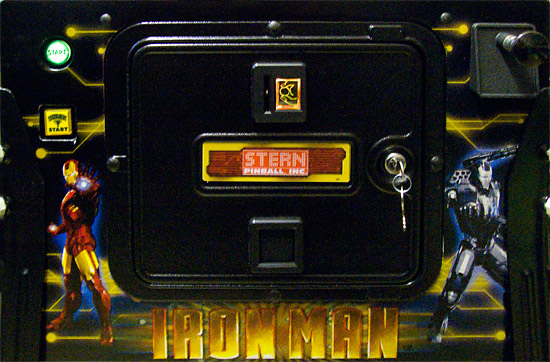
The Stern logo on the coin door also incorporates the yellow circuit design to give it continuity with the front and side art. The standard pair of start buttons (regular and tournament games) and the usual manual plunger complete the front of the machine. For anyone who has seen either movie, the exterior artwork will be immediately familiar, sticking to the style guides and incorporating images used in other Iron Man promotional material. There's nothing about the look which specifically says "pinball" though, so the design seems to have stuck quite tightly to the studio's branding. There's usually more artistic freedom when it comes to the playfield, so let's take a look under the glass and see what the team at Stern have given us to play with.
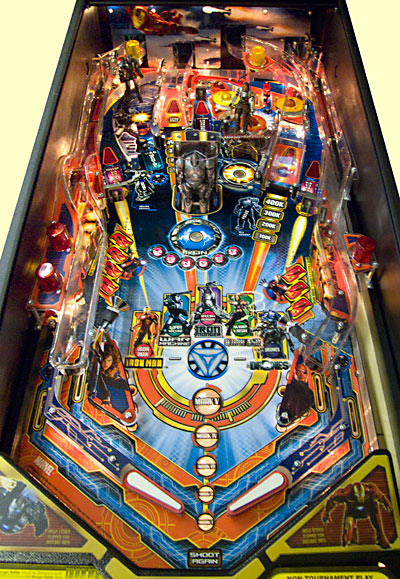
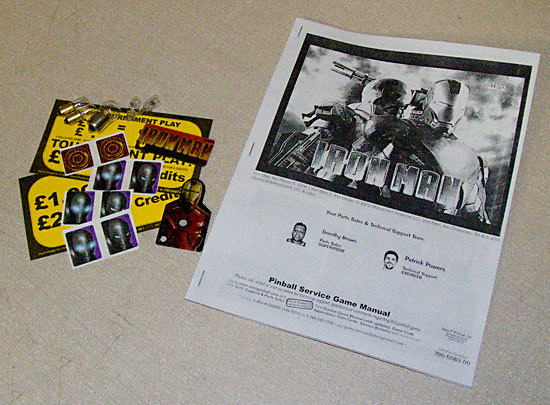
Iron Man is a two flipper, four ball game featuring three spinners, two magnets, two ramps and a large Iron Monger toy which rises up out of the playfield. To help keep the game looking good and running smoothly, the usual goodie bag is stapled to the inner cabinet side. It includes a selection of spare lamps, target and spinner decals, a couple of plastic pieces, alternative pricing cards and the game's manual.
This manual was a monochrome, stapled version and although the references inside to different coloured sections were therefore somewhat redundant, it's better than the much thinner version which shipped with many Big Buck Hunter games. It's also good to see the return of branded key ring plastics included in the bag. Now it's time to have a look at the game's assemblies and features, so we'll start our tour at the bottom of the playfield, working in a clockwise direction. As we said, there are just two flippers in Iron Man - white bats with red rubber. The rest of the game uses black rubber.
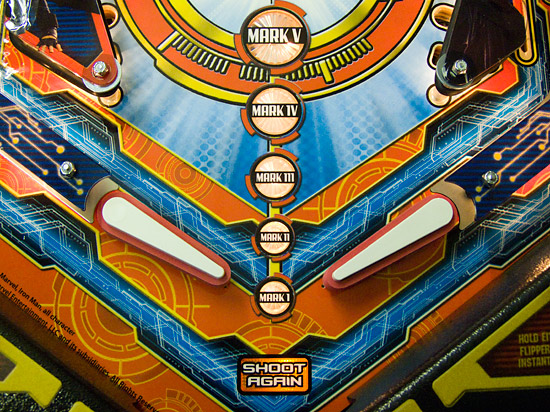
The electronic artwork motif makes a return here, creating fine threads which weave their way along the inlanes and outlanes. The artwork cutouts and soft shadows create several faux sunken areas which, while giving a slightly confusing look to the whole area, do create an effective three-dimensional, layered feel, hinting at something exciting happening below the playfield level. The shoot again insert is in the regular place between and behind the flippers, perhaps a little lower down than we are used to but about the same place as it was in Big Buck Hunter. For younger (or shorter) players, this may be hidden by the plastic playfield apron. Printed on the playfield, to the left of the shoot again insert, is the legalese missing from the translite.
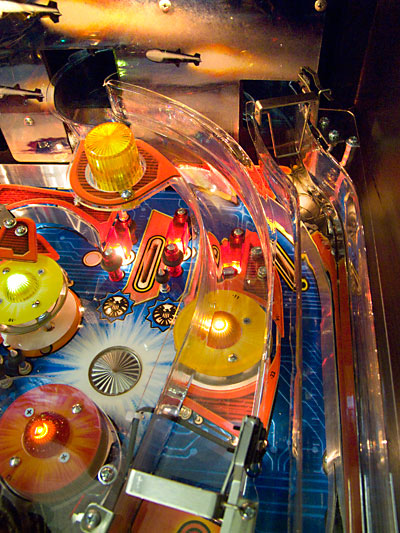
The left slingshot is a simpler device than we've become used to, having only a single layer and no flash lamp dome mounted on top.
There is, however, the familiar spot lamp positioned on the top corner to provide additional playfield illumination and to brighten up the Iron Monger toy. Behind the left slingshot are the left inlane and outlane.
There is no kickback or other ball save mechanism on the left outlane. Once the ball drains down here it's gone. What we do get is a rollover switch in the outlane and the inlane which lights the appropriate insert above it. This insert features an eagle motif and is the logo for S.H.I.E.L.D. - the Strategic Hazard Intervention Espionage Logistics Directorate. Yes, I know. But anyway, that's their story and their logo. There are S.H.I.E.L.D. logos on the inlanes and outlane on both sides as well as the top rollover lanes and we'll examine what they do in the rules section of part two. The ball ends up in the left inlane by either rolling in from the top or after shooting it up the left ramp, which terminates here. Above the left outlane is the outlane adjuster which allows the game's owner to set the width of the outlane (and hence the game's difficulty) to one of three positions. The test game we used shipped with the post in the upper (hardest) position.
It's odd how the playfield artwork doesn't cover this area as it makes it really obvious when the game has been set up to be hard. Conversely, when it's set to be easy, the bare wood area is behind the post and so is less noticeable. It may be easier for operators to identify the adjustment that way, but surely it is more likely to put off players whose attention is drawn to any game with hard settings. And while we're making requests, can we have the infinitely variable outlane adjusters - the ones where you just slacken them off and then slide the post up and down along a groove - back please? They're much easier to adjust than having to take the entire post out along with the nut on the underside. OK, rant over, so time to move along both metaphorically and literally as we turn our attention to the next feature on the playfield, the I-R-O-N targets.
Now I know what you're thinking: "where does it say I-R-O-N?" and you're quite right, it doesn't. But it does spell it out on the dot matrix display, although quite why they didn't print it on the playfield inserts as well I don't know. Let's just assume it was a last minute change or someone thought it might be confusing with the Iron Monger also spelling out letters. Whatever the reason, hitting the left most target adds "I", the next one "R" and so on to spell out I-R-O-N as part of "I-R-O-N M-A-N". There is a 3-bank on the opposite side of the playfield to spell the "M-A-N" part. The bottom target is quite tricky to hit reliably from the right flipper but, as we shall see in the rules section, there are ways around that. Sneaking into the top right corner of the picture above is the entrance to our next feature - the left orbit. The left orbit is our first major shot in the game and it consists of two parts - a spinner at the entrance and the orbit itself.
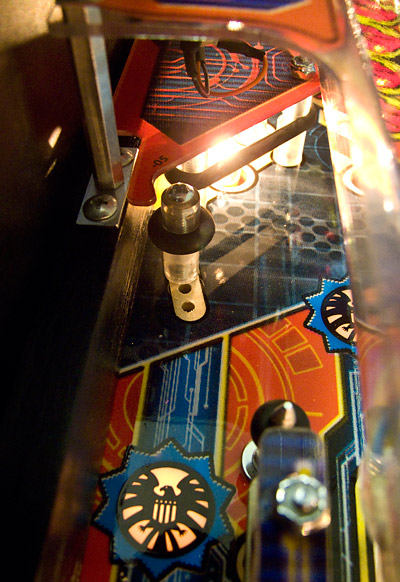
The spinner is the hanging variety such as that found in the classic Stern game Nine Ball by Steve Kirk, and as you can see it's mounted quite some way from the actual entrance to the orbit lane. That means it's quite possible to make to orbit shot and miss the spinner completely, and conversely, to make the spinner shot but not complete the orbit. It's not too hard to hit the spinner, but if you're making fast, repeat orbit shots with the right flipper, you'll quite often find the spinner just sitting there unmoved. The left orbit is a long lane which curves around the top of the playfield to feed either the right orbit lane or the top rollover lanes.
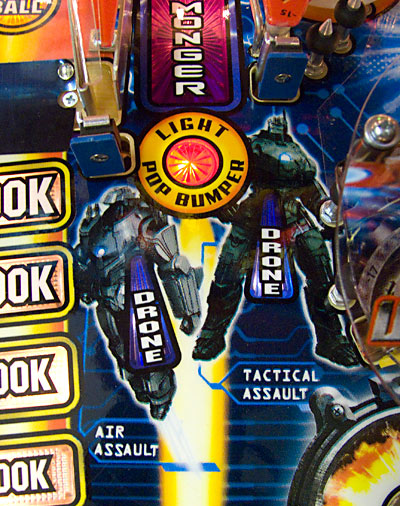
The left orbit lane can be lit to light the left pop bumper to score big points, advance towards Iron Monger mode and the big red arrow can be lit for jackpots or other points awards during various features.
The switch which registers the left orbit shot is at the top of the curve, so the ball needs to make it most of the way round to be correctly sensed. In some cases the display says to shoot the left spinner when it actually means you have to register a left orbit shot. At the top of the lane is a stop post which can rise to send the ball into the pop bumpers, or trap it temporarily while a feature begins.
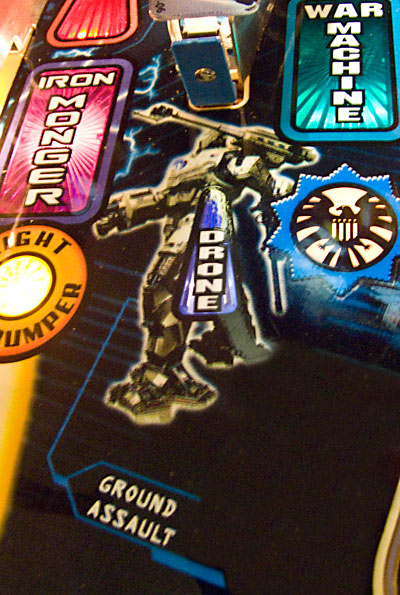
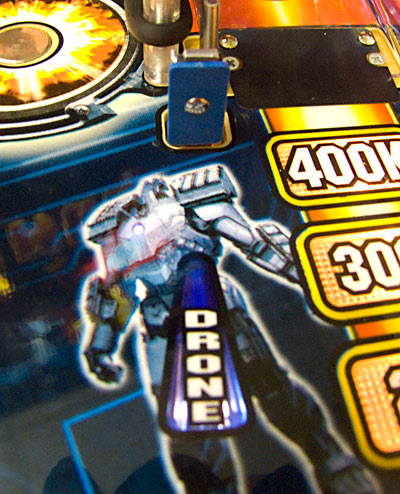
Some very strong left orbit shots can hit the raised post and rebound back down the lane while strong right orbit shots can fly past before the post has a chance to rise up and block them. Neither instance causes any problems to the game's software, though. Just to the right of the left orbit entrance is the first of four drone targets.
This blue standup target collects one of the four assault drones needed to advance towards war machine multiball. The four are; ground assault, air assault, tactical assault and sea assault, and each one has its own stand up target. The number of drones needed varies according to difficult settings and increases for subsequent war machine multiball modes. The ground assault drone is the only thing between the left orbit and war machine and it makes a nice change from those blue rubber pads.
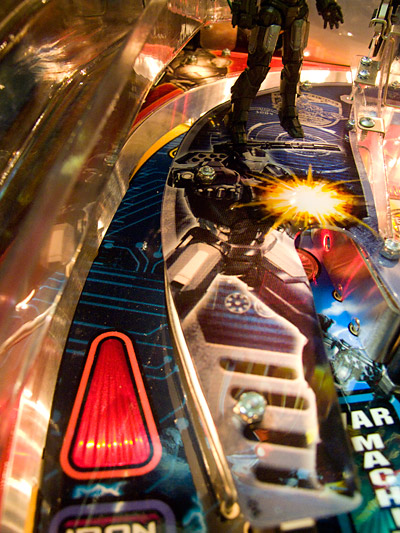
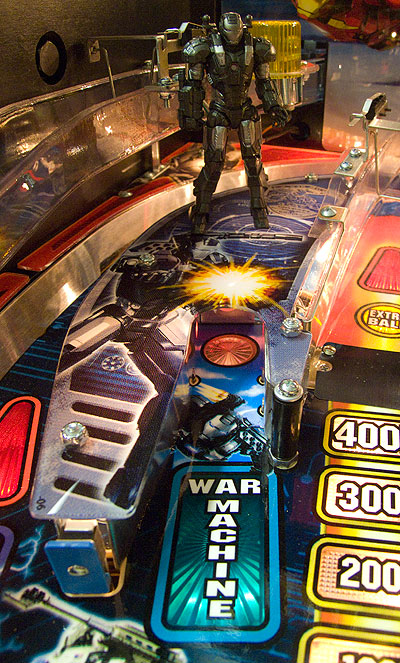
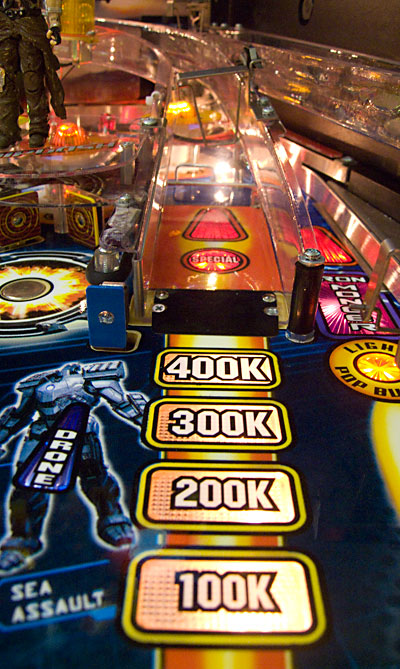
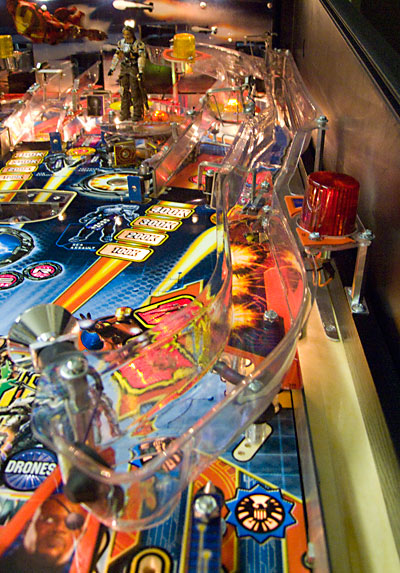
War machine is a short lane ending in a kicker solenoid which fires the ball back at the flippers, just like the raptor shot in Jurassic Park or, more recently, the ram in Big Buck Hunter.
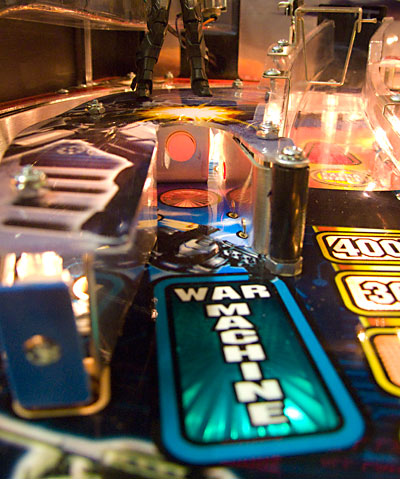
There is an opto sensor just in front of the solenoid and a flash lamp too for increased visual impact. The kicker is more powerful than the one in Big Buck Hunter and can lead to a drained ball if you're not prepared for it. War machine can also be lit for a mystery award once all the S-H-I-E-L-D inserts are collected. The next playfield feature is the game's first ramp.
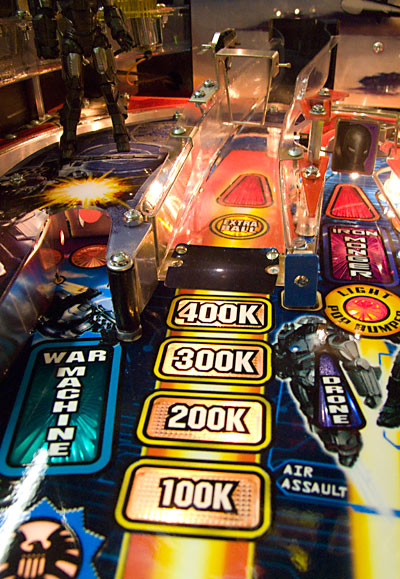
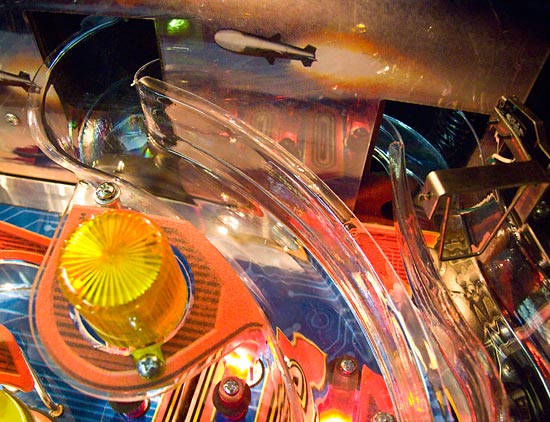
Leading up to the left ramp is a ladder of points awards from 100K to 400K, and successive shots increase the number of lit inserts on the ladder until it - and the corresponding right ramp ladder - is fully illuminated, when the Bogey mode begins. This makes it somewhat like Payback Time on Terminators 2 & 3. Both ramps in Iron Man are made from clear plastic and include playfield inserts beneath the entrance. The left ramp sends the ball round a sharp bend which is partially obscured by the backboard, before its journey down the left side of the playfield, into the left inlane.
The left ramp includes a few twists and bumps along its length, again much like Big Buck Hunter, and like that game it includes an emergency exit point in case the ball doesn't have the momentum to make the steepest climb.
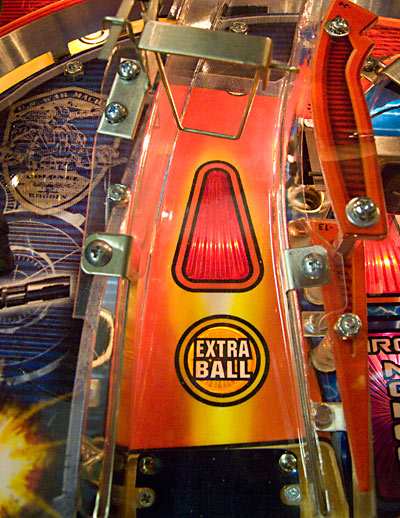
The big red arrow insert under the left ramp indicates it's one of the five major shots in the game and it's also the place to collect any extra balls when the corresponding orange insert is lit.
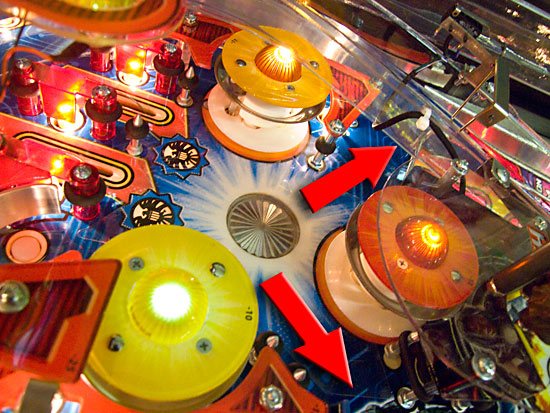
To the right of the left ramp is the game's second spinner which is mounted over the entrance to the centre lane.
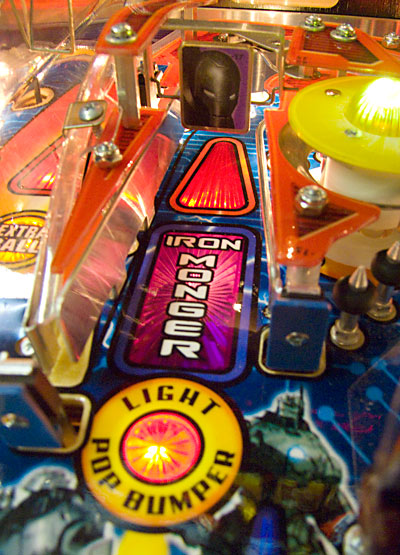
The centre lane is short and curves sharply to the right, sending the ball into the pop bumpers. The lane is the second of three shots which advance the Iron Monger feature but unlike all other major shots, this one doesn't have a dedicated switch to detect whether the shot has been made or not, so it uses the spinner instead. That means even a ball which doesn't make it all the way can still give you credit for making the shot. This Iron Monger insert is also unique amongst the three in the game in having a flasher beneath it. That means when all three are lit for the start of Iron Monger mode, the centre lane one also flashes. That doesn't mean the centre lane is any better to go for than either of the other shots, but that's where the flasher is. The red arrow shows this is another of the major shots and the circular insert indicates the lane can light the bottom pop bumper for increased scoring opportunities. Flanking the centre lane are two more drone standup targets.
The air assault and tactical assault drone targets catch any wayward shots, so even if you miss any of the adjacent shots you might at least collect a drone instead. If you do manage to make the centre lane, you will send the ball into the pop bumpers. However, the centre lane also has another trick up its sleeve.
At the exit to the centre lane is another stop post. This one doesn't do any more than delay the ball on its journey, but it does hold it up for long enough for the Iron Monger toy to activate and the associated light and dots effects to take place before releasing the ball into the bumpers. There is a one way gate to prevent the ball bouncing off the stop post and rolling back down the centre lane. The gate on this game was missing a rivet which seemed to make it rather less effective than it should have been. As we're now at the pop bumpers, it would seem to be an opportune moment to have a look at that area of the playfield.
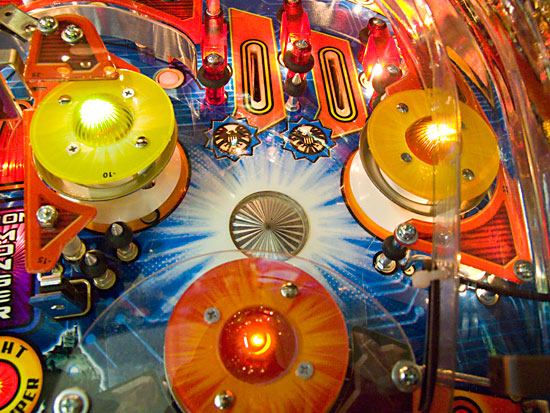
There are the usual three pop bumpers in a standard arrangement - two at the top, one at the bottom - with the same 'skinny' design we've become used to on Stern's recent games. The lamp domes on the top are - like the bumper caps themselves - individually colour-coded to match the corresponding yellow, orange and red "light pop bumper" inserts on the playfield. In the middle of the pop bumper triangle is a circular flasher insert which flashes when any of the pop bumpers fire. Unfortunately, this only has a single flash lamp beneath, unlike most recent games which have two, or Spider-Man which had three. The single flasher can't provide the same impact and flood the area with light in the way Spider-Man does. The pop bumpers use LEDs which seem reasonably effective, although they do sometimes flicker briefly or light dimly when they are supposed to be off. Above the pop bumpers are two rollover lanes which form the game's initial skill shot.
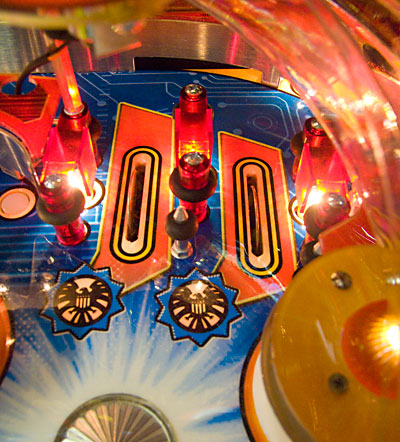
The ball will normally be launched from the shooter lane up the right orbit and hit the (now) raised stop post on the orbit, so these two lanes will usually be the first scoring switches the ball encounters. At the start of the game the insert below the right lane is lit for a skill shot award but the ball nearly always falls into the left lane, so the flipper buttons change which one collects the skill shot award. The inserts are curiously offset from the lanes themselves which may initially cause some confusion as the right lane's insert is half-way between the two lanes. It isn't immediately obvious why this was done as there seems to be plenty of space to make them nearer the lanes, even if a pop bumper obscures the right one slightly.
The inserts themselves feature the same S.H.I.E.L.D. eagle motif found on the inlanes and outlanes. That's no coincidence, as we shall see in the rules section. When the ball rolls through the top lanes and into the pop bumper area, there are two ways it can exit and head down towards the flippers.
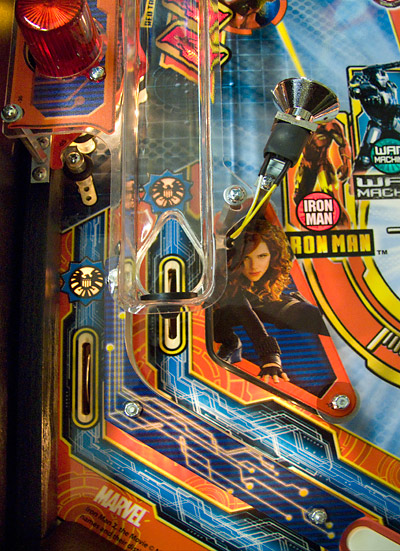
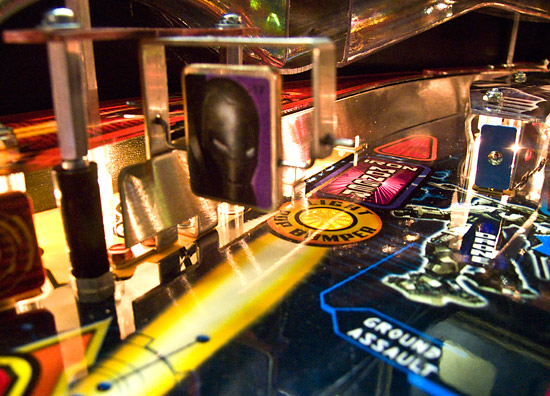
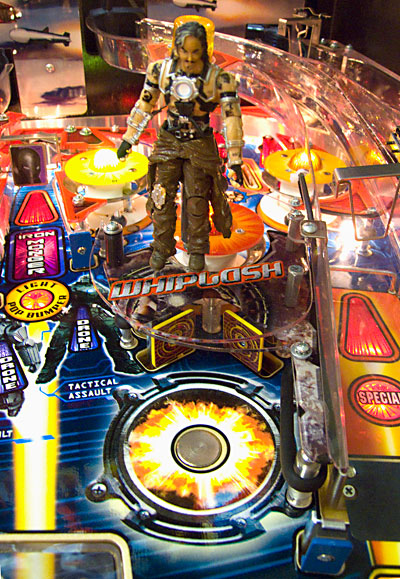
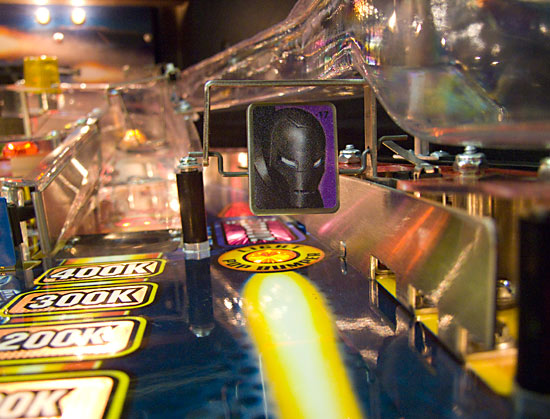
If the ball rolls to the left of the red pop bumper it finds itself in the centre of the playfield. If it rolls to the right of the red pop bumper instead, it passes under the right ramp, joins the right orbit lane and rolls down to the right flipper. Directly below the red pop bumper is another of the characters from the Iron Man 2 movie - Mickey Rourke's villain, Whiplash.
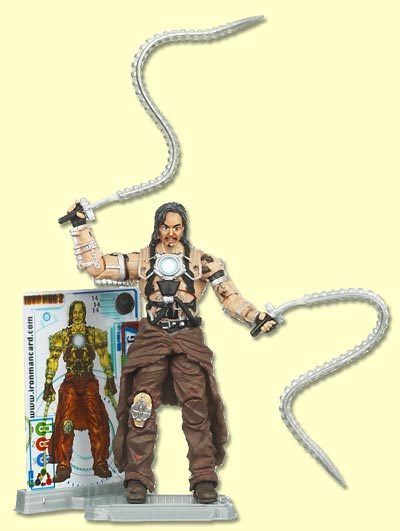
The Whiplash toy is supposed to have the whips he uses to such devastating effect in the movie and the toy's hands are designed to hold them, but they are not fitted or included with the pinball game. Every third party Whiplash toy comes with them though, from the official Hasbro version...
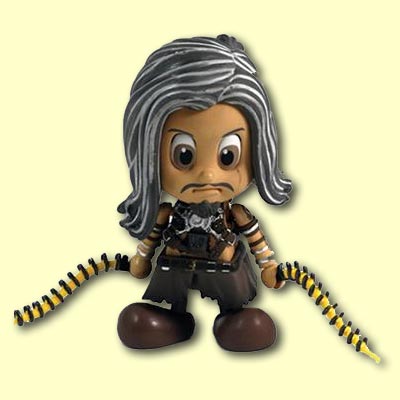
...to the ever-so-slightly less realistic Cosbaby model from Hot Toys.
Of course, whips or no whips, they toy doesn't affect how the pinball feature operates, so let's take a look at that.
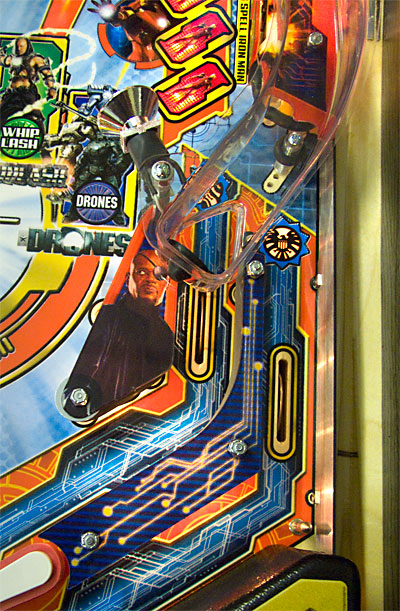
Whiplash consists of two standup targets which operate an electromagnet positioned in front. The magnet is pulsed briefly so that it pulls the ball back from the targets and sends it down the playfield. It's a simple arrangement but quite effective, producing seemingly random movement of the ball and increasing the chance it will drain. Each hit of the targets also counts down towards the start of Whiplash multiball where the targets become one of the necessary shots. On the bottom-right of the picture above you can just see the fourth and final drone target.
The sea assault drone target neatly covers up the divider between the Whiplash feature and the next shot on our playfield tour, the right ramp.
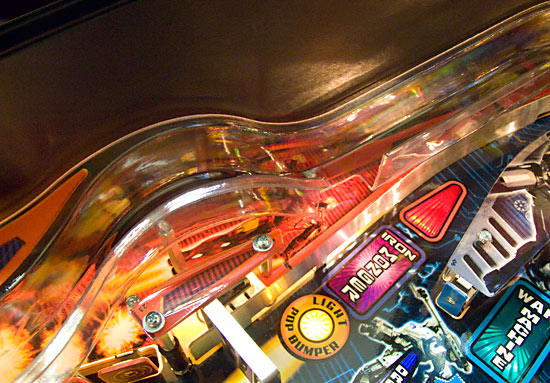
Like the left ramp, the right ramp sends the ball round a sharp bend behind the backboard and all the way down the side of the game to the inlane.
Although there is a switch at the ramp's entrance, it is the rollunder switch on the right of the picture above which registers a successful shot.
If, however, your shot doesn't make it all the way up the right ramp, it will roll back and is liable to hit this post on the way.
The post protrudes into the ramp entrance a little and works to deflect the ball on the way back down the ramp, sending it slightly to the left and quite possibly straight between the flippers. This effect is so common, Pinball Life even sells a replacement rubber post and ring kit so the ball doesn't drain so readily.
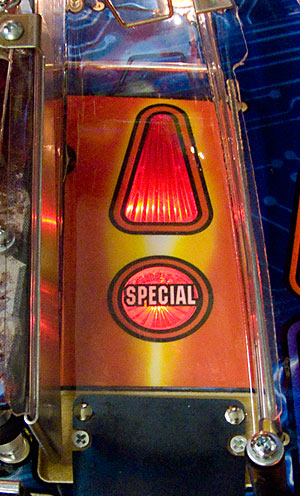
As with the left ramp, there is a ladder of awards from 100K to 400K leading up to the right ramp's entrance and two more inserts under the ramp itself. In this case there is the usual big red arrow to show this is a major shot used in multiballs and modes, plus the red special insert. In contrast to its counterpart on the other side of the game, the right ramp is a pretty flat and level piece of plastic, sending the ball to the right inlane with the minimum of fuss.
Both ramps send the ball behind the backboard so it's worth taking a moment to have a look at this.
The number of lamps on the backboard make it look a little sparse, but in fact it's one more than Big Buck Hunter and only one fewer than NBA or even 24 - the last of the "full-fat" Stern games. The light they produce doesn't illuminate the back of the playfield or the backboard as much as the 10 lamps used on CSI and earlier games, but it's adequate and no doubt saves a couple of bucks. Back to the playfield, though, and it's time for the next major shot in the game, the right orbit.
As with the left orbit and the centre lane, the right orbit has a spinner at the entrance. It hangs a little way back from the right ramp entrance so there's room to shoot the ball round the orbit and miss the spinner completely. Ideally though, you'll get the spinner too and send the ball up to the top rollovers or all the way round to the left orbit entrance. In case you were wondering what's on the other side of the spinner, here's a look.
If there's a spinner on the orbit, that must mean it advances Iron Monger towards his mode and indeed there is an insert to indicate this along with the obligatory big red arrow and an insert to show when the orbit lights the right pop bumper.
The metal piece on the right in picture above is the point at which the shooter lane feeds into the right orbit on its way to the top rollover lanes. For some reason, whenever the ball rolls out of the right orbit we found there was a natural reaction to try and flip it as thought there was an invisible upper flipper. It makes no sense as there are no cross-playfield shots, nevertheless the urge to flip was there. It's not as thought there is anything which resembles a flipper there.
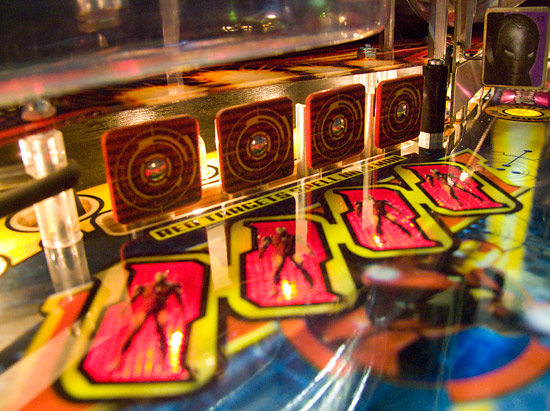
The final permanent feature to aim for is the companion bank of stand-up targets to the four bank on the left side. If those were the I-R-O-N targets, these must be the M-A-N targets.
Like the I-R-O-N targets, these aren't labeled but they do add the M, A and N letters to complete the sequence and light up the appropriate inserts. Perhaps some replacement target decals will be forthcoming with the letters printed on them. The M-A-N targets sit above the right inlane and outlane area which is very similar to the left side with one of each lane, shield targets lit by rollover switches and no ball save device.
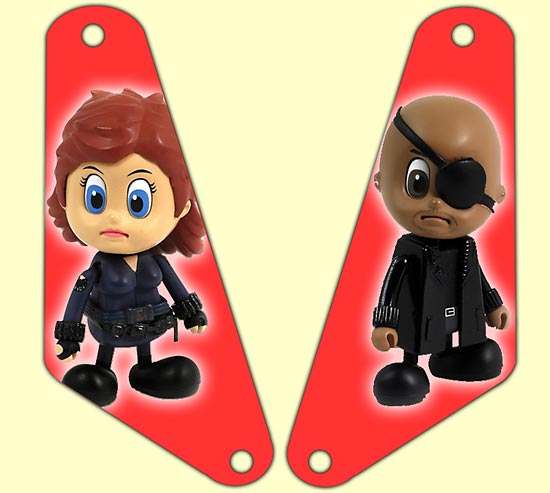
The left slingshot features Scarlett Johansson as the Black Widow and the right one has Samuel L Jackson as Nick Fury. Or as Cosbaby would put it:
No more Cosbaby toys, we promise. This brings us back to the flippers.
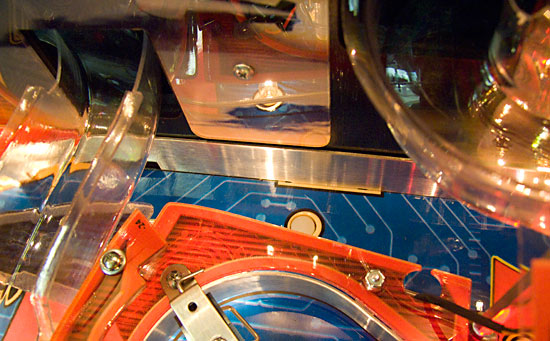
As with Big Buck Hunter, the apron behind the flippers is now plastic rather than metal and interestingly the divider between the shooter lane and the right outlane is now metal rather than the more usual black-painted wood.
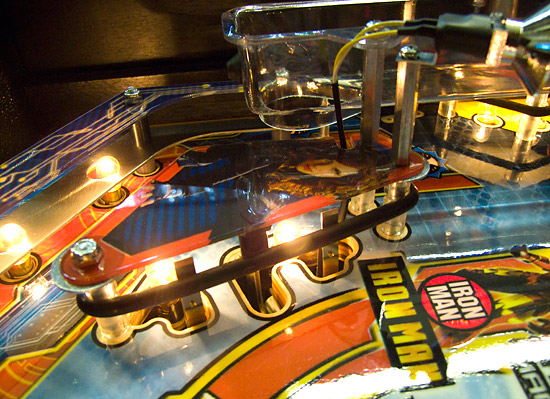
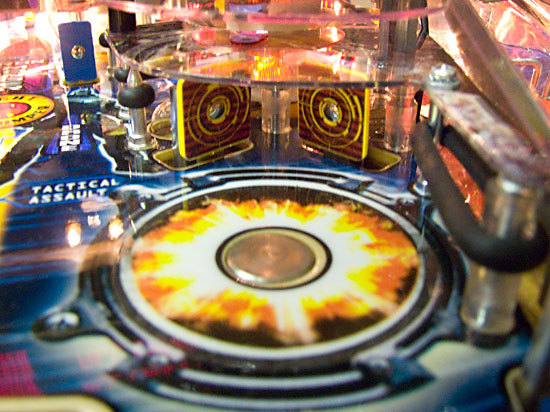
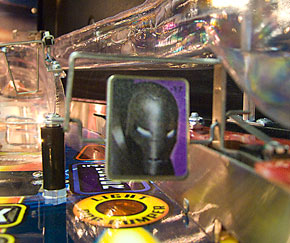
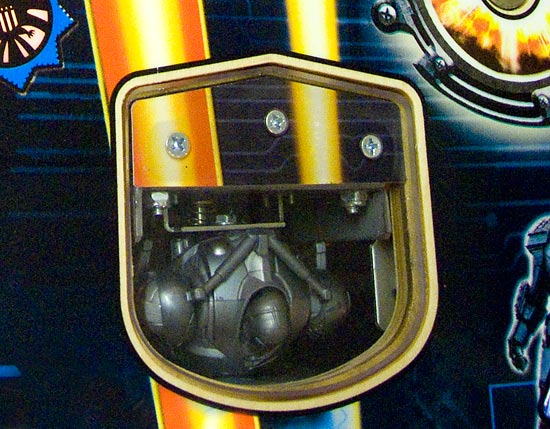
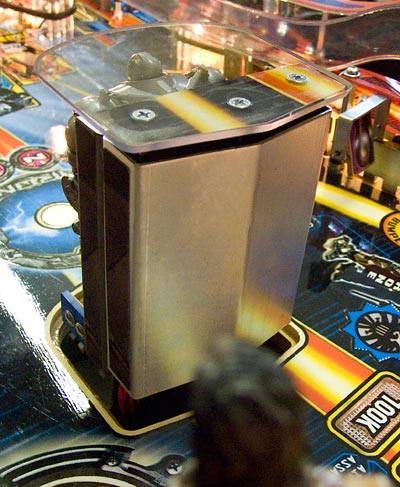
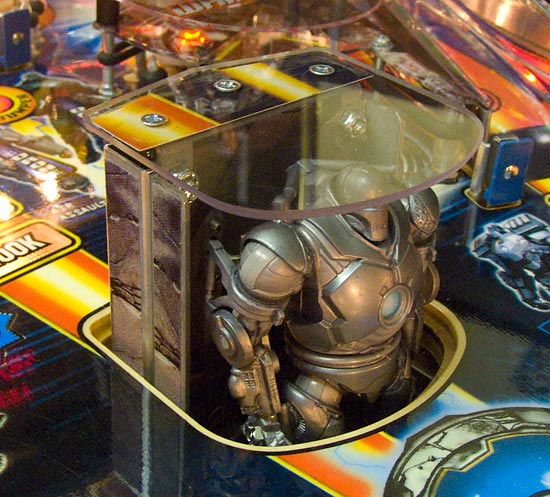
Now we move onto the centre part of the playfield and the game's one unique toy - and he's a biggie. Iron Monger is his name and while he's visible during attract mode, as soon as the game starts he drops down into the playfield and keeps out of the way until his mode begins.
Although he's under the playfield, the clear plastic cover reminds novices he's still there awaiting his moment to shine. The playfield artwork continues onto a decal which covers the back of the Iron Monger mechanism. In this position the clear plastic cover should lie flat with the playfield surface. It needs to be adjusted to make sure it is flat, as any unevenness will result in deviation of the ball's path or lots of airballs which may damage the toys or playfield plastics.
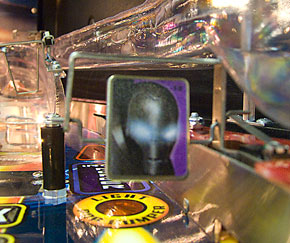
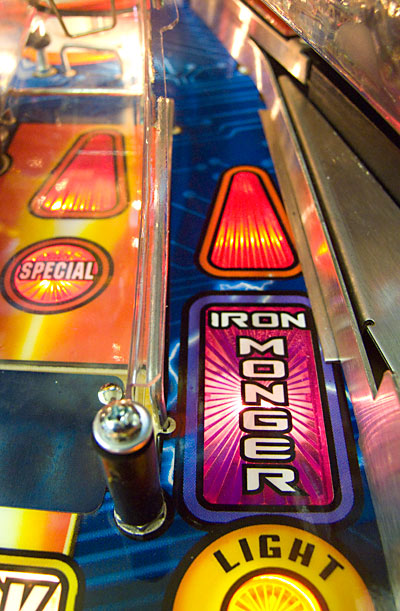
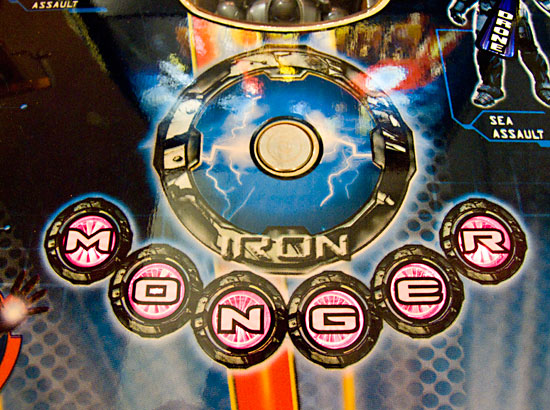
The Iron Monger is activated by shooting the spinner shots (not the spinners themselves) which complete the M-O-N-G-E-R inserts in front of him.
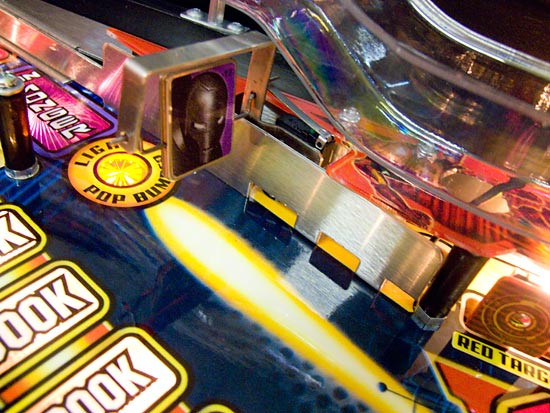
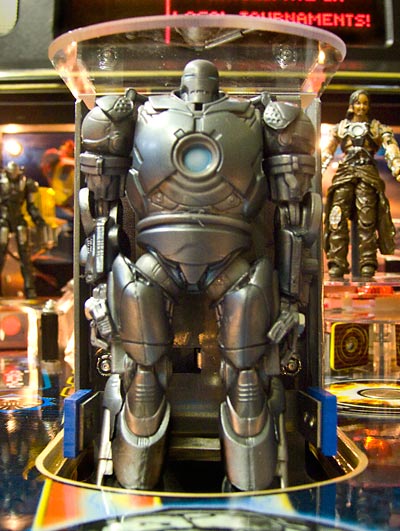
Once M-O-N-G-E-R has been completed, the next shot traps the ball on one of the stop posts and the Iron Monger rises up.
The Iron Monger toy is made of plastic and although he looks quite delicate with the fine detail and multiple joints, he does seem remarkably solid and robust enough to withstand being whacked repeatedly by a steel ball. The Iron Monger is mounted on a moveable back plate which pivots slightly when he is hit. That absorbs some of the energy and also causes switch contacts at the back to close and register the hit. The back of the moveable carriage consists of an angled plate which should ensure the ball never gets stuck behind.
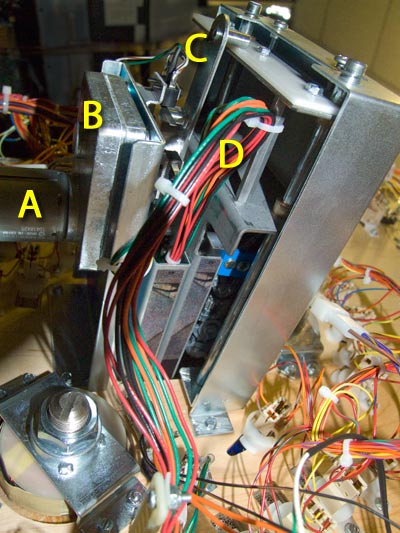
To see more about the Iron Monger mechanism, let's take a look under the playfield.
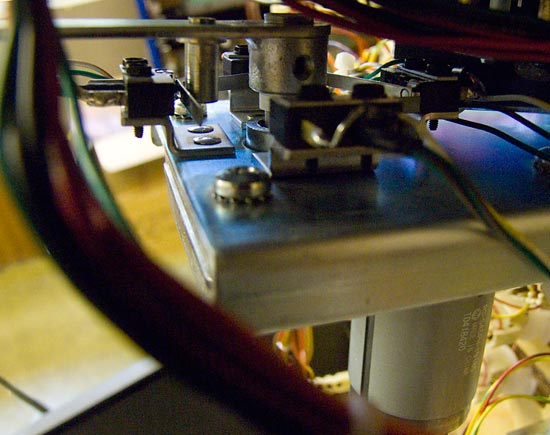
A motor (A) drives a gearbox (B) which turns a cam (C). This lifts the Iron Monger carriage up and holds it there when the motor stops. When the motor turns again, the weight of the carriage ensures it drops back down when the cam lowers. A set of cables (D) runs inside the carriage for the switch and lighting effects. To help with the lighting, there are a couple of static flasher lamps at the base of the Iron Monger mechanism which fire when he is hit. The game needs to know when the Iron Monger is up and when he is down, so a set of micro switches mounted on the rear of the gearbox are triggered by the cam as it turns round.
There are four microswitches because apart from the up and down positions, the Iron Monger also has a half-way up (or half-way down) position.
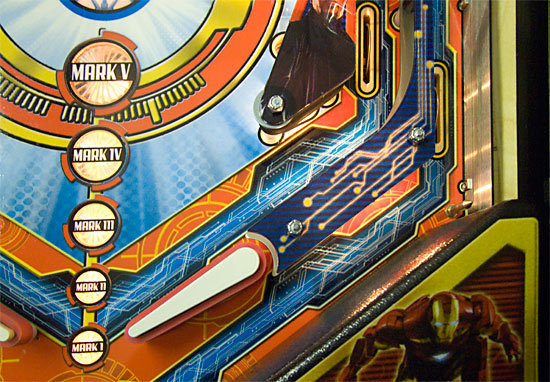
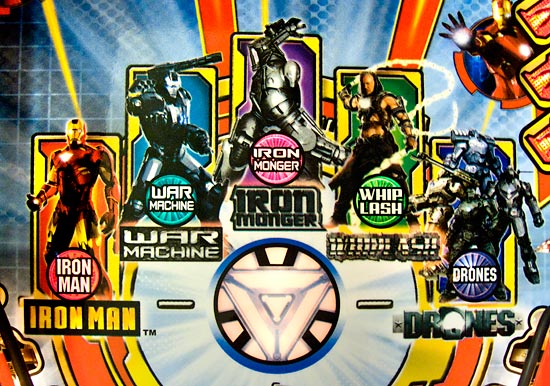
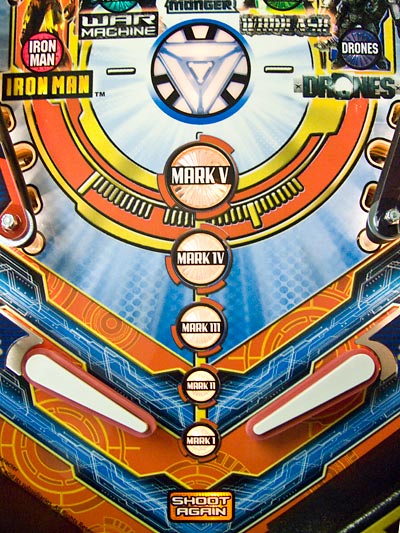
Coupled with the Iron Monger mechanism is another electromagnet which works very much like the Whiplash one, throwing the ball around whenever a hit on the toy is registered. It can also hold on to the ball while lighting, sound and display effects take place, releasing it back to the player when they are completed. The final feature on the playfield is the progress indicator which shows the player what they have to do and how far they have progressed so far. This consists of two parts - the character grid and the mark ladder. The character grid shows which characters' features have been played and which are yet to be played.
The mark ladder runs up between the flippers and lights up in steps as certain milestones are achieved.
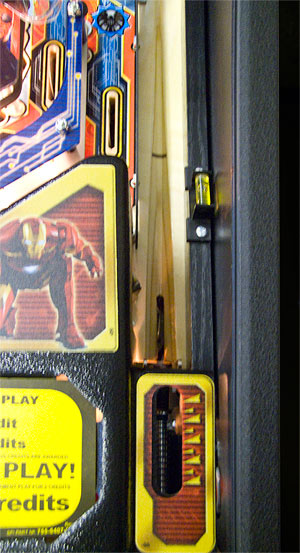
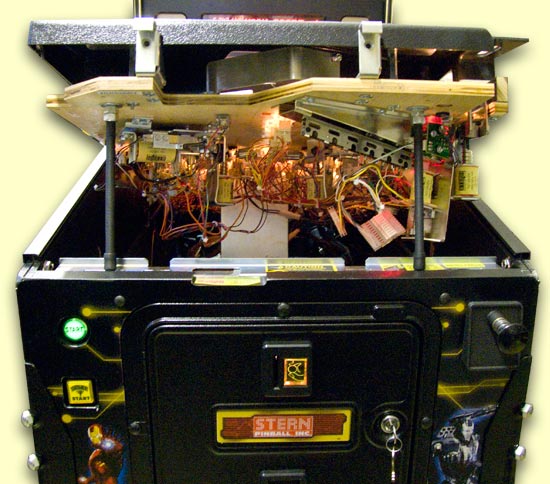
The "mark" numbers refer to the different versions of Iron Man suit Tony Stark develops over the two movies, with mark 6 being his ultimate design. That concludes our tour of the playfield, or at least the top side of the playfield. Let's have another look at the underside because there is change here we need to talk about. Lift the playfield and start to slide it out, and you'll immediately notice a difference. The rails on which the front of the playfield sits have gone. In their place are two metal posts which stand on the lock bar latch.
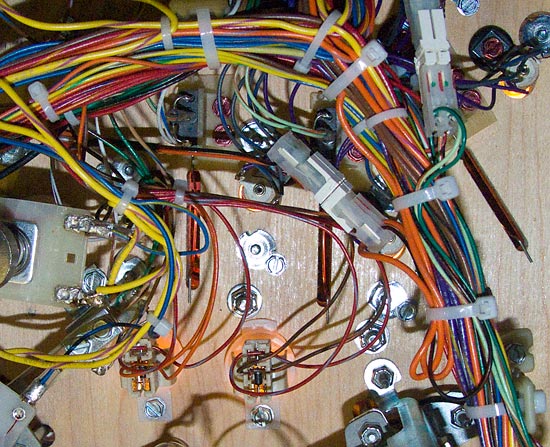
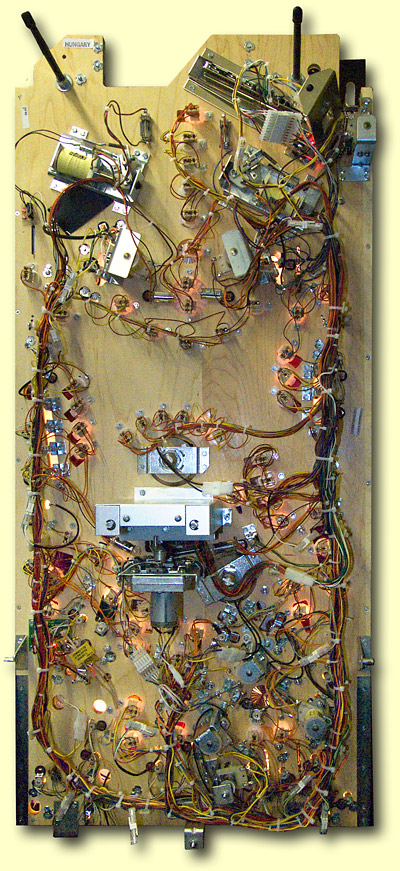
This introduces a few problems. First or all, the new posts only work in the position shown above. With the playfield out any more or any less there's nothing to support it in that position. If you don't manually hold the playfield up, it will rest on the components which is likely to lead to an electrical short on the lock bar latch and bent components. Secondly, having to hold the playfield up means you can't do any meaningful maintenance on the back of the playfield. You need to slide the playfield out to do that and now you can't. It also makes it difficult to reach any balls or other components which fall into the back of the cabinet. Finally, if you needed to slide the playfield out so you can work on the underside, the tradition way to slide the playfield back into the game was to push it until it stopped and then press down on the apron so it cleared the stop point and slide easily in. The new plastic apron raised our doubts about whether it was up to doing this repeatedly but we gave it the benefit of the doubt. Some people just slammed the playfield back in so it jumped the stop point which is obviously not desirable. Now though,that's the only way to do it since you have no rails to slide the game in properly. Anyway, more on that in our conclusions. In the meantime, here's a look at the whole underside of the playfield.
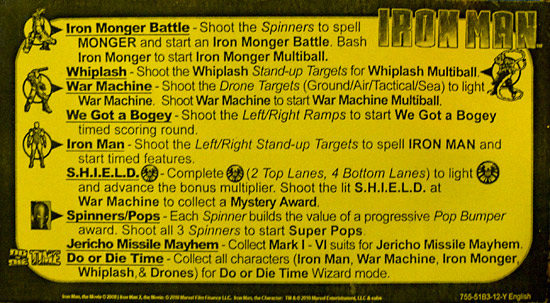
Before we end this first part of our in-depth review, here are a couple more goodies. First, this is the game's English instruction card:
Finally, here's the game's main theme music for you to enjoy. Get the Flash Player to see this video clip.
Got problems hearing the audio? Consult our help page for assistance.
The second part of our exclusive Pinball News In-Depth Review - where we look at the rules, each aspect of the game's design and give our conclusions on the the overall game along with our rankings - is now available. We asked for your comments on the game and what you've seen here. Thank you for sending them in. Now that the concluding part of this review has been published, comments for this first part are now closed, but we'd welcome your further ideas and opinions in the comments section of part two. Your comments:
© Pinball News 2010 |