 |
METALLICA |
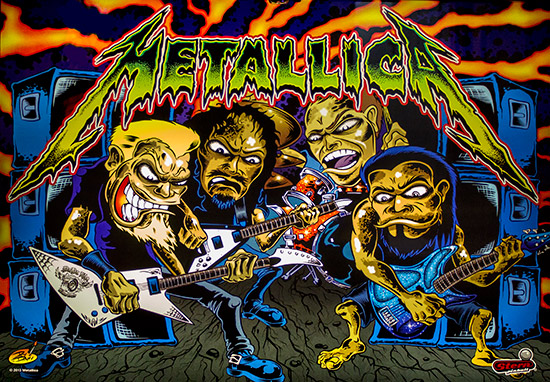
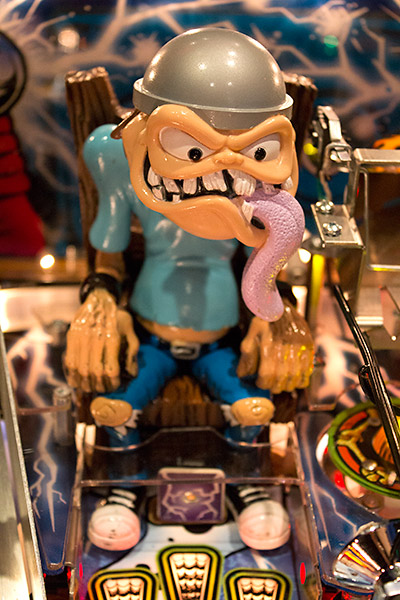
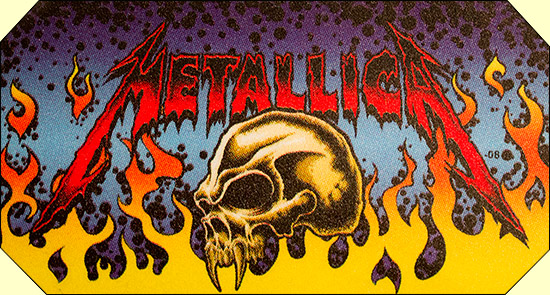
Hello and welcome to the first part of our exclusive In-Depth Review of Stern's new Metallica. Usually in these reviews we concentrate on the Pro version of the game, since that's the one we get our hands on first, but this time around we will show you both the Pro and the Master of Puppets Limited Edition models, comparing and contrasting them to give you the fullest coverage. So, Metallica. It's probably fair to say everyone has at least heard of the band, even if they might struggle to name more than one or two of their songs. But the L.A. four-piece have a strong and devoted following - one which has a significant overlap with the pinball playing and buying market. The band line-up has remained relatively stable since it was founded by James Hetfield and Lars Ulrich in 1981. Kirk Hammett joined in 1983, replacing Dave Mustaine who went on to found Megadeth, while Robert Trujillo is the most recent recruit, taking over from long-time member Jason Newsted on bass. The four are boldly illustrated on 'Dirty' Donny Gillies' highly-stylised translite for the Pro and mirrored backglass for the LE.
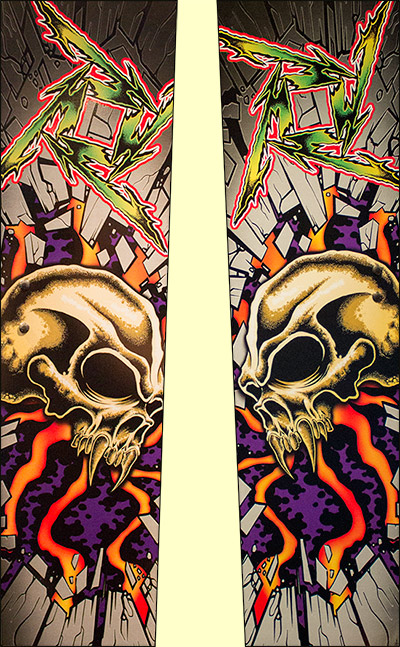
Dirty Donny's artwork defines both the look and the feel of the game even more than the music, setting it apart from anything produced in recent years and demonstrating how a relatively uninspiring theme can be brought to life by a talented artist and a receptive licensor. The tone of the design is all about power and destruction.
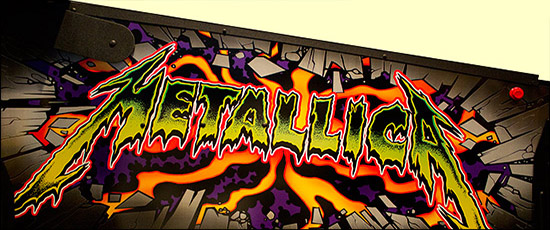
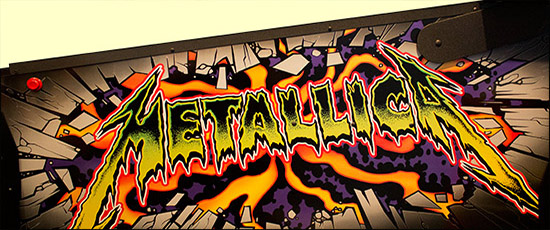
Apart from the Metallica logotype, the shattering background image is the simply flipped between the two sides of the cabinet. The same is true of the backbox sides.
The same style of background is used on the cabinet front where the greys and blacks nicely match the coin door, legs and shooter housing.
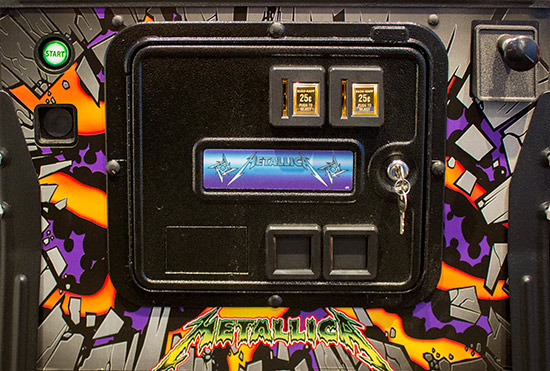
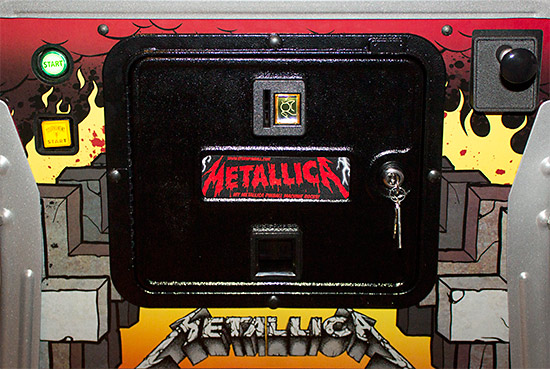
The coin door decal is the only part which looks out-of-place, where perhaps caricatures of the four band members would be more suited, given how the name of the band is already shown below the door.
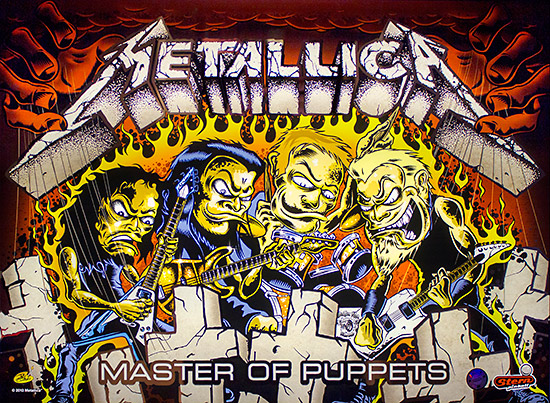
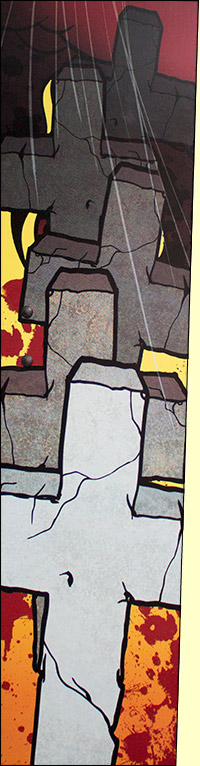
The Master of Puppets has different cabinet, backbox and backglass artwork, concentrating on the gravestones, or as Stern calls then, 'grave markers'. It also features a frosted metallic finish on the hinges, lockbar, apron, legs, and siderails which are extended to protect the artwork around the flipper buttons.
The backbox sides continue the grave marker theme, as does the cabinet front.
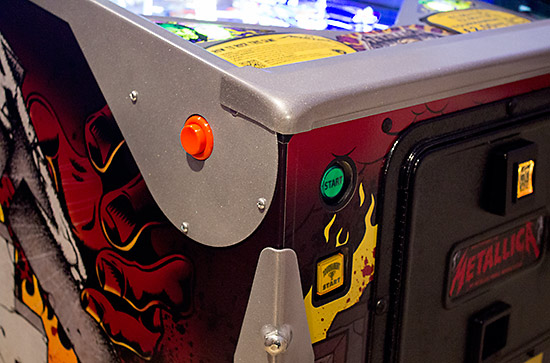
A regular shooter rod, coin door and tournament start button (or a blanking plug on the Pro) means there is no unusual hardware on the outside of the game. All of which means it's time to see what's been provided for us to play with under the glass.
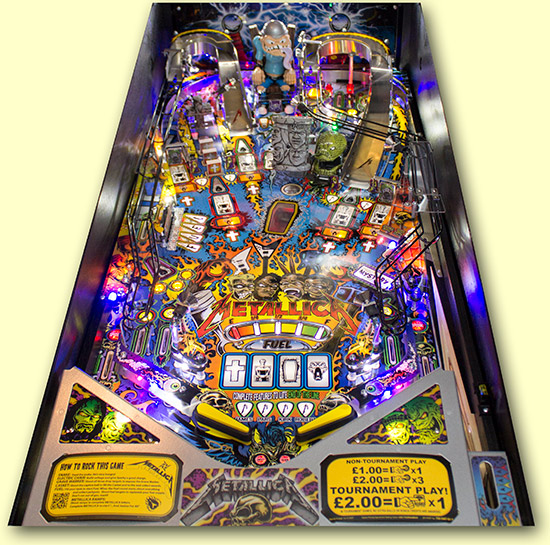
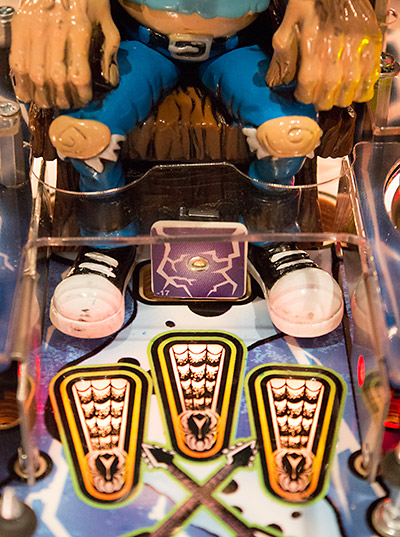
The vivid colours and outlandish artwork carries over from the backglass onto the playfield, with just about every hue and shade represented somewhere. You can see the way the LED illumination on the LE produces a much less yellow look compared to the playfield lighting created by the Pro's incandescent lamps. So let's start our tour of that playfield, beginning as usual down at the flippers, and working our way clockwise round all the features.
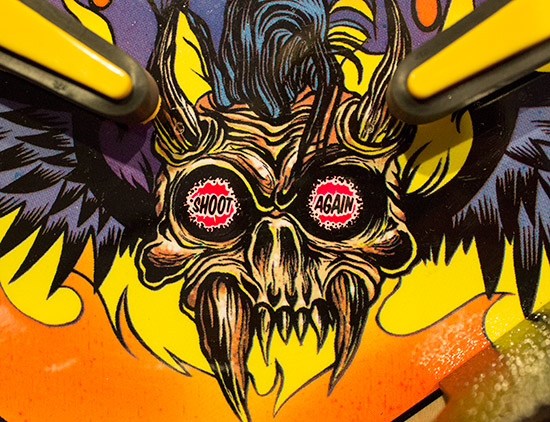
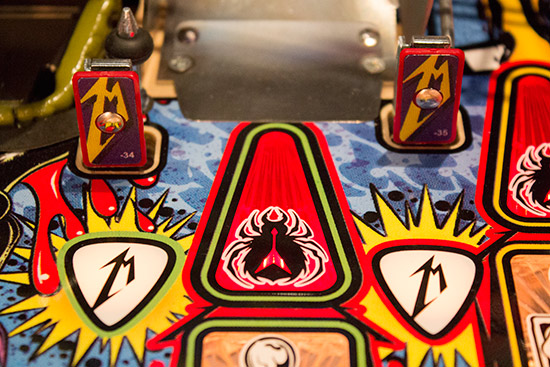
The game's two flippers are down here; their yellow colour echoed in the surrounding artwork. The flippers have good definition against the background artwork, aided by the black rubbers. The skull motif above each of them is used multiple times in the game but the instance between the flippers is embellished and given wings, perhaps an allusion to the bird Aplonis Metallica, the Metallic Starling. Unusually, the shoot again indication is split across two small inserts positioned in the skull's eye sockets. They light solidly when an extra ball has been earned and flash when the ball saver is active. Despite having separate lamps for each in the Pro model, the inserts are not illuminated all that brightly and can easily be overlooked, making them ideal candidates for replacement by high-intensity red LEDs.
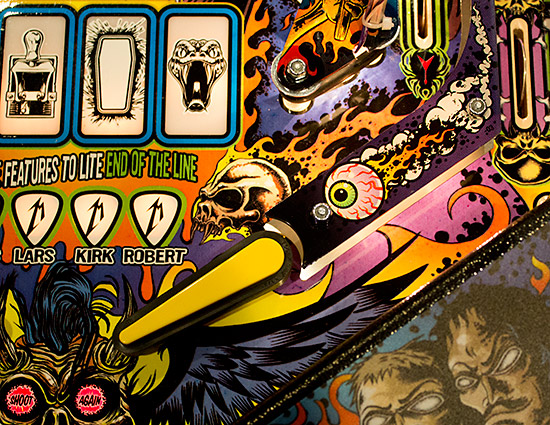
Above the flippers are the progress indicators - a row of guitar picks representing the four band members, and above them are four rectangular inserts showing your progress through the four multiball modes. We'll see how they work a little later in the rules section. Feeding the left flipper is the left inlane which features the standard design of a metallic ball guide with a single layer plastic above.
There is no attempt to use coloured plastic ball guides to create additional lighting effects as we often see in George Gomez's designs. It's the artwork which does all the talking here, so the brighter the better.
The LE uses coloured LEDs and uses three of them to boost the light level around the inlane and outlane.
Dual inlanes have gone from a rarity only found on select Pat Lawlor games to being a regular feature on John Borg's more recent titles (Big Buck Hunter Pro, Avatar, Tron, X-Men). Metallica continues that trend with two inlanes on the left.
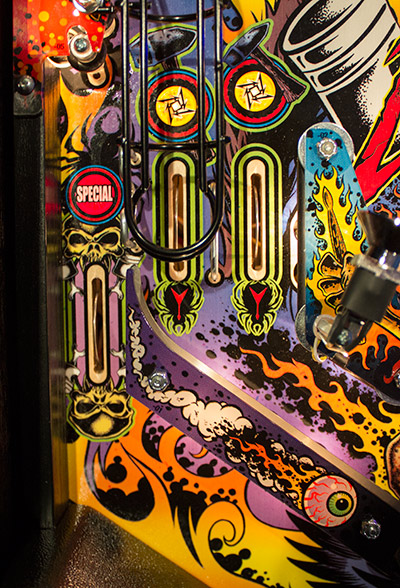
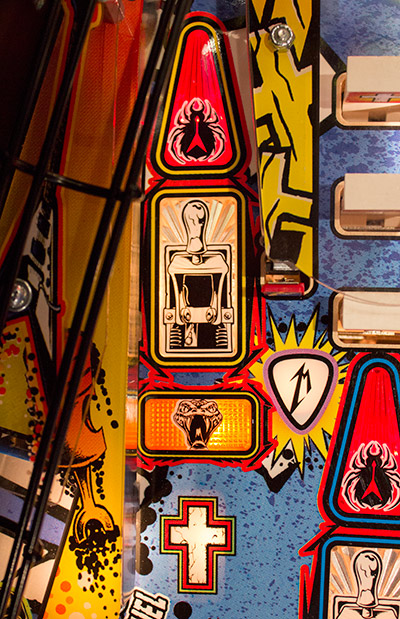
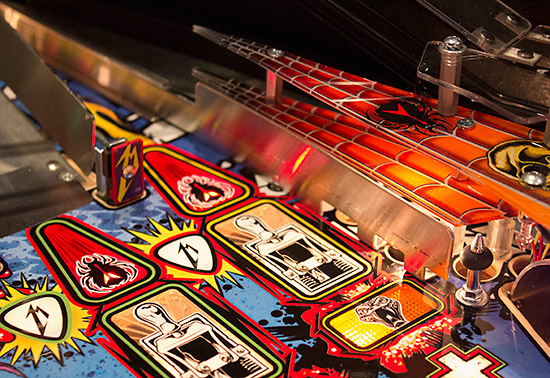
The outlane is framed by two more skulls, while the inlanes feature a throwing star Metallica symbol and hammers over the inserts at the top, with a spider with a Flying-V guitar symbol on its back. This guitar is usually accompanied by the letters 'K' and 'H' for Kirk Hammett - since he sometimes uses it on his guitar picks - but not on this occasion. We'll get to see more of these symbols a little later. The special insert in the left outlane has an equivalent in the right inlane. The two light together to ensure any ball draining down either outlane will collect the award. The throwing star inserts above the two inlanes form part of a set of five which include the right inlane and the two top rollover lanes. During the game, lane change cycles through these five, and all five have to be lit to collect their associated award and reset them. The left-most inlane is also where the left ramp ends. The simple black metal wireform means there's no loss of visibility, allowing you to easily see which inserts are lit and which are not, making a nice change from some recent Stern games.
Next to the right-most left inlane is the left slingshot.
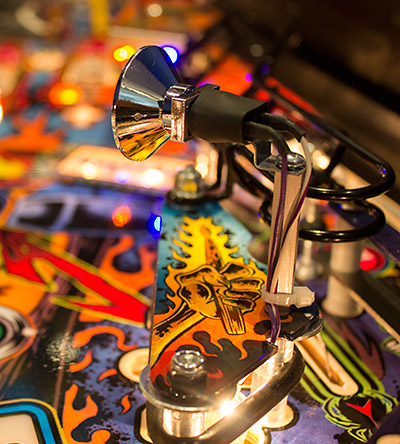
Again, this is about as basic as a slingshot can get, with just a single layer of plastic featuring Lars's hand gripping a drum stick. The only accoutrement being a spot lamp mounted on a post to provide additional illumination to the central playfield area.
The lamp (or LED in the LE) in the spot light has a tendency to fall out soon after shipping, so make sure it is pressed home firmly when the game is first unboxed. The slingshot plastic appears slightly smaller than usual, allowing the protective metal washers to extend some way beyond the plastic's edge. Other than that detail, it's a pretty regular slingshot. Just above the left outlane is the adjuster to vary the lane's width, and hence the game difficulty.
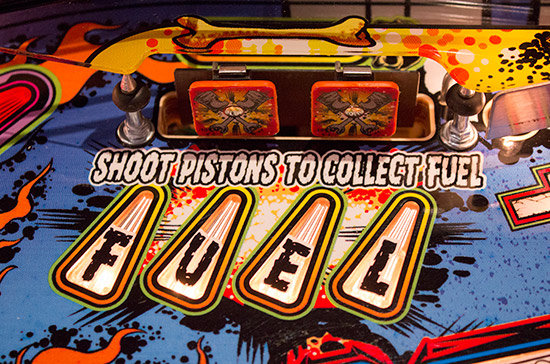
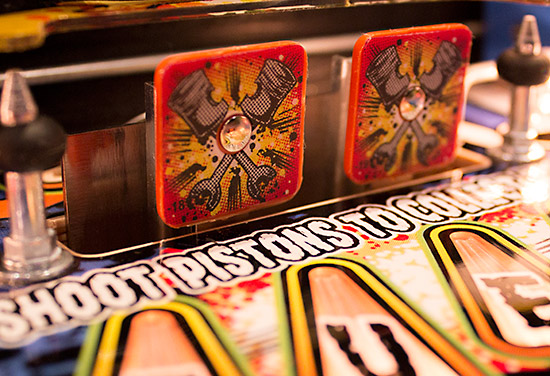
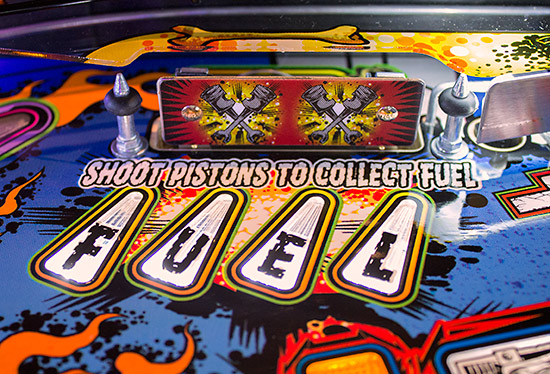
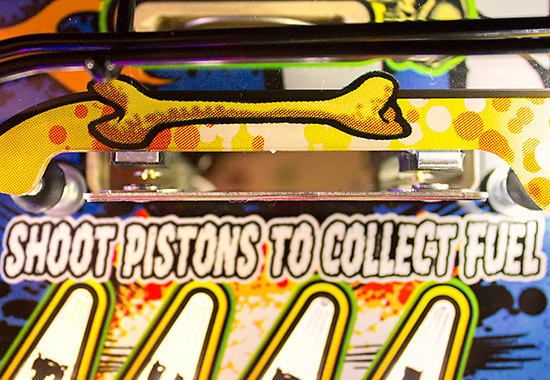
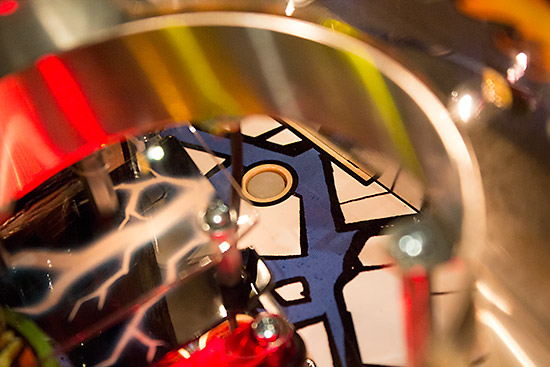
This has only two mounting holes and is supplied in the upper (harder) position. A notch is cut out of the covering plastic to allow easy adjustment. Moving up the playfield we come to the first of the game's major shots - the Fuel Lane.
At the entrance to the Fuel Lane is a red triangular insert featuring that spider symbol again. This denotes the Fuel Lane as one of the six major shots in the game. Below the arrow insert are three smaller yellow inserts which light up and then flash as the value of the Fuel Lane increases. The shot itself consists of a rollover switch about half way up the lane, and a blue square standup target at the end to register a successful shot.
On the outside of the Fuel Lane's right wall are the F-U-E-L standup targets.
There are just two targets which means they don't directly correlate with the F-U-E-L letters, but instead act as a single target so that hitting either of them awards a letter. This is despite the fact that they are actually wired independently. The decals on the targets show an image of crossed pistons. Spare decals are included in the game's goodie bag.
On the Premium and LE models you might expect these standups to be replaced by drop targets, as their equivalents are on earlier titles. In fact, the two standup targets are actually replaced by.... one standup target.
We said the Pro's two targets acted like a single one, so this was presumably the next logical step. This single target has a leaf switch at either end, and adds F-U-E-L letters when hit to advance towards Fuel mode.
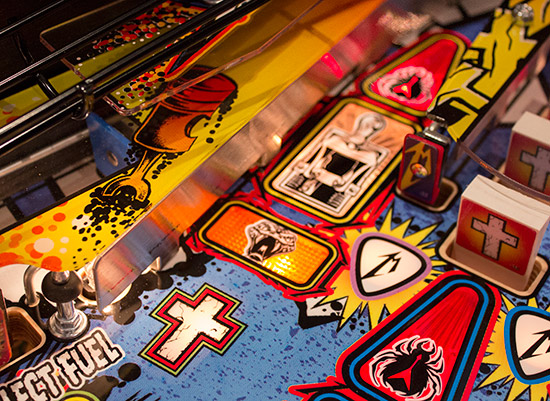
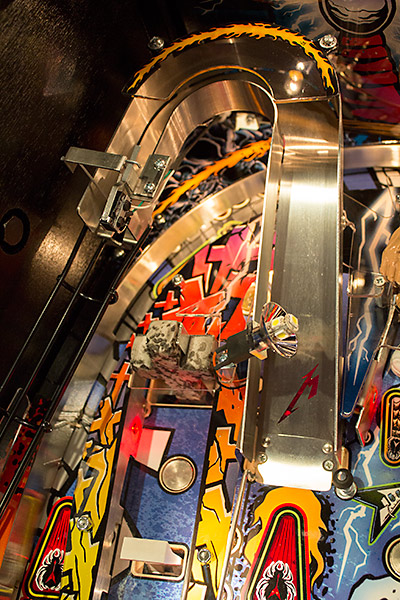
Moving on, the next shot begins just above the F-U-E-L target(s) and is the left orbit entrance.
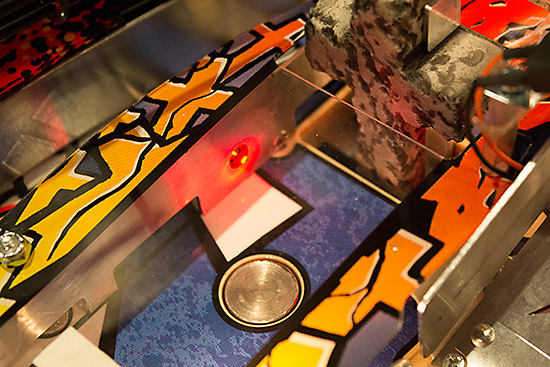
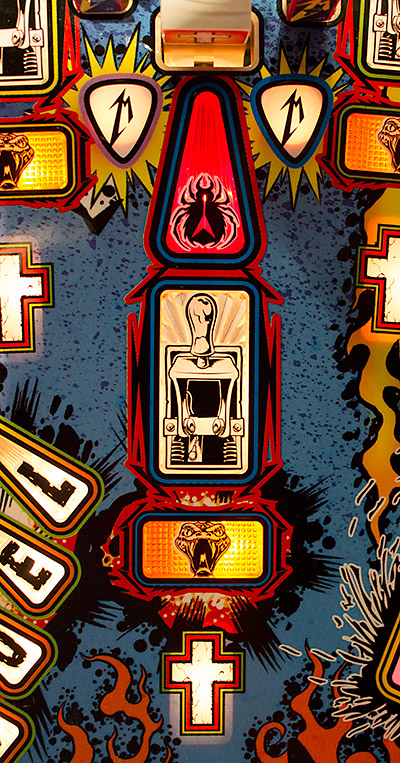
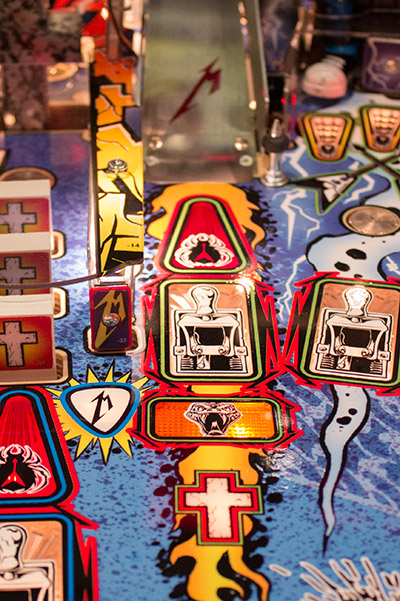
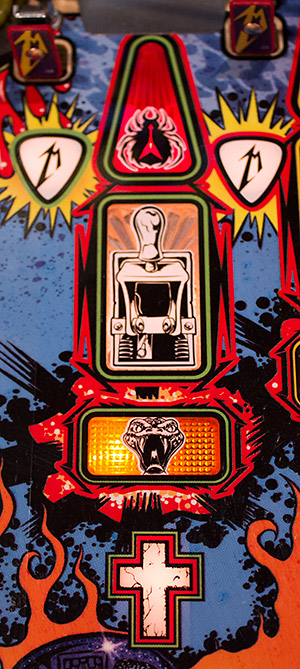
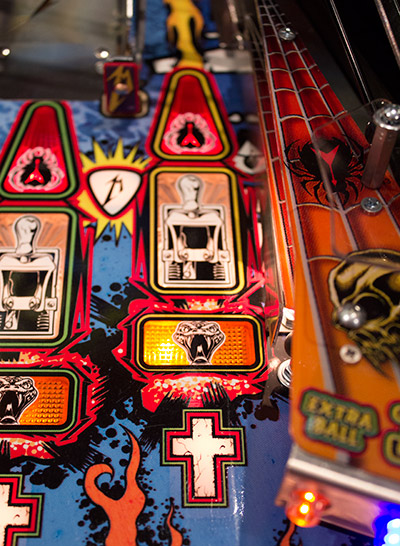
The left orbit lane features four inserts found on most of the game's major shots. We've already seen the red triangular insert with the spider, but below that is the electric chair knife switch insert, followed by the yellow snake insert and finally the grave marker.
On the Premium and LE models there is a spinner mounted over the left orbit lane's entrance.
The image is presumably Sparky, doing what he does to earn his seat in Old Sparky. Although we were reminded of an altogether different scene.
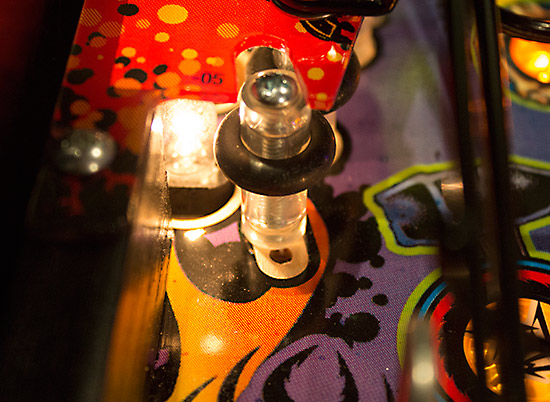
It seems rather churlish to remove it for the Pro, but that's what the company chose to do to further differentiate the different versions, leaving us with no spinner on the Pro. There is, however, a rollover switch towards the top of the lane which is used to sense a successful shot.
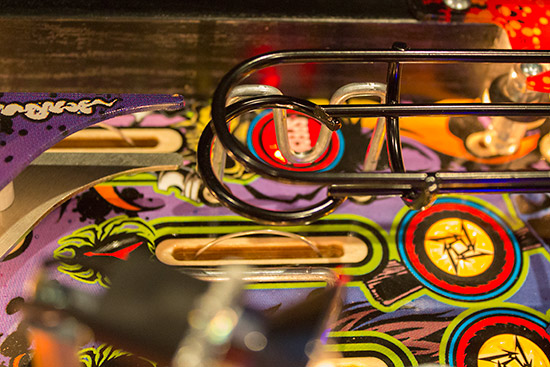
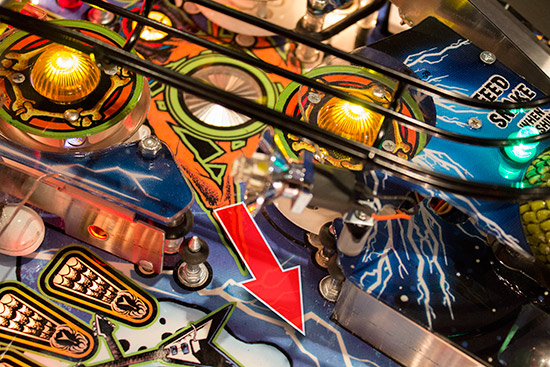
Although it is an orbit lane, for much of the game the ball isn't allowed to make a complete orbit of the playfield. An up-post at the top of the left orbit lane blocks the ball and sends it back the way it came until the lane has been shot enough times. When enabled, the post pops up when the switch shown above is activated.
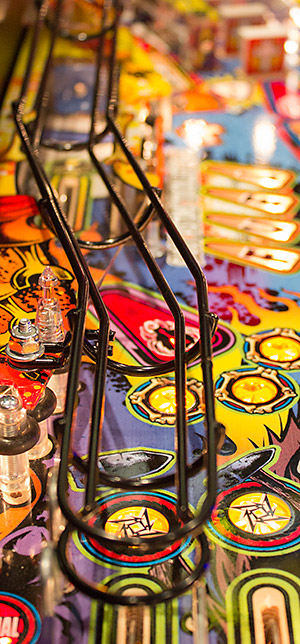
To help prevent air-balls if the post pops up while the ball is travelling over it, a horizontal post is bolted to the backboard to help keep the ball under control.
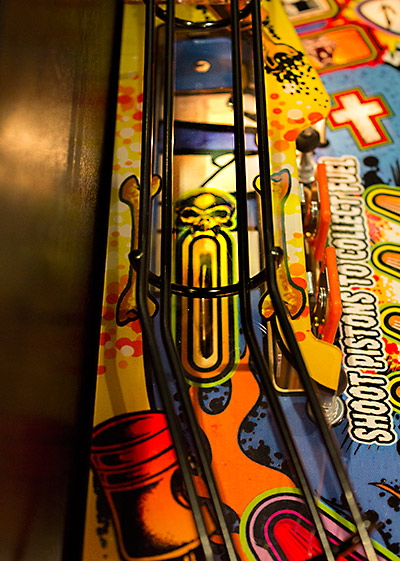
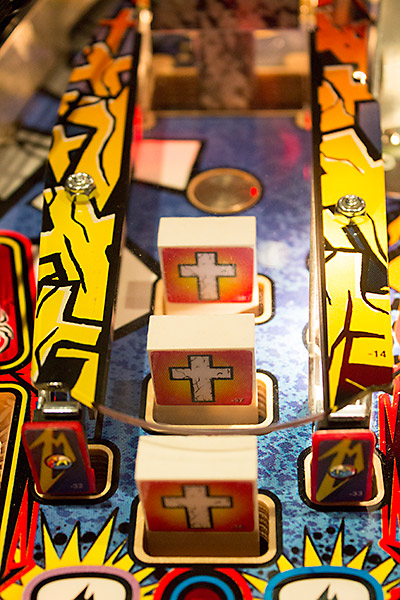
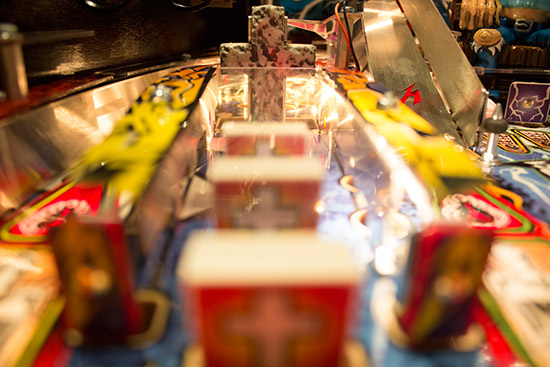
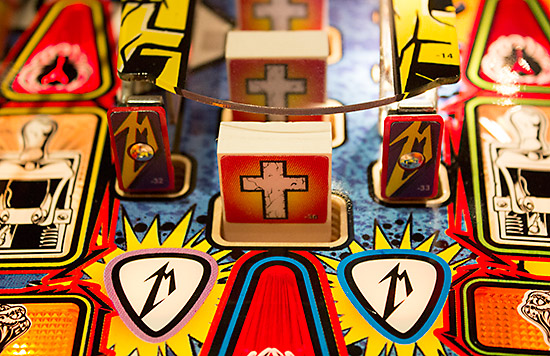
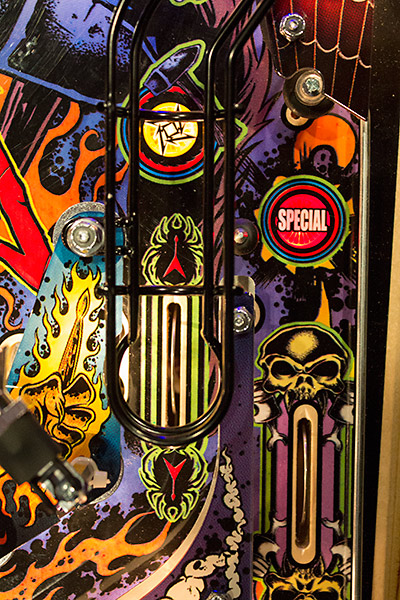
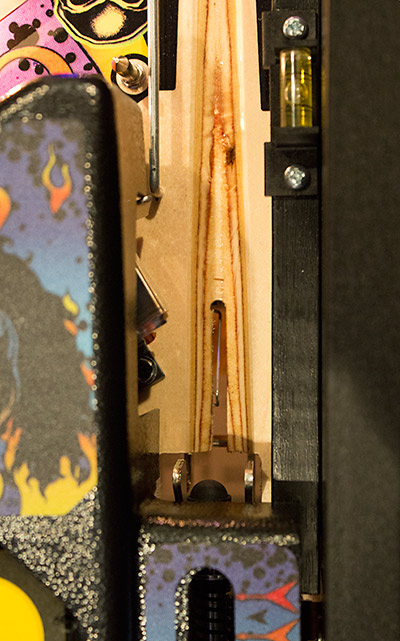
The pop-up post can also stop balls travelling in the other direction too, dropping them into the top rollovers and then the pop bumpers. It is activated at the start of each new ball unless the left flipper button is held in to disable it. More on that shortly, because the next playfield feature on our tour is the three-bank of inline drop targets known as the Grave Markers.
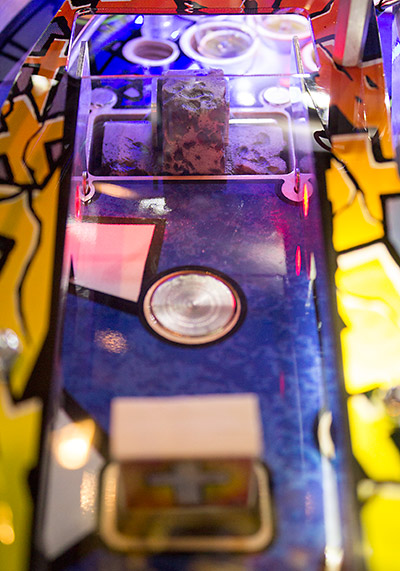
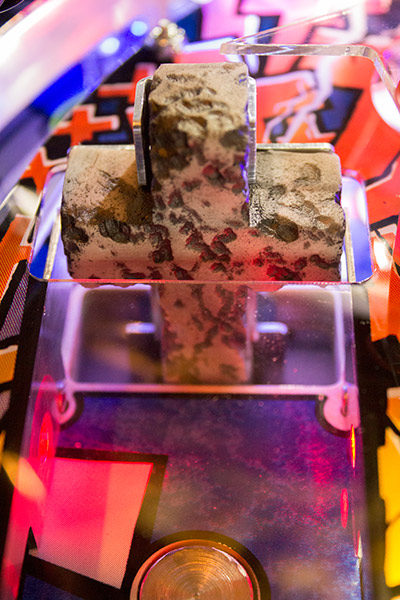
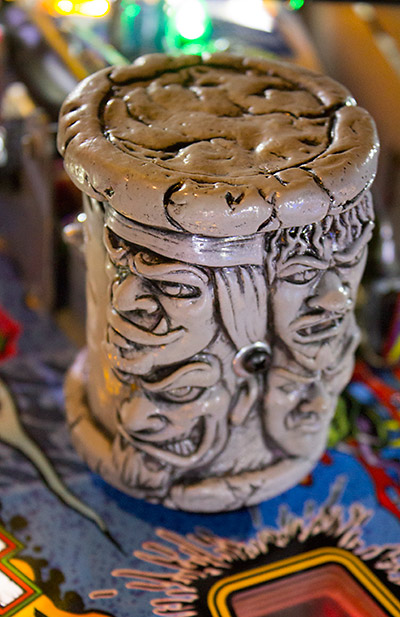
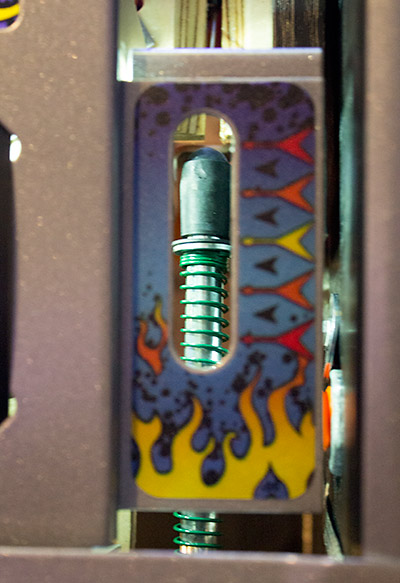
These operate as normal: shoot the front target to knock it down and expose the second, shoot that to expose the third and then knock that down to qualify the target at the end of the lane. The targets have a common reset solenoid, so it's not possible to control them individually and they all reset to their up position at the start of each new ball. At the end of the grave marker lane is the boss grave marker.
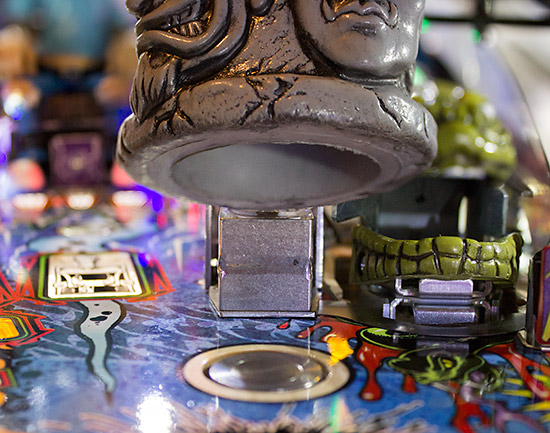
On the Premium and LE models this is motorised and starts the game sunk into the playfield, rising up when it is hit sufficient times. But on the Pro it is fixed in the up position.
In front of the grave marker is a magnet which grabs the ball when the feature's multiball mode begins. Shots to the end of the lane are sensed by a pair of optos mounted just in front of the grave marker.
Living behind three in-line drop targets means the magnet doesn't get a huge amount of action, but it's nice to see it wasn't costed out of the design for the Pro. Leading up to the grave marker drop targets are four inserts - the same four we found in the left orbit entrance.
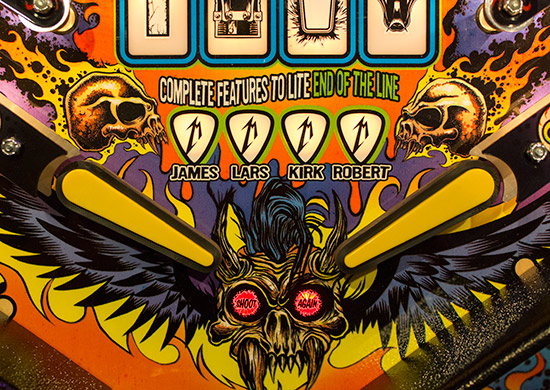
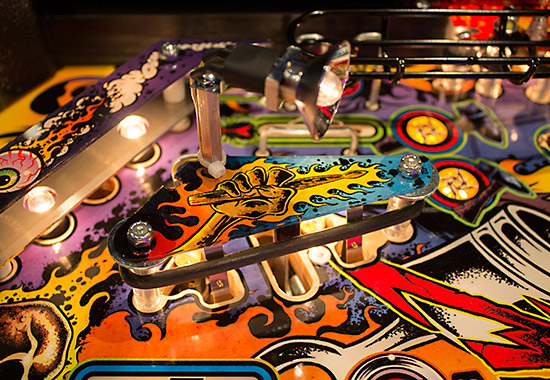
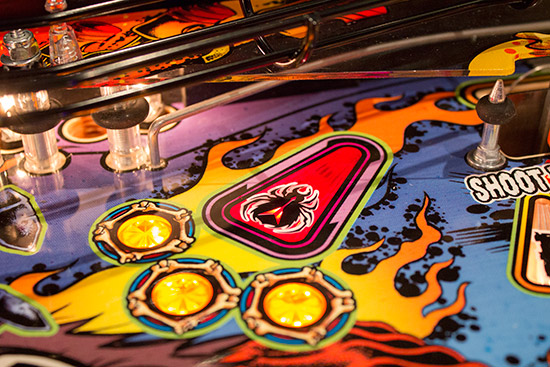
Flanking the Grave Marker lane are the first two from a group of four guitar pick standup targets.
The other two sit either side of the right ramp entrance, and hitting all four advances towards adding one of the band members shown above the flippers. In the newer software they also help add another ball to a multiball mode. So we move on to the first of the games two ramps, the cunningly-named left ramp.
Those same four insert lead the way to the ramp entrance, while shots from the right flipper are given a helping hand by the long metal ball guide which directs slightly wayward balls up the ramp.
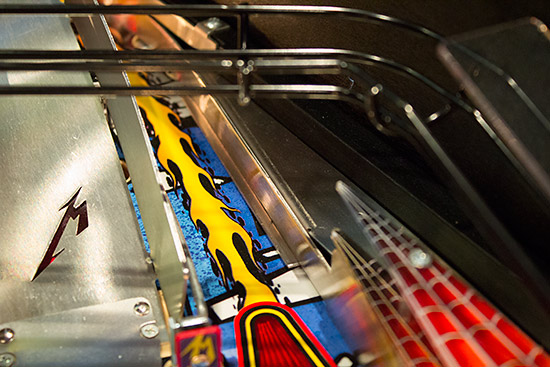
Pleasingly, the first part of the left ramp is made from laser-cut brushed steel on all models. The ramp performs a simple U-turn at the top and sends the ball on a black wireform down the left side of the playfield.
The left ramp terminates above the left-most left inlane, making it a fairly easy shot to combo the right ramp while safely lighting up more of those throwing star inserts.
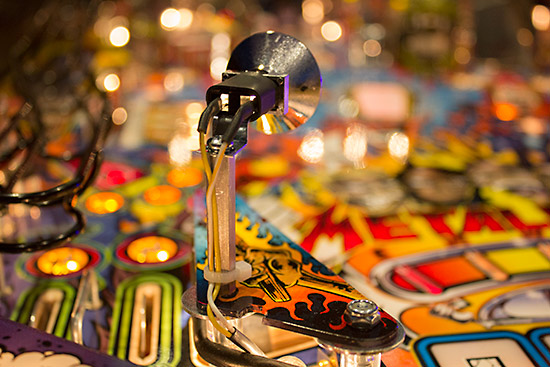
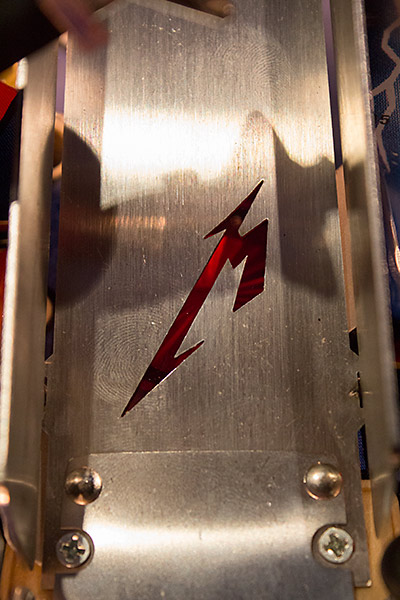
A Metallica 'M' symbol is cut into the bottom of the ramp entrance. It's a bit weedy, but if it were much larger it could presumably form a ball trap. There's a red printed insert with a red #89 flasher lamp beneath to emphasise the cutout.
Just above that is a rather prominent spot lamp which is fitted with a 5-device white flasher LED.
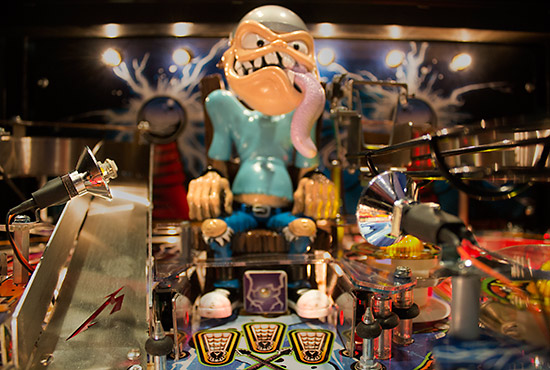
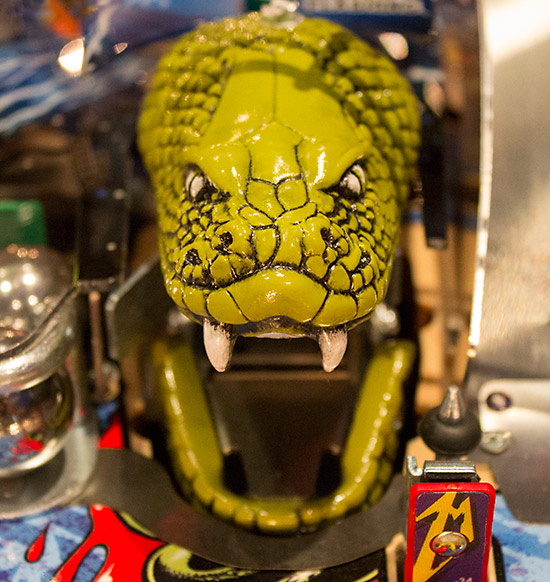
Yes, even the Pro has a few LEDs fitted, and quite honestly the intensity of light the device produces could only be achieved with LEDs. There is a matching LED flasher on the right of the playfield, with both pointed at our next feature, Sparky.
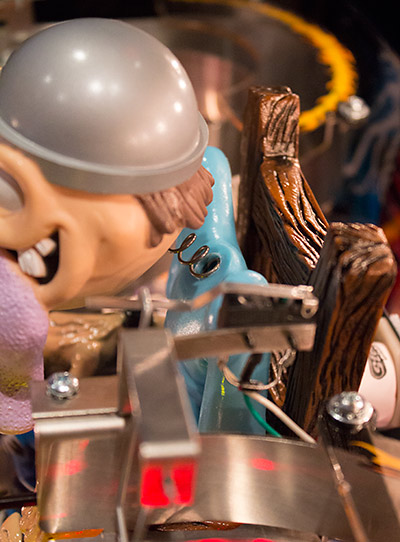
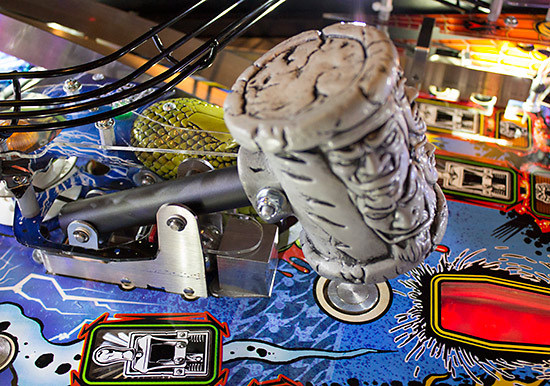
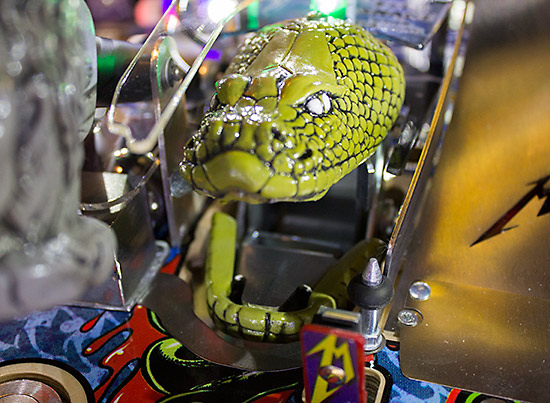
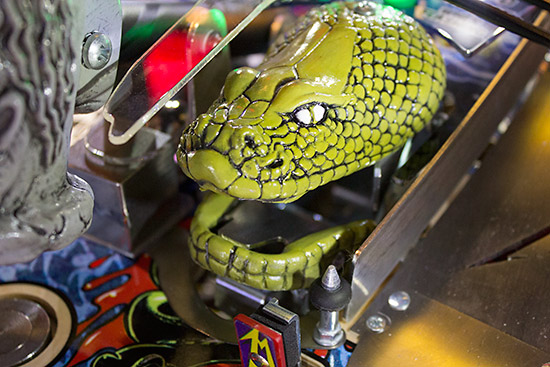
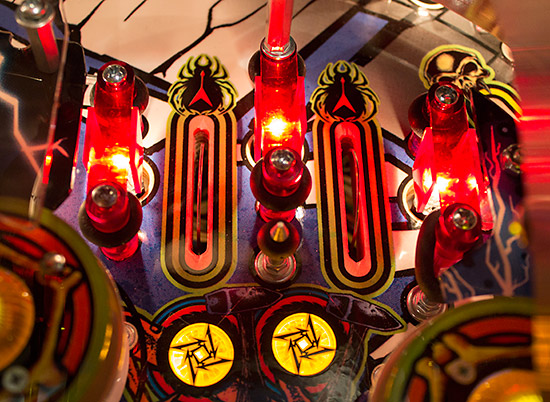
Early announcements from Stern called the character in the electric chair 'Sparkey' (with an 'e'), but it seems the consensus is plain old Sparky (not to be confused with Old Sparky which is a nickname for the electric chair). Either way, he dominates the upper playfield area.
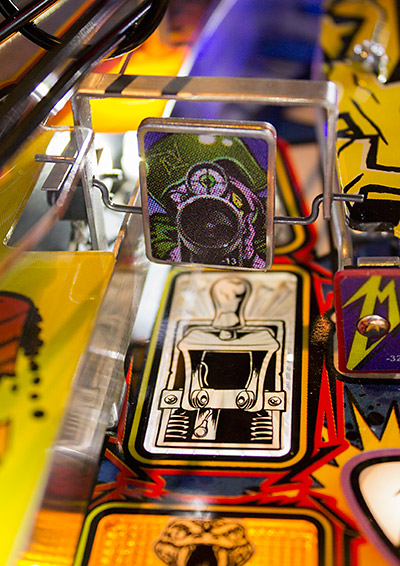
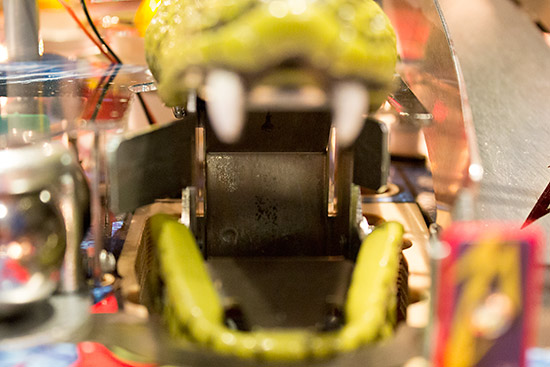
Sparky is actually made from three connected sections. The part from the belly down is fixed and solid, since his feet are regularly hit by the ball. He sits astride a square standup target and this, together with the opto pair in front of his feet, registers shots.
The white spider-web inserts show your progress, while the centre insert has a flasher lamp beneath to let you know when Sparky is ready to start Electric Chair Multiball. The mid-section up to the neck is pivoted at its base and driven by a small solenoid attached to Sparky's back.
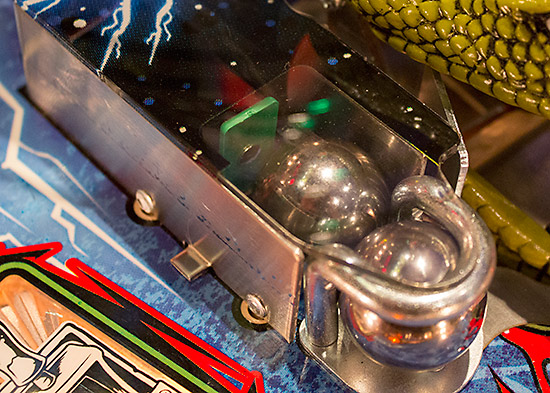
But that little solenoid isn't going to have much impact by itself, so Sparky's head is mounted on a spring so he can head-bang his way into multiball as the voltage is applied and the chair lights up thanks to those high-intensity white LED flashers. But that's not all, because there are also two flashers behind the two Tesla balls on the back panel which enhance the effect further.
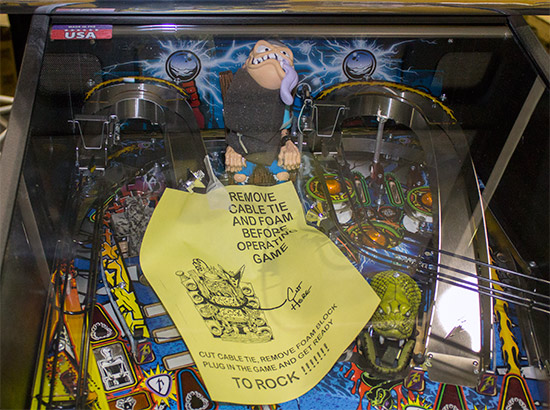
Sparky's movement plays no direct active role in the game, so if his mechanism breaks the game should remain playable (as long as it holds together). However, to make sure his head doesn't snap off on the way to the buyer, Stern wrap a piece of protective foam around Sparky which has to be removed before playing the game.
The next important shot in the game sits in front and just to the right of Sparky, and that's the captive ball. The captive ball is probably the biggest area of difference between the Pro model and the Premium/LEs. In the Pro it is a simple captive ball with a short distance to a green standup target.
That proximity means only the slightest glance on the front ball is needed to propel the second ball into the target and register a hit.
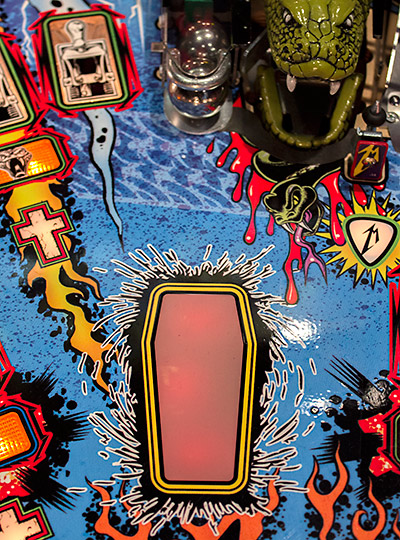
Each hit on the ball counts down to a virtual ball lock, indicated by a lamp beneath the coffin-shaped insert in front. 'Locking' three balls lights the insert completely and allows multiball to begin.
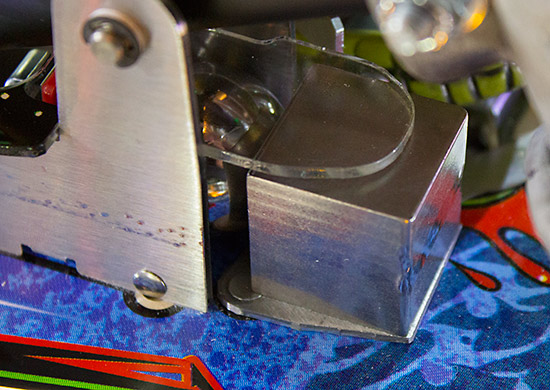
In the Premium and LE models however, this area is totally different. The captive ball is still there, but the actual mechanism has changed with the ball striking a solid metal 'stock cube' rather than a front captive ball. This cube then transfers the energy to the real captive ball behind. Its an odd arrangement for sure, making the captive ball all but invisible.
After just a few games this cube was looking the worse for wear, so hopefully it will stand up to repeated poundings and not cause any damage to the ball either. The reason for this alternative captive ball appears to be the large mechanism mounted above it - the hammer.
In front of the captive ball is a magnet like the Genie magnet from Tales of the Arabian Nights, which grabs the ball when the captive ball has been hit sufficient times and lock is lit. The large plastic hammer falls on top of the ball, and the magnet drops below the playfield, taking the ball with it, making it look as though it has been hammered through the playfield.
The magnet then releases the ball and it rolls into a ball lock area below the coffin-shaped insert which is clear in the LE/Premium so the locked balls can be seen. When three balls have been locked, multiball begins. The balls are released so they roll into the mystery kickout scoop, from where they can be returned to the playfield.
The hammer is actually hollowed-out at the bottom, so the ball and magnet dropping doesn't have to perfectly coincide with the hammer falling.
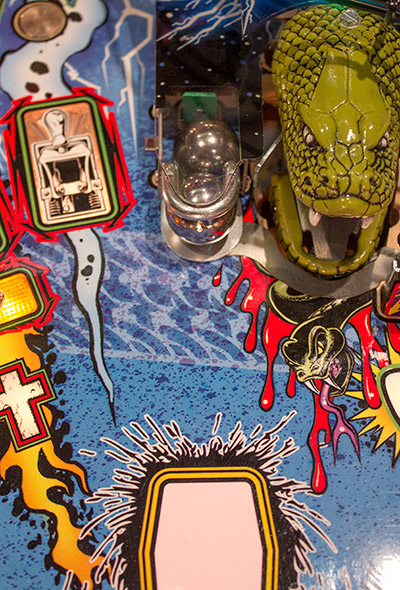
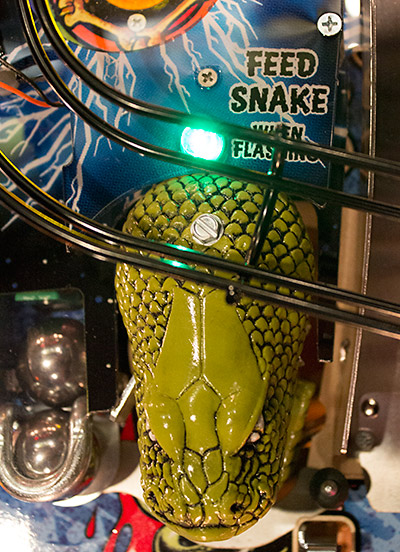
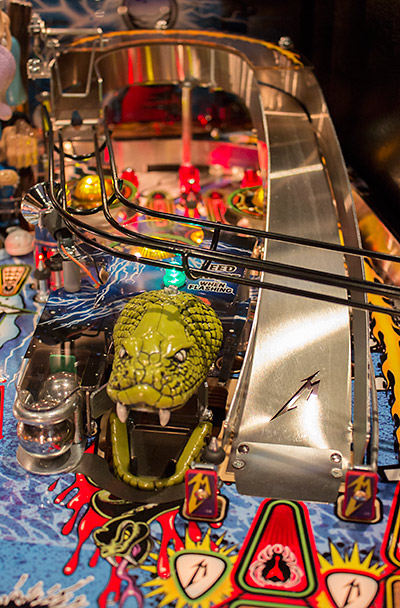
But none of that is present on the Pro model, so it's just virtual locks represented by insert lamps. The next feature sits alongside the captive ball, and that's the snake.
On the Pro, the snake is actually a fairly simple scoop which adds S-N-A-K-E letters, with a kickout mechanism at the back, very much like the autoplunger.
Things are given extra bite for the Premium and LE variants where the snake's lower jaw is solenoid-controlled, so it can close and deny the shot into the mouth.
The jaw on the Premium/LE is also used to sense shots at the snake and open its jaw if it is closed. We said that the enhanced mechanism gives the game extra bite, but you might notice the snake has been de-fanged in the Premium/LE version. There were reports of the fangs breaking off the Pro model, so these later games come 'pre-broken' and devoid of fangs. To show when the Snake's mouth can be shot to advance the feature, there is a green LED at the back of the head.
Continuing our look at the playfield features, we move right and find the entrance to the right ramp.
Like the left equivalent, this metallic ramp has a small Metallica logo cut into it, and like its counterpart it bends to the left before running down the side of the playfield. In this case, that means it has to cross over itself before it can start to lose some of its height. That drop is therefore sharper and is covered by a clear plastic shield to make sure the ball doesn't fly off the wireform.
As with the left ramp, the right ramp also terminates over one of the inlanes, although there's only one inlane on the right side of the playfield from which to choose.
Since the right ramp is one of the game's major shots,.it features the familiar foursome of inserts - grave marker, snake, electric chair and spider.
The second pair of guitar pick inserts and associated standup targets sit either side of the right ramp entrance.
These make the right ramp rather harder than the left ramp, since a missed shot is liable to hit one of the targets are rocket straight back at you. The right ramp turns from a brushed steel ramp to a black metal wireform before it crosses over itself and heads over to the right side of the playfield. The rollunder switch to detect a successful shot is a long way up the ramp, so there's no chance of a partial shot being credited.
The final major shot is the right orbit entrance.
This also features the familiar four inserts and includes a lengthy metal guide on the right wall to help any wayward shots find their way up the lane.
You might expect some kind of targets to complete in this relatively blank area, but it's blank in the Pro because the Premium and LE models feature a second spinner at the entrance.
The right orbit lane sends the ball up to the top of the playfield where it either completes the orbit and exits at the left orbit entrance, or is stopped by the up-post so it falls through the top rollover lanes.
There are just two rollover lanes, but after the initial skill shot opportunity they team up with the lower three inlanes to make a set of five which need to be completed by lighting their associated inserts with the assistance of lane change. Once through the rollover lanes, the balls enters the pop bumpers area which has the regular triangular arrangement of the three skinny bumpers, but has a choice of two exit points.
This area is the same across all three versions of the game with just a single #89 flash lamp under the clear round insert providing a modicum of light when the bumpers fire. As we said, there are two exits from the pop bumpers. The first is at the bottom right which sends the ball under the right ramp into the right orbit lane.
The second exit is to the bottom left which puts the ball in front of the Sparky shot, but with the addition of some unpredictably to the ball's movement courtesy of four black rubber-clad posts.
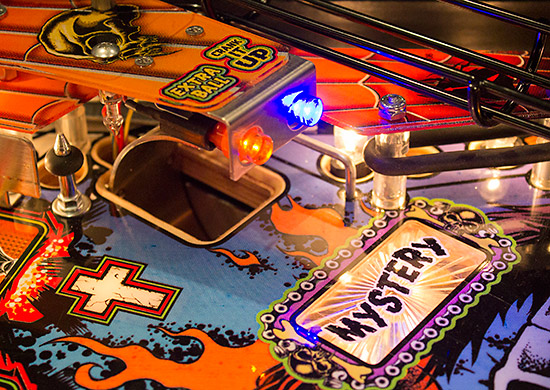
Returning to our clockwise tour of the playfield, at the start of the long lead-in ball guide on the right orbit lane we find the mystery scoop.
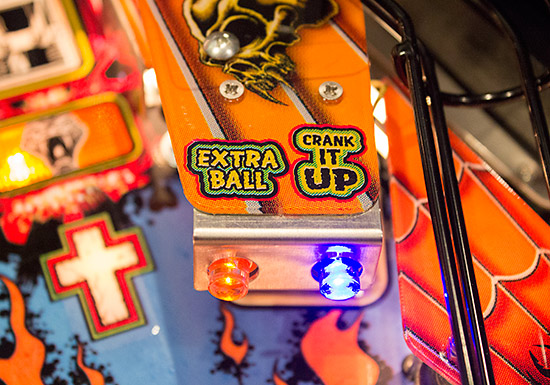
The mystery scoop is a relatively easy shot from the left flipper, which gives a mystery award when the insert in front lit. In addition it awards extra balls and starts the Crank It Up mode (or will do, when it's included in the software). The availability of these latter two awards is shown by the red and blue LEDs mounted over the scoop.
The shot is easier to hit than you might think because the scoop is open at the sides, increasing the range of shots which will find their way inside.
All three versions of Metallica have LED indicators over the scoop - there are no lamps used here. Working our way back to the flippers, the next area is the right inlane and outlane.
The right ramp ends just above the inlane switch, while the outlane is the place to collect any lit specials. The left outlane's adjuster is easily accessed, while the lane also features a second special insert. Like its left-side equivalent, the right slingshot is a very basic design with just one level and a spot lamp mounted on top.
The inlane ball guide is a mirror-image of the left side, which takes us back to our starting point at the flippers.
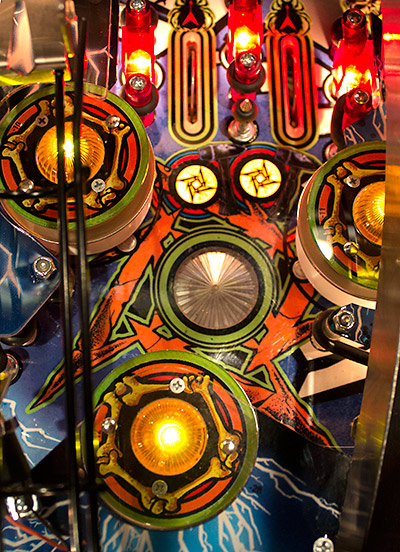
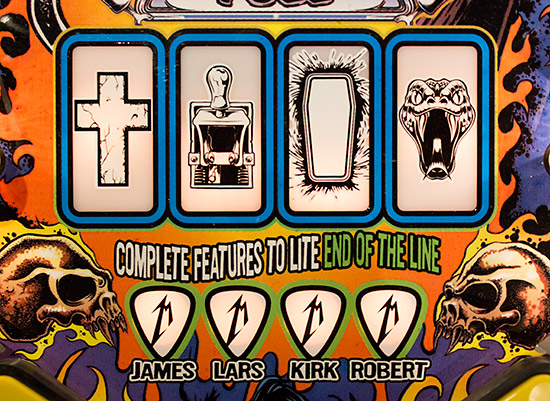
Above those flippers are the progress indicators which (hopefully) light up as you play and complete various features in the game. The main ones are the four rectangular inserts representing the game's four multiball modes - grave marker, electric chair, casket and snake.
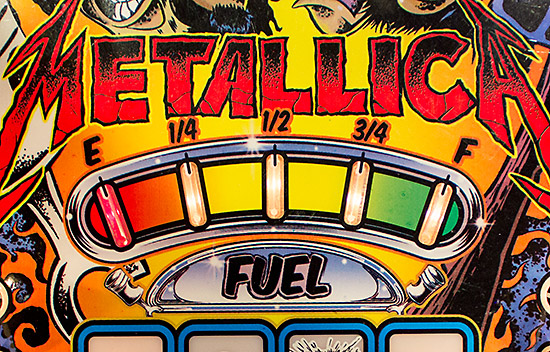
Below those are four guitar pick inserts much like those in front of the four standup targets sprinkled around the playfield. Completing those four targets enough times lights up one of the band members' pick inserts. Above all these is the fuel gauge which shows both your progress towards starting Fuel mode, but also the time left once it is running.
Hits on the F-U-E-L target(s) build up the fuel gauge until it is full and Fuel mode can begin. Then it starts reducing over time until it reaches empty, unless you make the necessary shots to refuel. A cheap and popular mod is to fit either coloured filters, coloured lamps or coloured LEDs under the marks on the fuel gauge so they match the colours on the gauge's scale. Below the flippers we find the game's apron which also differs between the Pro and the Premium/LE models. The Pro has the familiar black plastic apron which shouldn't be pressed upon to slide the playfield back into the game. The plastic apron is decorated with three Metallica decals featuring the band members and their logo.
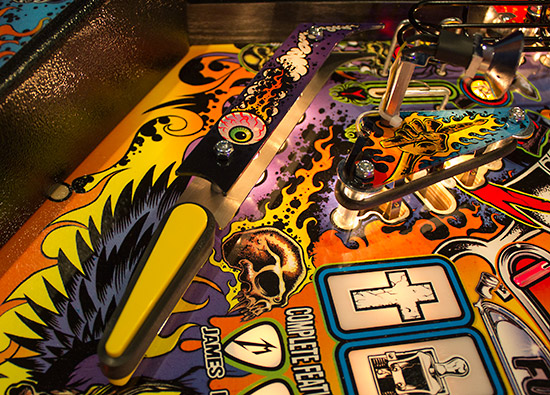
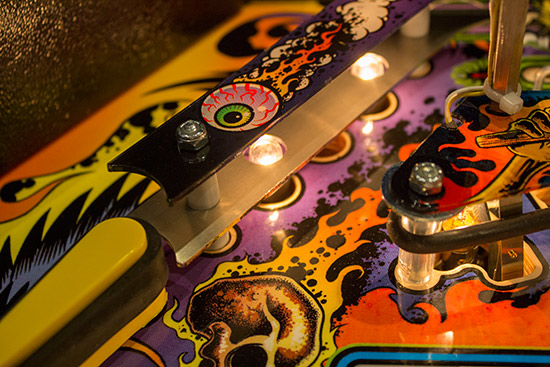
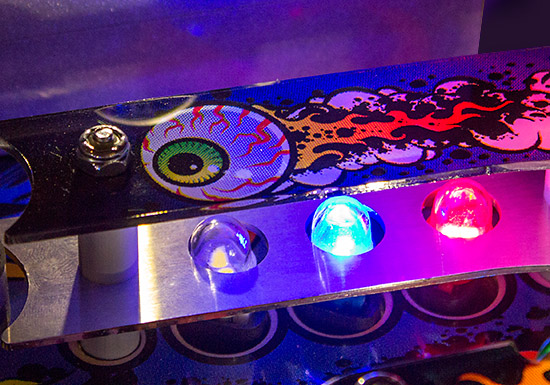
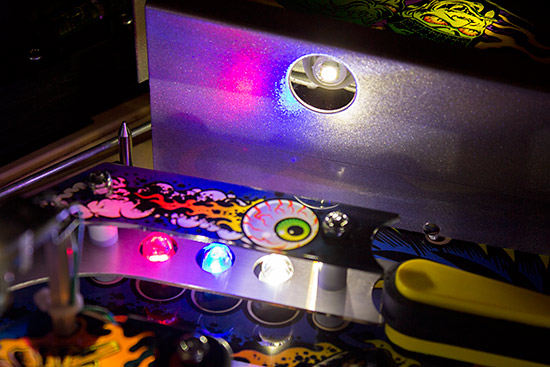
The Premium and Limited Edition version of the game include a metal apron with illuminated panels and extra playfield lighting.
The front edge of the metal apron features two cutouts with white LEDs. These shine onto the lower part of the playfield to provide additional illumination around the inlanes and outlanes.
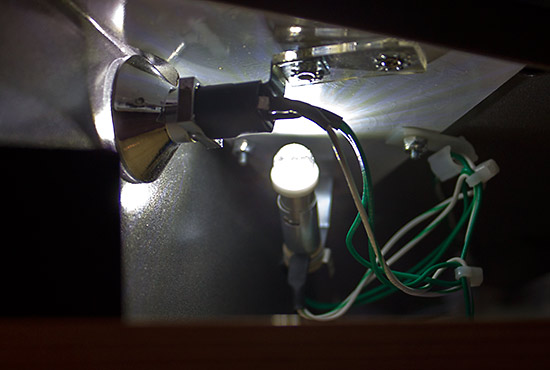
The under-apron LEDs on the right also provides illumination to the Premium/LE's ball shooter.
The shooter is the regular combined manual/auto mechanism.
The shooter lane doesn't contain any gameplay features such as a skill shot choice, lock lane or return feed. It feeds into the right orbit lane just above where the spinner is located on the non-Pro models, sending launched balls either up to the top rollover lanes or all the way around the orbit.
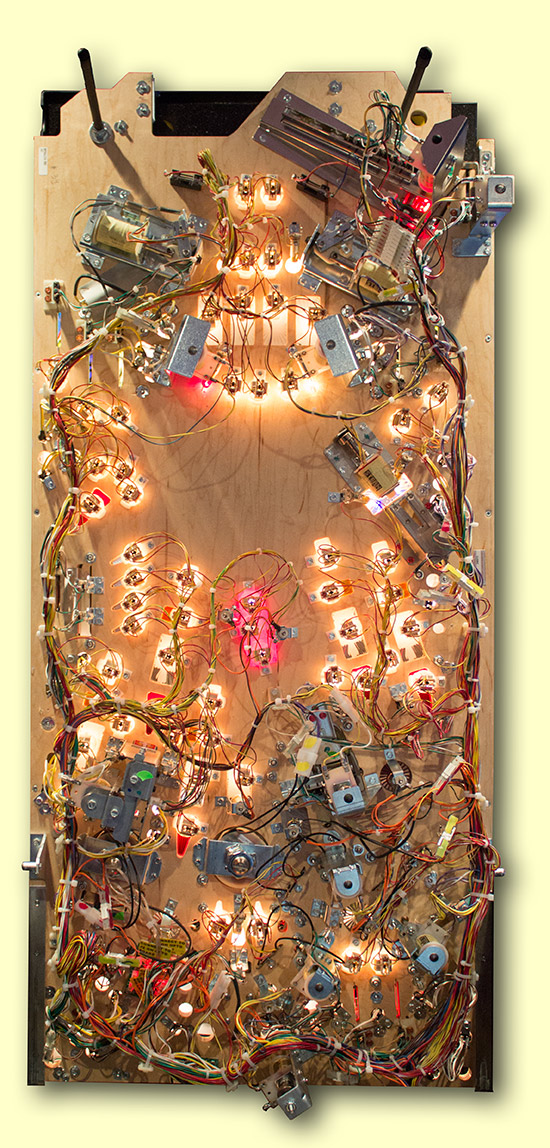
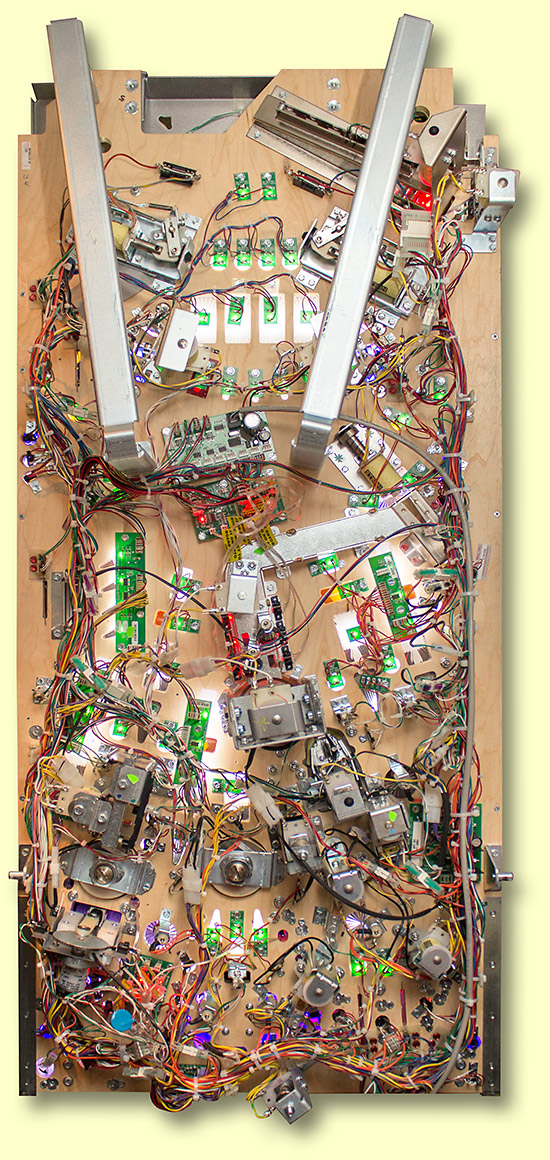
That concludes our look at the playfield features, but before we end this part of the In-Depth Review we have a few more things to show you, starting with the underside of the two playfields.
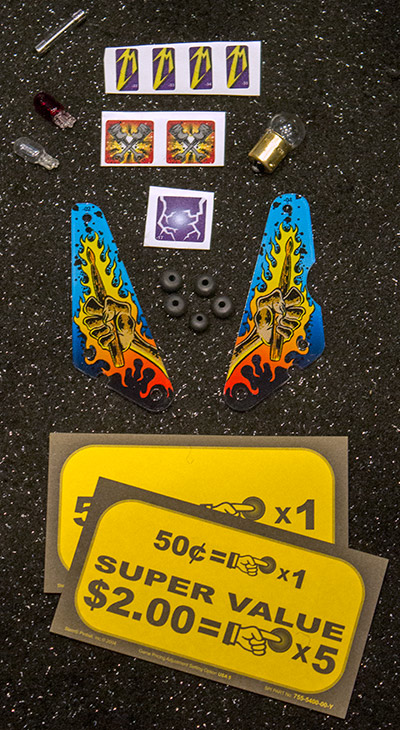
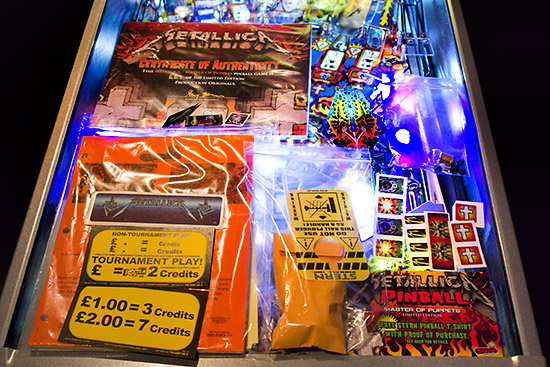
New Metallica games come with a number of spare parts. The Pro has a set of standup target decals, a pair of slingshot plastics, a trio of lamps, a few rubber rings like those found on metal posts, a 5A fuse, and some instruction and pricing cards.
The Limited Edition version has all these plus a certificate of authenticity signed by Gary Stern, a full manual, spinner decals and a postcard which can be returned for a free Stern T-shirt.
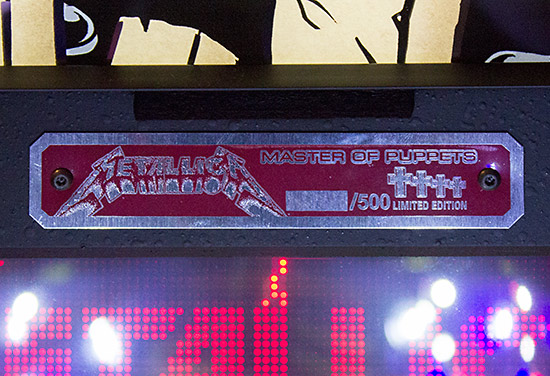
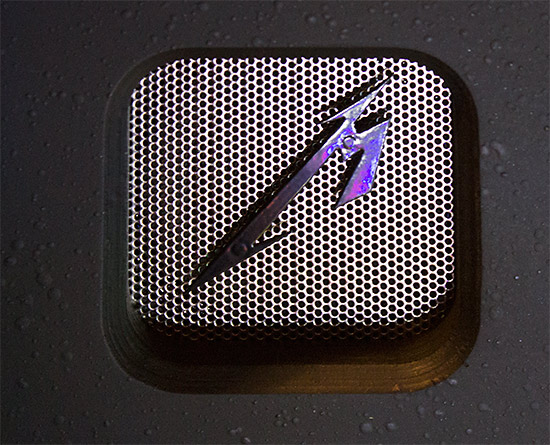
In addition, the LE comes with a numbered plaque and some decoration applied to the speaker grille.
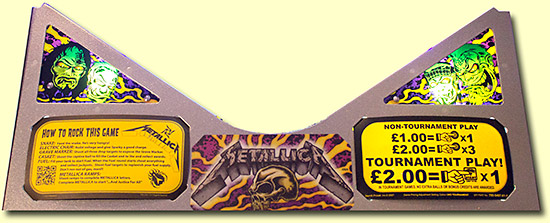
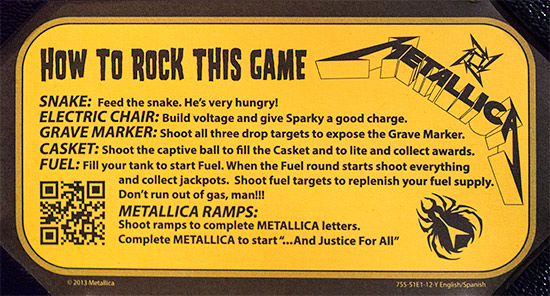
The instruction card is the same on all versions of the game, and provides the most basic instructions for the rules which were working in the current version of software.
We'll have details of those rules in the second part of this exclusive In-Depth Review of Stern's new Metallica, but we should also mention that the QR code on the instruction card above leads to metallica-pinball.com which originally allowed you to watch videos about the game and view shotmaps illustrating all the features you've just seen, but currently just leads to a blank page.
We'll be back with all the rules for Metallica right here at Pinball News, but in the meantime many thanks to Will Barber and Lloyd Marchant for the use of their machines in this review. See you in part two. Now, you've had the chance to see and possibly play Metallica. So what's your opinion? Is the Stern's best game yet, or just another rock 'n roll game? How does it compare to AC/DC or X-Men? What do you like and dislike about it? Share your comments with other readers by sending us your thoughts with the message box below: Your comments:
© Pinball News 2013 |


