|
|

|
PIRATES OF THE
CARIBBEAN |
| Arrrgh Matey! There, that's got all the pirate talk out of the way. You can now read on safe in the knowledge that there won't be any more fake pirate lingo cluttering up this review (but feel free to throw in a few choice phrases yourself if you think it helps set the tone). So it's new game time and of course it's Stern's Pirates Of The Caribbean that has freshly arrived by air from Chicago.
You've probably already read our earlier articles about the game so this is the in-depth review looking at the game's build, layout, features, rules and our verdict on all of them. In this first part we'll describe the game's layout and features, the toys and the shots and what's new in this game. In the second part we'll look at the rules, the scoring, the strategies and give our thoughts about what's good and what's not. Before we start part one, there are some important things to note about the game we're reviewing. First, it is to some extent not the finished game you may see on site and in people's homes. It's very close but some of the artwork may be different and there may be other minor changes. Secondly, this will be a very unusual game for anyone outside the European Union. The recent introduction of Reduction of Hazardous Substances (RoHS) laws means components containing lead are no longer allowed to be imported into Europe and for pinball that includes, amongst other parts, traditional dot matrix displays. So this game is the first Stern game to use an LED display.
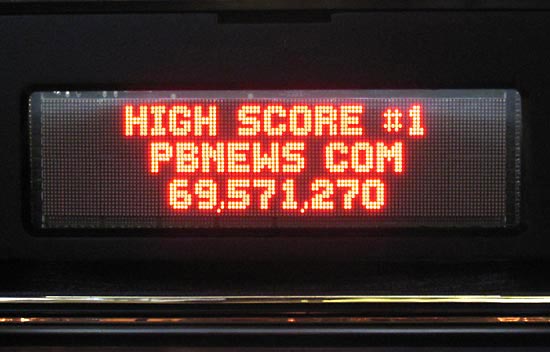
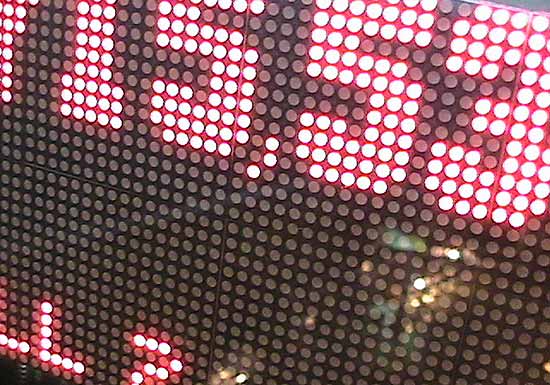
This is a PinLED display and it differs from the traditional dot matrix in a number of ways, the most obvious being how amazingly bright it is. We've noted this before on PinLED's other displays and it's true here too. The intensity rolls off as the viewing angle increases and at about 45 degrees it looks the same brightness as a traditional display but it can appear overwhelming at first and it definitely stands out in a line-up of other games.
When sat side by side the LED display is a redder shade of orange and the individual light producing elements are larger, making text look bolder.
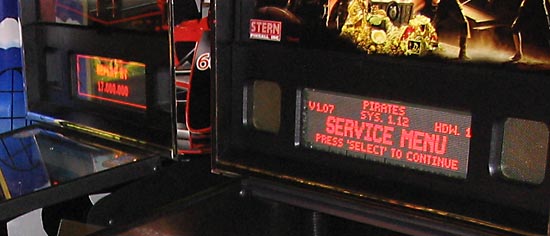
The display area looks unfinished on this game. There needs to be a bezel on the display to hide the components visible around the edge and to stop light leakage from the fluorescent tube in the backbox.
The problem evident on earlier versions of this display - that of visible lines between the sixteen blocks of LEDs that make up the panel - is all but gone. You can see the lines when the display is blank but not when illuminated.
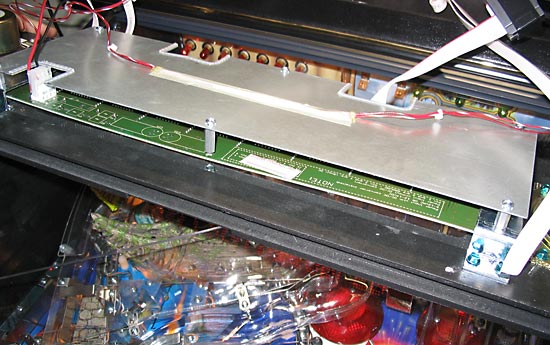
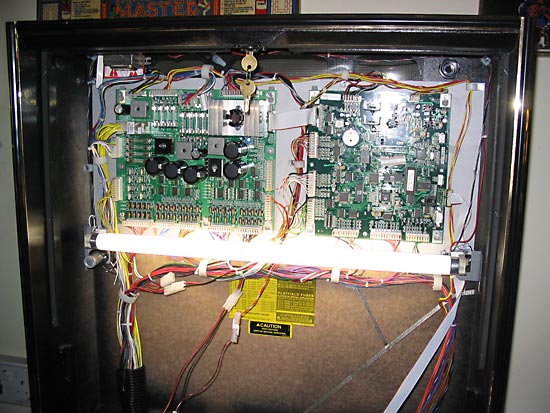
As the PinLED display uses low voltages, the small high voltage board is no longer necessary and has been removed making even more room in the backbox. Constructive ideas for using the space are welcome. As supplied, the game was running V1.07 software but we upgraded it to V1.08 during this review and have noted the obvious changes along the way. Aside from the display, the immediate look of the game is very attractive.
The rich warm colours of the cabinet complement the backglass well and if anything, it's the backglass that suffers by comparison, looking a little washed out which is a shame as it's some excellent work by Kevin O'Connor. So for home use, replacing that single fluorescent tube with something warmer and more evenly illuminated would be a good move.
The backbox is trimmed in gold but the rest of the game hardware is standard with a manual plunger and the usual tournament button blanking plate on the lockdown bar unless you install the tournament button. The ToPS tournament is now built into the operating system so no extra hardware is needed, although you can still add the Beta-Bright topper display if you want.
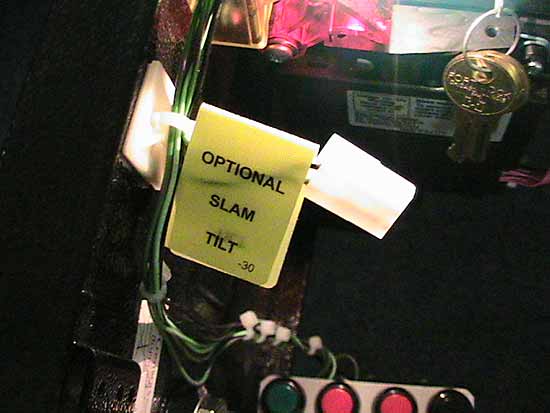
One change noted was the lack of a slam tilt switch on the coin door. There is now a connector labeled"optional slam tilt" instead. Let's now put the playfield back in the game and examine its layout and toys.
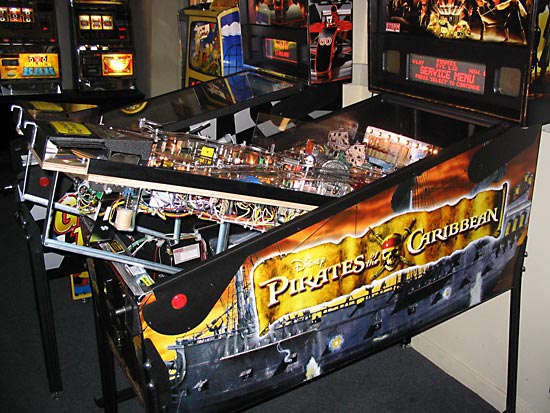
The playfield is light, bright and evenly illuminated, radiating an eerie glow from the lower half adding to the sense of wonder.
The upper part is full of clear plastic parts which shine and pick up reflections and refractions from a variety of different light sources. There are red lamps, green lamps, plain lamps, spot lamps and blue LEDs all adding to the mix. It could look a bit cheesy but is actually pulled off surprisingly well. But then this is a very colourful game.
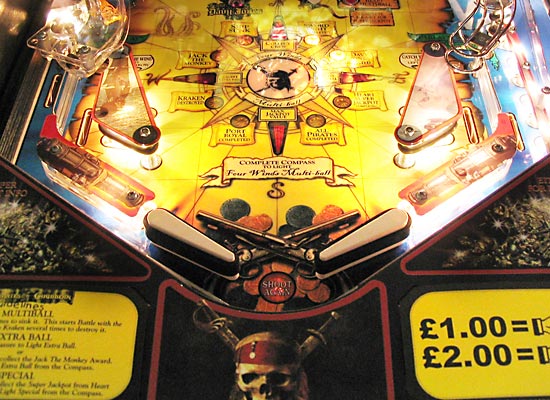
As you can see, black rubbers are used on the flippers and that continues throughout the rest of the game. The crossed pistols have a raised 3D effect which is clever if a little confusing the first time you see them right between the flippers. It looks like there have been some changes to the trough area because it is now possible to look through the outhole down into the cabinet and see the coin door buttons illuminated very clearly. From an operator's viewpoint, it's not good to publicise the presence and location of set-up buttons when that might encourage some "experimentation" in rougher locations.
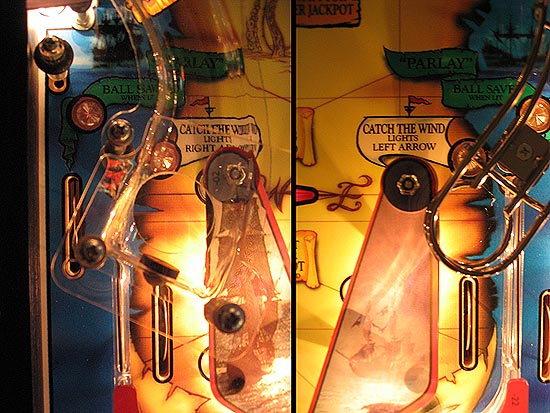
There is just one inlane and one outlane on either side - no second shooter lane or lock area or anything like that. Outlane drains can be save by a ball saver feature on either side but there's no physical kickback so saved balls are relaunched. Left and right inlanes light the right and left lanes respectively for Catch The Wind awards. Balls can be fed to the inlanes by the left or right exits from the upper playfield. There's plenty of rubber around the lower playfield area leading to lots of ball rebounds and bounces and virtually no dead balls. The inlane/outlane diverters are rubbered so it's not normally a problem to nudge the ball away from that area altogether
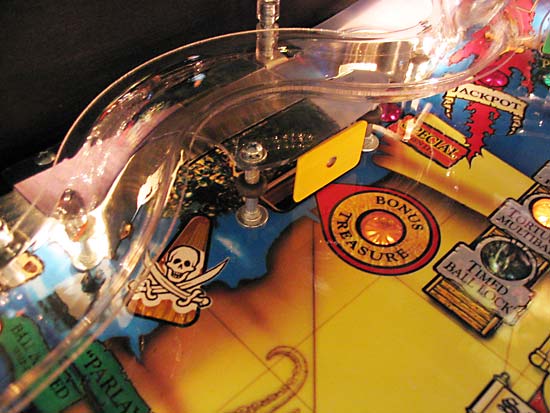
Moving around the playfield in a clockwise direction, we come to the left side lane. Positioned just above the outlane, this looks like an impossible shot and it's definitely not one you'd want to aim for, but it's just like the extra ball shot on Star Wars Episode 1 and the ball finds its way in there quite naturally during a game. Making the shot adds treasure and lights the standup in front for bonus treasure. Balls exiting the side lanes often hit the top of the slingshots making things a bit more unpredictable.
Next on our tour of the playfield is the left lane. On most games this would be a left loop but it doesn't loop on Pirates so it's a lane instead. Shots here feed the VUK to the upper playfield and can score jackpots or be lit for various features. It's a long lane and often weak shots will not make it all the way to the VUK. Next to the left lane is the first of six green Pirate standup targets. Each one has a green insert in front which illuminates when the target is hit.
To the right of the left lane is the left ramp. This is quite a steep ramp that leads to the spinning disk at the back left of the game. It is one of the feature shots, it collects Port Royal and also starts Tortuga multiball.
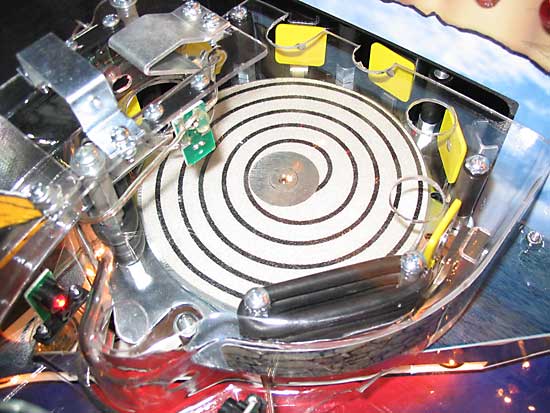
The spinning disk is encircled by six yellow standup targets, two sets of rubbers and an up-post. When a ball drops into the arena from the left ramp, it spins around hitting the standups and advancing the feature. The up-post is raised for a short time but soon drops allowing the ball to exit in its own good time by dropping into the left lane. There are a number of holes cut into the clear plastic cover allowing the standup targets to be tested by hand. The spiral pattern on the disk is probably not the final artwork and will be replaced by something appropriate. Next to the left ramp is another Pirate standup target and beyond that is the ship lane.
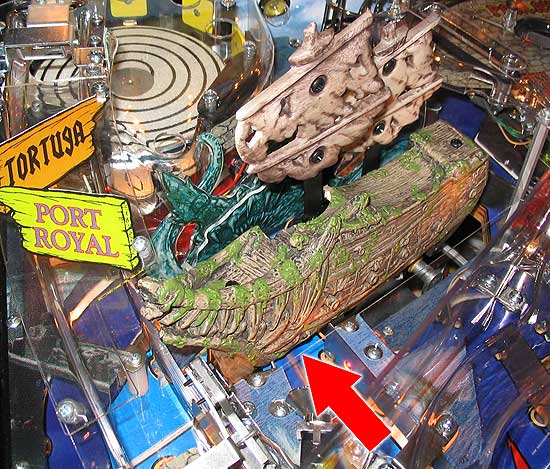
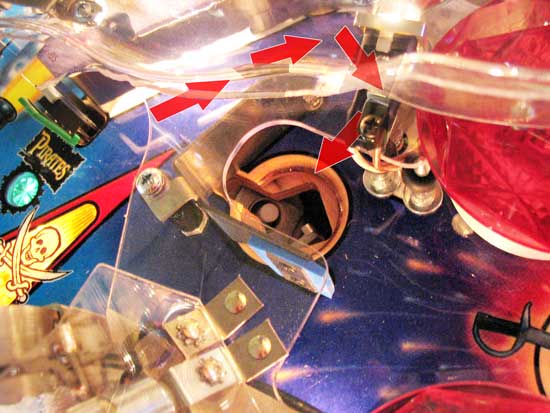
The aim is to strike the ship with the ball enough times to destroy it. Balls shot at the ship (arrowed) hit it and fall back to a stop post and one-way-gate combination which hold the ball long enough for the dot matrix animation and/or ship movement to complete.
The post is down when the ball enters the ship lane but if it makes it far enough to reach the opto and register a hit, the post raises trapping the ball between it and the one-way-gate to the right. The ball is released when the post drops. There are four ships to sink - The Interceptor, The Dauntless, The Edinburg Trader (a misspelling - it should be Edinburgh Trader) and The Terpsichore, represented by playfield inserts - and each one takes progressively more hits to complete. But this is no static ship. When hit, the sails collapse, it begins to rock back and forth and finally it sinks into the playfield to reveal the Kraken behind it.
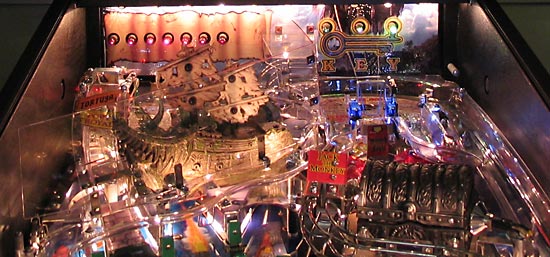
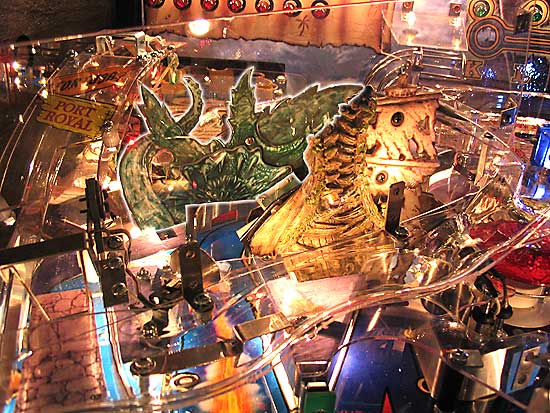
We've highlighted the Kraken in the above image because it's not too clearly defined in the game and you can see the ship in its sunken position here too. It never sinks fully into the playfield but you get enough of the idea to make the effect work.
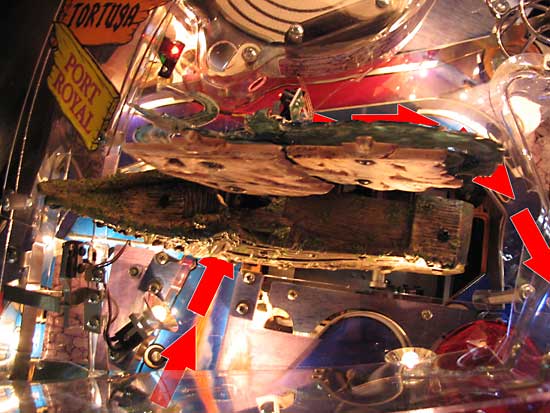
When the ship is in this position, shots to the Kraken take a long path (shown above) behind the ship and into the pop bumpers. The ship shot also scores jackpots when lit. Surrounding the whole top left corner of the game are two clear plastic sheets designed to stop air balls getting into the ship mechanism, causing damage and even falling into the cabinet. They're not an ideal solution and look quite awkward and intrusive initially although it's fair to say you do stop noticing them before too long. Some owners will wish to remove them and run the risk of airball damage. There were no airballs noticed during our hours of test games on this machine but your results may vary. To the right of the ship is the centre lane.
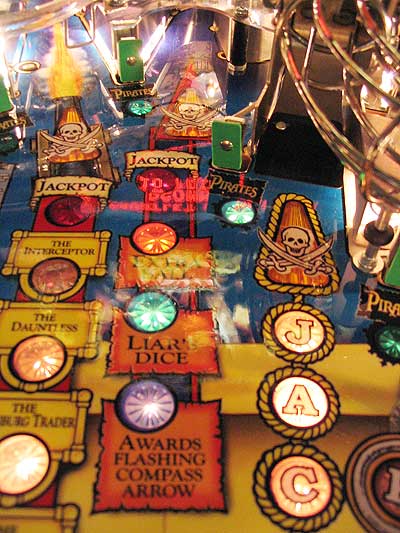
As you can see, the two pirates standups on either side make this a tight shot and one that is very tricky to make from the right flipper. The centre lane scores jackpots, collects extra balls, the Liar's Dice awards, lights compass arrows and scores feature awards.
This is actually quite a short lane but has a very tight bend leading to saucer. Fast shots up the centre lane can bounce out of the saucer and because there are no switches to sense shots up the lane, if the ball hits a pop bumper before falling back in, the lit award is not given. The ball is kicked out of the saucer into the pop bumpers from which it can sometime fall back into the saucer, although no award or display effect is given if this happens. The next playfield shot is the right ramp.
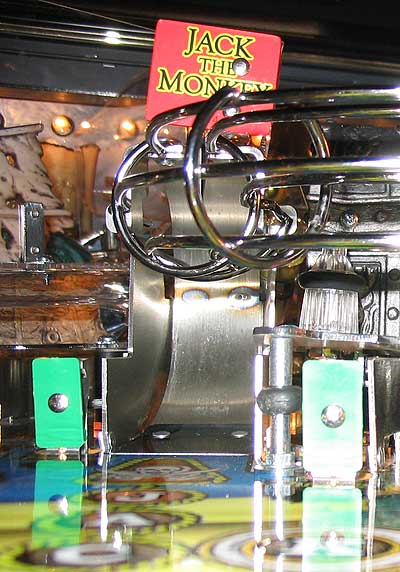
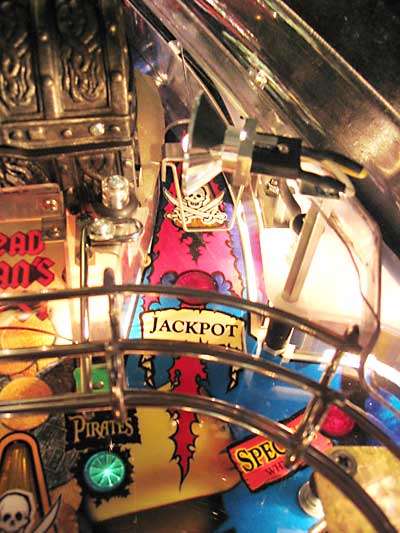
As you can see from the picture above, this is a tight scoop to put the ball on the wireform leading to the right inlane. It scores feature awards and advances J-A-C-K towards the Jack The Monkey feature. Next to the right ramp is the Dead Man's Chest shot.
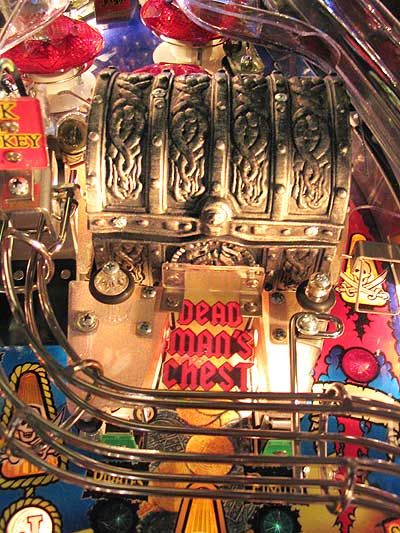
This is the final toy in the game and the aim to to shoot the ball under the chest enough times to spell K-E-Y and open the the lid to reveal...
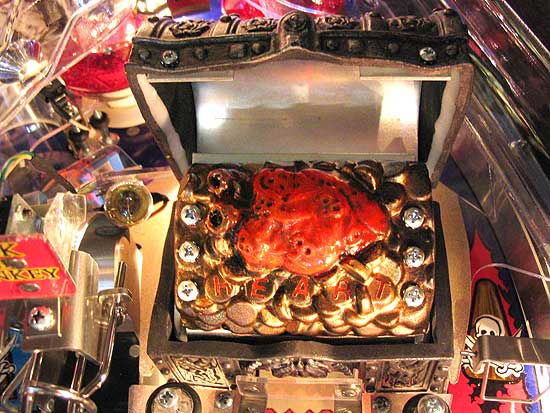
...the heart of Davy Jones on a bed of gold coins. The heart contains two pairs of LEDs which flash to the beating heart sound effect. They're incredibly cheesy but quite funny. Beneath the heart are the H-E-A-R-T letters which illuminate as you shoot the chest to complete the word and enable Heart Multiball. The chest itself is superbly well made and modeled as you can see by the thickness of the plastic and the six screws holding the innards. It's much sturdier than you might expect for a part that never receives any ball hits.
The Dead Man's Chest also scores feature awards and all the features of the chest are spelled out on the playfield. Passing by the final green Pirate standup, the next shot on our tour is the right lane which scores jackpots and feeds the ball to the pop bumpers.
It's another tight shot but help is at hand because the switch registering it is quite near the entrance making it easier to score. And talking of the pop bumpers, let's take a look at that whole area.
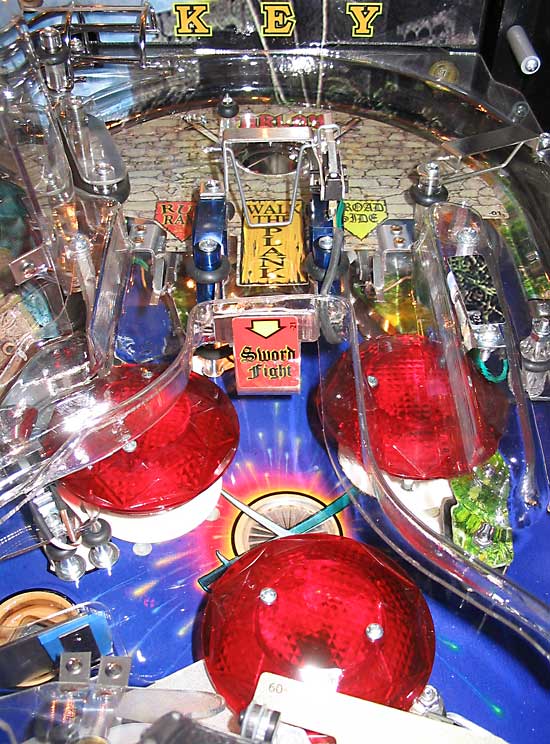
The pop bumpers score Sword Fight hits and advance the bonus multiplier after the appropriate number of hits. As we just said, the ball can get into the bumpers from the Kraken shot, the right lane and also from the upper playfield.
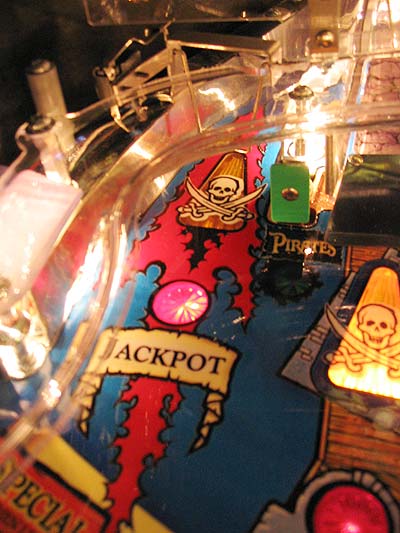
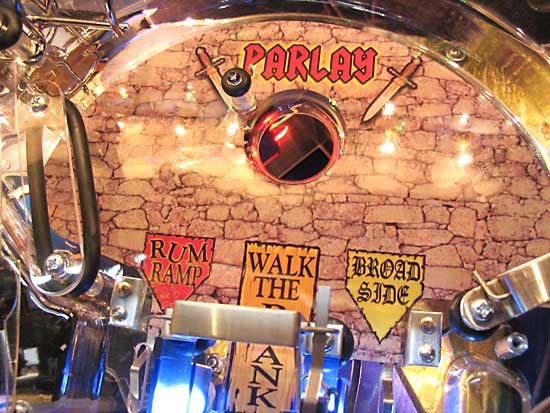
The upper playfield is accessed from the shooter lane and from the left lane via the VUK. The predominant colour scheme here is blue. The guides between the three lanes are illuminated by two blue LEDs and there's another LED between the shooter lane and the Broadside lane covered over by a sticker. The two side lanes have rollover switches while the centre lane is a gate switch. The rollover switches look to be difficult to access if they need to be removed as you have to take the whole upper playfield off. There is a sink hole which drops the ball to the main playfield level and into the pop bumpers, scoring P-A-R-L-A-Y letters on the way. If the ball escapes the sink hole there are three exit lanes - Rum Ramp, Walk The Plank and Broadside.
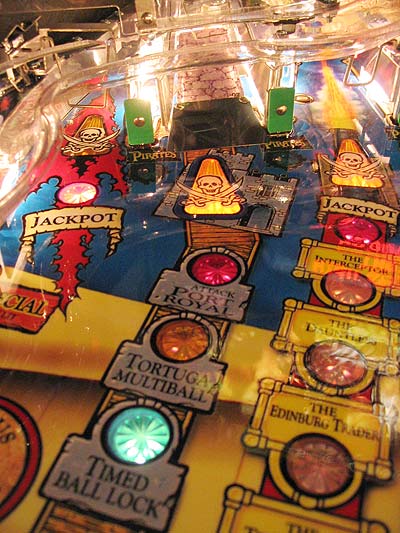
Making any of these lanes scores the appropriate award and lights one of the three green lamps on the back panel. These can be rotated with the flipper buttons (lane change) and when all three are completed a Top Lanes points award is given. The Rum Ramp lane feeds the ball to the left inlane, the Walk The Plank lane drops the ball into the pop bumpers while the Broadside lane leads to the ramp feeding the right inlane. The final shot on the playfield is the right side lane.
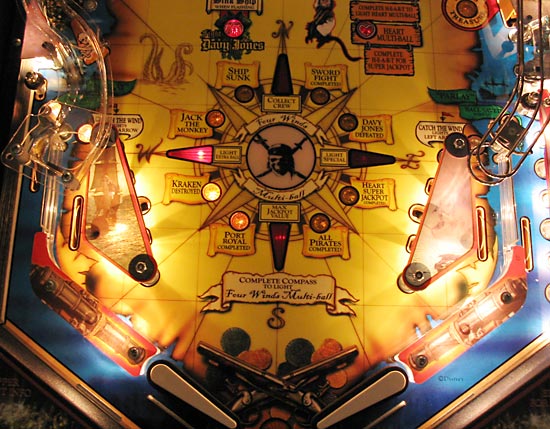
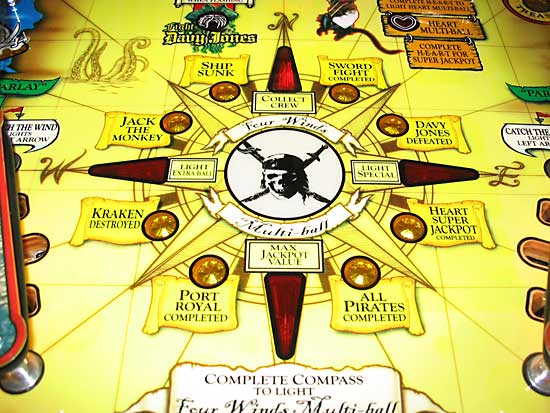
Like its counterpart over the other side, the right side lane collects treasure, lights bonus treasure at the standup in front and can also collect special when lit. Dominating the lower half of the playfield is the compass.
This is your guide to the features available, those completed and those currently running. Some features are more easily completed than others but you need to complete them all to get to the Four Winds Multiball wizard mode. We'll look at all the game's features and rules in the second part of our in-depth review along with our thoughts and comments on the whole game. In the meantime though, here's a sample of the game's main theme music.
Click here to go to part two of the Pinball News in-depth review.
© Pinball News 2006 |