|
|
SPIDER-MAN
|
|
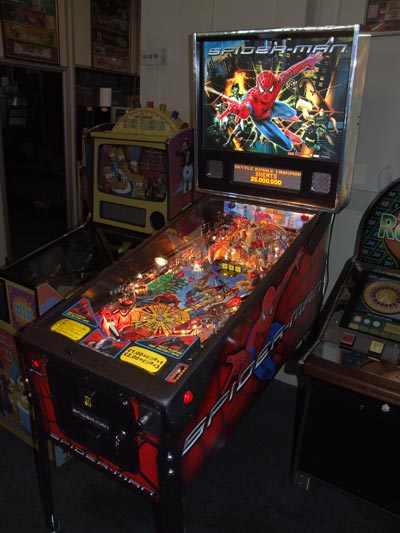
Hello and welcome to the first part of our in-depth review of Spider-Man the pinball game. We know many of you enjoy these detailed looks at the newest games so we'll be keeping the same formula this time and splitting the review into the customary two parts. This first part will deal with the game's hardware, artwork and mechanical construction. We'll take a tour of the playfield and describe how the various features are arranged and operate. In the second part, we'll concentrate on the rules, the sounds, animations and lighting effects, then draw them all together to bring you our conclusions. Often, the games we review here are early sample games which are likely to change in various ways before production. This time, the game is a little more developed that usual, the software installed is perfectly usable and not noticeably missing any major features. There still may be some changes but they will be minor and won't impact the gameplay significantly. So, let's get part one underway by looking at the first impressions of the machine.
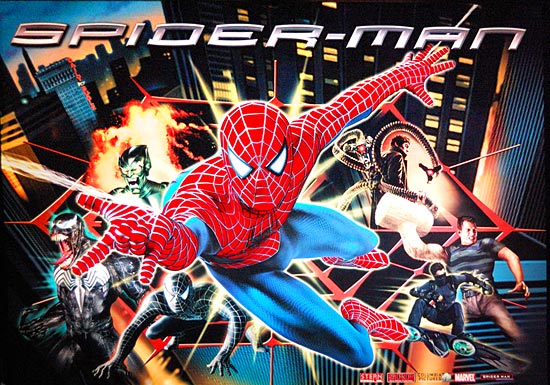
It's a striking game with a great backglass design which really brings Spider-Man out of the scene in a three dimensional way.
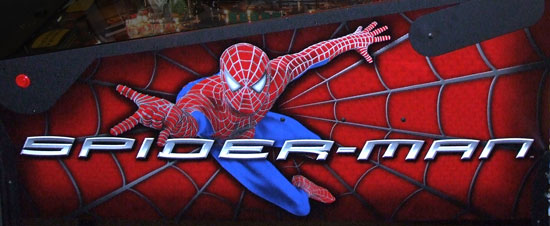
The composition of the villains may be questionable but after some disappointing backglass images in the recent past, it's good to see something powerful and exciting promoting the game. The cabinet art is much simpler by comparison but no less effective for that.
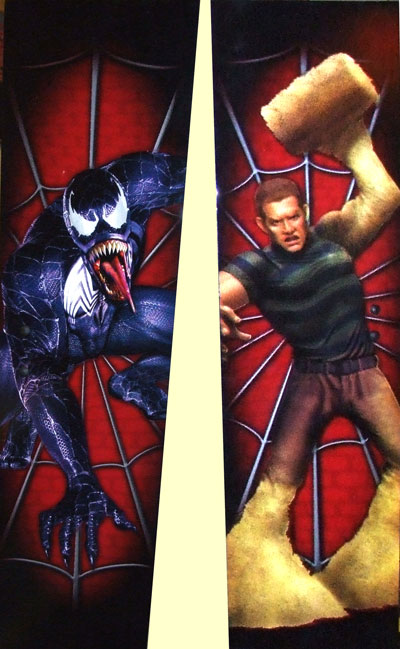
Consisting of three basic elements - Spider-Man himself, a web and the typographic logo - this ensures simplicity in the message and an uncluttered feel. The vivid red is very tricky to get consistently right and this was a sample game, so the production game may look very slightly different. The villains are saved for the backbox sides - Venom on the left, Sandman on the right although his sledgehammer arm is on the other side to the backglass, matching the playfield version.
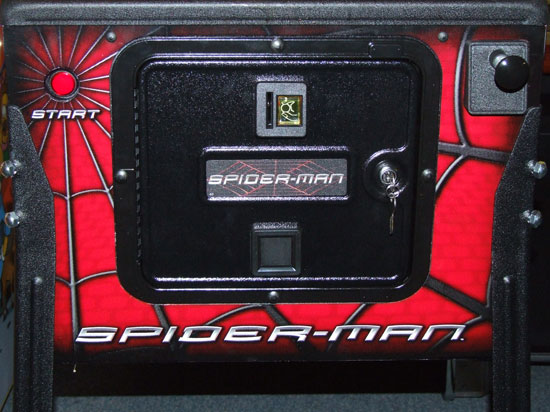
The front looks clean and clear with good focus on the start button.
So the outside looks good, but what's under the glass?
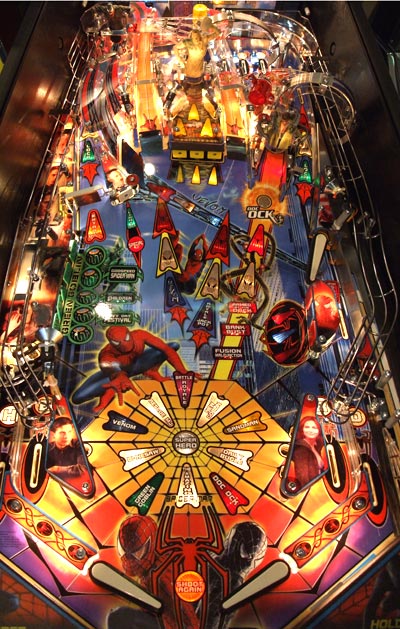
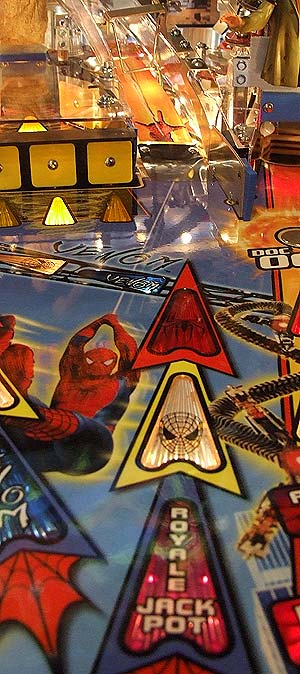
The vibrancy of the backglass is continued here with yellow glowing areas top and bottom, with a cooler, open area in between. It's brash, it's bold and it's clear. No tiny inserts here. If it's lit, you'll see it and you can read what's written on it. For those who like to think in those terms, this is a 3-flippered 6-shot fan layout with an open lower half and a cross field shot. In plain English, that means there are two regular lower flippers, a single upper flipper on the right and a bunch of interesting shots to shoot for. Starting at the bottom and working clockwise we begin with those two lower flippers.
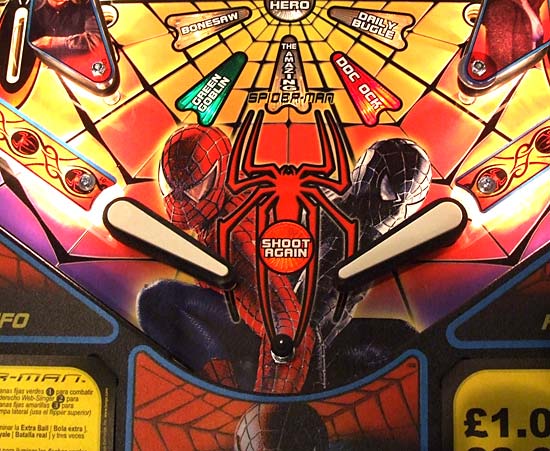
Nothing unusual about them but what is unusual is the metal centre post between them. It's something we haven't seen factory fitted to a game since probably Jackbot back in 1995 and tends to be something of a mixed blessing - saving balls going straight down the middle but not to be relied upon unless you're 100% sure it really is in the centre. The Shoot Again insert is between the flippers in the familiar spot and the colour is the equally familiar red.
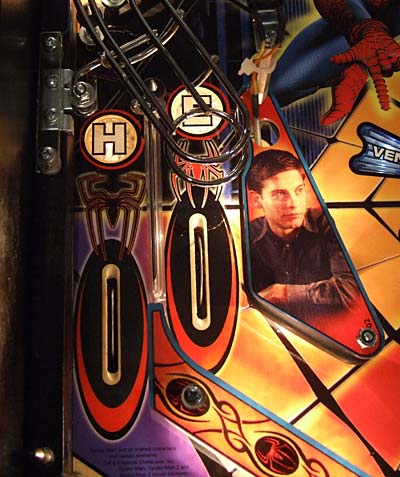
The left slingshot features Tobey Maguire in his most prominent appearance in the game and has a large hole drilled through it to accept a spot lamp cable. The left outlane and inlane both have rollovers to light the first two letters of H-E-R-O. Lit letters can be cycled by the flipper buttons in the usual Lane Change manner and completing them extinguishes them so you can begin lighting them all over again. The left inlane is fed from the left and the side Venom ramps exits and seems quite amenable to rolling the ball up the flipper and onto the switch to score a hit, without much danger of overdoing it and heading down the outlane. There is an outlane width adjuster post at the top of the outlane with three positions to vary the difficulty of the game.
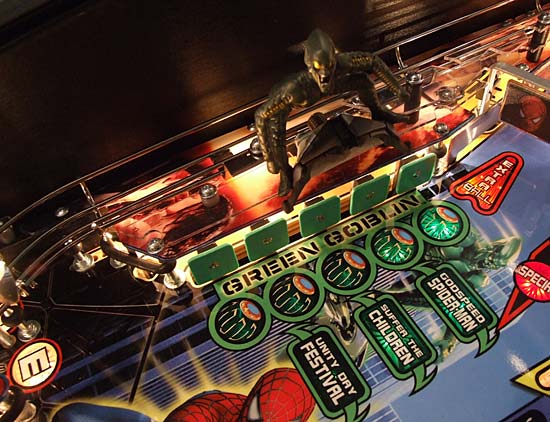
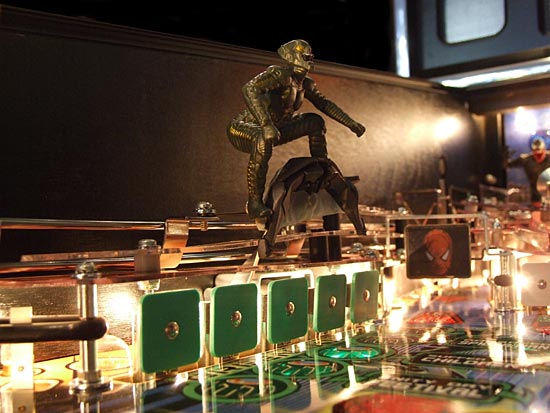
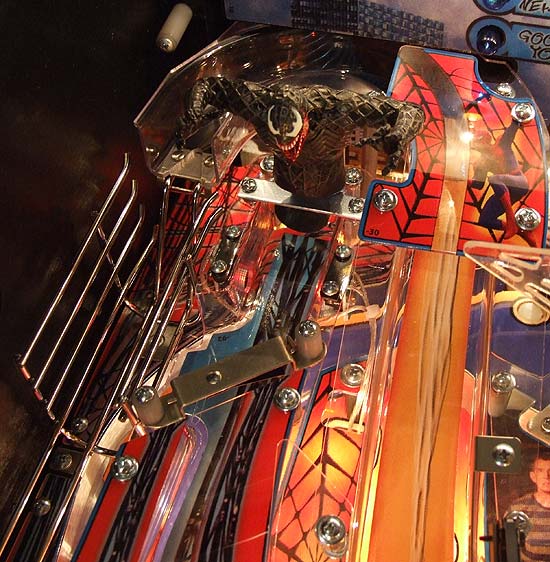
He is supposed to move left and right when hit or activated but in this game there was precious little movement and what there was went largely unnoticed during gameplay.
You can see the rear of the sprung mechanism for the Green Goblin in the picture below.
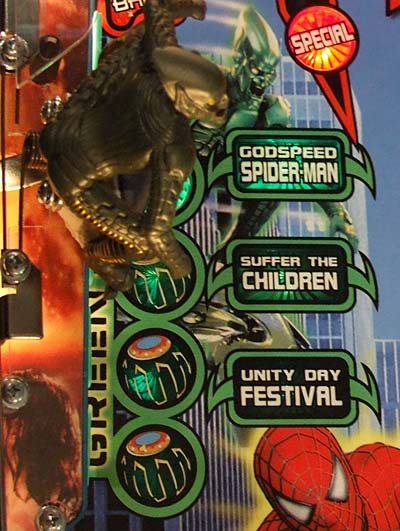
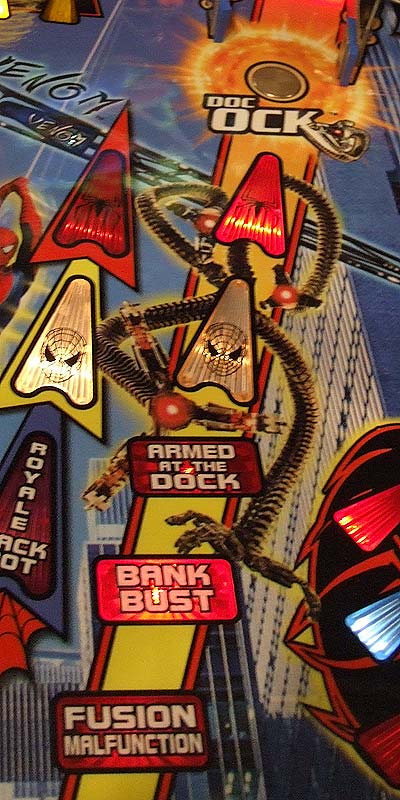
In front of the Green Goblin and his 5-bank of standup targets are the inserts for the three modes associated with him.
Completing the five targets starts the next mode, but we'll have more on all the villain modes in the second part of this review.
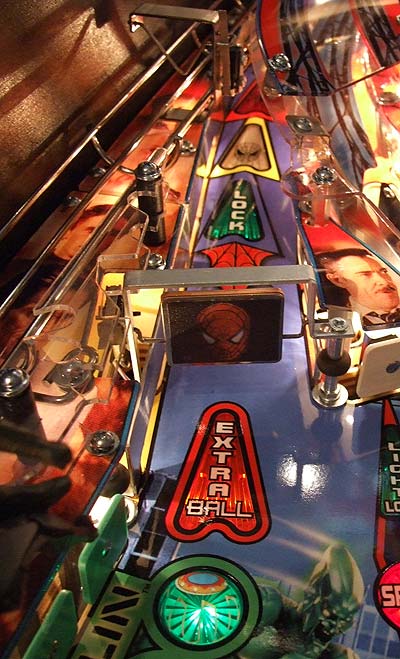
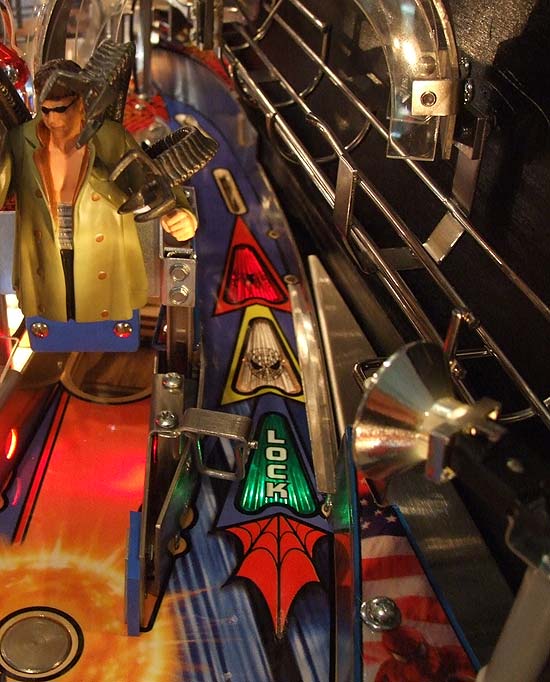
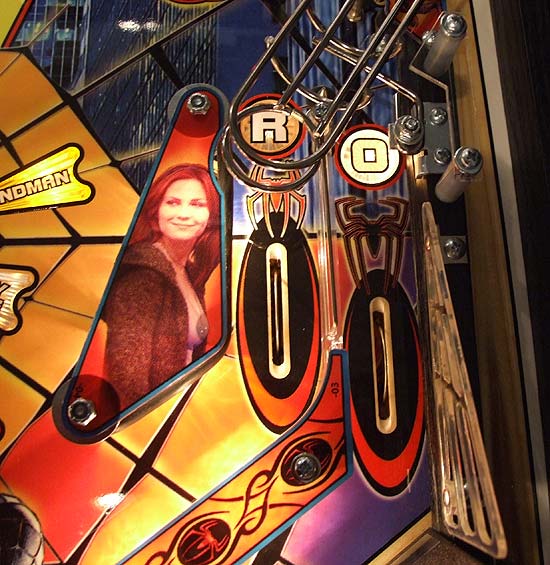
This feeds round to the right orbit lane, or a ball can be deflected into the Sandman saucer to lock it for multiball when lock is lit. Alternatively, the ball can fall into the top rollover lanes and then into the pop bumpers. There is a spinner at the entrance to the left orbit and the lane can be used to collect a red spider arrow, a white web arrow and extra balls. There is a switch about halfway up the lane so balls don't need to make the entire lane to register. The red arrows are jackpot and combo shots, or light to show the shots required to complete a task while the white arrows, when completed, start the next timed mode. To the right of the left loop is the lock target.
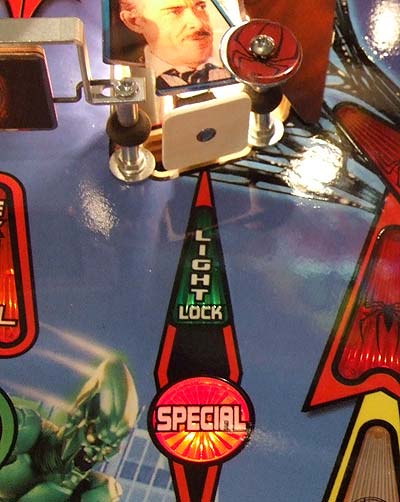
No great surprises what this does - it lights lock on the orbits. It is lit at the start of the game and any time lock is not already lit. Once you've played multiball once, though, you have to hit it more than one time to light lock . As you can see, it also collects special when lit. Next to the target is a metal washer with a decal. Besides helping to prevent airballs, this is the mounting point for a proposed Spider-Man model which was intended to be in the game but was removed for cost reasons. If plans come to fruition, the crouching Spider-Man model will attach here. Above the lock target is the side ramp which is a cross-playfield shot and can only be made from the upper flipper. Side ramp shots score Venom hits and also collect any lit red spider or white web arrows.
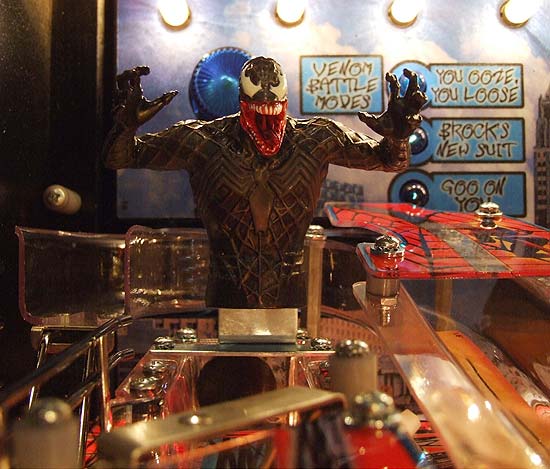
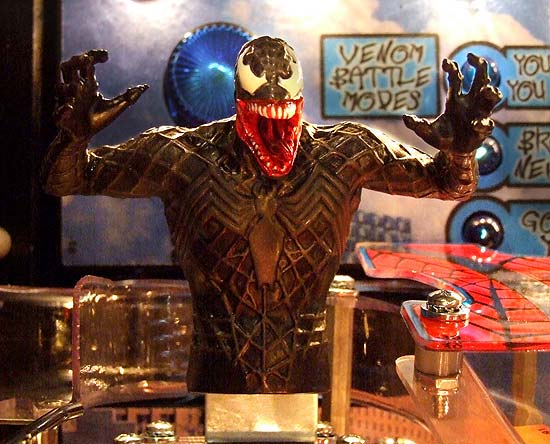
The ball is shot up the ramp by the upper flipper to the Venom toy at the top where it registers a hit and then falls back down the ramp to a one-way gate and onto the left ramp exit, as shown below.
The Venom toy is a static one, so the animation is provided by the dot-matrix display instead. But the side ramp is not the only shot to score Venom hits.
So the left ramp orbits behind Venom and heads down the left side.
As the ball leaves the plastic part of the ramp and joins the wireform, there is a sharp vertical drop before it meets the exit of the side ramp speeding up the ball on its return trip to the flippers. The Venom area sits over the left orbit path which will make it difficult to access the playfield for cleaning. In fact, because that whole area is quite crowded, there is no room to show the Venom modes on the playfield. So the modes are displayed on the back panel in his chosen colour, which is blue.
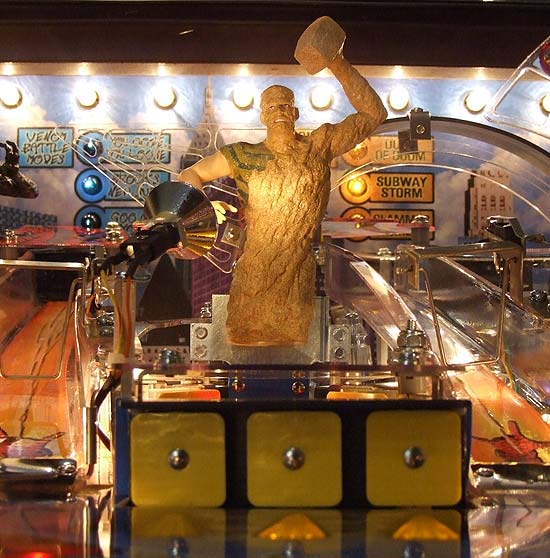
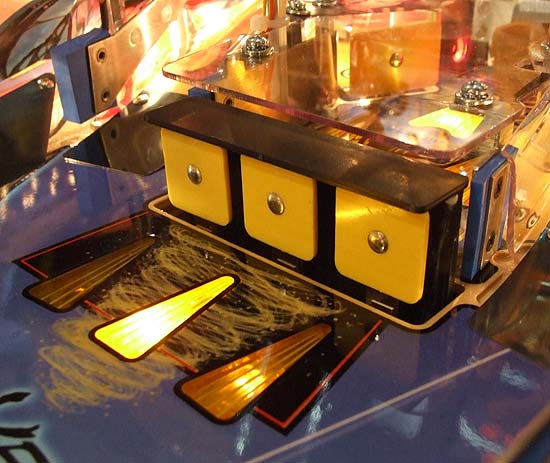
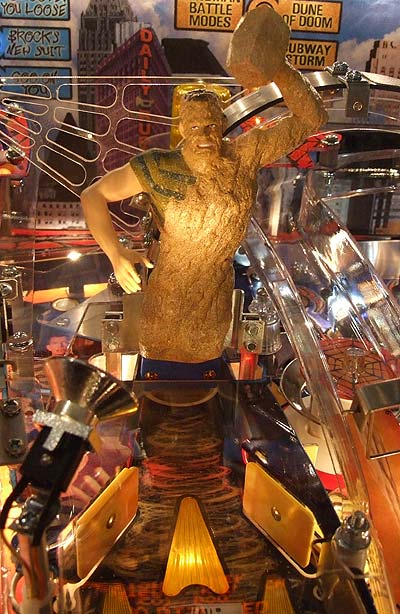
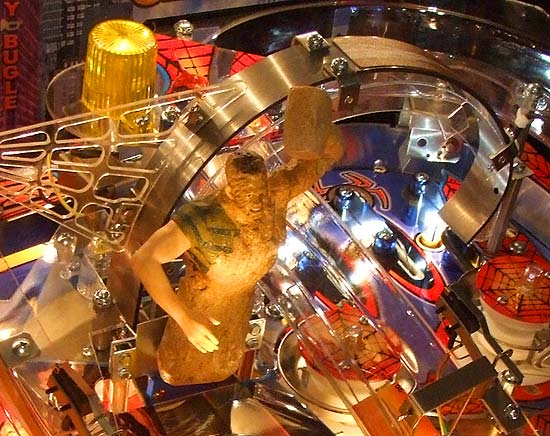
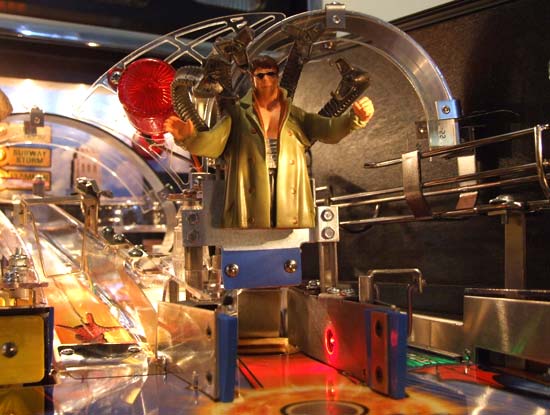
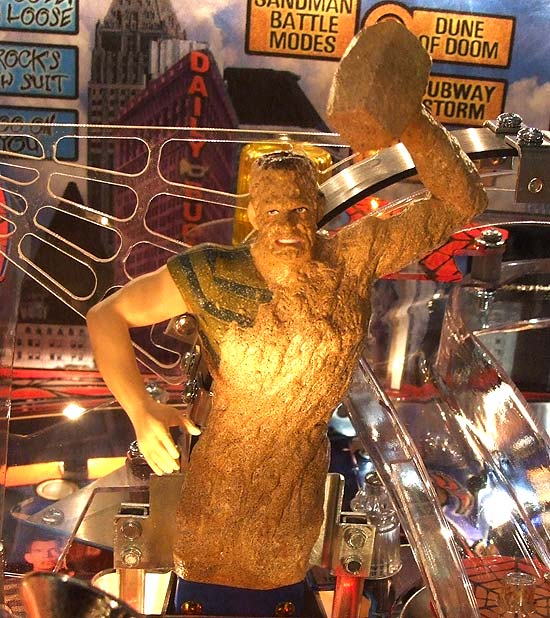
The Sandman is protected by a motorised 3-bank of standup targets with associated inserts in the playfield in front.
When all three targets are hit, the bank drops down into the playfield revealing The Sandman targets behind.
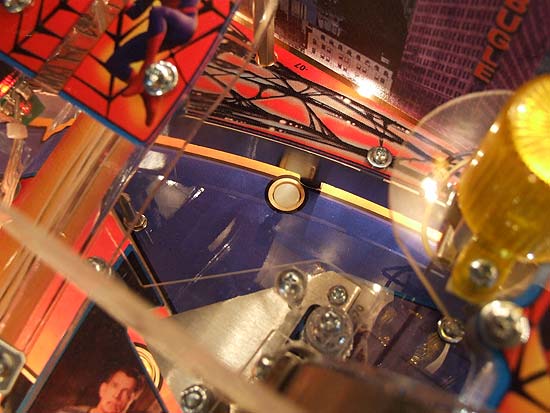
The saucer also has a secondary role, acting as the ball lock.
When lock is lit, a ball sent on either of the orbit shots is stopped at the back of the playfield by the white post (shown above) rising to interrupt the ball's flow. The ball then rolls down the playfield and into The Sandman saucer. In our sample game, the post was often too slow to stop fast balls shot up the left orbit, perhaps because the distance between the sensing switch and the post was too short to allow the post to react in time. On the longer right orbit, there was no such problem.
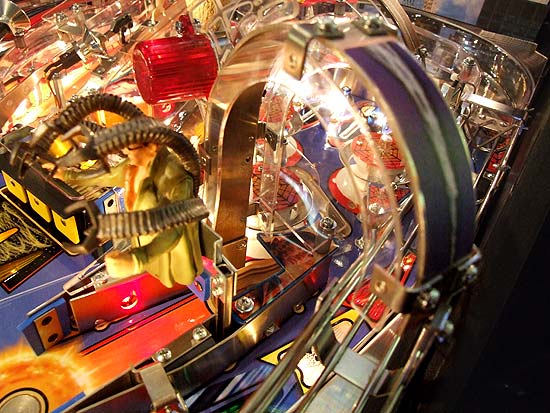
However they get there, balls from The Sandman saucer are ejected using a new style of vertical up-kicker (VUK). The metal ball guide is sandwiched front and rear by clear plastic walls, allowing the player to see the ball as it is kicked out of the saucer and into the pop bumper area. While it looks a little "industrial" when viewed from this angle, from the front you don't see so much of the metalwork and the whole unit is less obtrusive, as you can see below. . During multiball modes it's possible to get two or more balls in the Sandman saucer. While it did sometimes take a couple of attempts, the kickout seemed to have no problem clearing all the balls thrown at it. From here, you can see how The Sandman's modes are also displayed on the back panel, rather than on the playfield. The are slightly obscured by the kickout but not too badly.
The operation of Doc Ock is much like The Sandman - when lowered you can shoot at him, and when raised you can shoot the saucer behind him. Shots at him are registered by an opto pair set into the side walls, so it's only necessary to break the beam, not hit the target, and hard shot is no more likely to register than a softer one. In practice, despite the entrance being as large as the right ramp, the shot seemed much harder to make than it should be, rattling the ball around in the entrance instead.
Balls kicked out of the Doc Ock saucer travel on another of the souped-up up-kickers.
This one launches the ball onto the right ramp exit wireform, which feeds down to the right inlane Since this is the last of the three models on the playfield it's worth taking a moment to look a little closer at them.
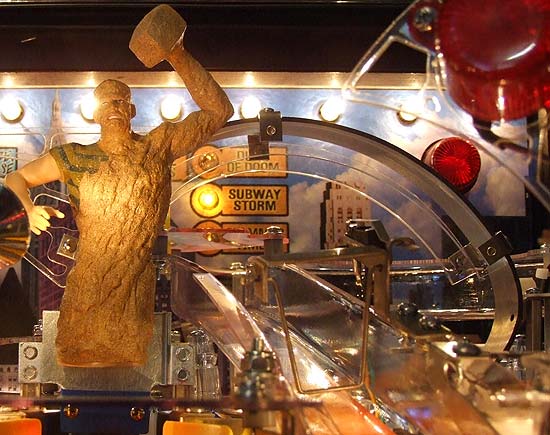
Unusually for pinball toys, these have a superb level of detail and texture. From the fine webbing on Venom to the gritty, rugged surface of The Sandman, it's a step above what we've seen before.
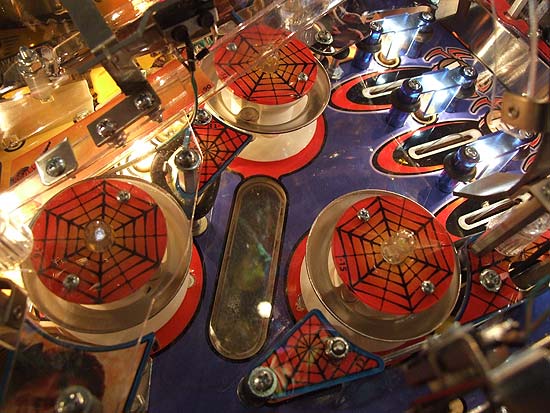
Behind Doc Ock is the pop bumper area.
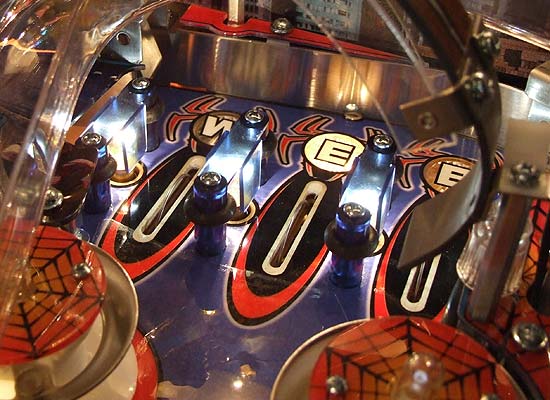
Fed from the left and right orbit shots, as well as the skill shot, the three rollover lanes spell out W-E-B and use the familiar lane change with the flipper buttons. The rollover switches are set up so the ball triggers them almost as soon as it enters one of the three lanes, not giving you much time to select an unlit lane or to get the flashing skill shot. The ball then rolls down into the pop bumpers but balls can also reach here after being ejected from the Sandman kickout which dumps the ball into the middle of the area. Once into the pop bumpers, we find an unusual design has been employed.
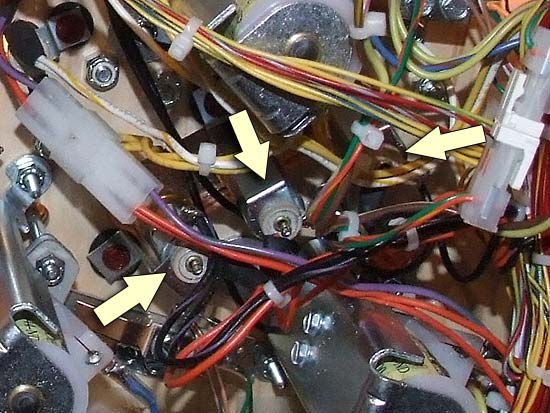
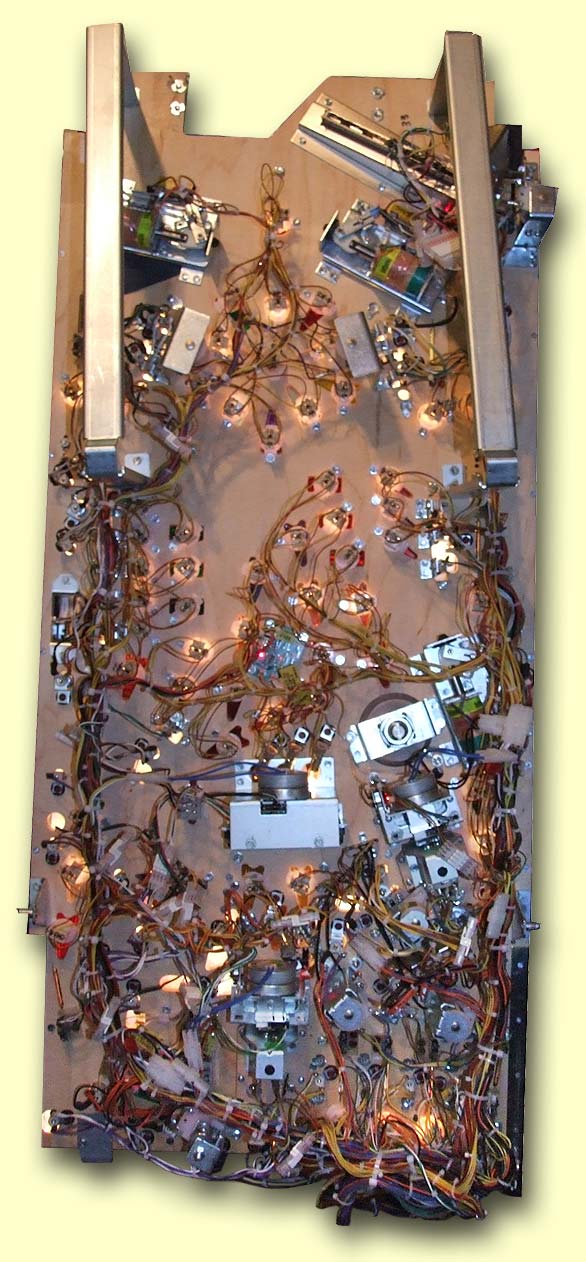
These are the skinny style of bumpers and have a flat bumper cap featuring a web motif. There's no lamp inside but instead we get an white LED on top. But these aren't regular white LEDs either, having a flat top to help diffuse the light better. Sadly, they didn't do much and didn't light much beyond a faint glow. On the plus side, though, the top left pop bumper LED is in no danger of melting the plastic ramp just above it. If the pop bumper LED lamps are less than illuminating, their shortcomings are more than compensated for by the three flashers under the clear "hotdog" insert between the bumpers. These activate when the pops fire and flood the area with white light. Their spread is a little limited by the lamps' position but they are still very effective. Flashers, though, are one of the most stressed components in a pinball game, so the most likely to fail. Are they readily accessible and easy to change?
Err... no, not exactly. They're under that tangle of cables but they are mounted on rubber washers which should help their longevity. Back to the top side, then, and the pop bumpers. Although the ball is very effectively thrown around by the bumpers, it rarely makes it back up the rollovers to light one of the lanes and on those few occasions, there didn't seem to be any favoured lane.
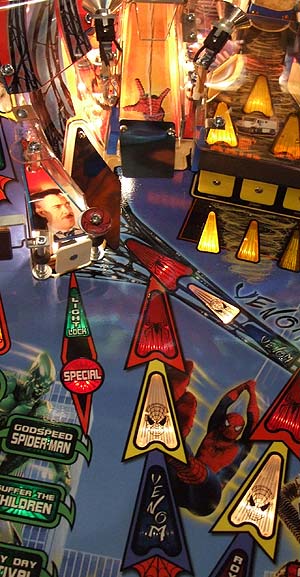
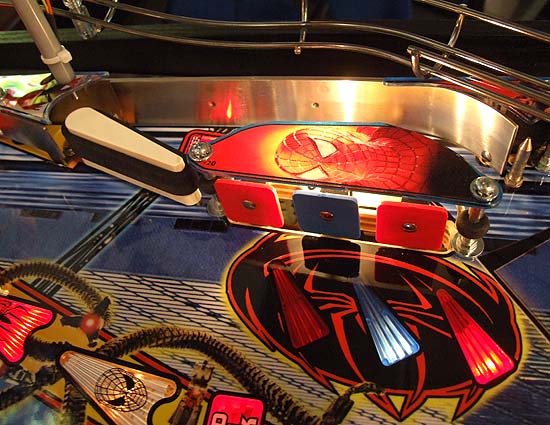
This is the mirror-image of the left orbit, having the same features - a red spider arrow for jackpots or combos, a white web arrow for mode start and a green lock arrow for ball locks. The top one or two arrows can be difficult to see as they are some way up the lane and hidden behind Doc Ock. Balls leaving the pop bumpers roll down this lane and are stopped by a half-gate at the entrance to slow down the ball and prevent centre drains. Normally, the ball shot up the right loop will hit the gate above the rollover lanes (at the top left of the picture below).
But when lock or combos are lit, the gate opens and the ball flows round to the left loop lane and either hits the post to lock the ball or heads back to the flippers for further combo shots.
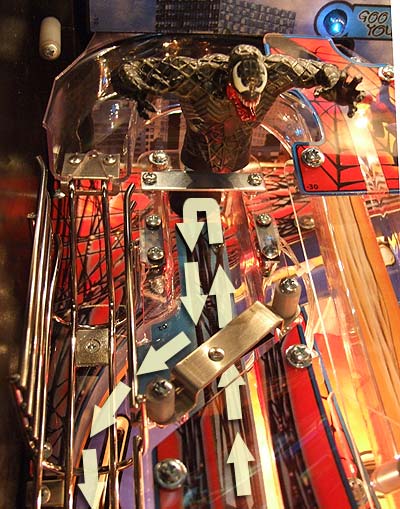
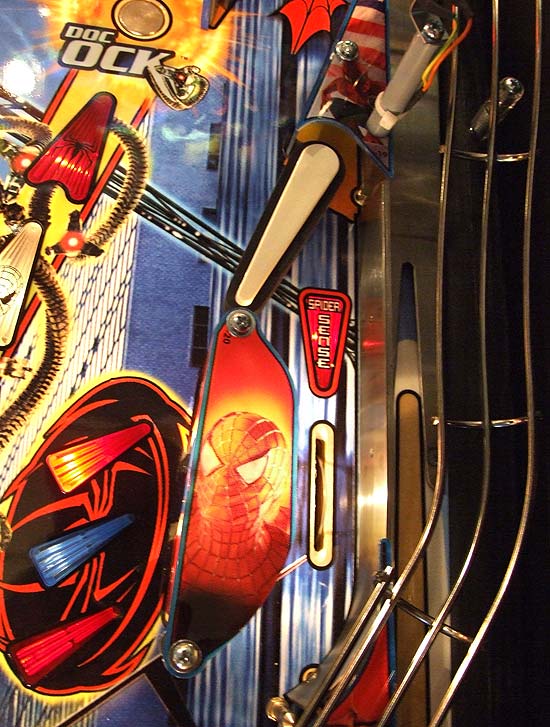
This is probably the game's most unusual design and consists of two discrete features. The upper flipper is mainly used to shoot the side Venom ramp but can also - seemingly impossibly - shoot up the left ramp, shoot the light lock target and shoot the 3-bank in front of The Sandman. Additionally, when a ball is held on the Doc Ock magnet, using the upper flipper is a good way to use another ball to knock it off. Below the upper flipper is the Spider Sense feature.
The three standup targets, when completed, light the Spider Sense insert in the lane behind. It's just about possible to shoot up the lane directly from the left flipper, but most balls entering it either do so by accident or hit the underside of the upper flipper and enter that way. It's not directional - having only one switch - so is as likely to be scored from the bottom as the top. Collecting the Spider Sense gives a context sensitive award, giving a bonus for the current feature or giving a points award if not.
Nothing unusual here with just one of each lane and the last two letters of H-E-R-O lit by the rollover switches. The slingshot features Kirsten Dunst as MJ while the shooter lane divider is decorated with a clear plastic web piece as found on the two upkickers.
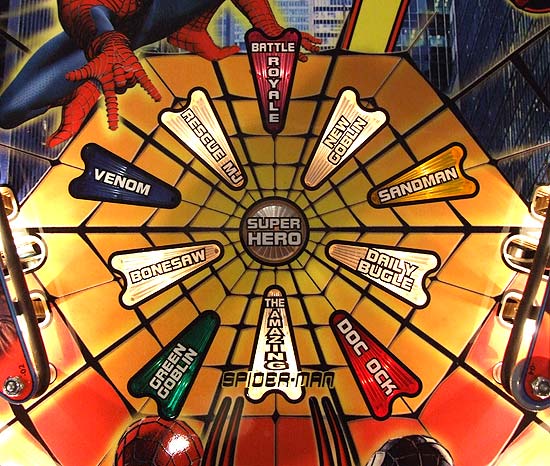
It shows Battle Royale on the outer edge, the four main villains - Green Goblin, Venom, Sandman and Doc Ock - one row in, then come the five timed modes - Rescue MJ, New Goblin, Bonesaw, Daily Bugle and The Amazing Spiderman - with the wizard mode - Super Hero - in the centre. The villains are colour coded here as they are in their relevant areas of the playfield; Green Goblin is obviously green and equally obviously The Sandman is sand coloured yellow, Venom is blue and Doc Ock red. Completing all 4 villains lights extra ball, completing them a second time lights Battle Royale and completing them a third time lights special and along with the 5 timed modes lights Super Hero.
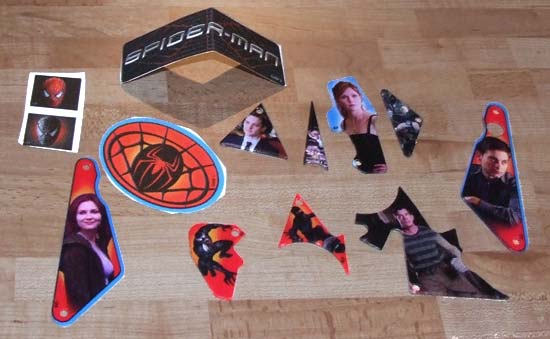
With the game you get a selection of spare plastics and decals as well as a number not used in the game and some plastic shapes you can use as key rings.
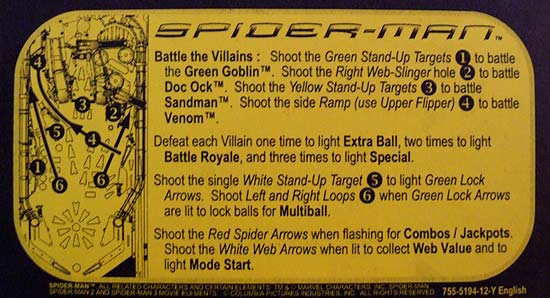
And of course, it comes with the instruction card. This time, featuring numbered markers to help players identify the shots.
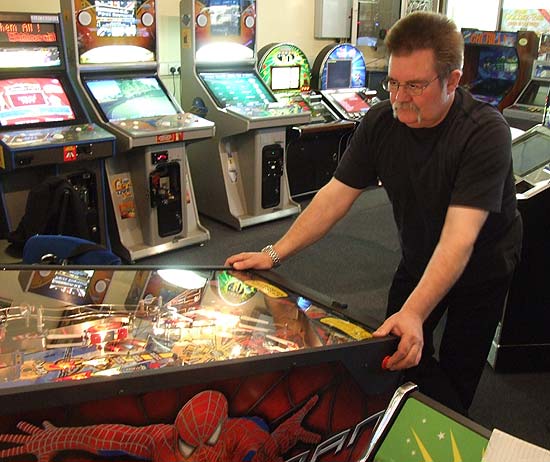
We'd like to send our thanks to someone who came with us on this review and gave us some special insights into the design rationale behind the game.
Thanks Steve. Finally, here's a video tour of the playfield accompanied by two of the game's music tracks - the first is the main theme and the second is the game over music.
© Pinball News 2007 |