|
STAR TREK |
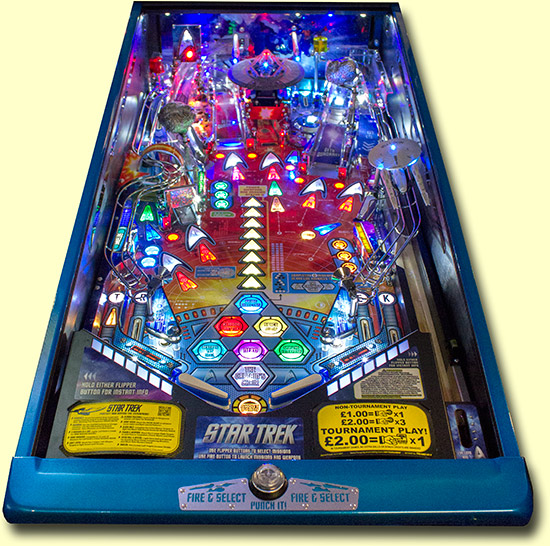
| Hello and welcome to our first In-Depth Review of 2014 and this time we are examining Stern's latest model - Star Trek. We waited until now as we wanted to review the Limited Collector's Edition which wasn't released until after the Pro model in December 2013.
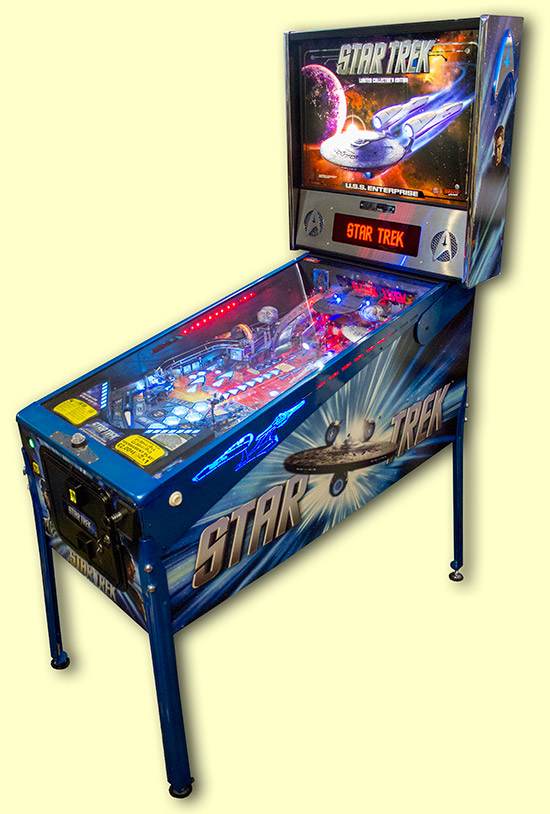
Star Trek is the latest design by Steve Ritchie who has, almost without notice, shifted gear from the 'King of Flow' into the 'King of Pinball'. The Limited Edition model is the top of the range of three variants - Pro, Premium and LE - and it reached at least one new high point for Stern games, weighing in with a recommended selling price of $8,795. So what exactly do buyers get for their money? Let's find out.
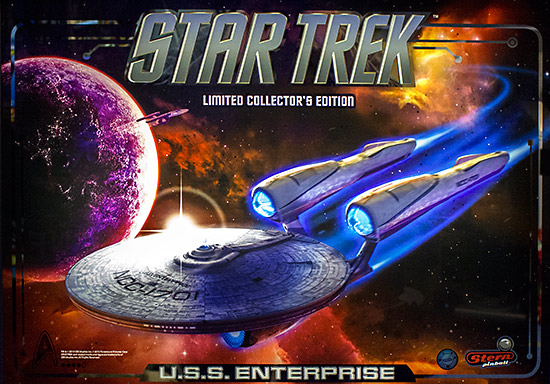
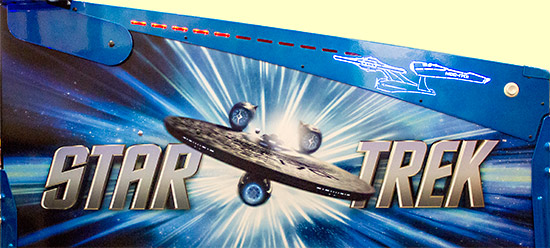
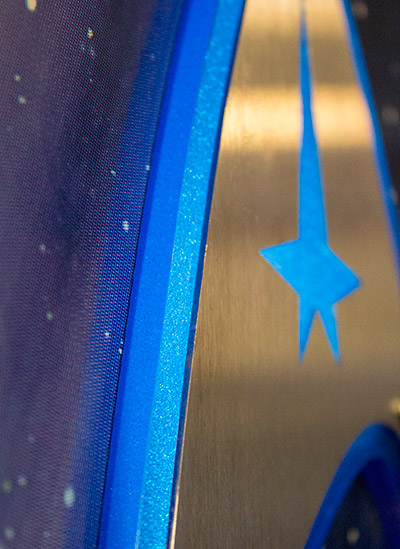
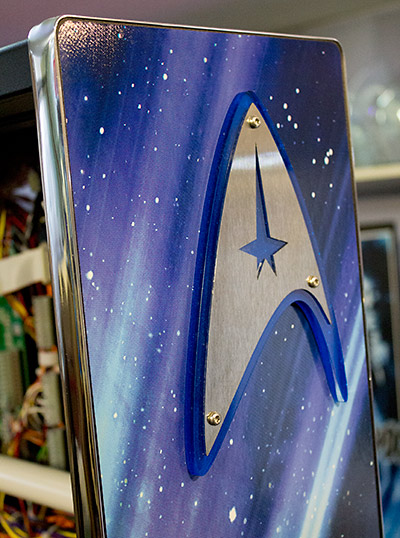
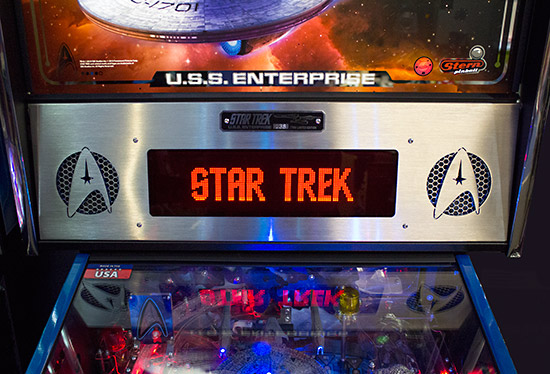
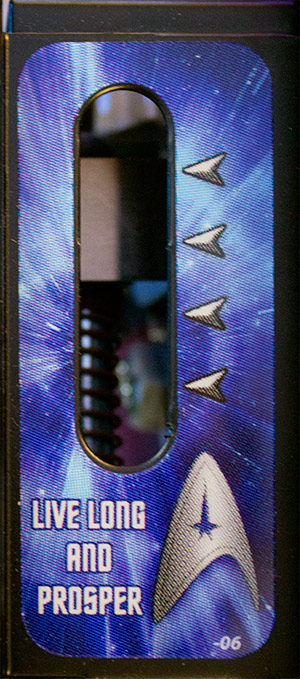
Being a Limited Edition model, this comes with a real mirrored backglass, and it is the only one of the three models not to feature any images of the movie cast in the backglass or translite artwork. The mirrored layer is used around the edge of the glass for the circuit board-type tracks, around the Star Trek text, and for the U.S.S. Enterprise panel at the bottom. The rear of the glass is plain white with no stencilled areas to create different levels of illumination. But, as we shall see, there are other ways that can be achieved. Let's continue with the exterior artwork, and the Enterprise is clearly the star of the show when it comes to the cabinet sides too.
The warp speed background is flipped between the two side so the darker area is always towards the rear of the cabinet, but the Enterprise and logotype are the same for both. The Limited Edition model has these special illuminated side rails and we'll take a closer look at them in a moment, but staying with the artwork we find the first crew member appearances on the front of the cabinet either side of the coin door.
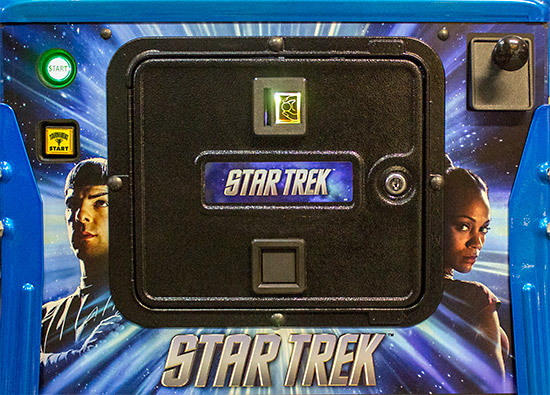
Spock (Zachary Quinto) and Uhura (Zoë Saldana) take up positions on the left and right respectively, with the warp effect radiating out from the centre and the Star Trek type both below the coin door and on a decal in its centre.
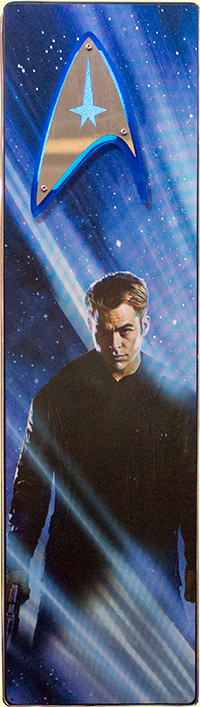
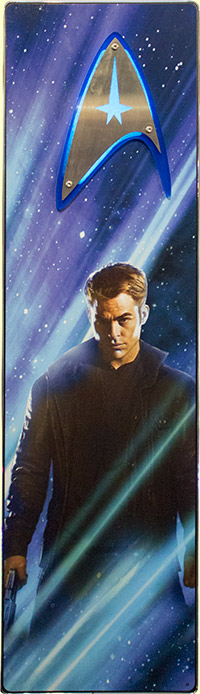
The usual controls are found on the cabinet front - the start button, the tournament button and the manual shooter rod. This is a European model, so it only has a single multi-coin slot and reject chute. So far we've only seen two members of the Enterprise's officers. If we want to find the Captain be have to look higher, to the sides of the backbox.
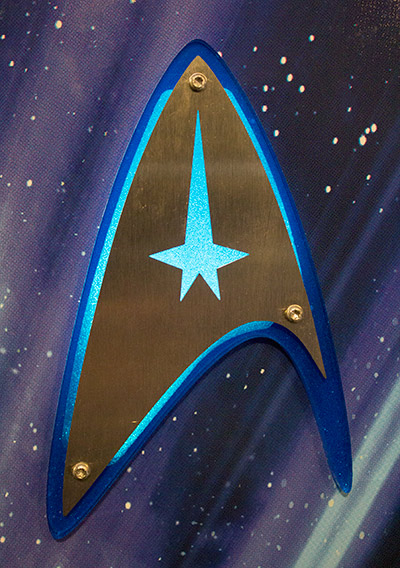
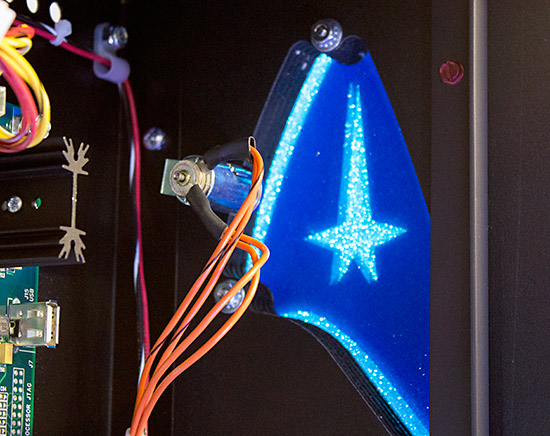
The same image of James T. Kirk (Chris Pine) appears on both sides, with the background starfield and the light beams flipped so they always rise towards the rear of the backbox. Hovering above Capt. Kirk is a United Federation of Planets' Starfleet emblem. This is an LE-specific feature and is a physical model which is attached to both of the backbox sides.
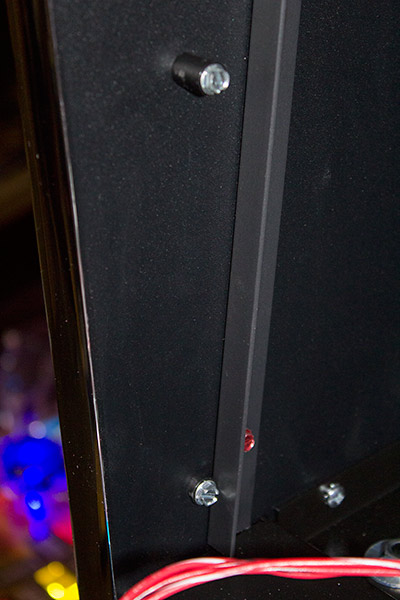
It is constructed from a frosted blue acrylic panel topped with a laser-cut brushed steel logo. The two pieces are held together and secured to the cabinet with three bolts.
To give them more impact, the two emblems can be backlit by flasher LEDs mounted inside the backbox.
Another thing you might have noticed in the backbox artwork images shown above is the fact that they are rectangular and don't taper towards the bottom. That's because Star Trek uses a new backbox design without that customary tapering but featuring a metal back and an improved mirrored T-molding.
The new T-molding not only provides a mirrored effect when viewed from the front of the machine, it also gives a pleasant silver edging to the backbox sides. And in an unexpected show of largesse, the mirrored T-molding even extends around the rear of the backbox.
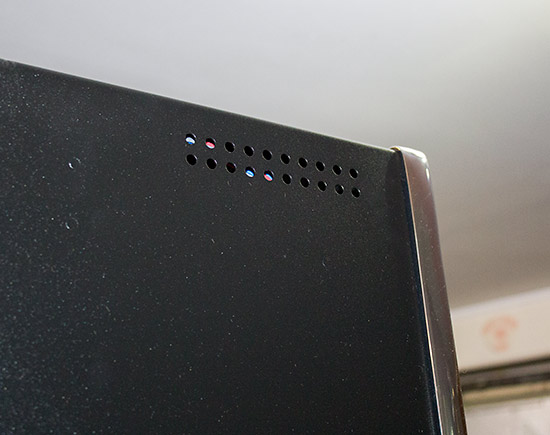
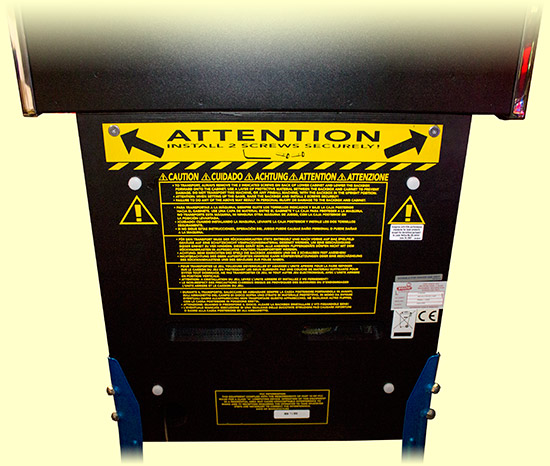
If the rear of the backbox also looks different, that's because it is now made of metal rather than the traditional plywood used for the other four sides. It's not entirely clear why metal is the material of choice since it makes it harder to attach game-specific circuit boards, P-clips and other hardware, and is unlikely to be much cheaper - the usual motivation for Stern's hardware changes - but perhaps all will become clear when Stern launch their new control system and board set soon. Either way, the new back has two rows of ten ventilation holes drilled either side which obviates the need for the metal grilles used on the three much larger ventilation holes in the old design. Plus, it removes the need for a metal grounding sheet behind the boards, so maybe it is cheaper after all.
Further changes have taken place at the bottom of the backbox, and these do have the feel of saving a few cents from the bill of materials.
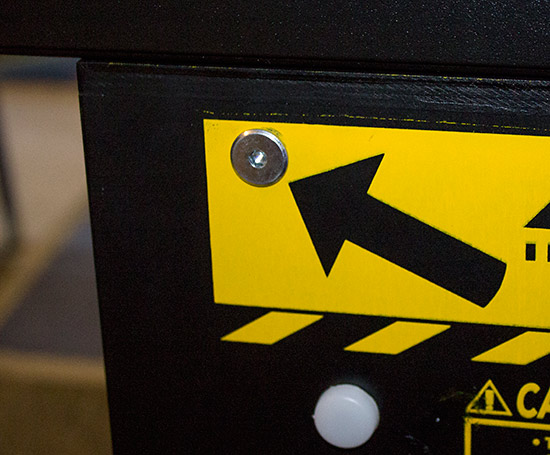
Stern's traditional backbox latch used an oversize hex/Allen key with a half-turn locking the cabinet and backbox together. That system has now been replaced by two much smaller hex/Allen keyed bolts, and whereas the old larger key could be left in the latch until it was needed, there's no convenient place at the back to store this new smaller key.
On the plus side though, the size of key used here should already be part of most pinball tech's toolkit, and if it's not, you probably have some keys left over from the last time you bought furniture from Ikea. That's enough time round the back of the game, so let's return to the front because to go along with the new backbox we also have a new speaker panel.
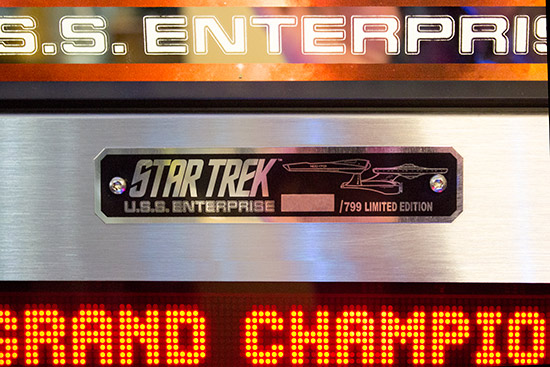
The top of the panel is now angled away from the player, which points both the speakers and the display up towards their eyes and ears,helping to reduce the reflection of the display in the playfield glass. Only the LE model has this brushed stainless steel speaker panel. The Pro and Premium have a plainer design with a large patterned decal covering the speaker and display surrounds. The LE also has a special plaque showing the machine's number out of the 799 built.
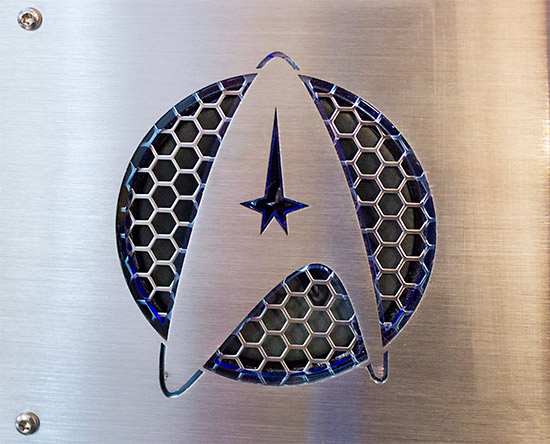
The Limited Edition also has custom laser cut speaker cutouts featuring the Starfleet emblem and the same honeycomb hexagonal shape found in some of the playfield inserts.
There's more to these cutouts though, and you can see a hint of what that might be in the picture above (before we give it away below). In an attempt to replicate the effect provided by aftermarket modders, the speaker grilles are actually illuminated.
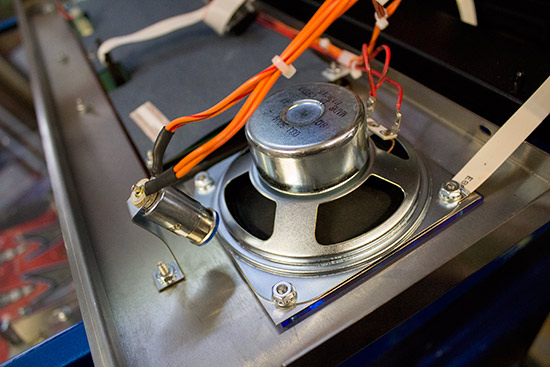
The speaker cutout has a blue acrylic surround which can be illuminated from the top by a single LED flasher. It's location and angle suggests it may not placed in the most effective position, and one of the thicker speaker mounts available might produce a more effective result, but it's something. As you can see, the speaker panel is also made of metal and uses a new system to lock into position.
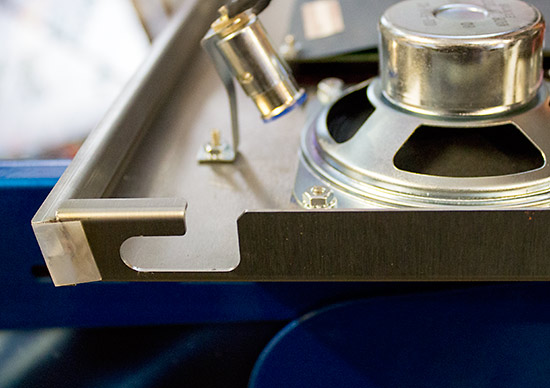
These mounting slots lock onto pegs on either side of the backbox. There are actually two pegs on either side, but the speaker panel only hooks over the top one, while the bottom one provides support to the bottom of the panel.
To fully lock the speaker panel in place, two pins on the bottom of the backbox engage with two holes in the bottom of the speaker panel.
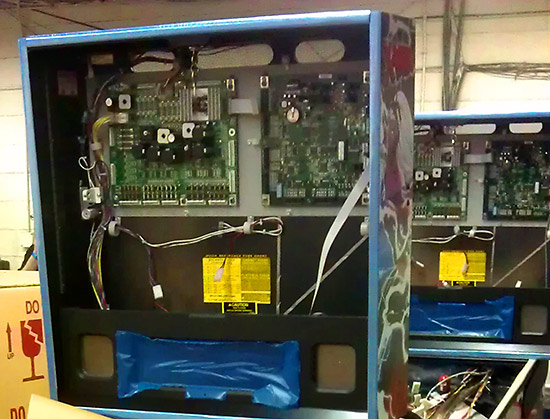
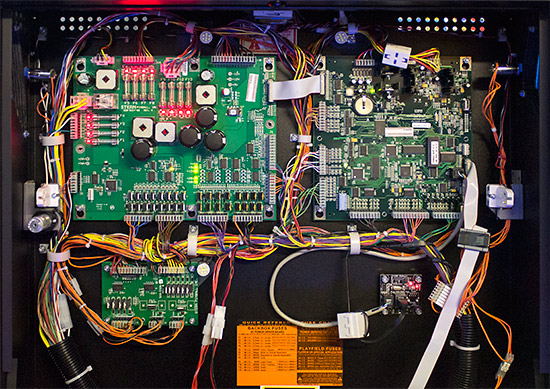
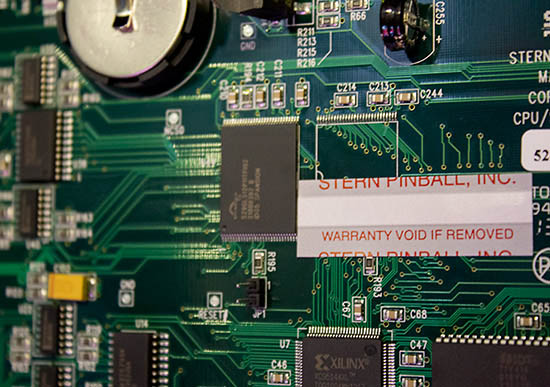
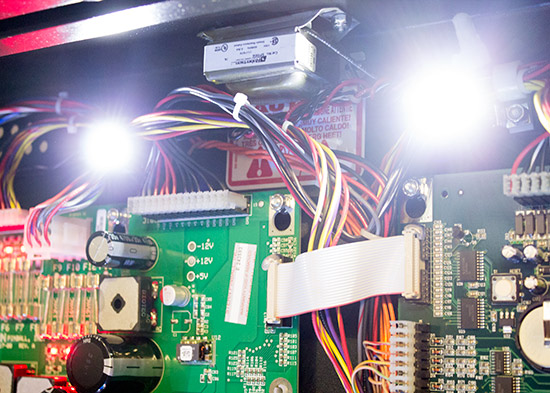
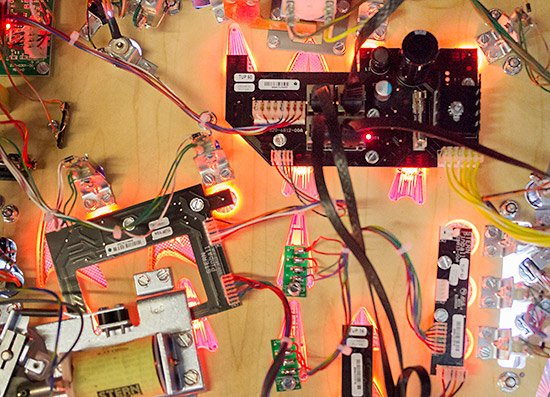
Meanwhile, inside the new backbox we find the usual driver and CPU boards, along with a couple of additional boards and a surprise or two... or even three.
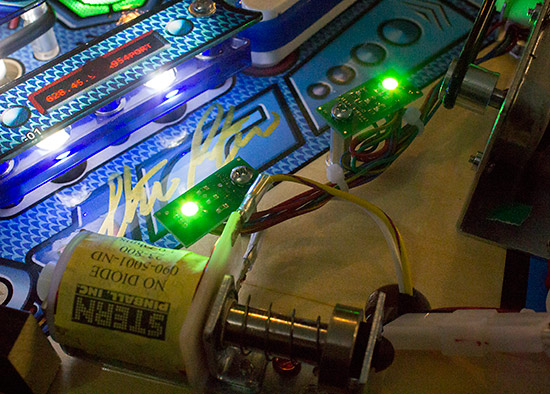
The driver board is a standard SAM 520-5317-00 Revision A model with 16 high current solenoid drivers, 8 low current drivers and 8 flasher drivers. The CPU board is a 520-5352-01 with just one flash RAM chip fitted. Stern's music games usually have two of these to hold all the songs, but only one is needed in Star Trek.
Beneath the two main boards are two smaller ones. On the left is an expansion driver board which increases the number of drivers for flashers and/or solenoids.
The second board we're not sure about, but it seems to be doing some buffering/reclocking of the data from the CPU board to the RGB LED drivers beneath the playfield.
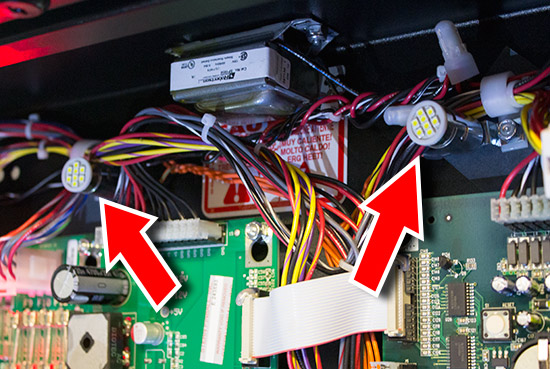
We've already seen four LED flash lamps - one on each Starfleet emblem and one on each speaker, but nestling in amongst these four boards in the backbox are another three flashers. These are designed to illuminate the backglass, so two are at the top to light up the Star Trek logotype, while the third flashes behind the image of the Enterprise.
These three LEDs are all 8-element white flashers, and like the other four they are driven by the expansion board, which is also the location of the third LED.
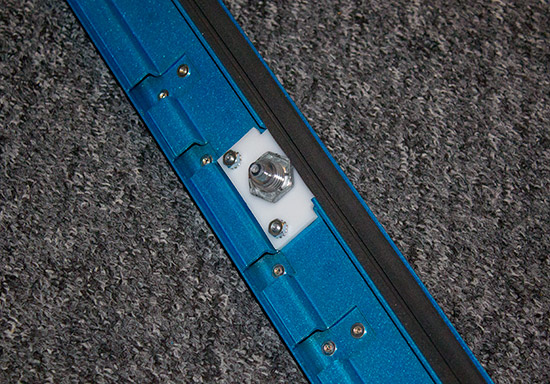
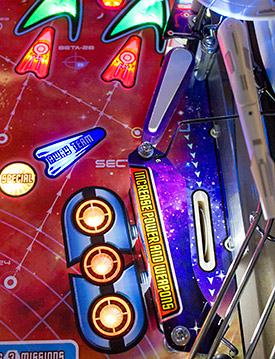
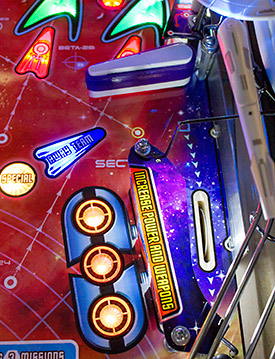
Naturally, these flashers are specific to the Limited Edition and Premium versions of Star Trek, as is the expansion board to drive them. Another LE-specific feature can be found attached to the game's cabinet. Laser-cut side rails have become something of a Steve Ritchie trademark of late, starting with Spider-Man and continuing with AC/DC and now Star Trek. This is the first time they have been illuminated though.
Both the Enterprise and the photon torpedo cut-outs are back lit with LEDs. The blue Enterprise ones are static and permanently on, while the red photon torpedo LEDs run in a chase sequence so the ship appears to be firing. These red LEDs are also replicated inside the cabinet, so the player gets to see the effect too.
Of course, having LEDs embedded into the cabinet walls means they need a source of power, so cabling needs to be run and Stern have done a good job of keeping it hidden.
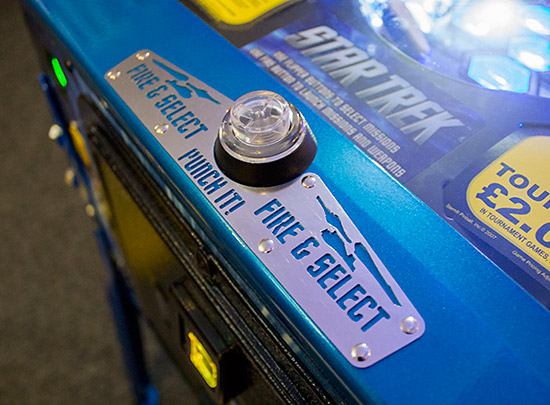
This also means the 799 Star Trek LE machines use a bespoke cabinet design to go along with the custom LE artwork, should it ever need replacing due to damage. To go along with the blue illuminated side rails we have a blue lock bar which, like AC/DC, features an illuminated fire button.
The button is used to select modes and fire photon torpedoes at the Vengeance during gameplay, and is common to all versions of Star Trek.
The button works just like a flipper button, pressing down on a leaf switch which is mounted inside the front molding.
Adjacent to the leaf switch is a small circuit board on which a red LED is mounted to provide a small amount of illumination to the fire button's clear body. Another high power flasher LED would work well here to draw attention to the fire button's availability. There is a warning label attached to the front molding advising about the use of a laser device. We'll come to what that's all about a little later. We've now looked at everything outside the game, so it's time to remove the glass and find out what the team at Stern has given us to play with.
As is customary, we'll begin at the flippers and then work clockwise around the playfield, exploring all the game's features as we go. Star Trek uses LED lighting throughout, and the result is a much brighter playfield with far more options to change the mood and indicate shots to the player. Clear inserts are the norm here, with the colour determined by the RGB LEDs beneath. So expect to see a wide variety of colours used during this review, and be aware they don't necessarily represent the colours the inserts appear during regular gameplay. So then, the flippers. Star Trek has three flippers - two lower one is the usual place and an upper one on the right side in about the same place as Getaway, Rollergames and Spider-Man.
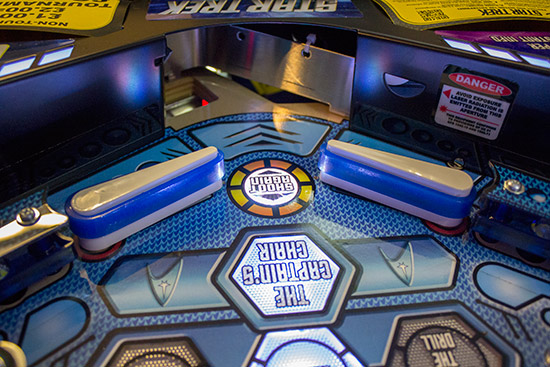
The game is shipped with black flipper rubbers fitted to the white bats, but our review machine had replacement blue urethane Super-Bands installed instead. The flippers have good definition against the darker Starfleet emblem-patterned background, with control panel shapes framing them nicely and the Shoot Again insert positioned centrally. There is no centre post or other ball saving device between the flippers, just a regular path back into the trough.
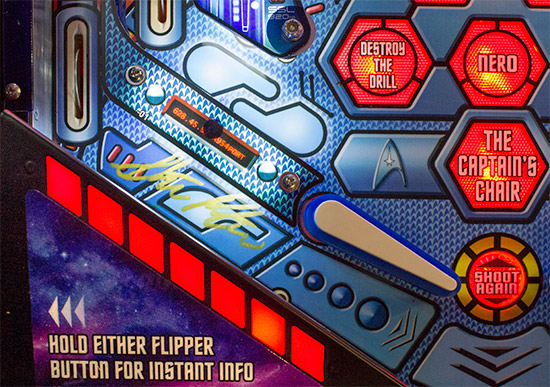
Being the LE model means we get a metal bottom arch covering the ball trough, and a warning label next to a semi-circular cutout. We'll discover what that's all about shortly. The Premium models also have this, but the Pro models have a much flimsier plastic ball arch and neither the warning nor the cutout. Another 'benefit' of buying the LE is receiving a signature on the playfield below the layer of clearcoat. On Star Trek, Steve Ritchie has signed his name in the left outlane.
The inlane ball guide plastic blends in with the playfield art to give a flatter appearance than it is in reality. The artwork includes the text 628.45.92-A954PORT which doesn't mean a thing to us except the 'PORT' part, but presumably it does to someone. Incidentally, the right ball guide reads 992.61.72-D114STBD for starboard, so send us your conspiracy theory about what it all means. Nestling at the bottom of the left outlane, underneath the apron, is a kickback assembly which is triggered by the rollover switch just above.
This is available when the Rescue insert is lit, and kicks the ball up the playfield to the upper flipper. It is not fitted to the Pro model, just the LE and Premium.
The game has a single inlane and a single outlane on each side, each with a letter to spell out T-R-E-K.
The left inlane is where the left ramp's wireform ends, dropping the ball just above the rollover switch for a clean feed to the left flipper.
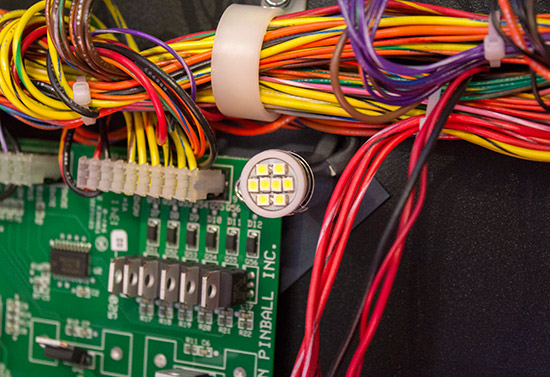
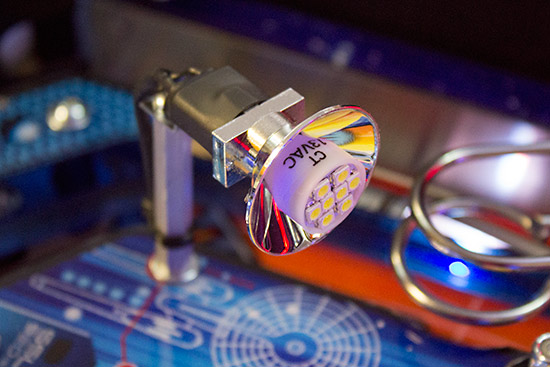
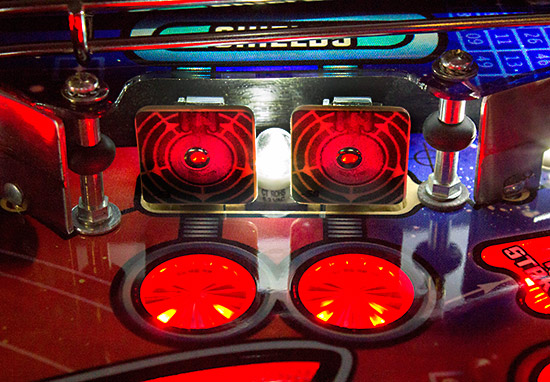
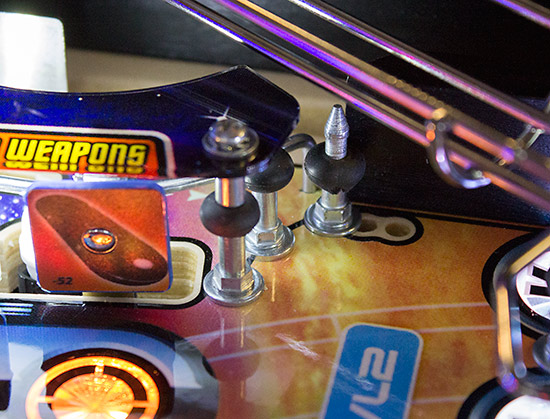
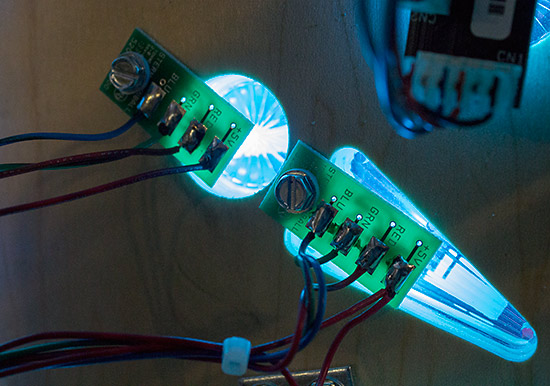
To the right of the inlane is the left slingshot which has a minimalist design of just a single storey, housing two white bayonet-style LEDs, two leaf switches and a kicker arm, all finished off with a solitary spot lamp.
Normally the spot lamp is there to provide extra illumination in the central area of the playfield, but in this case the silver spot lamp is a purely decorative surround for another 8-element white flasher LED, just like those in the backbox.
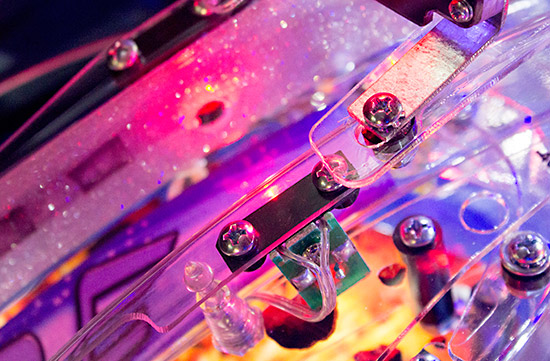
The wireform at the end of the left ramp is bolted to the top of the slingshot using pretty standard hardware, but there is also a novel use of a P-clip to, presumably, avoid a potential ball trap.
Because it features a kickback mechanism and a directional outer flat rail, the width of the left outlane is not user-adjustable.
Just above the left outlane are two 'Shields' standup targets which together relight the Rescue insert and so enable the kickback.
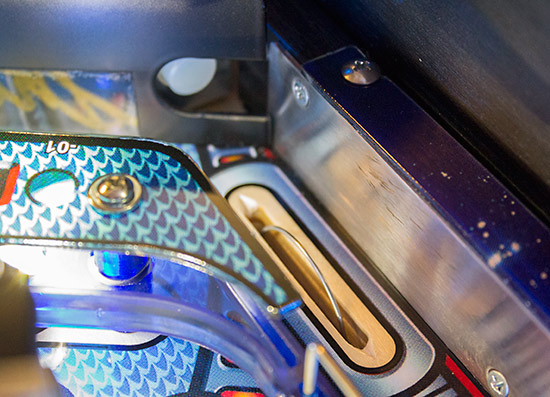
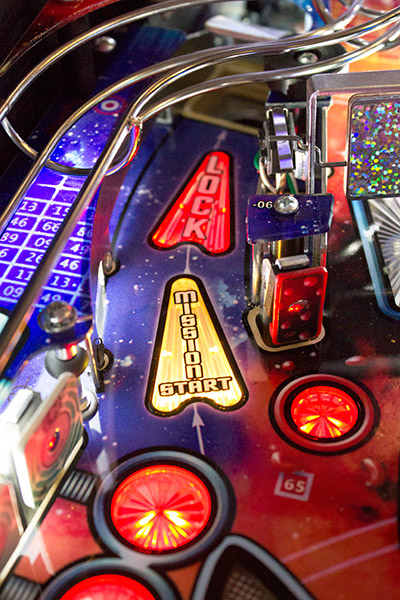
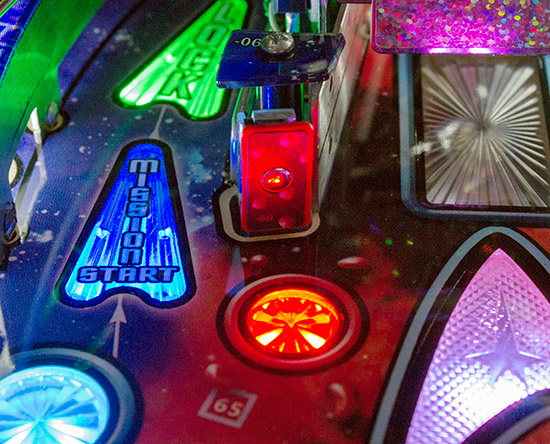
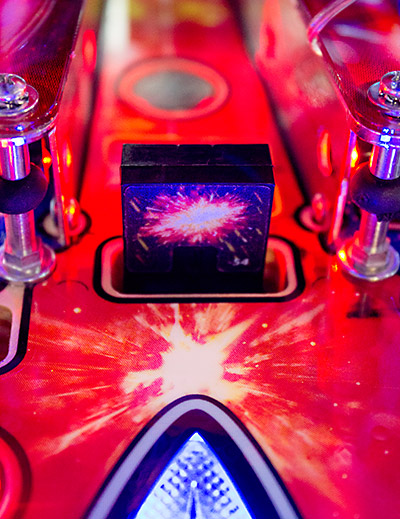
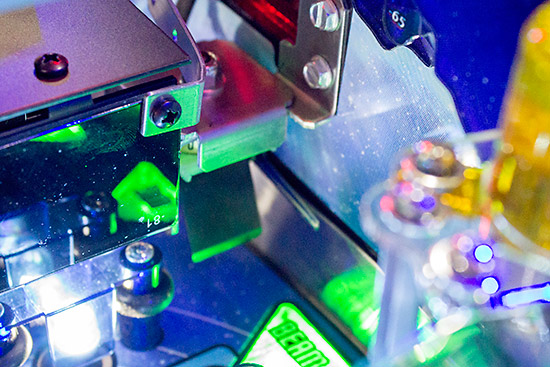
As usual, each target has an insert in front which lights up when the target is hit, and lighting both extinguishes them so you can do it again. A little further up the playfield we find the game's first major shot - the eject hole.
The eject hole is used for virtual locks when building towards Klingon Multiball, and also starts modes when the Mission Start insert is lit. The eject mechanism is an unusual one, and one whose operation changed from the initial design and promotional material which promised a "2-way Deflector ball eject/VUK with wireform tube". This was intended to kick the ball up onto the side ramp and round to the upper flipper, but apparently proved too unreliable. However, the 2-way nature of the eject remains thanks to a rotating ball deflector. In its normal position, a ball is ejected out the front just like any regular saucer.
If the deflector is activated though, it rotates clockwise by 90 degrees to move out of the way, turning the eject into a vertical up-kicker (VUK).
The ball is then kicked upwards and around a 'web-slinger' ball guide - just like the one at Hobbiton in The Lord of the Rings - which deposits it on the left ramp's wireform for a quick trip down to the left inlane. A black rubber pad beneath the wireform helps absorb the ball's energy as it lands.
It's a shame the original design didn't work, since there's now not much to choose between the two exit methods, with both returning the ball to the left flipper. Anyway, on the right side of the eject hole lane is the first of six red rectangular 'Matter' standup targets.
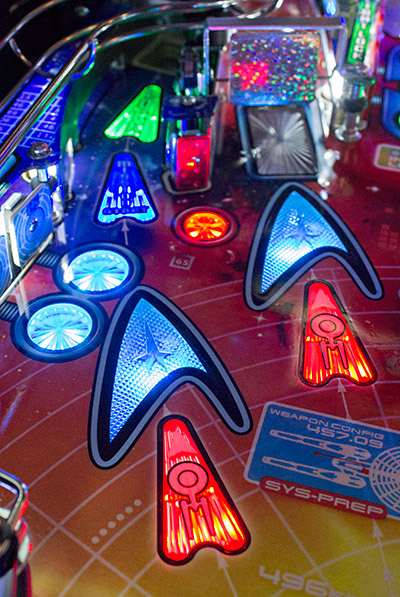
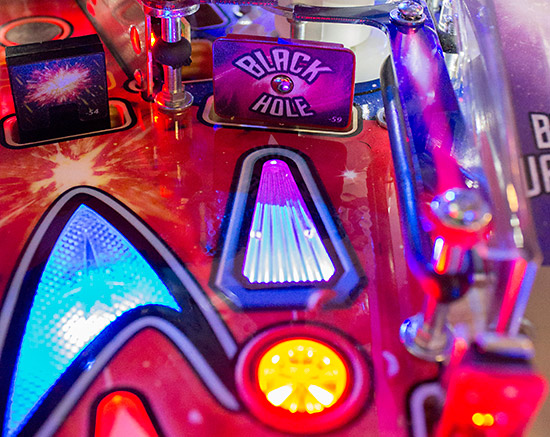
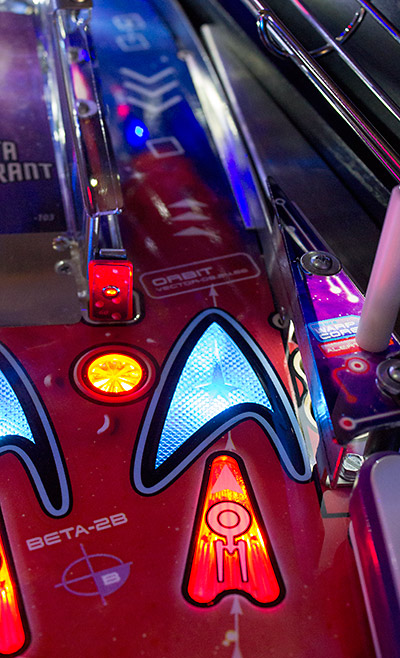
These are the targets you accidentally hit when you're trying for one of the major shots, but they are useful in their own right too as they light the Black Hole standup for random and helper awards. And so on to our next major shot, and we come to the left orbit lane. Like the eject hole, the left orbit is identified as a major shot by a Starfleet emblem-shaped insert and an arrowhead Enterprise one.
The emblem inserts are used to indicate the required shots during the current mode, while the Enterprise ones show when a shot is available for a combo, is a super skill shot, or has a scoring multiplier running. Mounted over the entrance to the left orbit is the games only spinner.
Unlike the vast majority of spinners on modern Stern games, this one doesn't feature different images on each side which are supposed to look like they are animating flip-book style (but don't). For a change, Star Trek uses a holographic pattern which works in conjunction with a bright white flasher LED under a clear rectangular insert to produce a very effective high-intensity flash with each spin.
Other than the flasher, the orbit lane is pretty conventional, feeding round to the right orbit lane unless a controlled gate at the top of the game stops the ball.
Whether this controlled gate allows the ball to pass beneath it or blocks the ball depends on which modes or features are currently running. The switch to sense a successful shot to the left orbit lane is only part way up, meaning the ball doesn't have to travel all the way to the top to register, although the right orbit switch also needs to be triggered to record a full orbit for combo purposes.
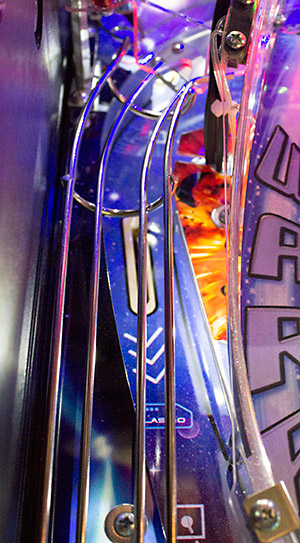
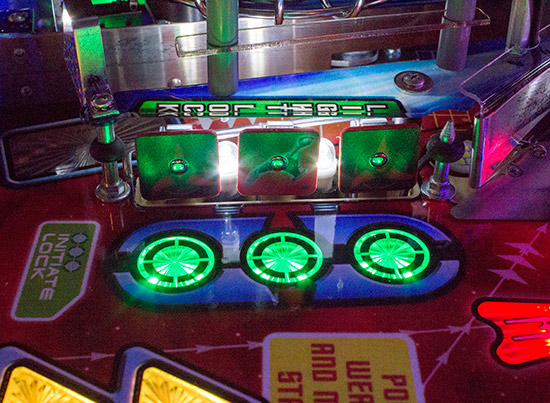
Running along the outer edge of the left orbit are three more standup targets which are usually lit green by the LEDs under their corresponding inserts.
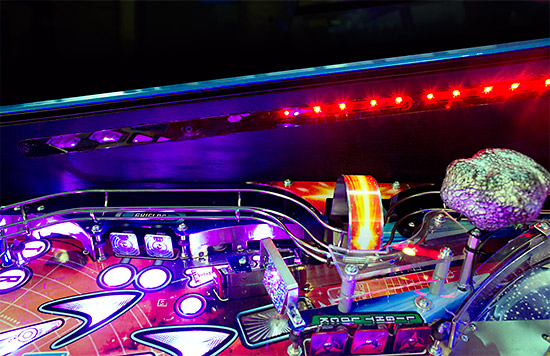
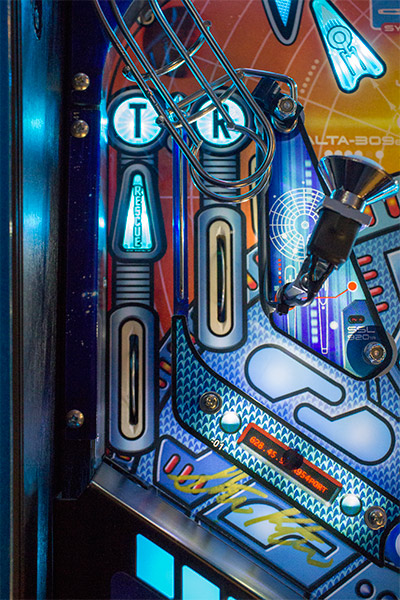
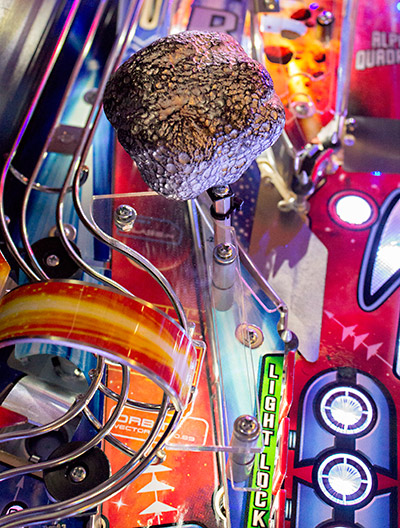
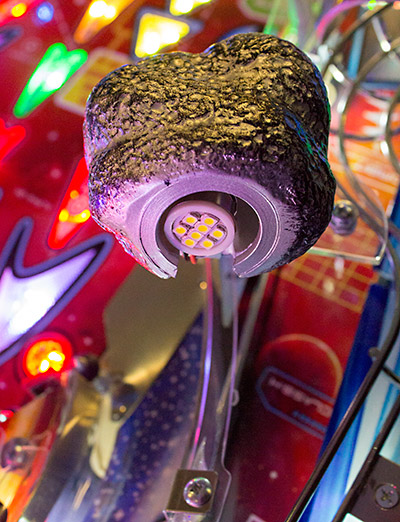
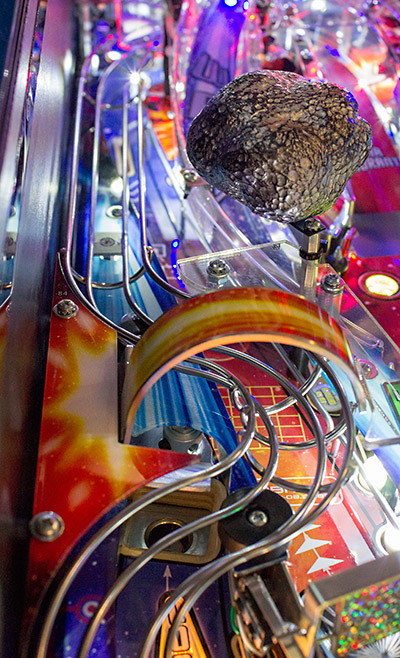
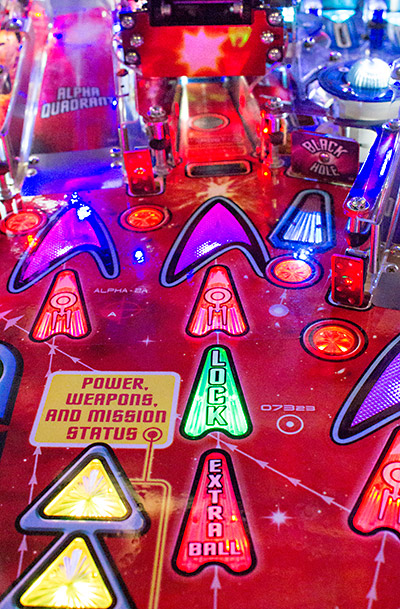
These targets are used to light locks for Klingon Multiball, with all three needed to light each lock on default settings. Because they run vertically up the playfield, they cannot be hit directly from the left flipper. The right flipper can certainly hit them - although precision is much harder - but they are really designed to be shot from the game's upper flipper, which they face. Elevated ominously above the Lock targets is one of the game's two asteroids.
These are absent on the Pro but fitted to the Premium and LE models. They look better than suggested by the initial photographs which led to comparrisons with baked potatoes wrapped in foil, complete with a sour cream and chive topping. Some people thought the asteroids were motorised and would turn, but their main purpose of housing additional flasher LEDs ruled that out.
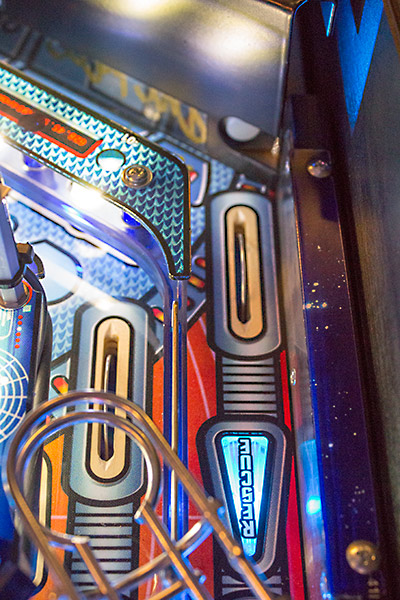
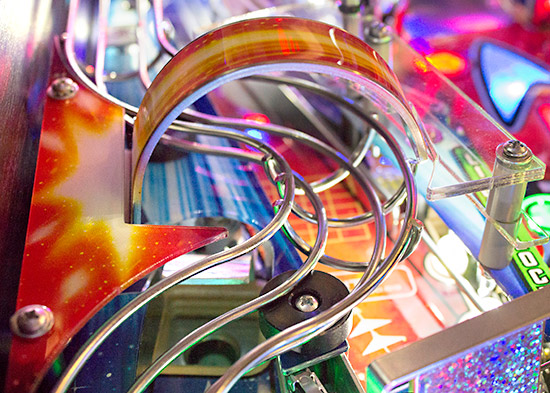
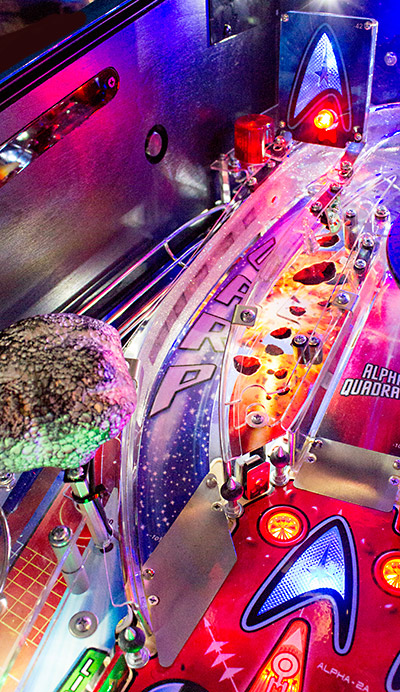
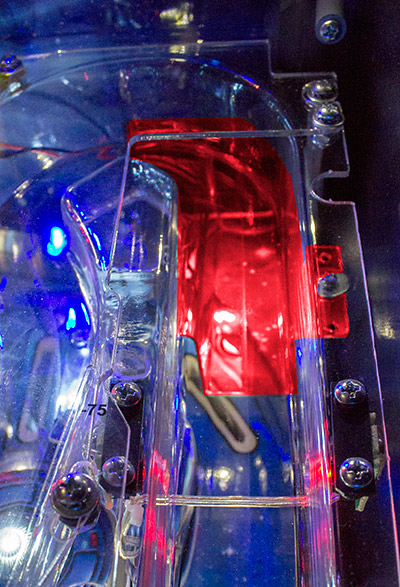
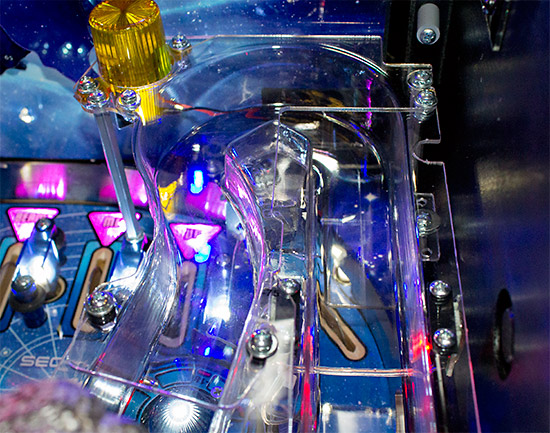
If you've been keeping count, you'll know that we've reached a total of nine LED flashers so far, and we're not finished yet. A little further up the playfield from the Lock targets sits the first of Star Trek's three ramps - the Warp ramp.
This is the more unusual of the three as it combines the upper-level looping of No Fear with the main playfield level inner orbit from Getaway. Although the ramp shot from the upper flipper takes the ball above the playfield, by the time it has returned the flipper for a repeat shot at the ramp, the ball is back at the main playfield level. The ramp has a large 'WARP' decal attached to the bottom surface, and a holographic-patterned decal covering much of the left wall. These combine to make the ramp stand out as a discrete shot much more than a clear ramp would.
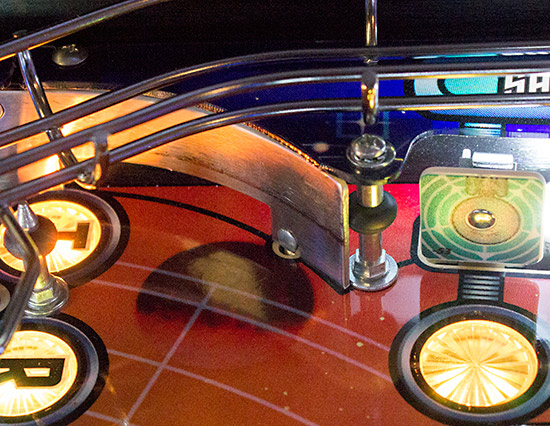
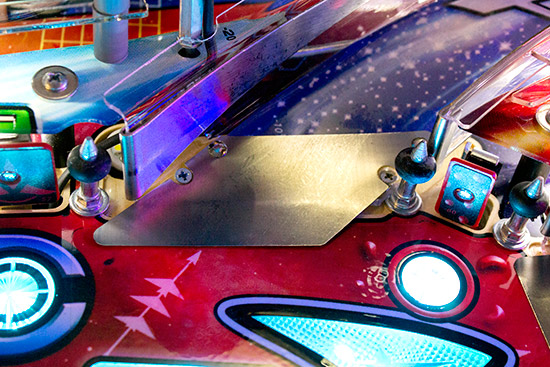
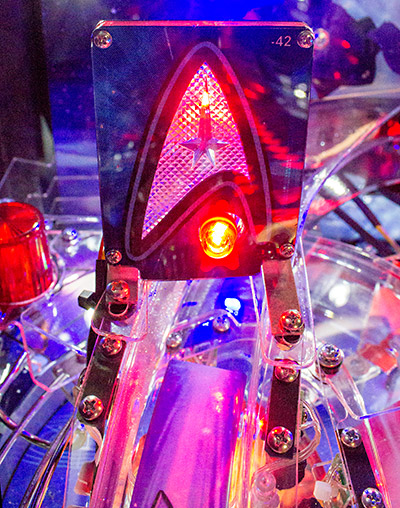
Metals posts fitted with black rubber rings guard the Warp ramp's entrance and they certainly receive a battering. The ramp is easily missed and these posts take the brunt of those failures. The plastic ramp is also protected by elongated steel side pieces, although the left one in particular has its work cut out having to deal with multiple fast and wayward shots from the upper flipper. Sitting over the Warp ramp is another Starfleet emblem, this time on a rectangular mirrored plastic with added backlighting.
This is more than just a decoration. The emblem equates to an emblem insert on the playfield, having the same RGB lighting and making the Warp ramp another of the game's major shots, while the red LED at the bottom is the ramp's Enterprise arrowhead insert.
A completed shot to the Warp ramp is detected by a pair of optos near the top of the incline.
Once the ball passes under the emblem sign, it continues along the ramp and disappears briefly behind the back panel before re-emerging and dropping off the ramp into the right orbit lane.
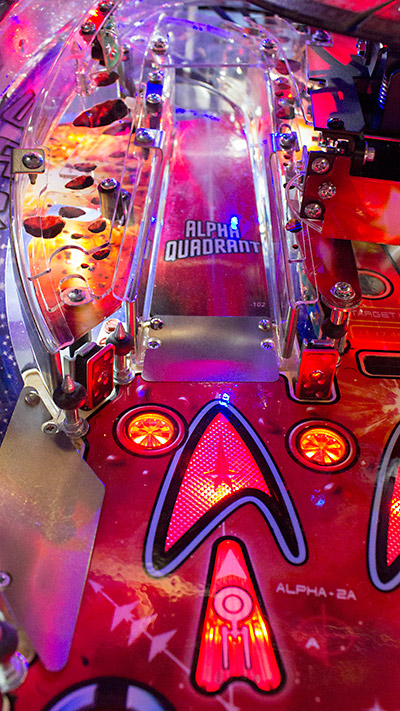
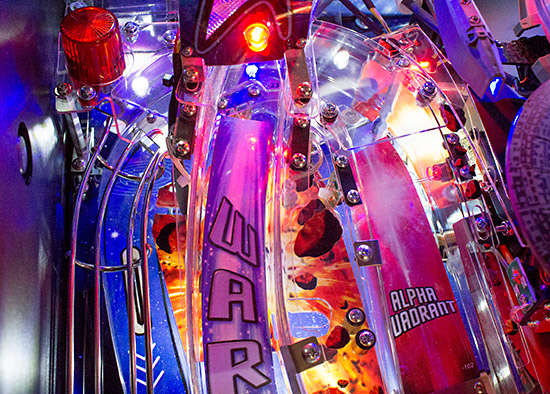
As the ball rolls off the end of the Warp ramp it enters the right orbit lane and feeds the upper flipper, albeit at some speed, for a repeat shot at the Warp ramp. Moving on to the next major shot, we come to the left ramp, the entrance to which features the next two rectangular Matter standups.
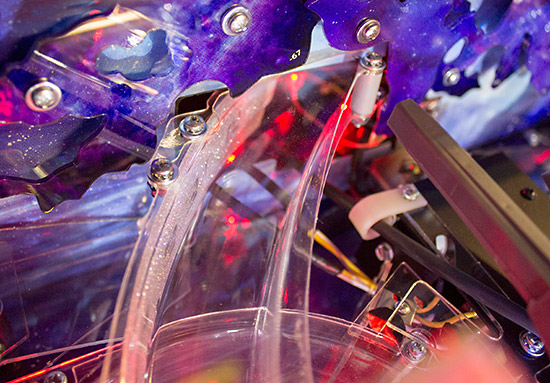
The ramp has an initial incline but quickly levels out where the Alpha Quadrant decal ends, before it heads into a near-180 degree hairpin bend passing under the Warp ramp.
This makes the ramp appear to behave rather strangely - almost defying gravity as the ball continues up the ramp seemingly without any momentum. An opto sensor near the top of the incline registers the ball entering the ramp, and another at the top of the curve tells the game the shot was successful.
From here, the clear plastic gives way to a steel wireform, which runs down the left side of the playfield, gives a little wiggle as it passes the eject saucer, and ends at the left inlane.
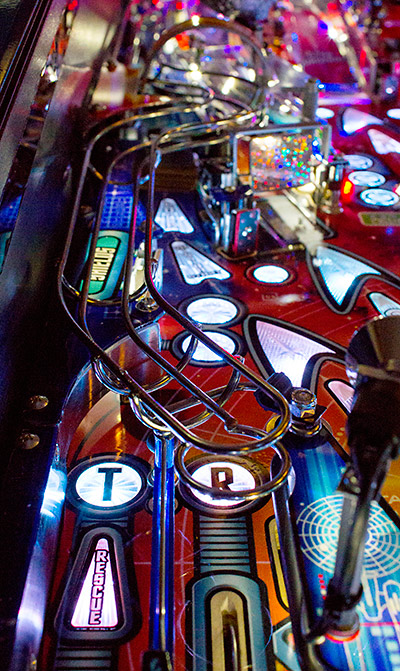
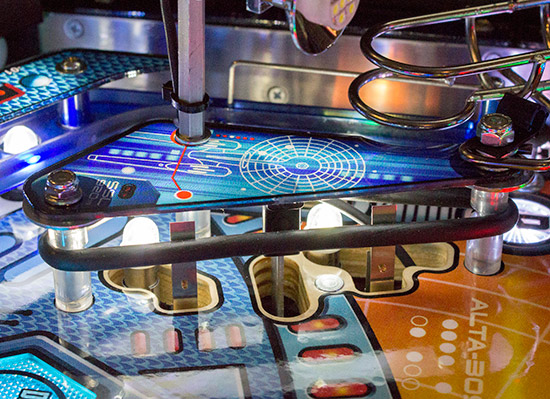
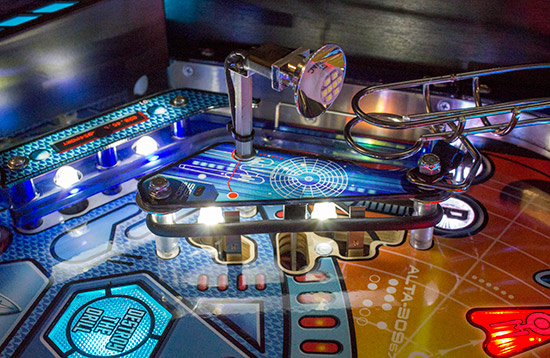
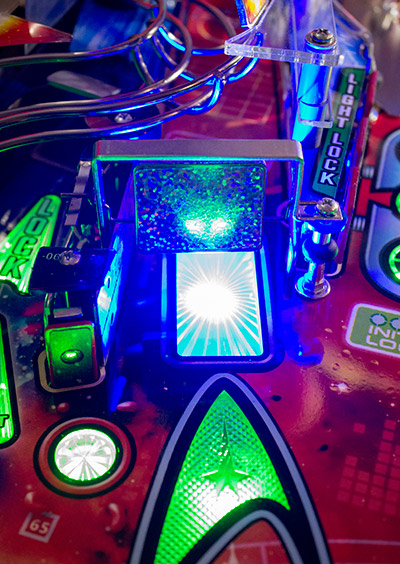
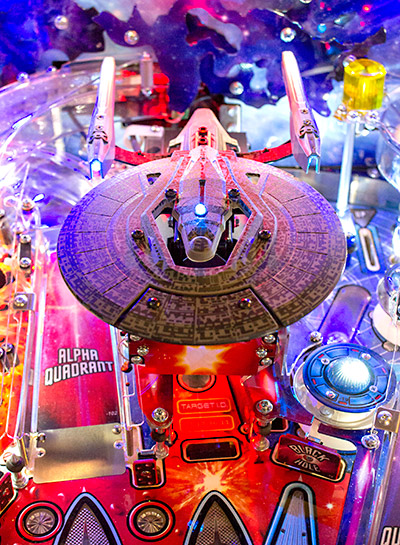
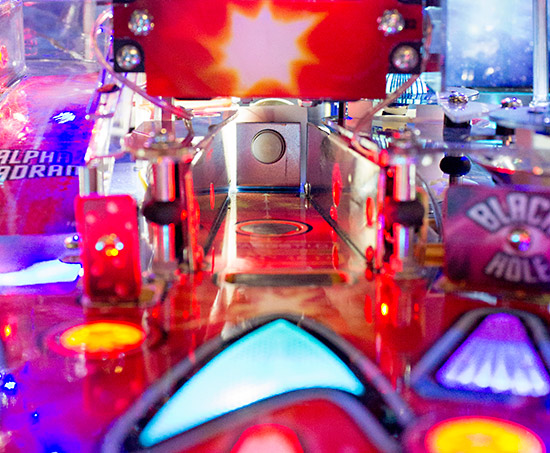
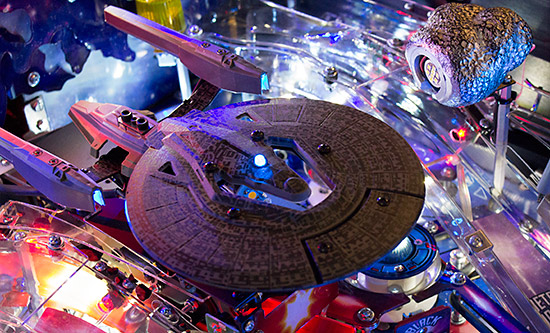
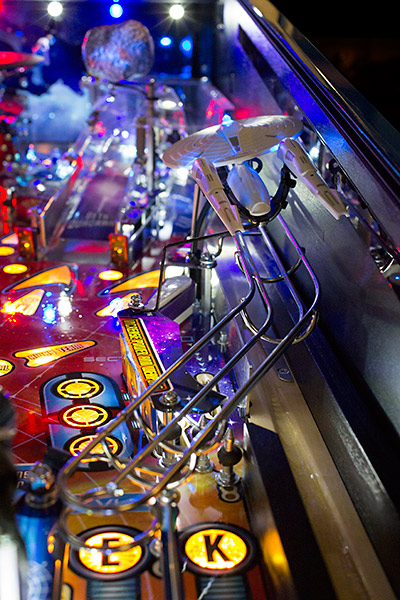
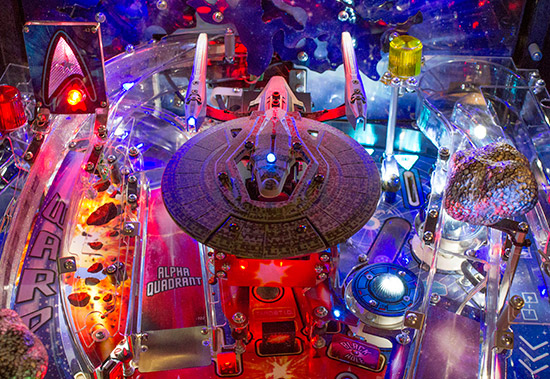
As the ball reaches the left flipper it can be shot backhand up the left ramp again, just like the Rock 'n Roll Train ramp in AC/DC. Next, we come to the main toy in Star Trek - the USS Vengeance.
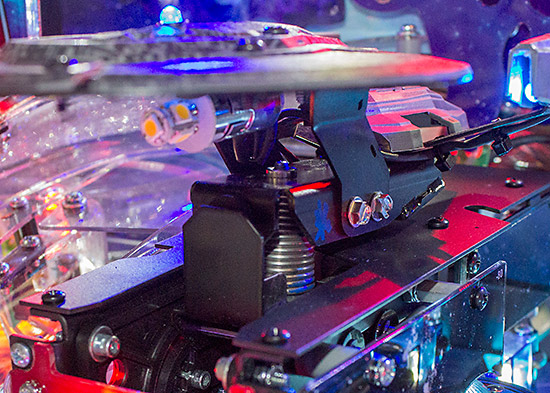
This next major shot consists of two parts - the ship itself, which lights up thanks to LEDs in the warp drives and above the bridge and has some degree of animation, and the mechanisms in the centre lane below which interact with the ball. In all three versions of the game, the ship shakes and rocks as the targets below are hit by the ball or a photon torpedo is fired by the player. The USS Vengeance model is mounted on a large base which includes another flasher LED and a shaker solenoid. When fired, this solenoid hits the ship's mounting which sits on a spring, allowing it to wobble.
On the Pro that's as far as it goes, but on the Premium and LE models the ship can also pivot so it appears to 'crash' into the playfield.
In truth, the crash effect is less impressive than it originally appeared in the promotional material. The ship never tilts forward enough for the ball to hit it, so it remains purely decorative. It also sits on top of a pretty large and hefty mechanism, although this should at least provide some solidity to the device.
So the best action takes place in the lane below the ship.
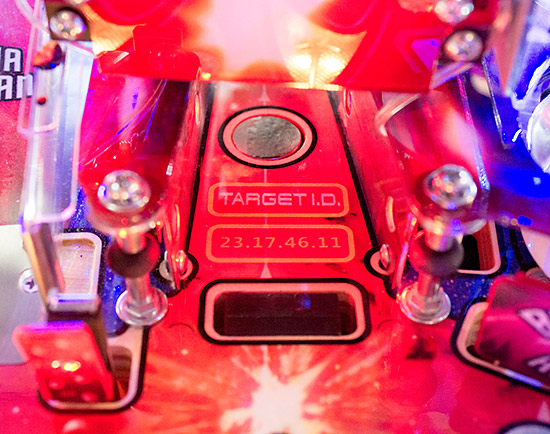
The top two inserts show this is another major shot and can be multiplied in value, while the lower two are self-explanatory. They all point at the Vengeance lane which contains three devices - a drop target, a magnet and a kicker solenoid.
The game's sole drop target lives here and it is used to both block the ball's entry into the lane, and trap the ball within it. The drop target is fully controllable thanks to the two solenoids below which allow it to be both raised and dropped by the game. When the target has been hit enough times it stays down, and the other features are available.
Behind the drop target is a magnet which can grab the ball - after which the drop target is reset - and then release it so it locks behind the now raised drop target. The final feature in the Vengeance lane is the kicker solenoid located at the far end.
Like the Raptor kicker in Jurassic Park or War Machine in Iron Man, this rapidly fires the ball back at the player when the magnet and drop target are not working together to lock it. There are two opto beams in the Vengeance lane. The first sits just behind the drop target and is used to confirm a locked ball has settled comfortably. A second opto beam runs across the magnet's exposed core to both confirm the ball has been grabbed, and to activate the kicker when the magnet is not stopping it. Two metal posts on either side of the Vengeance lane feature the same small black rubber rings as the two protecting the side ramp. These take a lot of hits and appear to wear and split fairly rapidly, so owners by want to try something a little more substantial such as a post sleeve instead. Tucked in to the right of the Vengeance lane is our next shot, which is neither black, nor a hole.
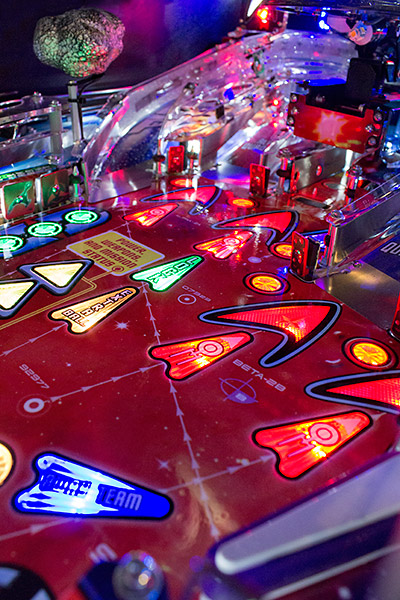
However this black hole is one you'll want to head towards, because whereas a real Black Hole draws in everything and reduces it to a single point, this one gives out things, including lots of points. To get them, you'll need to hit all six standup targets with a small orange-lit round insert in front, of which the Black Hole target is one. We've previously encountered three of these 'Matter' targets on the left side of the playfield and the final two stand either side of the right ramp. When all six have been hit and their inserts lit, the triangular insert in front of the Black Hole target lights up to indicate a semi-random mystery award is available. This is most useful in multiball where it will normally add a ball to the melee the first time the award is collected. Unlike Metallica (at the time of writing) this does have a decent range of awards including points, bonus multiplier increases and holds, and extra balls. So those standup targets really can 'Matter' (sorry!). Continuing around the playfield, the right ramp is our next feature and the next major shot.
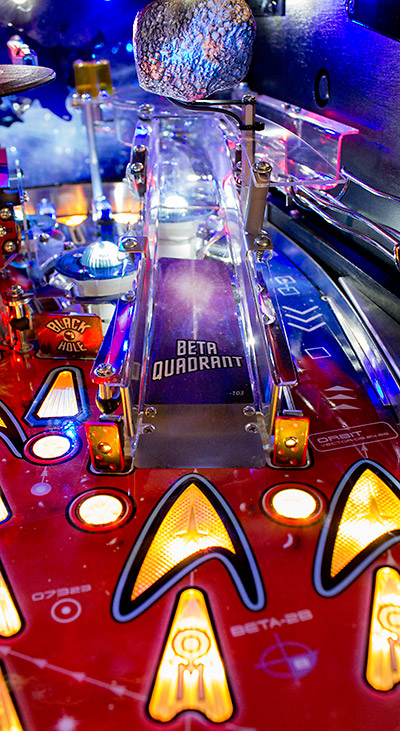
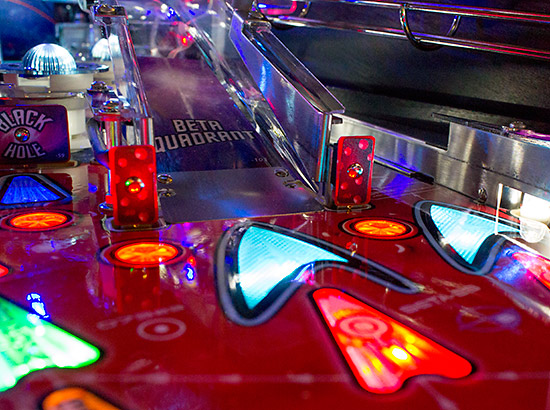
The usual two inserts point the way up the ramp which mirrors the left ramp by featuring an initial incline followed by a 180-degree turn and a wireform which ends at the inlane. While the left ramp is the Alpha Quadrant, this is the Beta Quadrant, harking back to Star Trek - The Next Generation where the left and right ramps were similarly named. Those final two Matter targets guard the entrance to the ramp to pick up any wayward shots and send them straight back to you.
Poised precariously above the ramp is the second asteroid which also serves to hide an LED flasher directed at the USS Vengeance.
As we saw before, the hairpin bend at the top of the right ramp is also the point where the Warp ramp re-emerges from behind the backboard.
Overall, Stern have been careful to hide the wiring as much as possible by encasing it in black heat-shrink tubing and using clear plastic on opto cables so they blend it with the clear ramps. This has to be commended, but one or two examples slip through the net - such as the flasher above - which are notable because so little else is. The right ramp's incline has a tendency to launch fast balls off the ramp, so the whole top area is covered with clear plastic which will make cleaning the ramp a little trickier. Two pairs of optos sense the ball's travels up the ramp. One pair is at the top of the initial incline, with the second pair visible in the pictures above and below, just before the plastic ramp turns into a metal wireform.
The right ramp continues straight down the right side of the playfield, before turning left to feed the right inlane.
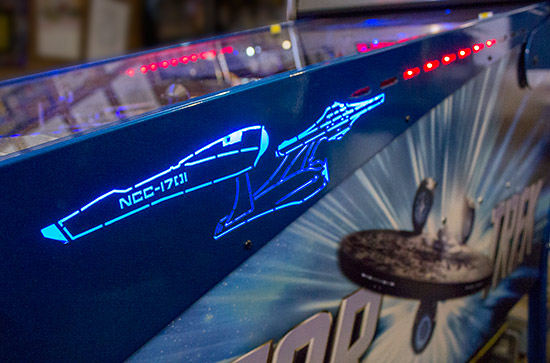
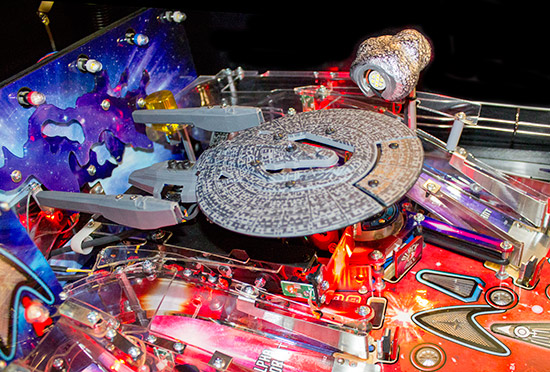
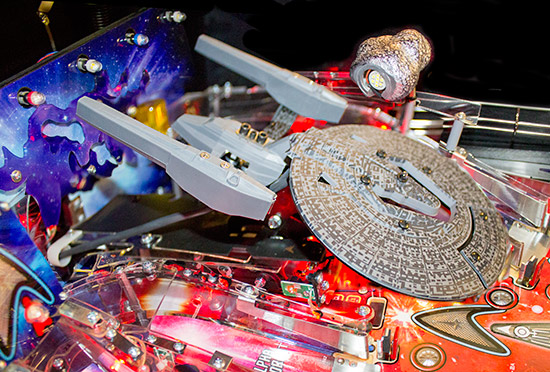
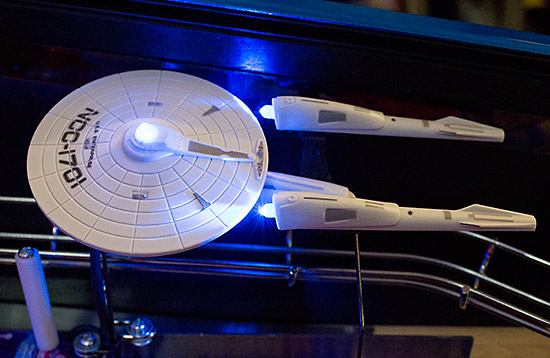
Just before the bend, the wireform passes under a small inanimate model of the USS Enterprise. Although this is the Enterprise Limited Collector's Edition, the Vengeance is the star of the show. However, the Enterprise does put in this appearance and has just as many on-board LEDs as its foe.
To the right of the right ramp is the right orbit lane, which unsurprisingly is the opposite end of the left orbit lane.
Equally unsurprisingly, it is the sixth and final major shot in the game, and it leads up to the top of the playfield. There is a reasonably long lead-in flat rail to guide the ball into the lane, making it an easier shot than it could otherwise be. When the ball is shot up the right orbit and reaches the top of the playfield, it may be allowed to flow into the left orbit lane and back to the flippers, or a second controlled gate behind the Vengeance mechanism could intervene to stop it.
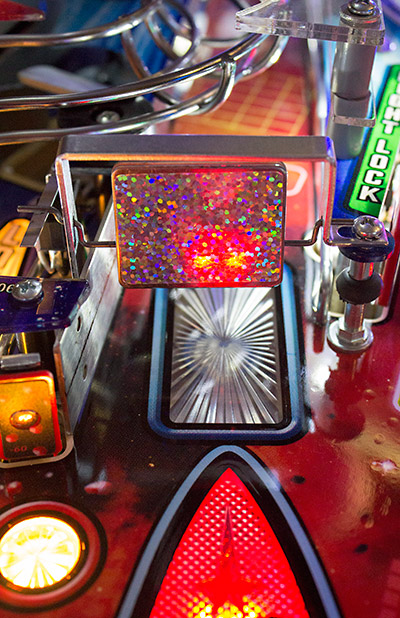
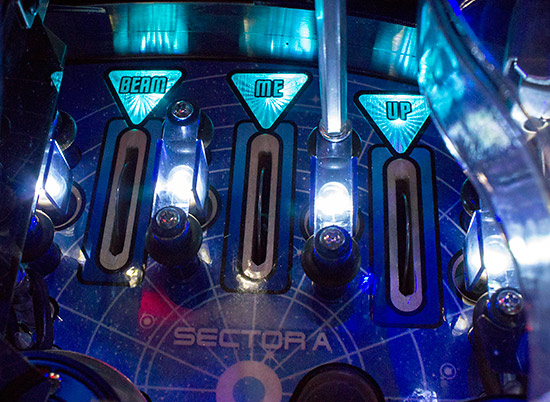
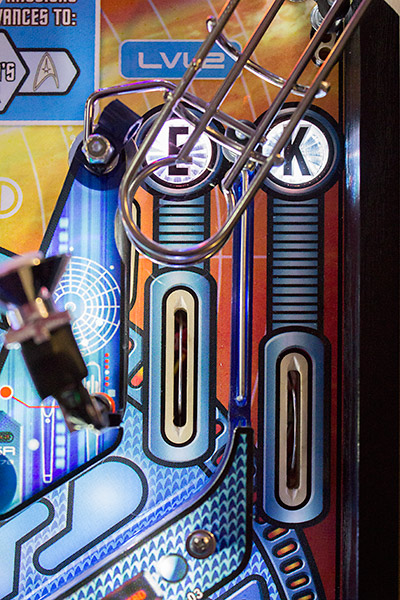
If the ball is stopped, it drops through one of three rollover lanes, each marked with one word from BEAM-ME-UP.
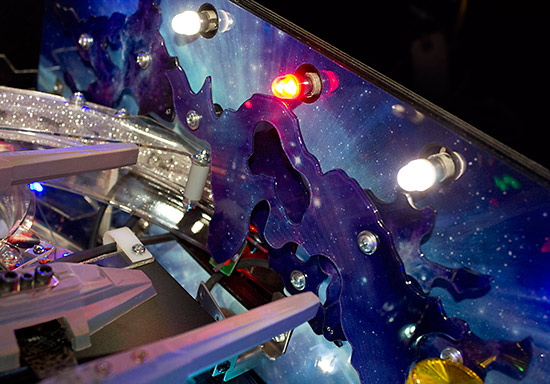
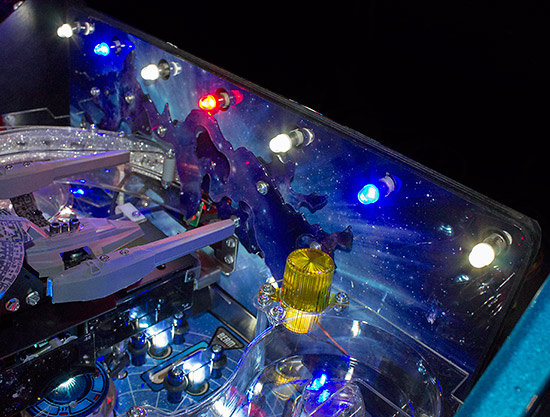
These three multi-colour inserts are independent of the inlane/outlanes, so only need three switch activations to complete. The lanes are brightly illuminated by four white LEDs inside the blue lane guides. Above the top rollover lanes is the game's back panel which features a space pattern with a dual-layer plastic which looks a little like a Dikironium cloud.
The game uses seven LEDs to illuminate the back of the game - four white, two blue and one red. Like most of the general illumination, these are fixed colour and not controllable other than to be either on or off.
With the large Vengeance ship dominating the area, it's difficult to see the left hand 'Beam' rollover lane. New players may not even realise there is a third lane up there, but it's usually not too much of a problem, because there's no flashing lane skill shot in this version of software anyway.
Once the ball has rolled through the top lanes, it enters the pop bumpers area which is both very active and at the same time quite traditional in design.
There is just one exit at the bottom right which feeds the ball into the right orbit lane. The hot dog-shaped clear insert suggest the game was designed either for three incandescent flash lamps - as we usually find on Steve's designs - or for more than the single LED flasher fitted. The one LED does a decent job, but two or more would transform the pop bumpers area and would be an easy mod to add. As the ball rolls out of the pop bumpers and into the right orbit lane, it comes within range of the game's third flipper.
Again, this comes from the factory with black rubbers fitted and not the blue Super-Bands shown in this review. The main shots for the upper flipper are the three Lock standup targets and the Warp ramp, but it can also shoot the left ramp as well as several of the Matter targets and the Shields standups. Just be careful not to shoot the ball down the left outlane.
Like Steve's earlier game 24, Star Trek has an escape lane back into the shooter lane. In this case it is tucked away behind the upper flipper and is called the Away Team shot. Raising the flipper and shooting the ball behind the upper flipper is an easier shot than it may look, and is worthwhile to relight mode start at the eject hole and collect the special award when it is lit.
Another rollover switch senses a successful shot, before the ball returns to the shooter rod to be relaunched.
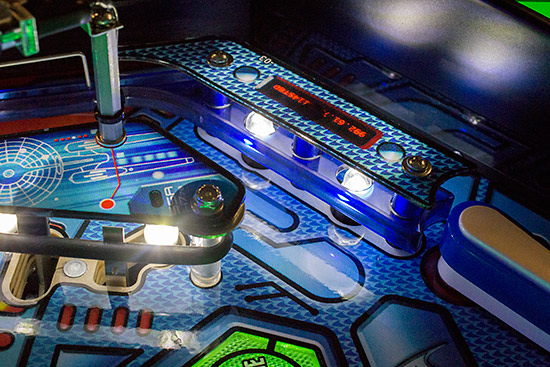
Forming the left wall of the Away Team lane is a three-bank of standup targets featuring decals of a phaser, some radioactive material, and a TV remote, because - you know - it can get quite boring up there in space. Or maybe it's a communicator.
As you'd expect, shooting one of the targets lights its corresponding insert and shooting all three completes them and resets the inserts. Completing these targets adds photon torpedoes you can fire with the lock bar button to attack the Vengeance, thereby reducing the number of shots you need to make on the drop target to start the next Vengeance mode. Below the target bank and Away Team lane are three posts which shape the top of the right outlane.
Unlike the left side, the width of the right outlane can be adjusted with a choice of three difficulty settings. The game ships with the post in the middle position, and has been adjusted here to make it harder. You'll find just one inlane and one outlane over on the right side. The switches in these light the last two inserts in T-R-E-K.
The artwork here, as with the rest of the playfield, consists of assorted geometric patterns and shapes which don't relate to anything in particular but seem appropriate enough for a Starship theme. And while not exactly pretty, the colour scheme does help create the right atmosphere for the game and keeps the playfield nice and bright, preventing the ball disappearing Into Darkness. Moving swiftly on, the right slingshot is also a mirror of it's left-side counterpart - a single level with a flasher spot light and another of those P-clips.
The right inlane ball guide is made of blue plastic to add a degree of colour to the light produced by the two white LEDs inside.
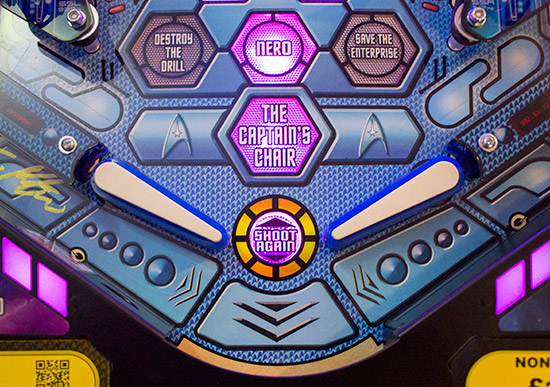
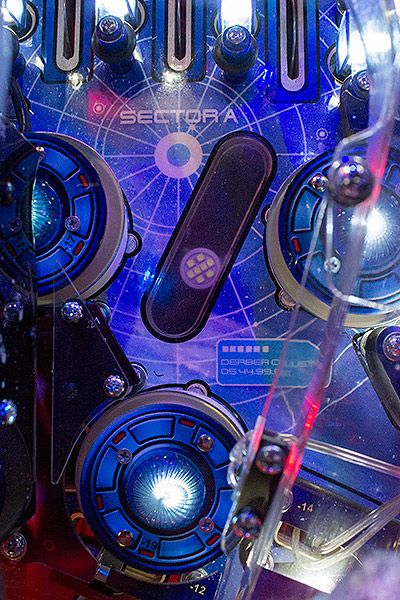
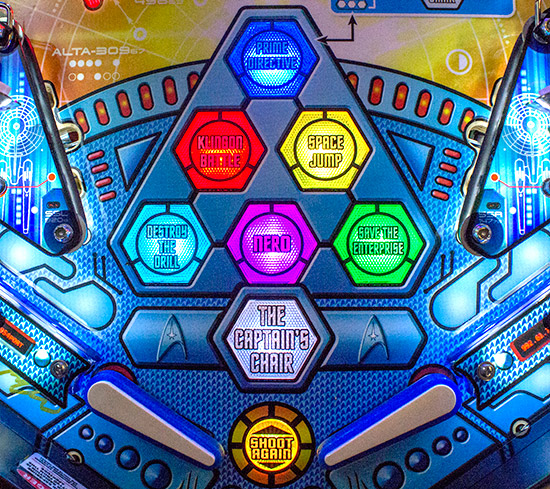
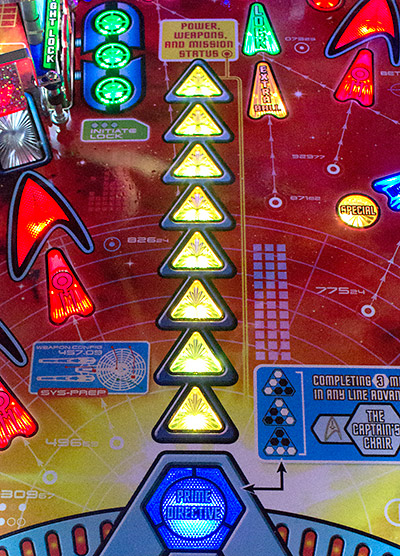
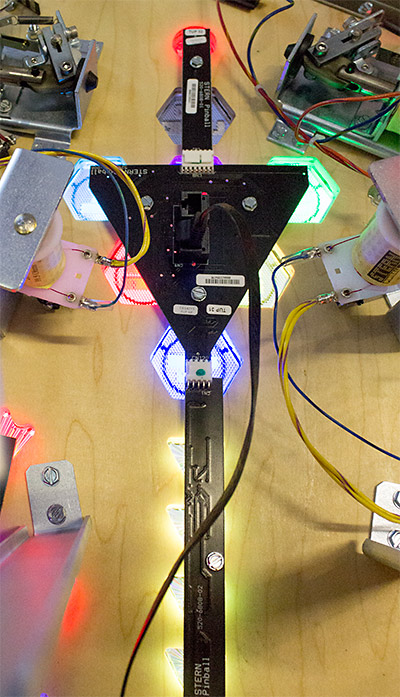
Which takes us back to the flippers. Above them we find our feature matrix which consists of six hexagonal inserts - each corresponding to a mode name - and one additional insert to indicate when one of the Captain's Chair mini-wizard modes is enabled.
Each of the six modes in the matrix actually consists of three separate and distinct levels, which means there is really a total of 18 modes. Starting a mode lights its insert, and there is a mini-wizard feature when you light three in a row. In addition, a mini-wizard mode is available once all six have been lit. Above the matrix is a stack of triangular inserts pointing at the USS Vengeance.
These are lit by the 3-bank of standups on the right of the playfield, and each one represents a weapon which can be fired at the Vengeance with the fire button on the lock bar. Meanwhile, over on the right is the shooter lane which, as we saw, is where the Away Team shot leads.
The ball shooter is a standard combined manual/auto mechanism as found on nearly all Stern games.
The shooter lane runs along the right side of the playfield, joining the right orbit lane just above the upper flipper to send the ball up to the top rollover lanes.
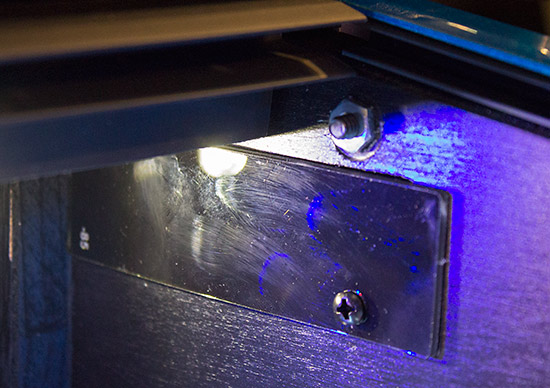
The only part of the playfield we haven't looked at yet is right down at the bottom behind the flippers - the bottom apron.
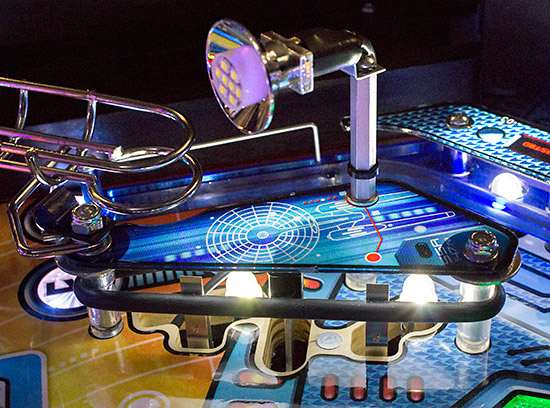
On the Premium and LE models this features two illuminated panels, and it also houses the assembly which produces a laser starfield effect over the playfield. To find out how they work, we'll have to remove the apron.
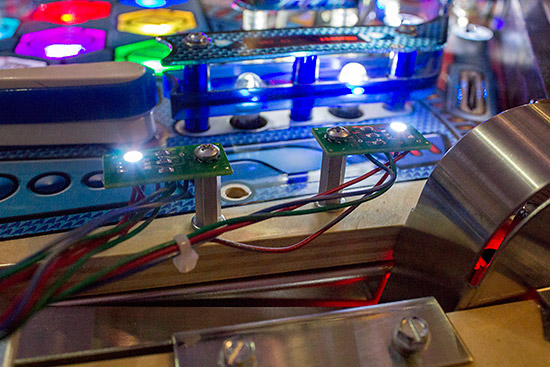
The apron is fixed to the playfield with two screws at the back, and two bolts at the front which pass through the playfield and are secured underneath. The two illuminated white panels are recessed and viewed through cutouts in the top surface. Two RGB LEDs on each side provide the lighting.
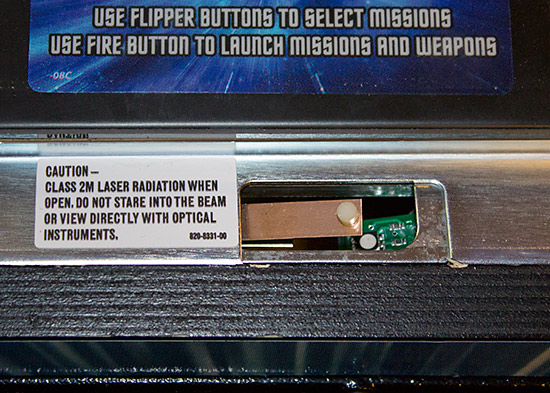
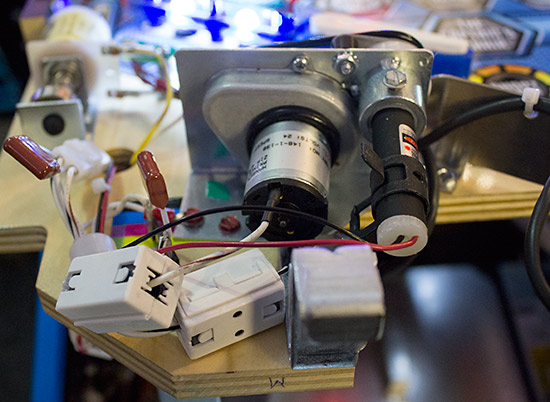
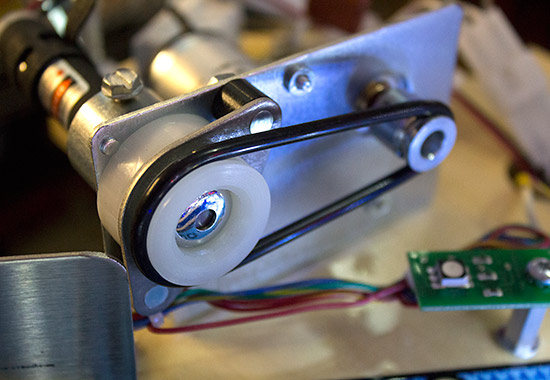
The most interesting device under the apron is the laser starfield generator and it sits on the left side.
It is made of two parts - on the right is a low power laser with a kaleidoscope lens fitted to the front, and on the left is a motor and gearbox which turns the laser's lens to rotate the pattern.
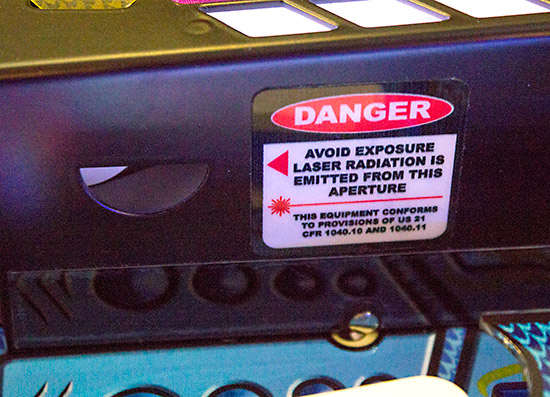
This laser pattern is then projected through the semi-circular cutout in the bottom apron we saw earlier. Unfortunately, the laser wasn't working correctly on our review model. When it does work the effect is a little underwhelming, although still quite fun.
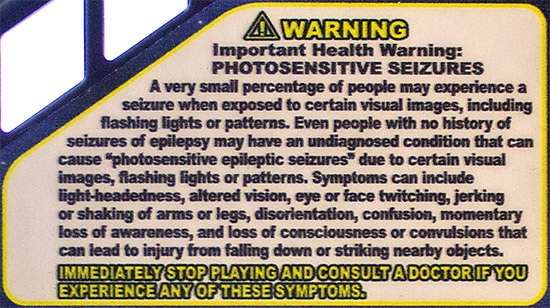
There is a warning label here for the laser and another under the lock bar. A third warning appears on the top surface of the apron warning about the bright and repetitive flashers used in the game.
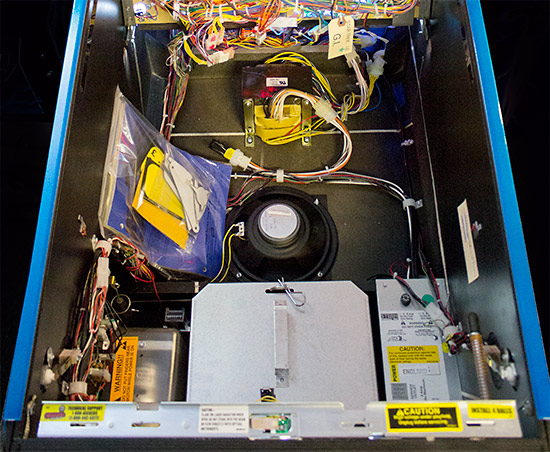
We've seen inside and outside the backbox, the outside of the cabinet and the top of the playfield, which means it's time to lift up the playfield to see what's inside. The regular cash box is joined by the speaker, transformer and line filter/fuse box
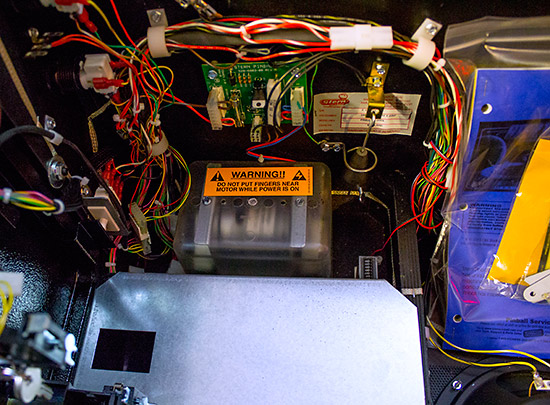
Just inside the coin door on the left is the shaker motor, which is unique to the Limited Edition but can be added to other versions of the game.
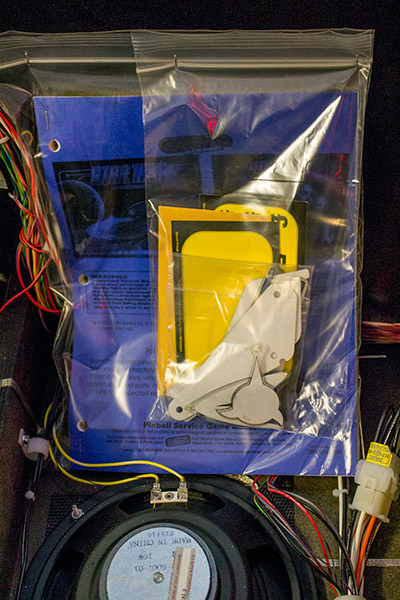
A full manual is included with the LE and Premium models. Pros get a much thinner version with just the bare essential details included.
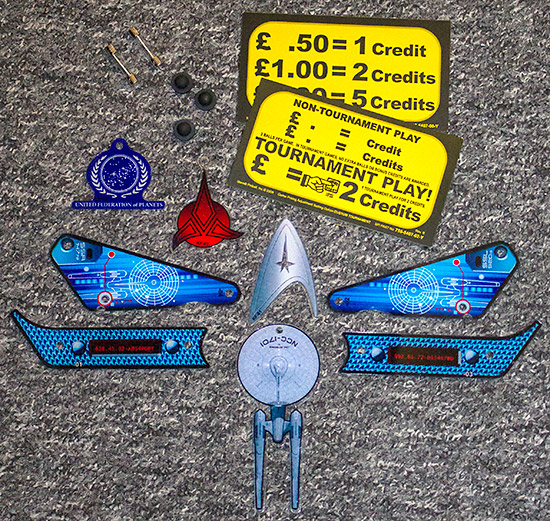
Along with the manual comes a goodie bag with replacement plastics, decals, pricing cards, key fobs and other common parts. This selection used to include spare lamps, but with LEDs throughout which are expected to last much longer than lamps, no spares for these are included.
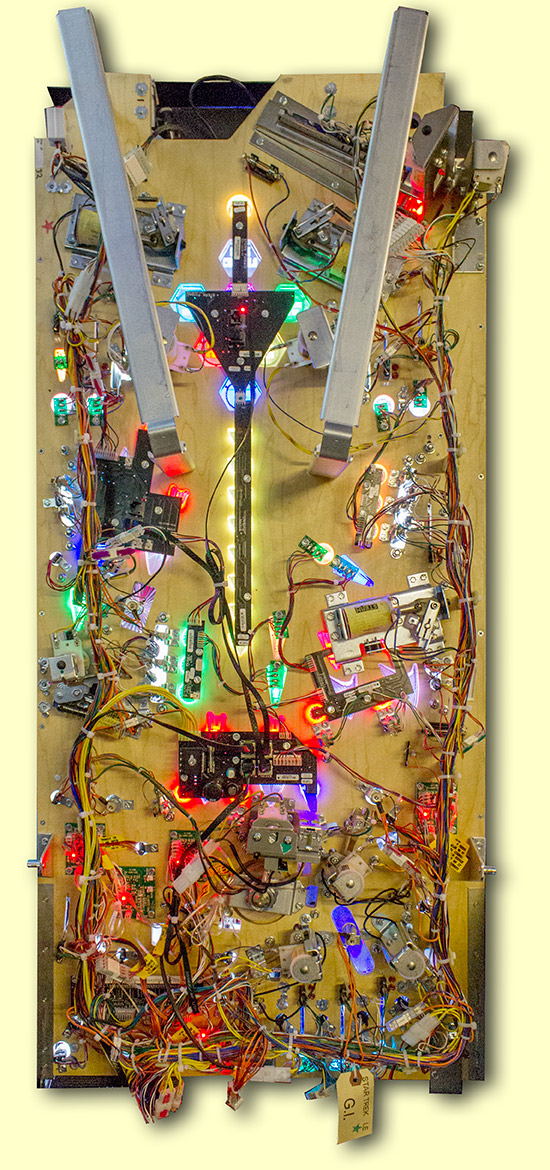
Next, let's have a look at how the game is put together by examining the bottom of the playfield.
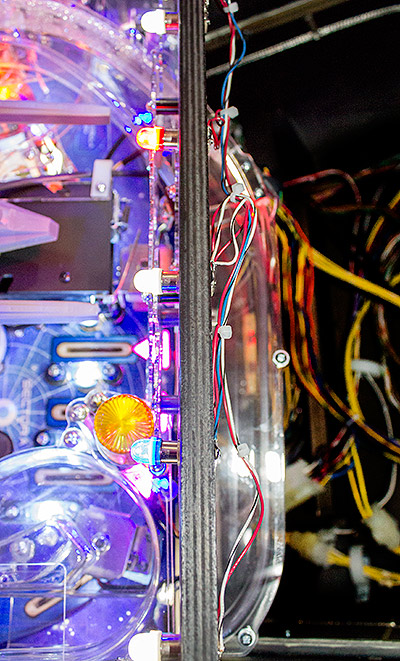
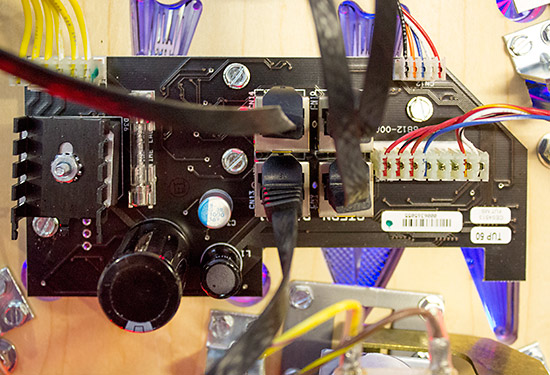
The RGB LEDs are driven by a number of controller boards scattered around the playfield which helps reduce the amount of cabling. Some controllers are built into lamp boards while others are standalone boards, but they all connect to a central hub board using flat black ethernet-style cables.
Those inserts not covered by a lamp board have discrete power cables to link them back to the nearest controller board.
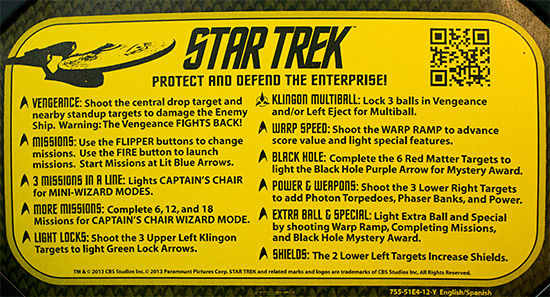
There's no doubt the lighting is a major part of the attraction of Star Trek, so we'll examine it in more depth along with all aspects of the game in the second part of this In-Depth Review. In the meantime, here's the instruction card to give you a brief summary of the rules.
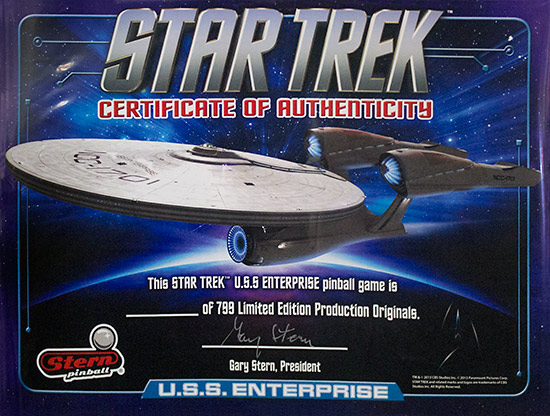
The Limited Edition games also come with a numbered certificate of authenticity signed by Gary Stern.
And that brings us to the end of this fully authentic first part of the Pinball News In-Depth Review of Star Trek. Many thanks to Nick Marshall for his hospitality and the use of his Limited Edition machine in this review. We'll be back soon with the second part, but you can give us your comments about Star Trek right now. Have you played it? Have you bought it? Tell us all about it and share your thoughts with other readers. Your comments:
© Pinball News 2014 |