|
| TRON:LEGACY |
|
Hello and welcome to the first part of our in-depth review of Stern's Tron:Legacy. As is customary, we'll use this first part to give you a thorough look at the game, both inside and out, before we head into part two where we examine the rules and give our opinions of various aspects of the game. Tron is an important game for Stern Pinball in a number of ways. It's a title which was virtually demanded by pinball fans since news of the sequel movie was first announced. Sci-Fi is one of the recurring genres in pinball licensing - Star Trek, Star Wars, Johnny Mnemonic, Demolition Man, even the company's first title; Laser War - and these games have all been reasonably successful sellers too. Then there's the small matter of competition in the pinball market. Stern's claim to be "The only maker of REAL pinball games on the planet" is about to be negated by Jersey Jack Pinball - a company making full-featured games to counter Stern's back-to-basics approach. Jersey Jack Pinball (JJP) is appealing to the serious collectors who want more in their games than Stern has been offering of late and are prepared to pay accordingly. Tron is Stern's first move towards the ground JJP is occupying - adding a little extra hardware and producing a premium version with more hardware and additional rules. Plus, of course, a higher price tag, taking it every closer to the price point for JJP's The Wizard of Oz. The clear line of distinction between Stern's offering and that from JJP is becoming ever more blurred. In this review though, we'll be looking at the first version of Tron:Legacy to hit the production line - the regular (or 'Pro') model. At the time of writing, the Limited Edition version has just started to be delivered and there are a couple of pictures you've probably already seen here at Pinball News, with videosexpected to appear on YouTube shortly. So, the Pro version is the flavour you'll find in most locations. Let's take a look at it.
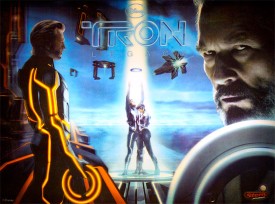
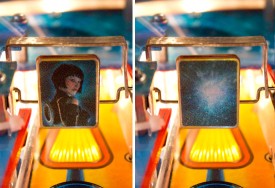
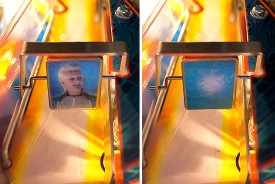
We'll begin with the backglass you can see above. Tron (as we'll call it from now on) copies the Avatar approach and comes with a 3D lenticular translite. It looks pretty effective too, although this method of 3D lends itself best to smaller elements in the image where the positional changes which take place as you move around apply to the whole object, and so are more natural. The Jeff Bridges image on the right, along with his identity disc, are large objects. That means some areas of these elements move before other parts, which reveals how the 3D technique works and reduces its effectiveness. Other than the 3D nature of the translite, the composition depicts Kevin Flynn (Bridges) in the right foreground holding his identity disc, his digital alter ego, Clu (Bridges, again) on the left, with Sam Flynn (Garrett Hedlund) and Quorra (Olivia Wilde) in the mid-ground at the Portal. Above them, Recognisers drift through the sky above the Grid looking for rogue programs, as a Solar Sailor makes its return trip from the Portal's home. Additional elements and characters from the movie are portrayed on the cabinet and backbox sides.
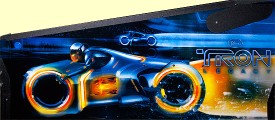
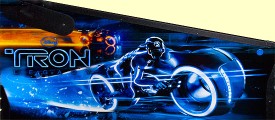
The two cabinet sides depict different views of the Light Cycle battle from the movie. On the left, Sam Flynn is in the foreground. On the right side it's presumably Rinzler/Tron dominating the foreground on his Light Cycle. Both images are suitably vivid and dynamic, in keeping with the movie. The cabinet front artwork continues that motif, placing the two light cycles on course for a head-on collision while the disc battle rages next to the legs.
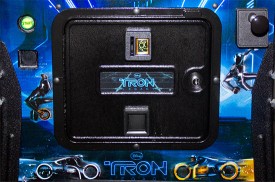
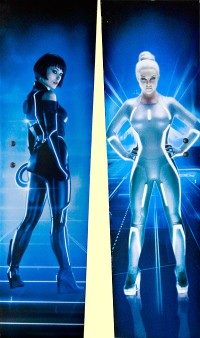
This is a European model, so only has a single multi-mech coin slot fitted to the door. It also appears to be missing the tournament start button which has been present on all games we've reviewed recently. However, this game was also lacking the coin mech which is usually present as well, so it may be a country-specific issue. The two main female characters in the film adorn the backbox sides.
Print quality is par for the course (i.e. pretty bad). This is, of course, just the operator-quality Pro model, but the Limited Edition is unlikely to use an improved printing process.
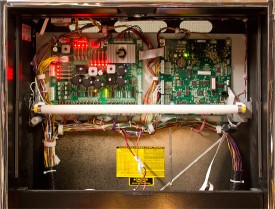
Before we start looking at the playfield, let's take a look inside the machine, starting with the backbox.
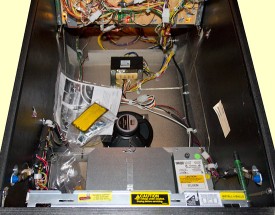
Nothing unusual here. The single fluorescent tube (depowerd here) and the two PCBs - the driver board on the left, the processor board on the right. Again, this being a European model, the dot matrix display uses LEDs, so no high power board is needed. Inside the cabinet, things are pretty standard too.
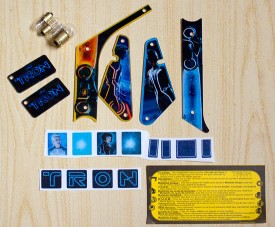
There is the regular goodie bag with spare decals, lamps and the instruction card(s). Tron also includes some spare slingshot and lane guide plastics, and a couple of key fobs.
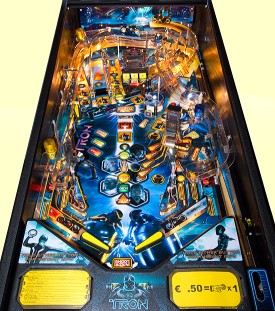
So now it's time to look at the playfield itself and see what Stern Pinball have given us to play.
Just for a change, Tron is a three-flippered game - two regular flippers down at the bottom and a full-sized upper flipper on the left side. We'll get to that third flipper in a moment, but we start our tour of the playfield at the bottom, working clockwise to check out all the features.
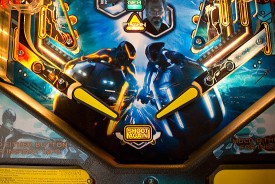
There's a lot of dark artwork around the flippers but the yellow flippers are sufficiently well lit to stand out against the dark background of the two light cycles. Because there are two inlanes on the right side along with the shooter lane, the two flippers look rather unbalanced and shifted to the left - an effect compounded by the shape of the apron.
There is no post between the flippers, just a 'Shoot Again' insert as the ball heads for the drain.
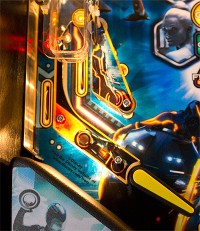
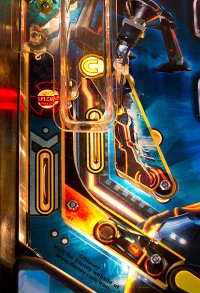
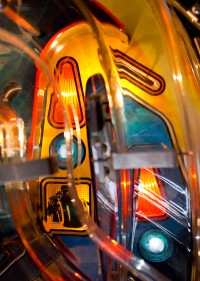
Moving round to look at the bottom left of the playfield, the lane guides and slingshot plastics portray the yellow team, with a yellow light cycle on the lane guide, Clu in his yellow suit on the slingshot and yellow trim on the plastics and around the rollover switches.
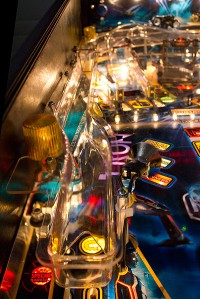
As you can see, illumination levels are good with some of the playfield artwork almost appearing to glow. There is a single inlane on the left side matching the solitary outlane.
The outlane can be lit for a special award and hence it sports the appropriate red insert. The inlane lights the first letter in C-L-U when the ball rolls over the switch, or when the ball drops off the ramp return, which terminates over the left inlane. At the top of the outlane is a 3-position adjuster so the game can be made harder or easier.
The game comes from the factory with the post installed in the middle of the three positions. Moving it involves removing the plastic ramp which sits above it, so it's not something you'll want to change too often. The slingshot is a simple single-level affair, with a spot lamp mounted on the top corner which shines across the central playfield to brighten it up a little.
As usual, both slingshots include metal washers beneath the plastic covers to help protect them from damage, although spares are included in the goodie bag.
Directly above the left outlane adjuster is an area of the playfield populated by several posts surrounded by a rubber ring. The bottom face of this arrangement is designed to deflect the ball towards the outlane and generally add a bit of bounce to the game. There is no switch to register ball hits or award points, just a lamp to give a lift to the dark artwork on the playfield.
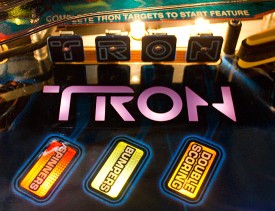
To the right of this combination of posts and rubber is the first of the game's features; the T-R-O-N target bank.
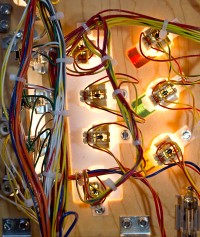
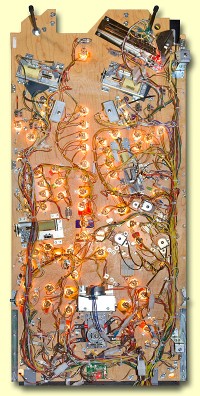
Hitting one of the four standup targets lights the appropriate letter in T-R-O-N and completing them all starts one of the three modes shown on the inserts in front. Each standup target has its own decal and there are spares in the goodie bag. The T-R-O-N lettering on the playfield is a little unusual, as it doesn't employ the normal trick of one insert for each letter. Instead there is one large printed insert with a lamp beneath each letter, as we can see if we look at the underside of the playfield.
This system leads to some light spill across adjacent letters, and if you're playing in high ambient light levels it can sometimes be hard to see which letters are lit and which aren't. With lots of black in the playfield artwork, this area needs help from the general illumination to lift it out of the gloom, and the two lamps behind the targets have a good stab at it with reasonably success. Positioned directly above the T-R-O-N bank of targets is the game's upper flipper.
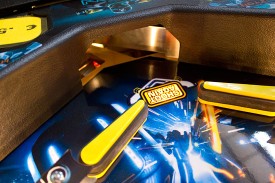
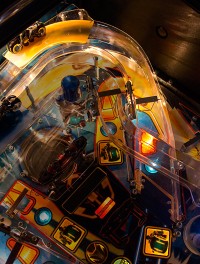
There's an alignment hole at the end and plenty of illumination to make sure you don't miss it. This is a full-size flipper and its main shot is to the ramp on the right side. To help guide your shot across the playfield, the artwork includes a couple of light beams leading to the ramp.
That's not to say the ramp is the only shot from the upper flipper. It can also shoot the right inner loop and the recogniser three bank as well as the Z-U-S-E targets. But more about those shortly. At the base of the upper flipper is the left orbit lane entrance.
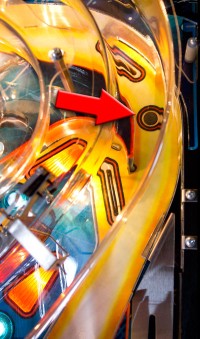
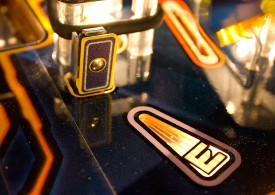
The left orbit lane includes each of the four main feature inserts. At the top is the red arrow insert which shows jackpots, combos and is a general indicator that the shot is lit for something. Below that is the blue disc insert used for Disc Multiball and later in the game for the wizard modes. The large yellow square is the light cycle insert used to indicate the required shots for Light Cycle Multiball. Finally we have the circular Clu insert which is used to qualify and play Clu Hurry-up. The left orbit lane continues up to the top left of the playfield before curving round to the right and heading over to the pop bumper area. The switch which confirms a successful shot is near the top of the lane, so a weak or poorly-aimed shot probably won't register.
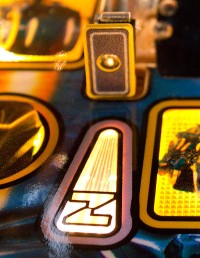
On the right of the entrance to the left orbit is the first of four Z-U-S-E standup targets.
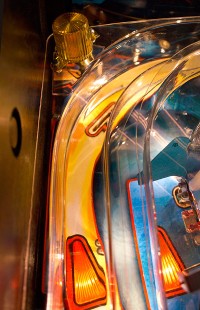
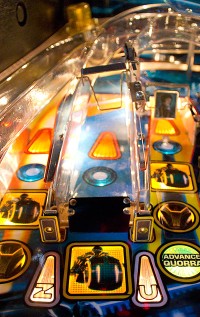
This lights when hit and when all four are completed, Zuse Scoring begins. The first Z-U-S-E target separates the left orbit lane from the first of the game's two ramps - the left ramp.
The left ramp includes three of the four inserts found on the left orbit - all except Clu, although the blue disc and red arrow are positioned under the clear ramp with just the light cycle in front. There is a switch at the entrance but you also need to make the switch much further round the ramp to register a successful shot. This ramp curves to the right, following the inner curve of the orbit lane, until it heads down the right side of the playfield to drop the ball in one of the right inlanes. This ramp represents the blue light cycle while the right ramp is the yellow one.
There is a second Z-U-S-E standup target on the right of the left ramp entrance. Like its counterpart on the left side, it adds one of the letters to Z-U-S-E and is used in Zuse Scoring too.
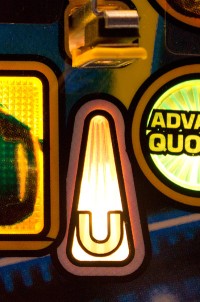
Next to the 'U' target we find the first of the two inner loops in Tron.
The left inner loop is packed with inserts and is a key shot in the game. Not only does it feature the same four inserts (arrow, disc, light cycle and Clu), but it also advances towards Quorra Multiball. There's no rollover switch or opto in the lane, so a successful shot is registered by one or more spinner switch triggers.
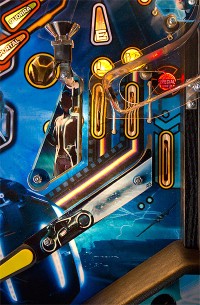
One side of the spinner shows Quorra while the other side...err... doesn't. Both sides, however, are rather dark and don't exactly stand out. The left inner loop does a u-turn and sends the ball into the left orbit lane, ready for a flip by the upper flipper. If you think that sounds like a combo shot, it is, and the game keeps track of combos as we'll see in the rules section. On the right of the left inner loop lane are the game's main toys - the Recognizer target bank and the spinning disc behind it.
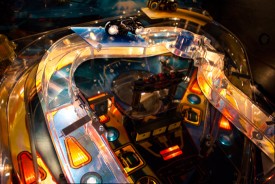
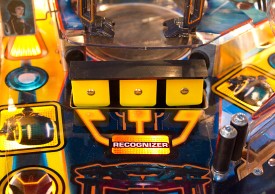
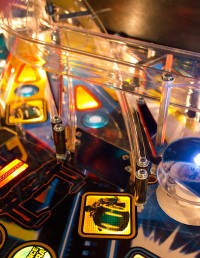
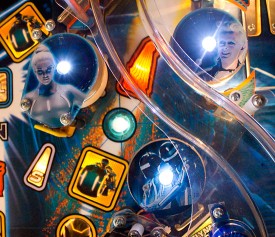
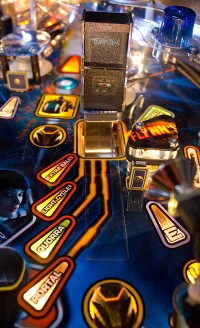
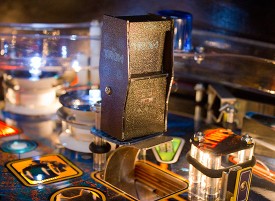
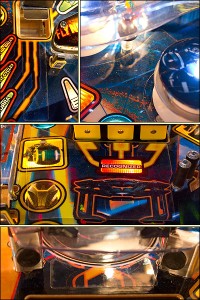
The recognizer target bank is the familiar one we've seen in games such as Avatar and Spider-Man which drops down to reveal a shot behind. This one is a little different because there aren't individual playfield inserts for each of the three yellow targets, and so a hit on any one of the three counts equally. After the requisite number of hits on any of the targets, the target bank drops down to reveal the spinning disc behind.
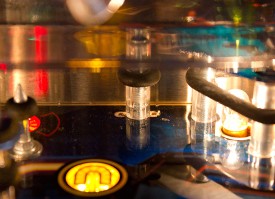
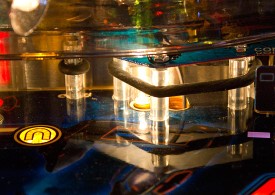
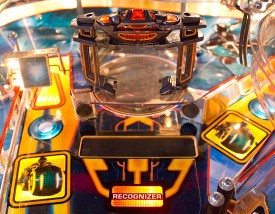
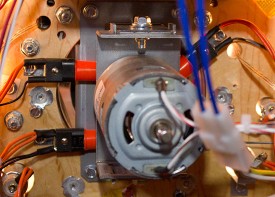
A Recognizer ship sits on a clear plastic covering the disc area but it is purely decorative. The main shot now is between the two metal ball guides into the disc arena. Once the Recognizer target bank is down, the disc begins to spin. The ball's entry is sensed by a pair of optos behind those rubber pads at the entrance. You can just see the one on the right shining in the picture below.
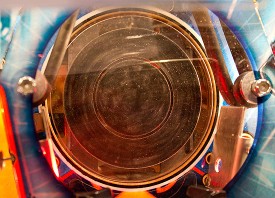
The spinning disc is unlike any we've seen before. It consists of a clear plastic base, inlaid with two black rubberised sections - one in the centre and another as an outer ring.
As the ball enters the disc arena, it is whirled around, while black rubber rings along the sides ensure the ball is sent out the same way it came in. The clear sections in the disc allow some attractive lighting effects to be produced by placing coloured lamps beneath the disc, although colour-changing LEDs might produce a nice effect too.
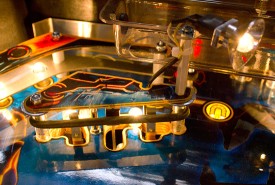
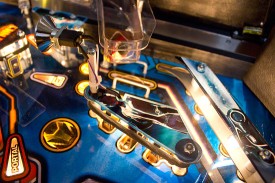
Because the disc spins quickly and there is no pattern on the disc's surface, it is often hard to see that the disc really is spinning, giving the mechanism a sense of mystery and suggesting it might be using a magnet instead of a motorised disc to fling the ball around. It's an effective method of throwing the ball back to the flippers with reasonable speed. It's not super fast like the Ram kicker in Big Buck Hunter Pro or the Raptor kicker in Jurassic Park, but it still works well enough, providing quite some variation in where it sends the ball and even looks the part when lit from below. The next shot on our tour of the playfield is just to the right of the Recogniser target bank and it is the second of the game's inner loops - the right inner loop.
The shot is only reliably achievable from the upper flipper and as you can see in the picture above, is easier to make when the Recognizer target bank is down and the full width of the entrance is available. Much of the right inner loop is hidden beneath the left and right ramps, but it curves round about 120° and sends the ball into the right orbit lane. So it's not really a loop, but it's close enough.
The red arrow, blue disc and yellow light cycle inserts indicate some of the modes or features in which this shot participates, but it is also key to starting and playing the Follow Gem mode which isn't indicated anywhere. A successful shot is sensed by the rollover switch at the end of the loop lane, so the ball needs to make it all the way into the orbit lane to register correctly. If the right inner loop is one of the main shots from the upper flipper, the other is the right ramp.
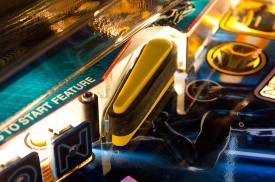
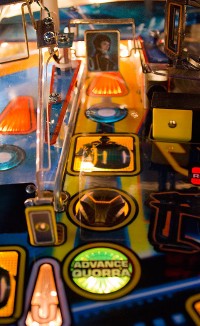
The right ramp features the same inserts as the right inner loop but takes the ball on a much longer journey, across the top of the playfield and down the left side to deposit the ball in the left inlane.
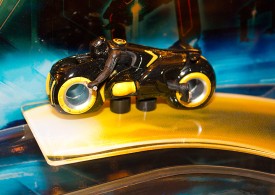
The right ramp represents the yellow light cycle and, like the left ramp, has a light cycle toy mounted over it.
As with the left ramp, there is a switch at the entrance to the right ramp to trigger sound and lighting effects, but a shot to the ramp is only awarded once the ball passes a second switch on the way to the left inlane.
While the right ramp is shot from the upper flipper, our next target takes us back to the main two flippers.
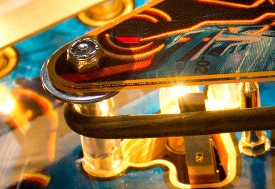
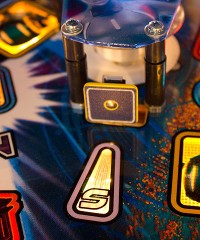
Although it sits in front of one of the game's three pop bumpers, the 'S' standup target is free standing and quite close to the flippers, so it may be liable to get bent backwards fairly quickly. Our seventh major shot takes us to the right entrance of the orbit lane, which is also where we'll find those pop bumpers.
The right orbit can be lit for jackpots and combos, and to collect a blue disc, a light cycle or a Clu shot to build towards and play those modes. We'll come to the pop bumpers in a moment, but the right orbit has a couple more tricks up its sleeve. Half way up the right orbit lane is the game's second spinner.
Unlike the Quorra spinner, this is not used to register a successful shot to the lane over which it sits. Instead there is a rollover switch at the top of the right orbit lane which performs that role. The second little wrinkle the right orbit has for us can be found next to that rollover switch.
Yes, the right orbit includes a pop-up post which stops balls from making it all the way round the orbit during some modes and when the ball is launched from the plunger. In the former case it is activated by the Zuse spinner and in the latter, by the shooter lane switch. It is only a temporary activation and isn't used to trap the ball like the post in Big Buck Hunter Pro's bird lane. Back at the start of the right orbit lane, we have the game's three pop bumpers.
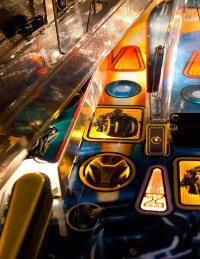
The top bumper cap depicts Michael Sheen as Zuse/Castor, the middle cap features Beau Garrett as Gem, while the bottom bumper cap shows Guy-Manuel de Homem-Christo and Thomas Bangalter, a.k.a. Daft Punk, who played the masked DJs in the Tron:Legacy movie and created some of the music tracks included in the game. All three are lit by blue-white LEDs which provide a quite intense, focused light source. The right-most two bumpers have regular caps screwed into the bumper body, while the Gem bumper cap is mounted on the two posts behind the 'S' target. The pop bumper area can be entered from the top following a left orbit shot, or from the bottom with a right orbit shot. While the ball could theoretically exit up the right orbit lane, the most likely exits are between the bottom two bumpers, or under the ramp between the right two bumpers, which sends the ball towards our next playfield feature.
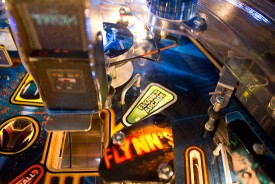
The ball can end up here either on the way out of the pop bumpers as we just said, or it can also arrive here from a weak plunger shot since this is at the end of the shooter lane. Once here, the ball rolls down and goes either left or right of a divider made up from four posts surrounded by a black rubber ring with the 'FLYNN'S' plastic atop it. If the ball goes to the left side of the divider, it ends up in the Flynn's Arcade scoop. If it goes to the right, it rolls down to the right inlane/outlane area. So let's take a look at that scoop.
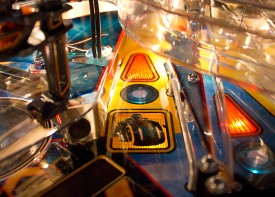
Sitting on top of the scoop is a Tron video game toy. This contains a couple of lamps which flash when the ball is about to be ejected or when the scoop is lit for a specific feature.
It's not the most lovingly-crafted tribute to the Tron video game ever created, but it does the job, more or less. The scoop itself doesn't feed the ball anywhere, so the ball goes in, something happens and it's kicked out again. What that 'something' is, is shown by the inserts in front of the scoop.
So the video game scoop awards the extra ball, starts Light Cycle Multiball, starts Quorra Multiball and kicks off the Portal wizard mode. Although it is a little removed and disconnected from the scoop, the Clu insert at the bottom right of the picture above also refers to the scoop, meaning it both starts and then becomes one of the shots in the Clu Hurry-up mode. In addition, the video game scoop also collects mystery awards, the availability of which are indicated by the in-cabinet lights flashing. All these functions make the video game scoop the most important single shot in the whole game and fortunately it's fairly easy to make and not likely to lead to a drain if you miss. If the ball didn't roll into the scoop at the Flynn's divider, it would have gone this way instead.
There is a rollover switch to the right of the divider to tell the game where the ball went and to light combo shots or a skill shot from the right flipper. Before we get too far down the playfield though, there still the small matter of the final Z-U-S-E target.
Positioned on the bottom edge of the divider, this rectangular yellow standup target has a little more support behind it than its companion, the 'S' target so shouldn't bend back too easily. Directly below the 'E' target is the first of the two right inlanes.
These two inlanes light the second and third letters in C-L-U when rolled through. The left ramp terminates here and drops the ball over the right-most inlane, although it is not too uncommon for it to then bounce into the left-most lane. Not that it matters too much since the lit C-L-U letters can be rotated with the flipper buttons in traditional 'lane change' style, since there are no top rollover lanes which would normally use this function. The right outlane, like the left outlane, can be lit to collect specials when lit but neither outlane features any way to save the ball once its on the way to the drain.
If the bottom left corner portrayed the yellow light cycle, with yellow trim to the plastics and Tron in his yellow lit suit, the bottom right is much starker with no trim to the plastics and a blue-white theme. The yellow edging to the rollover switches remains but the overall feel is colder and about as inviting as a dive into the Sea of Simulation. The right slingshot is similar to it's companion on the left - consisting of just a single level plastic cover featuring Sam Flynn, and one spot lamp on the top corner.
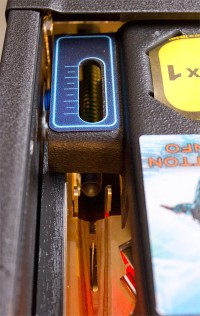
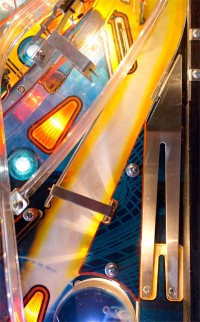
All of which brings us back to the flippers. But before we can use those, we have to launch the ball onto the playfield, and that takes us to the shooter lane. In the usual place on the right side, there is the regular manual/auto ball launcher with a familiar shooter rod, covered by the now standard black plastic apron and a strength meter decal.
The game uses a green plunger spring which a medium tension version to allow full strength plunges right around the orbit lane, or weaker ones to the Flynn's Arcade scoop or the right inlanes. The ball shooter lane runs up the right side of the playfield and sends the ball into the right orbit lane.
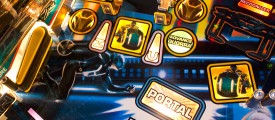
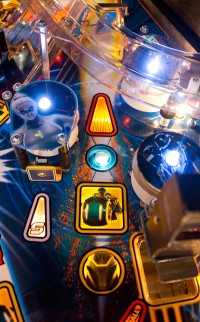
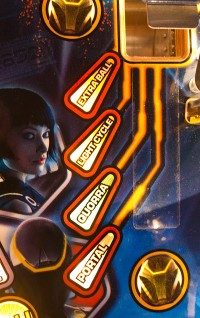
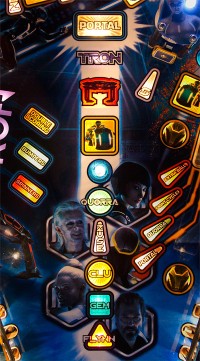
As we mentioned earlier, there is a pop-up post in the right orbit lane, and as soon as the ball leaves the plunger that post pops up to stop the ball and send it into the bumpers, unless either you hold in the left flipper button, or the post is disabled in the software (or broken). The final element we're going to look at in this part of the in-depth review is the feature ladder running up the centre of the playfield, starting just above the flippers.
The ten inserts are comprised of nine which relate to different modes or features you need to play, and the tenth - Portal - which is the game's main wizard mode. With no central toy to get in the way, there's plenty of space to fill, and the progress ladder gives a clear indication of the modes you have yet to play or complete, as we will see in the next part. One final point about the playfield worth noting is the fairly extensive use of mylar to protect high-traffic areas. There are mylar patches covering the whole area in front of the Recognizer target bank, at the entrance to the spinning disc, in a strip leading up to the scoop and in the pop bumpers.
All of which brings us to the end of this first part of the in-depth review of Stern's Tron:Legacy. We'll be back shortly with part two where we'll cover the rules and give our verdict on the game. Until then, we leave you with a look at the underside of the playfield.
© Pinball News 2011 |