|
|

|
THANKS FOR THE
MEMORY |
| In the fourth in his series of articles, Todd "Pinted" Andersen, President of the TCFPA turns his attention to fixing battery problems such as loss of memory, board damage and loss of memory. Remote Battery Holder
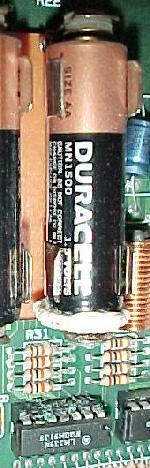
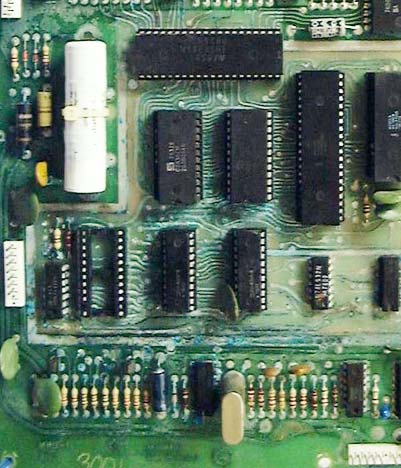
INFORMATION The purpose of this battery is to enable the CPU board to keep track of game settings and high score information. Over time this battery gets old and subsequently leaky. You can tell if you have an older battery by just looking at it. This battery will usually be about the same size as a single AA battery. Fluid (base NOT acid) may be leaking out of this battery. Or, a silver / gray powdery build up (crystallized base) may be built up on the battery and surrounding circuit traces. The rechargeable battery (old or new) must be removed from the game or it will, eventually if not already, damage the CPU board. If the board has damage from a leaky battery, the board must be cleaned / repaired before the battery can be replaced. Regular (non-rechargeable) batteries are used on the CPU boards in some games. These "pen batteries" may also become leaky. If this occurs, as the board must be cleaned / repaired, you may opt to install a remote battery holder in place of the old on-board holder. Once the new holder is installed, it's best to change the batteries at least once each year. Remember, if you have either the original on-board or a remote battery holder, the batteries need to be changed at least once per year. This can be done at some anniversary that you already recognize - like your birthday. Or, you can write the installation date on the new batteries and refer to that date.
ALTERNATE USES The remote battery holder may also be used in: slot machines, video games, tabletop games along with: Data East, Gottlieb, and Premier pinball machines that use a 3.6 Volt rechargeable battery. The holder works as a convenient replacement for: Atari, older Stern, and Williams pinball machines with on-board 3 – place AA battery holders. As the new holder can be mounted remotely off of the CPU, it can be placed in a more convent to reach place than on the CPU.
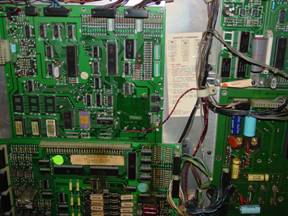
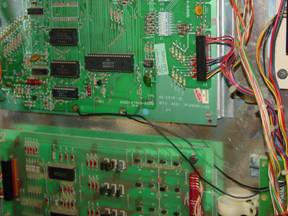
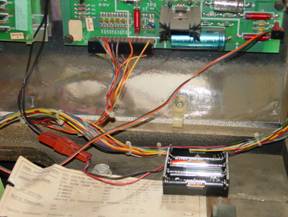
INSTALLED IN PINBALL
Here the remote battery holder is installed in “Blackout”. The RED / BLACK wires in front of the card allow the holder to be mounted within easy reach.
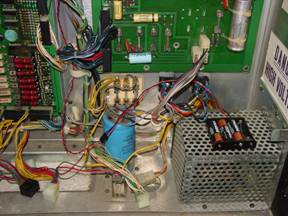
Pictured is the remote battery holder in “Black Pyramid”. The BLACK wire and BLACK wire with WHITE stripe go over to the open side of the light board allows easy access.
Notice in both sets of pictures that the remote battery holder is mounted: off of the CPU, away from any assemblies, and within easy reach.
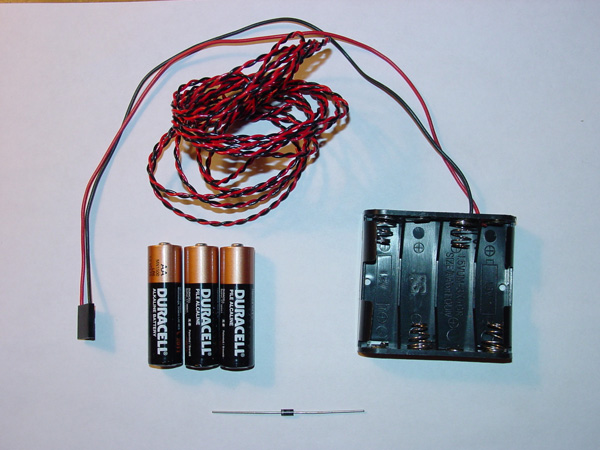
PARTS
Shown are most, but not all, of the parts used for this simple assembly.
PARTS LIST
PARTS SOURCES "Radio Shack"
SUBSTITUTE PARTS For the wire, most any miscellaneous spare wire will do. (e.g. speaker wire). I do recommend keeping with the RED / BLACK color scheme.
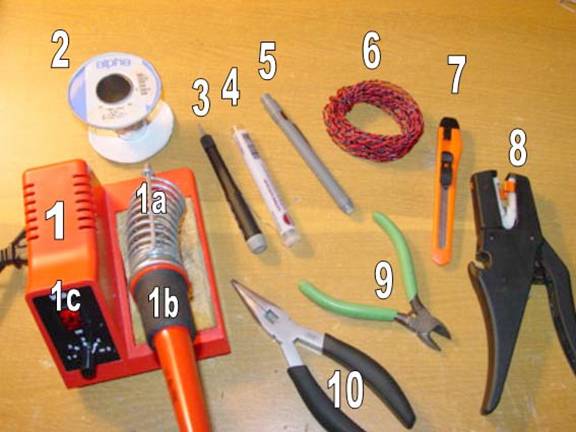
TOOLS
Pictured are most of the tools and supplies I used while making and installing the holder.
TOOLS LIST (clockwise) 1) Soldering iron
CONSTRUCTION Solder the 1N4005 Diode into the cell that is farthest away from the wires on the 4-place “AA” battery holder. The diode MUST be placed so the side of the diode with the band is on the side of the holder with the plus (+) symbol. The other side of the diode is soldered straight across to the spring that is on the other side of this cell. Do not clip off any of the lead of the diode. Instead, bend the extra lead length so the body of the diode rests against the wall of the cell. Bending the diode in this way allows a clear space for the wood screw that is used to fasten the batter holder assembly. Next crimp or solder (2) pins for the male end of the connector. One pin goes to each wire protruding from the battery holder. Now, crimp or solder the other (2) pins for the female end of the connector. One pin goes to each of the RED and BLACK wires that are added to the battery holder assembly you are making. Be very careful. Do not cross the wires at the connector. Keep the RED wire with the RED wire, and the BLACK wire with the BLACK wire. Remove the old battery from the CPU board. Neutralize any battery base with vinegar and clean up with warm water. Be sure the board is completely dry. A normal hair dryer may be used for this. Repair any damaged traces on the CPU board, if necessary. Solder the free RED and BLACK wires into the CPU board. The RED wire goes to the positive (+) hole where the old battery was. And, the BLACK wire goes to the negative (-) hole where the old battery was. Using the wood screw, install the battery holder assembly. Be very careful not to mount the assembly where it may harm any part of the game, or get in the way of its operation! Lastly, Install the (3) “AA” batteries in the empty three cells of the battery holder. Use the plus (+) and minus (-) signs on the holder as guides for installing the batteries.
DIAGRAM
NOTE
|