|
|

|
STUCK
|
|
By Todd "PinTed" Andersen
My vintage beauty, Pharaoh, is a WMS System 7. She is high class but not perfect. And, like all cool chicks, she loves to occasionally attend a pinball event with the boys. Though I live with Pharaoh, I hadn't put my hands on her for some time. So, she was reluctant to let me touch her bad parts; even though we both knew she needed it. I told her that I'd be gentle. But, once I got into her, I got to work like an overanxious schoolboy. Without forgetting a fresh new rubber, I stuck my parts into all the correct places. I made sure there was proper play and contact. By the way she responded after round one, I could tell that she approved of my parts and my technique and was in need of more. Now for rounds two, three, and four. Aren't I the luckiest guy in the world?
THE BAD This generalization has caused a false categorization of flipper parts. So we, as consumers, are stuck with what the pin-parts sellers have or think they have. I have discovered that many pinball parts sellers simply don't have the knowledge or experience necessary to tell what are true OEM NOS parts or even correct parts. And, many sellers truly believe that remanufactured parts are the same as NOS parts. Maybe that's why so many professionals sell screwed-up pins? Back to the subject at hand, when pinball parts sellers get stuck with slightly different or even bad parts from their manufacturers, they usually don't know what they have on their hands. So that they don't lose money, it seems that sellers sometimes stick-it-to-us by selling us consumers questionable parts. Like the act of passing a social disease, the sellers are usually not aware of what they are doing. I'm sure many of us who repair pinball machines have had to deal with bad rubbers or bulbs. So, many of you who are reading this article have been hosed or at least know what I am describing. All pinball manufactures that lasted for at least a few decades not only used several different flipper systems; they had variations of each system. These variations were sometimes subtle but they are always important. Though other pinball parts sellers have some of the part available to restore your older pinball machine to its former glory, Pinball Life sells complete kits to rebuild or completely revamp your flippers.
To make your life easier, Pinball Life and Pinball Renaissance have gotten together to provide you with the most original and most correct kits for you to rebuild or completely revamp your older WMS pinball flippers. Along with its enormous parts (collection), Pinball Life is the only place that I have found who has all of the correct parts for revamping or for totally rebuilding older WMS Sys 6/7 flippers. All of the WMS Sys 6/7 flipper parts are limited!
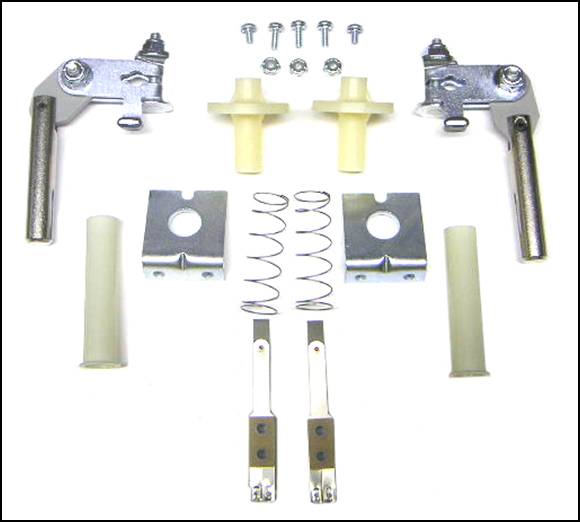
THE TECHNICAL One, a complete flipper rebuild kit. The kit will rebuild two (1 left and 1 right) flippers.
or
Two, directly below is a complete list of older Williams pinball machines that were originally built with the C-8230 / C-8270 flipper system. The list is arranged by system. Each of the three systems is listed by date of release. The games in each system are arranged alphabetically.
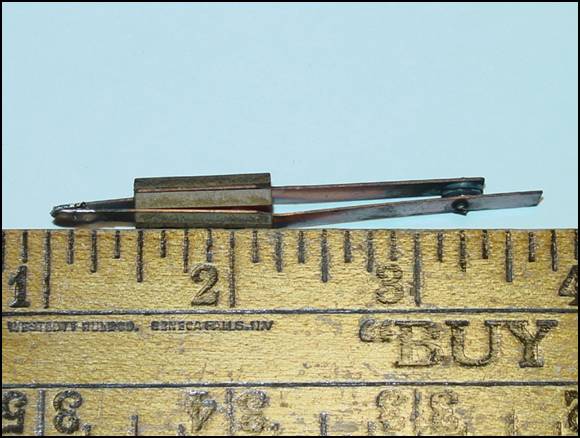
Three, below is a detailed description/listing of the specific parts I stuck in Pharaoh and my private techniques that made her so happy. I will also show the incorrect parts and explain why they simply couldn't make her happy. You can see that I have given the: original, incorrect replacement, and correct replacement parts. All are listed as references. Rubbers
Pictured at the top, the original part is week by design. A hefty hardware assembly has replaced the simple pin. And, the fiber link was replaced by modern plastic. In the picture, at the top, notice the straight neck of the old link. The usual replacement part, pictured bottom, has no neck and frequents viewings of The Rocky Horror Picture Show. With no neck, there is simply no space for the return spring. With each flipper stroke, there is only enough room for the link and plunger. In this case, two is company. But, three is a necessary crowd. The flipper link of the correct replacement part, pictured center, has a sexy tapered neck. This taper allows a natural place for the spring to snuggle, after it has collapsed, due to the powerful stroke. For those of you taking notes, this is one of those important points. Another is to follow.
The original flipper coil sleeve, pictured at the top uses the same part number as the incorrect replacement part, pictured in the center. Unlike the correct new part, pictured bottom, the original sleeve was actually 1/16" shorter than the correct replacement. Again, as is the case with the bottom picture, I guess it’s true; size does matter. In the picture below, notice that the correct coil sleeve protrudes just far enough out of the retaining bracket to hold the return spring in place.
The original bracket, on the top, is virtually the same as the correct replacement part, pictured center. The usually sold incorrect replacement part, pictured bottom, has a four extra ears. The wrong bracket will bind the crank in action. It is the new coil sleeve, not the ears on the bracket, which helps properly hold the return spring in place as it collapses. Bushing
The original bushing, on the top, is virtually the same as the correct replacement part, pictured on the bottom. The sometimes-sold incorrect replacement part, pictured center, has a longer neck. The long neck can pinch your ball in play against the playfield. As you know, a pinched ball will uncontrollably bounce away from the playfield. Whereas, the proper spacing provided by the correct bushing will continue the ball in play up field. Spring
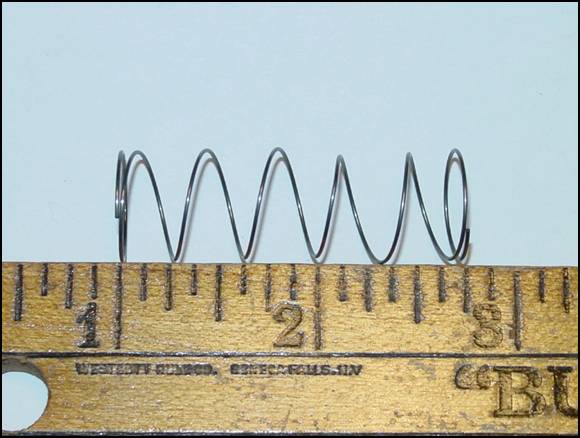
The original spring, on the top, is again virtually the same as the correct replacement part, pictured on the bottom. The usually sold incorrect replacement part, pictured center, is actually the return spring for the next WMS flipper system. The wrong spring will bind on your plunger and will not let your bat snap back into action. In the picture below, notice that my plunger fits all the way into her tube, leaving the perfect amount of room for the return spring in place.
End Of Stroke (EOS) Switch
The original EOS, on the top, is the same as the correct replacement part, pictured in the bottom. The sometimes-sold replacement part, pictured center, is too long. The tip will bind with the hardware on the busing. On the other hand, a switch that is too short will bind at its tip. The wrong switch will painfully bind the crank in action. I guess this proves conclusively that length is the most important aspect of a full flip. CLIMAX First, this is not an article on rebuilding flippers. This is an article on showing the correct flipper parts for your WMS Sys 6/7 pinball machine. Second, one may mistakenly diagnose a mechanical reason for a poorly working flipper when the real reason is electrical. Turn your game off the moment you discover a flipper that sticks in the upright (flipped) position. If the flipper drops when the power to the game is cut, the cause of the stuck flipper is most likely electrical. Don't forget to visually check your flipper and EOS switches. And don't forget to verify correct voltage before you rip apart your flipper assembly. Third, the instructions for rebuilding flippers are available on several easy to find and view on-line sites. And lastly, the example you need to rebuild your left flipper is your right flipper and vice-versa. Remember, she likes it when you take your time. Start and finish one spot before you continue to another. But, I will give you one golden rule. Just like my daddy did on my wedding day. Except, you will be able to use this rule. And that rule is; 1/8 - inch (0.125 or about 3 mm). There should be 1/8 - inch of spacing between the flipper bushing and the flipper pawl. And, there should also be a 1/8 - inch space between the individual leaves of the EOS switch when the flipper pawl crank breaks the contacts at full stroke. Sometimes rebuilding the flippers is not enough to make your game happy. Many pinball parts suppliers sell the correct coils for your game.
In the picture on the left, notice that the stop of the original flipper base plate is warped and broken. Pictured on the right is a nice, new, shinny flipper base plate from Pinball Life. Only Pinball Life sells the correct WMS Sys 6/7 flipper base plate. Again, all of the WMS Sys 6/7 flipper parts are limited! But, if you want to put less effort into keeping your pin-partner happy, perhaps buying the complete assembly is the answer? And, once again only Pinball Life sells the flipper assembly complete. If you do decide to order the complete WMS Sys 6/7 flipper assembly, you must choose: side (left or Right), coil (SFL 19-400/30-750 or SFL 23-600/30-2600), and quantity.
NOTE
© Pinball News 2006 |
 Well, I can't say she doesn't deserve her attitude.

 Complete Flipper Rebuild Kit: C-8230-L_C-8230-R (PBL)
  Complete Flipper Assembly: C-8230-L (PBL)
 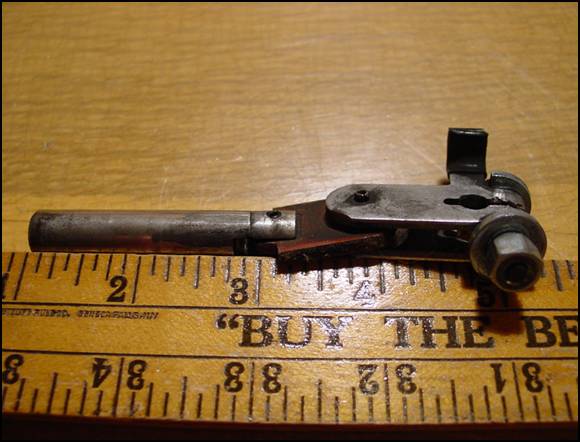 PN: A-8232-R or L
 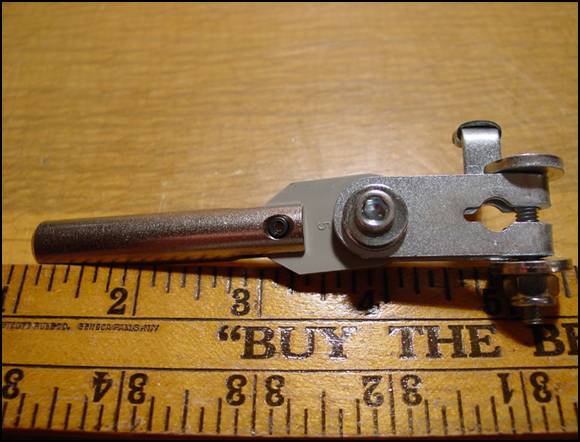 PN: B-10655-L or R
 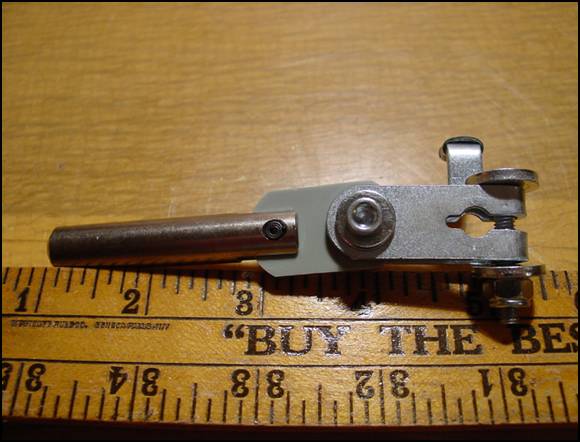 PN: A-15848-L or R
 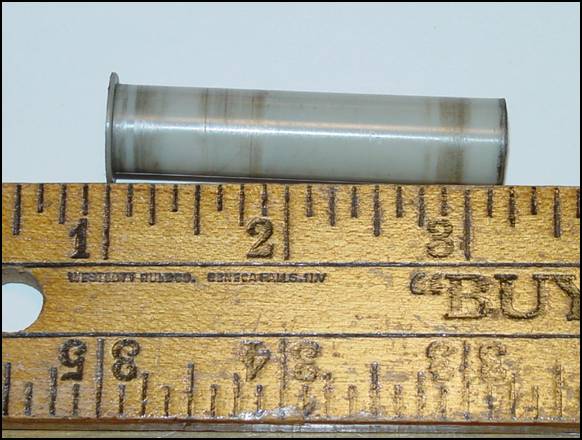 PN: 03-7066-5
 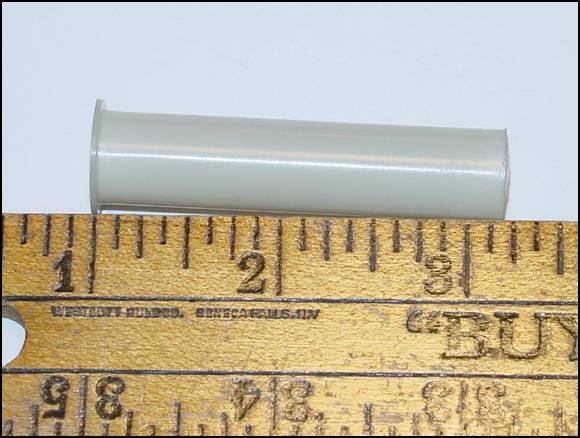 PN: 03-7066-5
 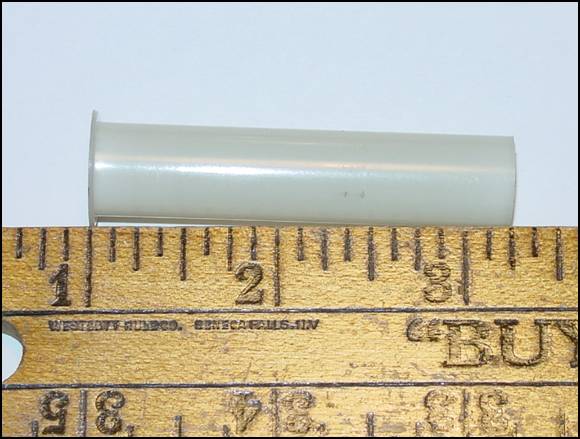 PN: 2.25_sleeve
 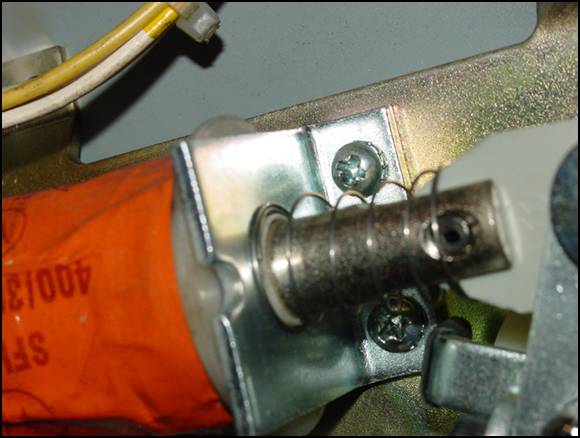 That's the way she likes it.
 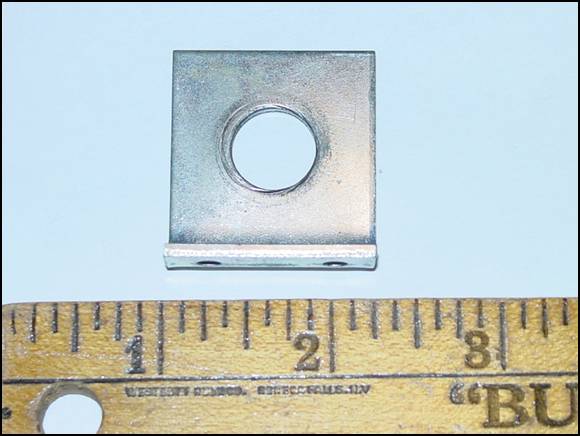 PN: 01-6928
 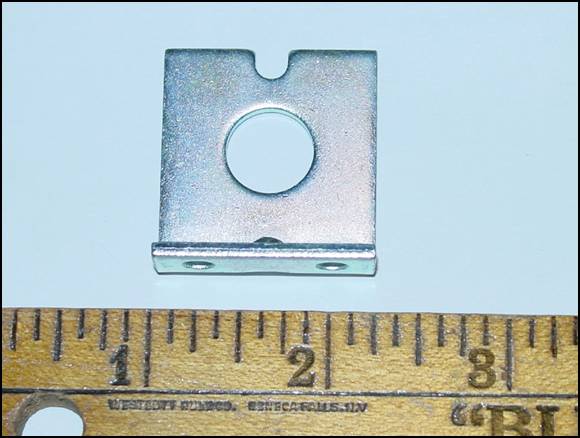 PN: 01-7695-1
  PN: 01-7695
 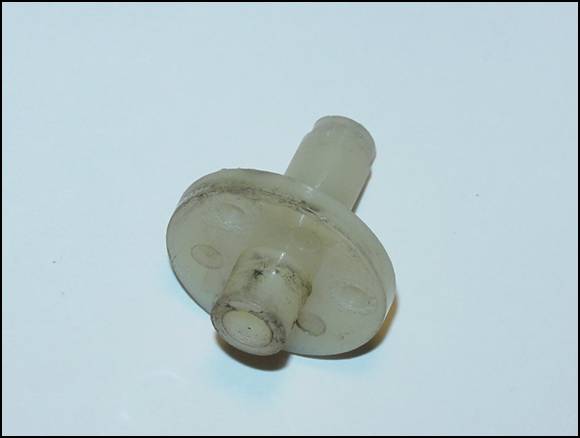 PN: 03-7568
 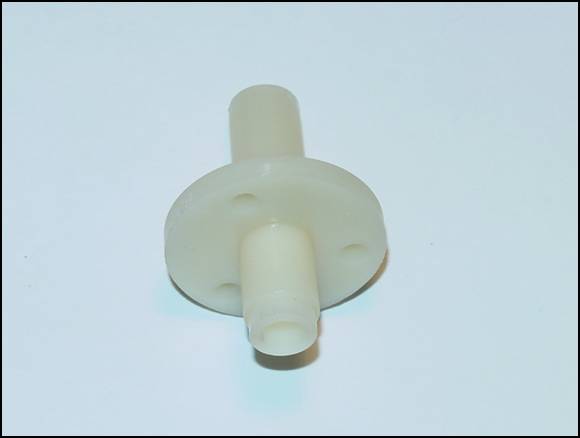 PN: 545-5070-00
  PN: 03-7568
 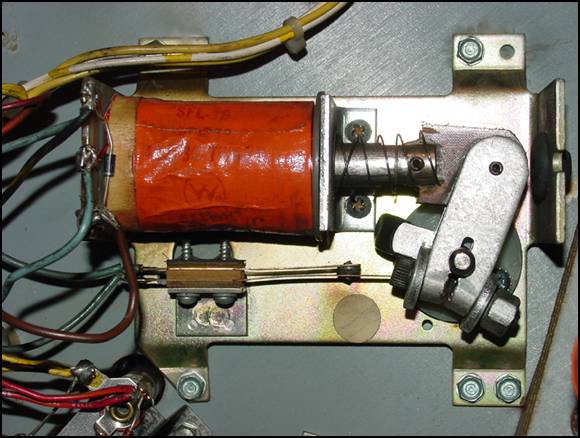 The old return spring is broken.
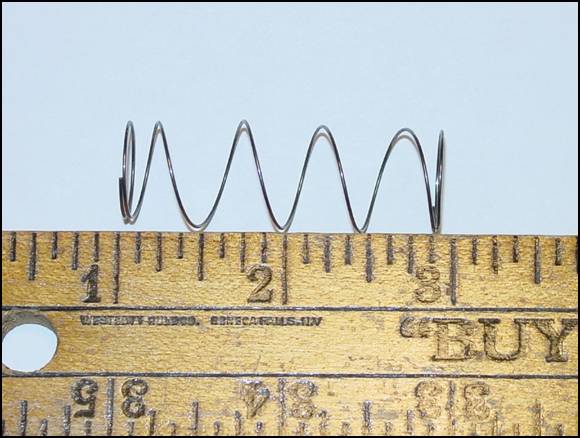 PN:10-135
 PN: 10-376
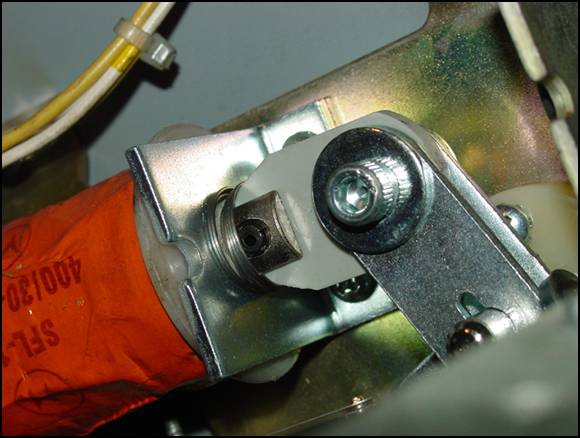
 PN: SW-10A-50
 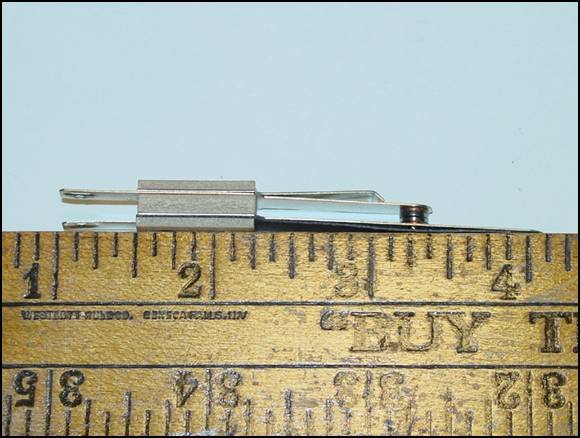 PN: 03-7811
 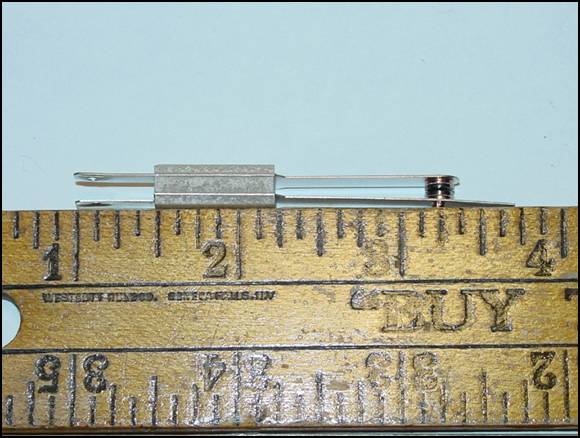 PN: Sys_6_&_7_EOS
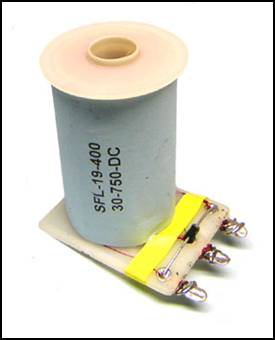
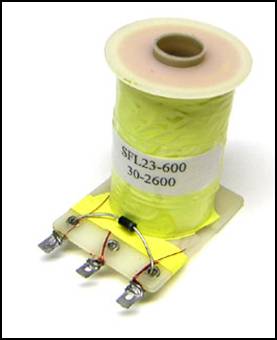

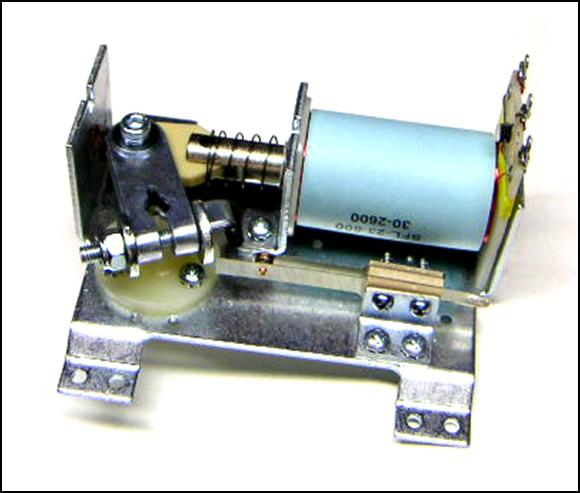 The new complete flipper assembly, PN: C-8230-L for the left side. (PBL)