 |
|
|
| The last few service calls Pinball Renaissance has been on have involved correctly repairing incorrectly serviced flippers. Unlike Santa, we simply can’t visit all of the good little pinball machines in need of flipper care before the holiday season. So we must leave most of the flipper repairs to you jolly owners of pinball machines. Rather than making you double check a list of articles, we gift with you good readers of Pinball News by simply showing you some of the problems we have found and corrections we have made this year’s end. Remember to be a good, safe fix-it elf. Perform all repair(s) with the game turned off or even unplugged. Only after you have completed your repair(s) should you power up the game and use its internal diagnostics or game play to verify that the flipper(s) is/are now fixed. Don’t bother asking a misfit little elf for help. We don’t mean to be Scrooges, we are just trying to steer your sleigh of pin-repair away from icy failure from the start. While you do gather together your family for holiday celebration, we don’t recommend that you ask some relative who “does something with computers” to help you with your beloved pinball machine. Bye-the-by, Santa’s two more helpful flipper repair elves for pin-parts are Pinball Life and The Pinball Resource.
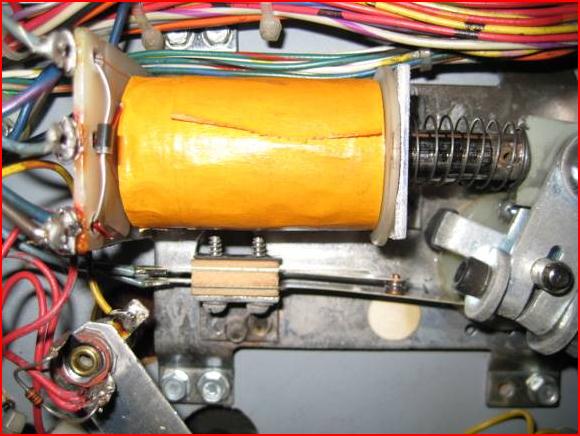
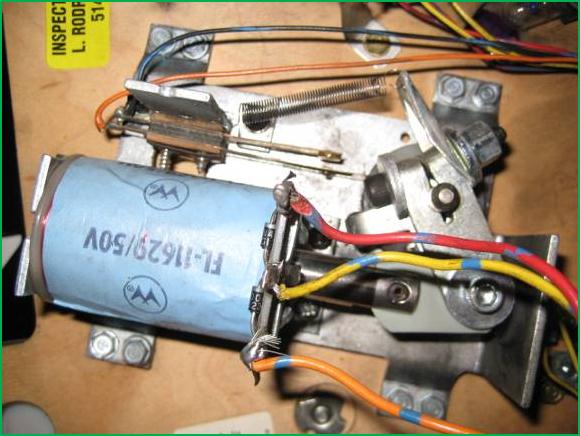
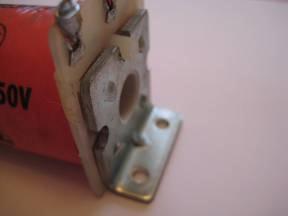
For those who may have enjoyed a little too much nog, simply put, make sure that you have all the correct information and parts before you begin. You would want to make sure that the present you gave was safe, wouldn’t you? To be safe, you would check that the flipper’s End of Stroke (EOS) switch opened or closed how and when it should. The two pictures below show the correct assemblage of: coil, EOS switch, and wiring for the systems utilizing each specific flipper assembly.
Like plugging in holiday lights, you need to pay close attention to how the wiring is connected. So, when you replace a flipper coil, be sure that you are connecting its wires in the correct places. See the two pictures directly above for examples. As with the job of assembling a child’s toy, you need to pay attention to the orientation in which each individual part must be installed.
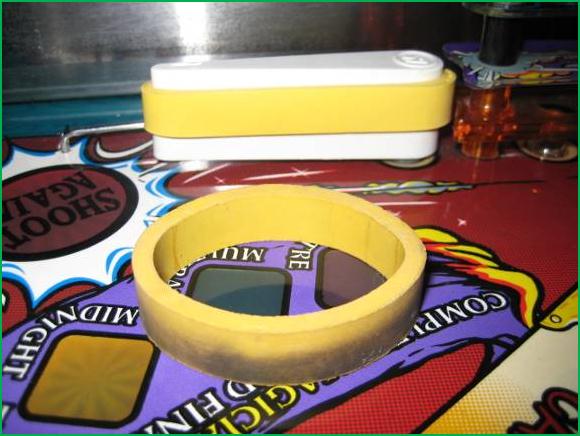
Of course you would clean off your galoshes before you entered your host’s home prior to a holiday party. This consideration can be extended to your flipper’s rubbers.
When throwing up a sash, the direction of your attempt is important. This is also true when replacing a flipper’s rubber.
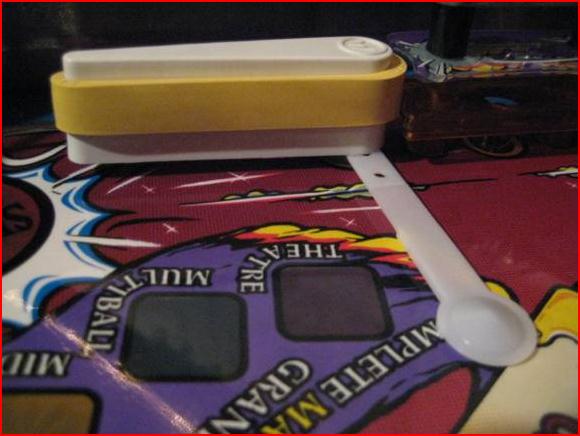
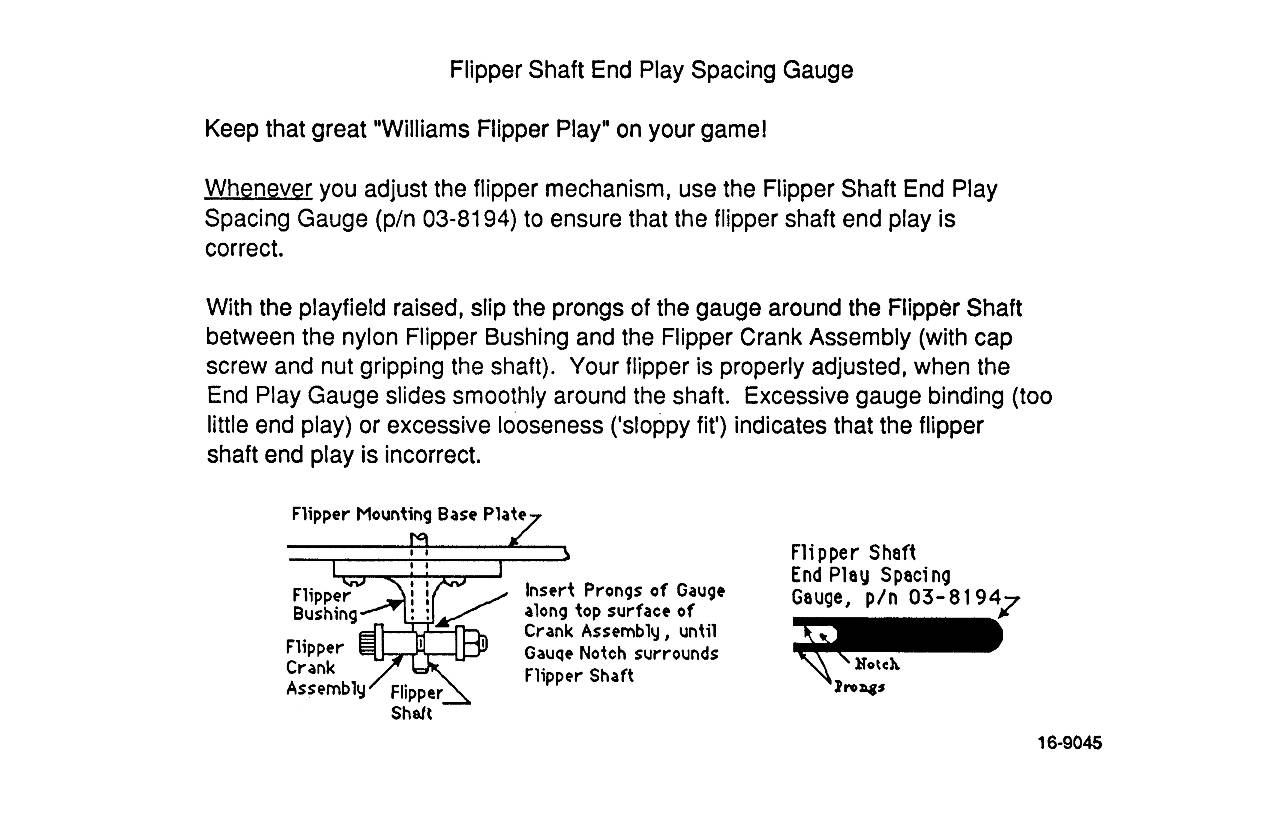
One more seemingly minor point is akin to you taking time out of your busy holiday schedule to play. Specifically relating to pinball flippers, make sure there is enough play between your flipper bat and the flipper bushing.
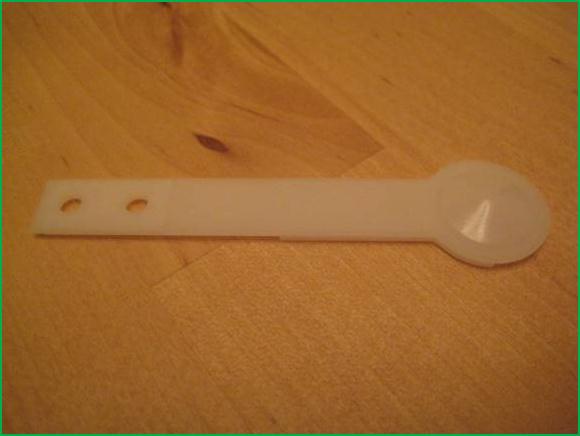
The picture above shows a quick way to verify proper flipper free play. If an adjustment is needed, this tuning is done under the playfield. So, the gauge should then be placed against the flipper shaft, between the flipper pawl and the flipper bushing. The spoon is readily available from may pinball parts sellers. As listed below, this substitute Flipper Shaft End Play Spacing Gauge has a couple of variations. Either of two spoons should work well as a gauge: Bally reference #C-921 or Williams reference #03-7395.
We at Pinball Renaissance and Pinball News wish you all happy and safe holidays.
|


