|
|
LED BACKBOX |
Date: 3rd February, 2013 With very few exceptions, one of the most obvious deficiencies of Stern games over their older brethren built elsewhere in Chicago is what resides in the backbox. Or more specifically, what doesn't. The lack of multiple lamps and flashers behind the translite or backglass may not affect a game's earning potential on location, but with an increasing proportion finding their way into private buyers' hands, maybe a new look at backbox lighting for those expensive limited edition models is long overdue. Fortunately, improving the look of that single fluorescent tube behind the glass is something anyone can now enjoy thanks to the LED Backbox Lightning Kits produced by Superfluxshop.de - a major player in the world of LED replacement lamps and LED mods. Pinball News took one of their kits and installed it in one of our machines to find out whether the look is indeed improved, and what you get for your money.
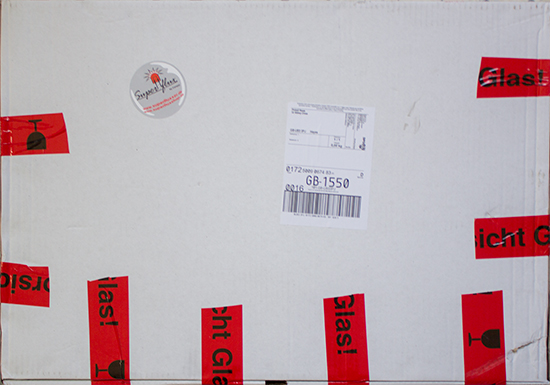
This is what you get - a large cardboard box sent from Superfluxshop in Germany or their US distributor, Pinball Decals. Thankfully, the postal service didn't try to fold it so it fitted through the letterbox, and the container arrived at the Pinball News office undamaged.
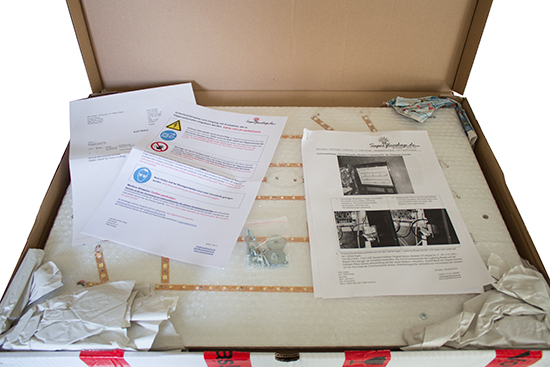
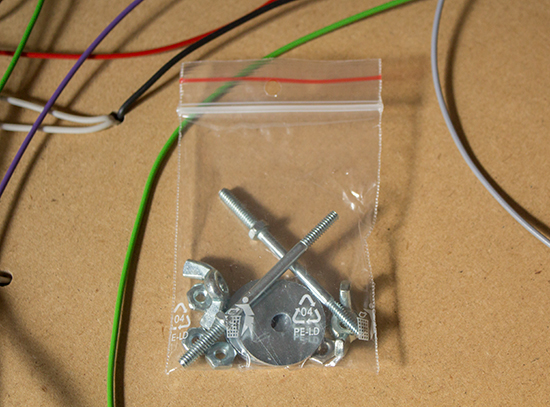
Opening the box revealed a set of instructions, a warning notice, the invoice, some fixings, and - protected at the corners with scrunched-up paper and covered with bubble-wrap - the LED Lightning board. If your German is as fluent as ours, you should have no problem reading the instructions and concluding you have no idea what they say. What you need is some instructions in good old English. Although they were missing in ours, these would normally be included in the kit, meaning you won't have to resort to Google Translate and a lot of typing like we did. In the end it proved largely unnecessary as the whole lot goes together quite logically. So, after unpacking everything, the important parts are the Lightning board and the nuts, bolts and washers to mount it in the backbox.
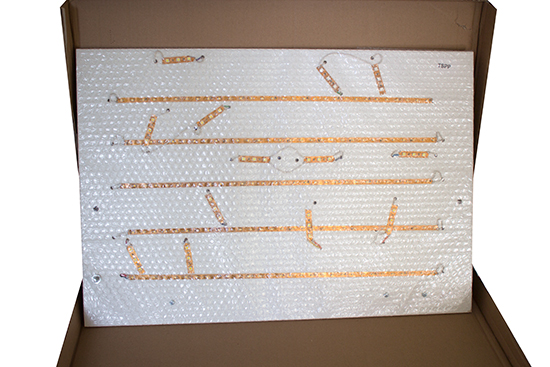
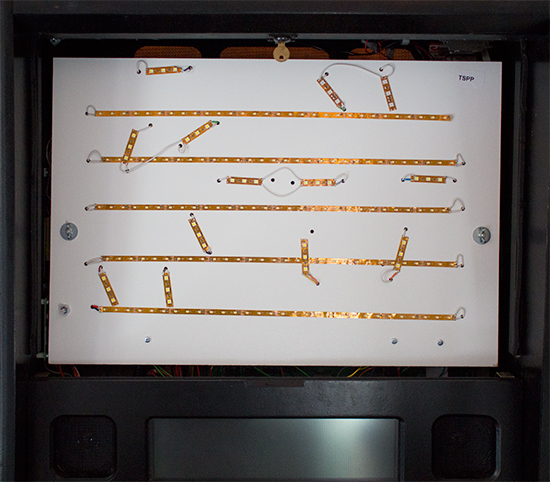
We opted to keep the bubble-wrap on the board for as long as possible to avoid damaging it during installation, but it does seem quite robust anyway. The board itself is a thin but rigid sheet of MDF. Several holes have been drilled, through which the cables linking the LED strips pass.
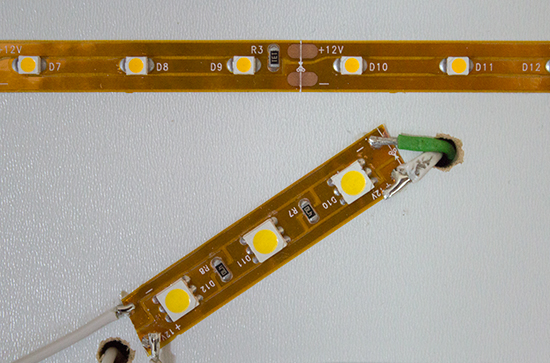
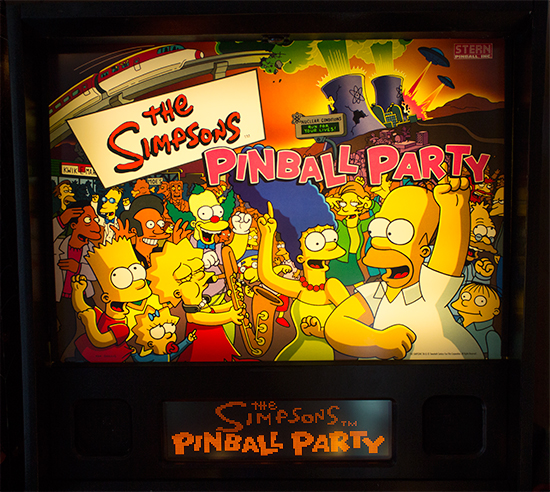
As you can see above, there are two types of LEDs mounted on the board. At the top we have the warm-white general illumination, while the lower strip contains 'flasher' LEDs which may be white or coloured, depending on their location and the game model. Superfluxshop make different boards for various Stern machines, and a generic version for other titles. The different versions have the flasher LEDs positioned at appropriate places, so they illuminate specific parts of the backbox artwork. The generic version doesn't have the flashers pre-installed (though it does come with them - you just have to work out where they should go and connect them up yourself) and is consequently cheaper. This specific version is designed for The Simpsons Pinball Party, so if you're familiar with that game's translite you could work out how the flasher LEDs map to features in the artwork. Power for the LEDs comes from the game itself. Several pass-through connectors are included, which plug into the machine's power board and the CPU board in place of existing connectors. Those existing connectors then plug into the pass-through connectors.
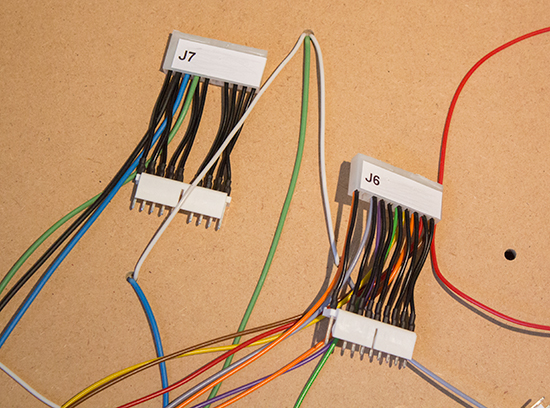
The connectors are labeled and polarized the same as the board's connectors to reduce the change of mixing them up or plugging them in the wrong way round. The J7 connector has its polarizing pin in the centre, so it is theoretically possible to get it the wrong way round, but the connector only fits comfortably one way. The supplied mounting hardware is fairly minimal, but perfectly adequate, consisting of two threaded posts, four washers, four nuts and two wing nuts.
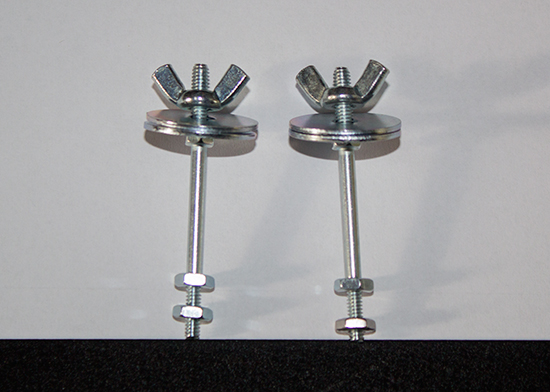
When put together, we get two mounting posts.
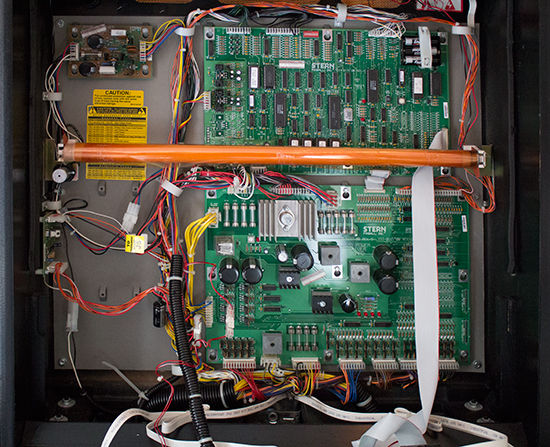
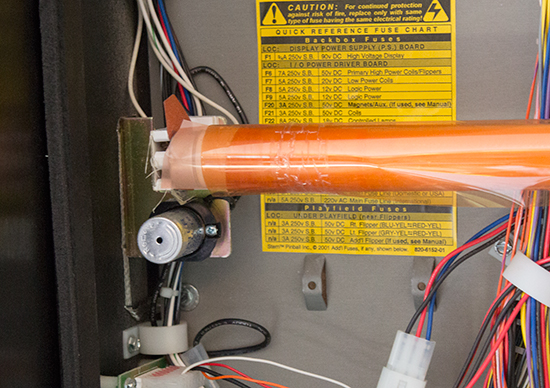
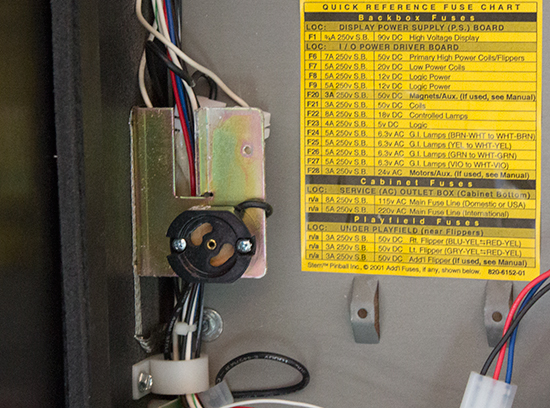
Having found out what we have, let's install it. We removed the display panel and laid it on the playfield glass but kept it connected, so this is the view inside the backbox before we started the installation.
The only change from the way it came from the factory is the addition of some orange film wrapped around the fluorescent tube to warm it up. This tube and its starter have to be removed before we can fit the Lightning board.
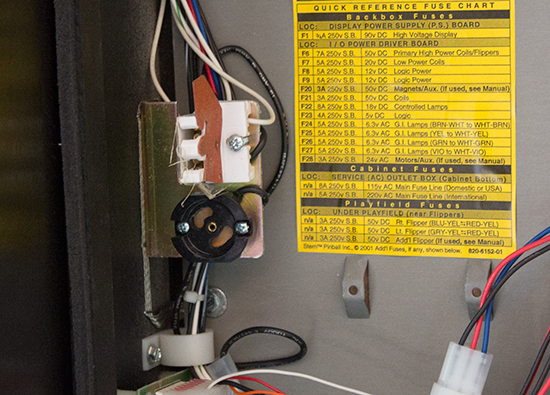
Stern used a very cheap interlock method to hold the tube in place on this model. Pushing up on the brown piece of card on the tube holder allows the tube to slide out, while twisting the starter in an anti-clockwise direction unlocks it so it can be lifted out.
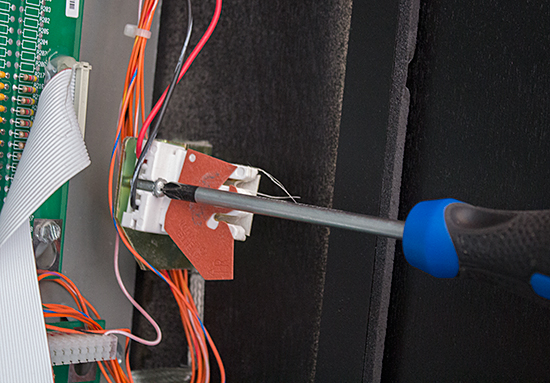
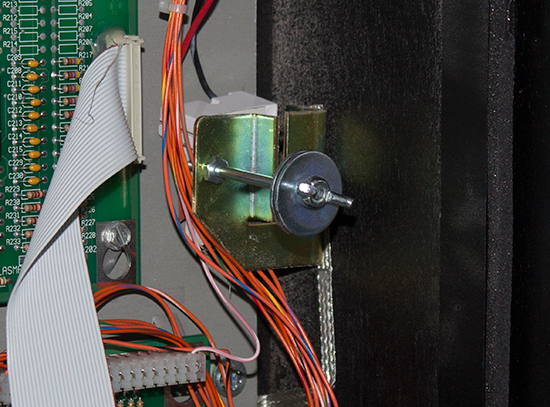
Our work is not finished here though as we also need to remove the two white tube mounts - one on each end - completely. These are held in with a single bolt each.
Once they have been unbolted, the mounts can be put behind the bracket to which they were bolted. This keeps them out of the way and makes it easy to reinstate them if you ever need to.
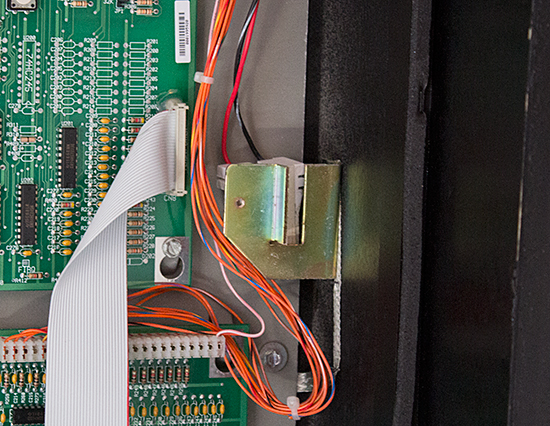
Now we install the Lightning board mounting posts. These are designed to fit into the same bolt holes we've just vacated. Clever, eh?
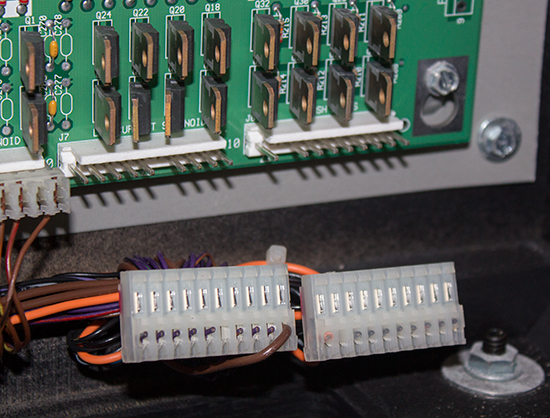
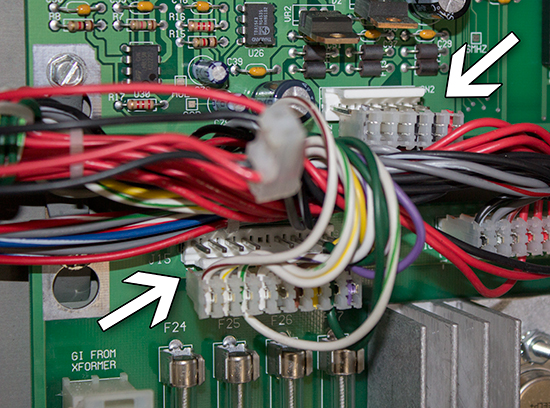
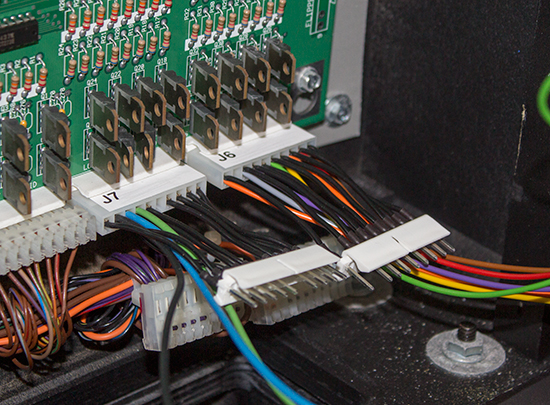
One nut goes behind the bracket on the end of the post's thread, the second goes on the other side of the bracket to ensure the post is securely held in place. We've put the wing nut and the two washers on the post just to keep everything together. They will need to be removed before the board is fitted. Next we laid the Lightning board on the playfield glass on top of the display panel. The bubble-wrap is still on it at this stage, so nothing should get damaged. With the board in place, we can disconnect the plugs on the power and CPU boards and hook in the new connectors. There are three connectors on the power board to unhook - J6, J7 and J15. J6 and J7 are at the bottom-right corner, while J15 is at the top-left.
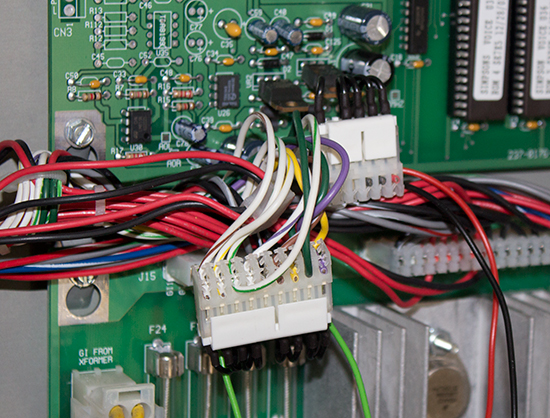
The CPU board's plug needing disconnecting is CN2, which is right next to J15 on the power board.
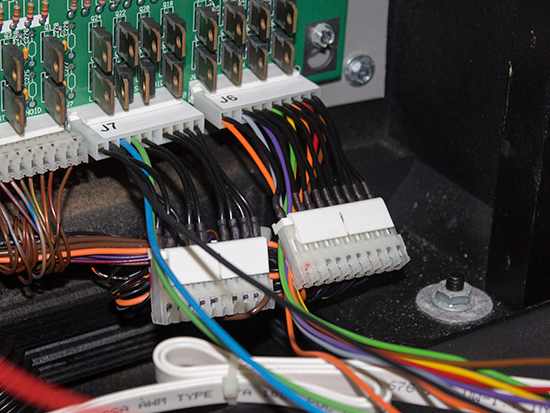
The appropriate pass-through connectors from the Lightning board are plugged into the power and CPU boards...
...and the original connectors plugged onto the new header pins.
Not all models use the same connectors, so be sure to check the instructions and the labels on the pass-through connectors to make sure you have the right ones (J6 is the same in German). Those are all the connections which need to be made, so now we can do one of two things; either tidy up all the various cables we've just added and make everything neat and tidy, or forget that and just try it out.
Removing the wing nut and one of the washers from each side allows the board to sit on the two mounting posts. The washers and wing nuts are then replaced and tightened to complete the installation.
Now comes the moment of truth. With the translite replaced and our box of fuses at the ready, we powered up the machine.
The initial impression is - wow! The lighting is much more even and the warm colour is spot-on. If we were being hyper-critical, we'd suggest a strip of LEDs running around the outside edge to remove those darker corners, but even so it's a vast improvement on the single, cold, fluorescent tube. Plus, unlike that tube, the LEDs are connected to the general illumination, so when the game goes dark, it really goes dark, backbox included, making the lighting effects that much more dramatic. But that's only the start, because hidden at the bottom left corner of the Lightning board is a potentiometer, and - by default - it's set at the half way point. Turning it clockwise shows how bright the general illumination LEDs can be. All we can advise is to treat the LEDs like the opening of the Ark of the Covenant in Raiders of the Lost Ark - don't look straight at them - because these things can be bright. Very bright. Too bright in fact, as before long the brilliance of the translite reflects in the playfield glass, making the top of the playfield all but invisible. The optimum level seems to be about 70% of maximum brightness. For added fun, try turning up the brightness to full just as the game's attract mode turns off all the general illumination, so you think you've blown it up. Oh, the laughs we had with that one. The part we can't show you in pictures are the effects produced by the flashers. Some of these are coloured, others are white. Because there's no additional code to support this Lightning board, the flasher LEDs are piggy-backed off existing playfield flashers. While that's never going to be as good as dedicated flashers, rewriting the code for these games to support additional hardware backbox flashers is unlikely to happen, even if there were sufficient spare drivers available. Even so, the effects are pretty darn impressive. The cooling tower pop bumper flashers also flash the cooling towers on the translite, the flasher in Homer's head causes Homer's image on the translite to flash in time with his words, and so on. Each flasher on the Lightning board has been placed so it illuminates an appropriate feature and it works surprisingly well. We said we can't show you in pictures, but we can show you in video. So here's a typical seven minute game on The Simpsons Pinball Party, including Couch Multiball and Itchy & Scratchy multiball, with several jackpots and a super jackpot. Compare that to a single static light source and we don't think we'll be needing those fluorescent tube connectors again. The quality of the components is high, with the Lightning board fitting easily and the connectors feeling reassuringly solid and well insulated. Installation took less than an hour, including working out what the instructions meant and taking these pictures. The LED Backbox Lightning Kit costs €199 for the game-specific models, or €119 for the generic DIY version without the flashers pre-installed. Both prices are plus shipping from Germany. That's not amazingly cheap, but you do get a lot of hardware for your money - especially with the DIY option - and the difference it makes is huge. Not many mods make this much difference to a game's appearance in a way which looks as though it was always intended. It's simply unthinkable to go back to that fluorescent tube now we've seen the light. The only problem now is trying to concentrate on the game and not constantly looking up to see the lighting effects in the backbox. Multi-player anyone?
Most other Stern/Sega Whitestar and SAM system games can use the generic version, although some basic electronic skills are needed to work out and make the correct connections linking the playfield flashers to the backbox ones.
© Pinball News 2013 |