|
|
FROM JACK |
| In this article we will see how to build and use the PinRen “Wheelie-Bobber”. In two upcoming articles you will see that the Wheelie-Bobber can be used, among other pinball related tasks, to help you install beverage holders and/or level your games.
Have you ever tried to level a pinball machine by yourself? Crawling under the game in order to use yourself as a human lift can be a pain in the … backside. Leveling a pinball machine is easier with the help of a friend.
But, if you haven’t got a helpful friend, then the Wheelie-Bobber may be the answer for you. I built the PinRen Wheelie-Bobber to hold the front of my pinball machine just off of the floor, when I removed one leg in order to install a beverage holder.
No responsibility is taken by PinRen or Pinball News by any use or misuse of the Wheelie-Bobber should you decide to build one for yourself. In general, if you don’t know what you are doing or feel uncomfortable doing it – don’t! The most commonly available PVC tubing for household (DIY) use, is Schedule 40 rating/type. The maximum operating pressure of Schedule 40 rated PVC tubing is 480 psi. Therefore, a single piece of this type of PVC tubing will not support the weight of an entire pinball machine. However, one short column can temporarily raise one end of a pinball machine. (Editor's note: For the details of this calculation, see the footnote at the end of this article) When selecting material for your project, examine your PVC tubing to ensure that there are no split seams, breaks, or fractures. Never play your pinball machine while it is temporarily supported by any means. Only play on well maintained pinball machines with properly secured legs; that are in good condition. TERMS ID – An acronym for: Internal Diameter. PSI - An acronym for: Pounds per Square Inch PVC – An acronym for: Polyvinyl Chloride TEE – A junction for joining tubing. TUBING – A length of pipe with specific inside and outside diameters.
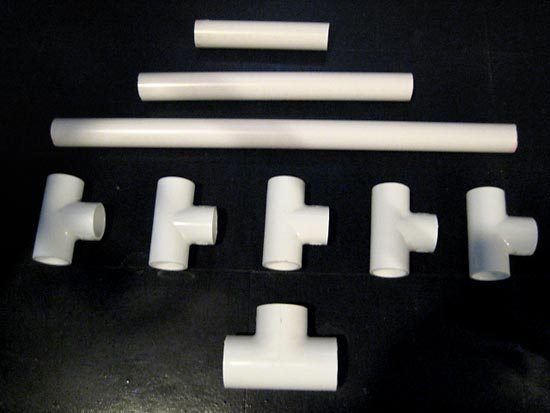
The parts list for the PinRen Wheelie-Bobber includes: The above parts are readily available at most local DIY/hardware stores. For metric sizes, the standard 32mm and 40mm tubing and tees are good substitues for the ¾” and 1” sizes used throught this article. You should ensure you are using good quality rigid tubing and not the cheaper, more flexible variety. As stated earlier, if you don’t know what you are doing or feel uncomfortable doing it – don’t!
Small Saw (Hand or Electrically Powered)
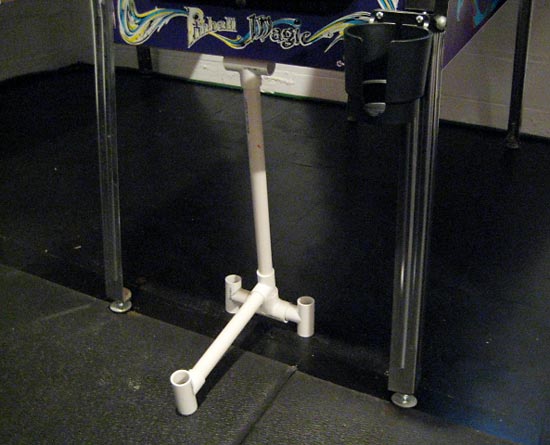
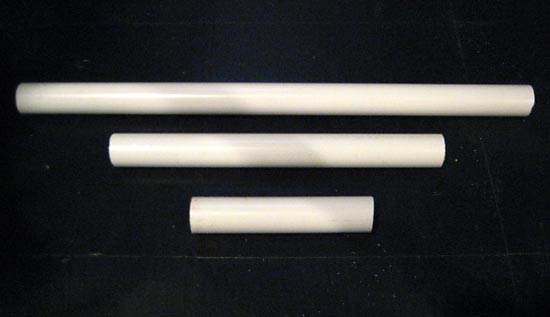
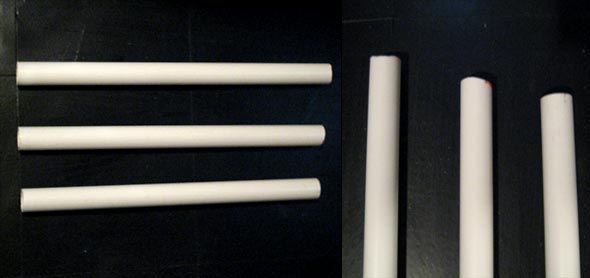
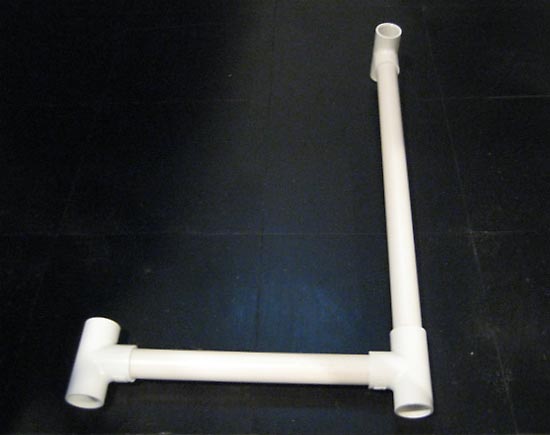
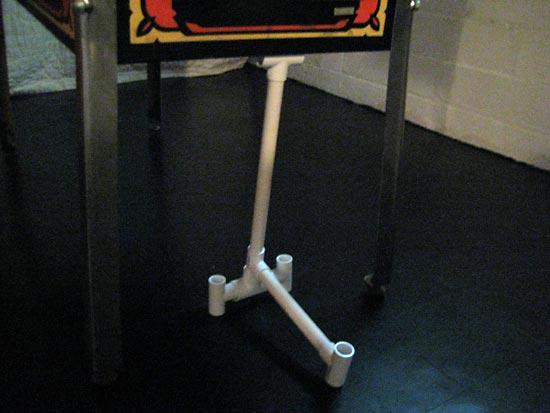
I built my prototype Wheelie-Bobber, in just over an hour (including the trip to the hardware store), for less than $5.00. Start by examining your PVC tubing a second time. Ensure that the tube is continuous with no: seams, breaks, or fractures. If the tubing passes visual inspection, only then, proceed by making and collecting all of your pieces. Your measurements do not have to be spot-on. But, your cuts should be clean and square. In the picture below, the longest (17”) cut tube will be the lifting column. It is this piece, in conjunction with the pivot, which will lift one side the pinball machine slightly off its casters. To help ensure that the column can stand up to the job, inspect it (and your entire homemade Wheelie-Bobber) prior to each use. In the same picture, the second longest (10”) cut tube is for the kickstand/outrigger/stabilizer. For the sake of stability, one of the rules for climbing applies here, “three points”. When in use, the “kickstand” is like a Kangaroo’s tail. It will rest on the ground. In the picture directly below, the shortest (5”) cut tube will be the axle; which will allow the assembled Wheelie-Bobber to pivot.
For the longest piece, the lifting column, I took advantage of that fact that I had to buy a 10-foot piece of PVC pipe. I cut three pieces of different length. Now I can change the lift span of my Wheelie-Bobber to easily accommodate just about any pinball machine. Below are (longest to shortest): 17”, 16”, and 15” columns.
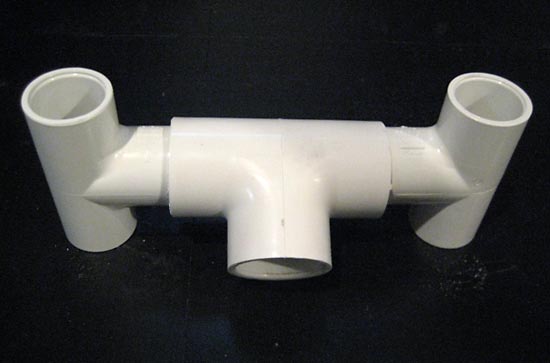
Start assembly by temporarily placing one ¾” tee on the 5” tube. Follow the ¾” tee with a 1” tee “threaded” lengthwise.
Now capture the 1” tee with another ¾” tee opposite the first.
Next, make another PVC “sandwich” using two more ¾” tees and the 10” tube.
Secure the tees by pressing them towards each other. Use a flat surface to square up the tees on the end of the tubes. Do this for both sets of parallel tees.
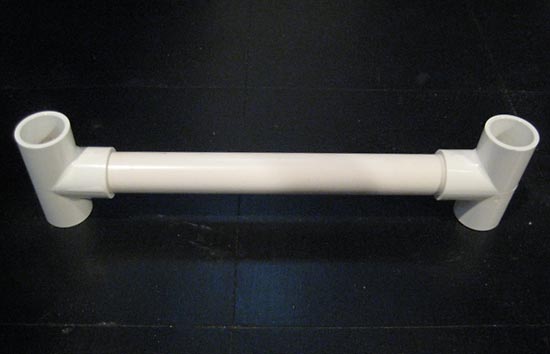
You already have most of the Wheelie-Bobber assembled. Just a few more steps remain! Continue by capping the 17” lifting column with the remaining ¾” tee.
As seen directly below, the “tail” will nestle in the axle. But, as shown in the following picture, the lifting column will first have to be added.
The tail with lifting column attached. Notice that the column cap is mounted differently than the other two tees.
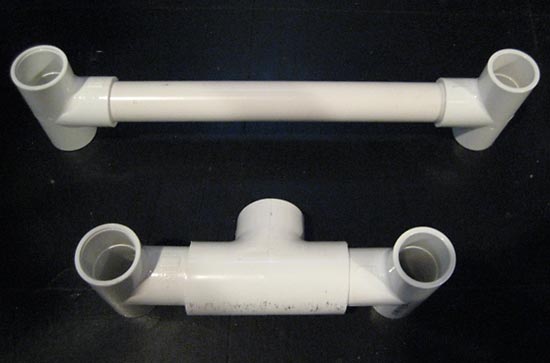
Pictured directly below is the temporarily assembled stand. One last step is to secure the pieces.
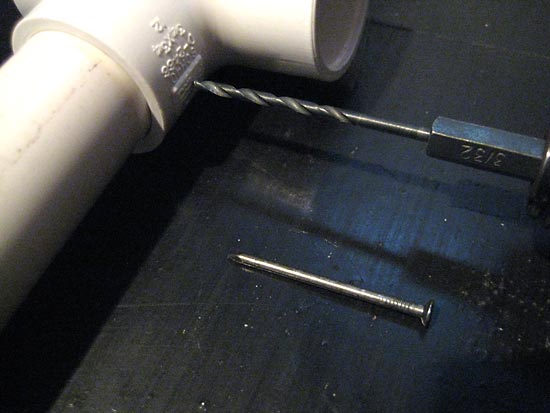
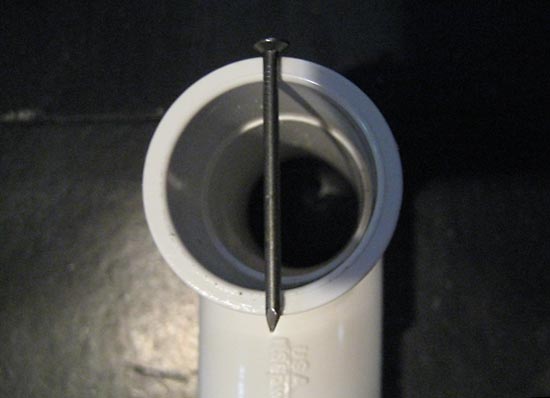
Lastly, secure each of the ¾” tees with hardware. I used a 3/32” drill bit to provide a visa for the five 4d nails I used as retaining hardware. The hole is drilled ¼” below the rim of each ¾” tee and at the apex of its diameter. Making a via for each piece of retaining hardware helps to ensure that the PVC tube will not split when the retainer is installed. The 1” tee on the axle will need to be left free to swivel. So, do not add any hardware to this single piece.
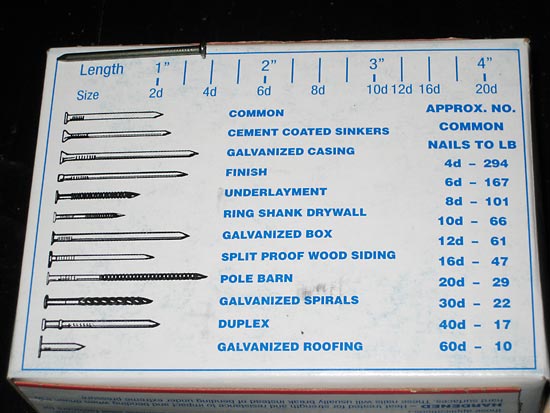
I used common 4d nails, not only because they were what I had on hand, but because they worked very well for this application.
Make sure that you employ narrow/thin hardware. The narrowness of the hardware will help to keep the retaining hardware itself from acting like a wedge; thus splitting your PVC tubing. It is recommended that you use hardware which is long enough to span both sides of the joint it is retaining without getting in the way of the use of your homemade jack. You may file the hardware to blunt the ends, and help keep you safe from nicks/scratches.
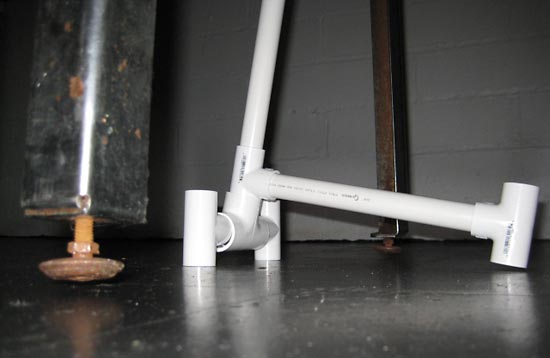
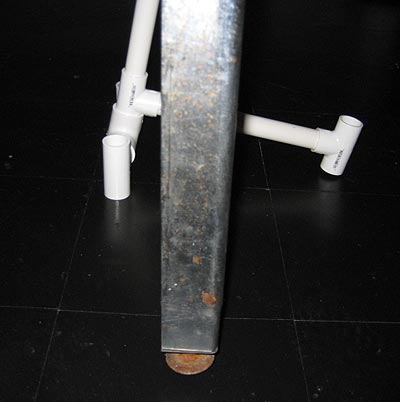
USE To use your Wheelie-Bobber, place it under the center of the edge on the side of the pinball machine you wish to raise off the floor. Place the tail so that it is sticking out, away, from the middle of the machine. Place yourself near the jack. Do not press down on the tail. Instead, lift the cap of the lifting column towards yourself. The pinball machine will move a few inches toward you, while at the same time, that side will be jacked up about an inch.
The Wheelie-Bobber is used to temporarily raise any one side (front, left, back, or right) of your pinball machine off of the ground. The side you are working on will only be raised about an inch or so.
When the jack is in its upright position, the angle of the column goes slightly past 90° and the tip of the tail rests on the floor. Notice that the base of the jack is straight with the line of the legs.
You can use your Wheelie-Bobber when you remove or replace the legs on your game. It is recommended that you do this one leg at a time. This is why I keep a spare set of legs on-hand at all times.
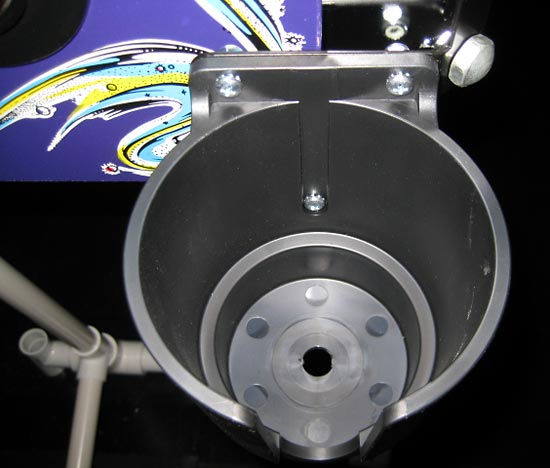
As mentioned above, I designed, built and first used my PinRen Wheelie-Bobber to help me install a beverage holder.
Formula for the strength of a tube made from closed cell medium density plastic. The following formulas are based on ASTM D1785, using Schedule 40 PVC tubing. A = Area in Square Inches = In2 So, with one piece of ¾ In. Schedule 40 PVC tubing having nominal dimensional characteristics, you can temporarily lift 170 Lbs. and temporarily hold 85 Lbs.
|