|
|
THE MAKING OF |
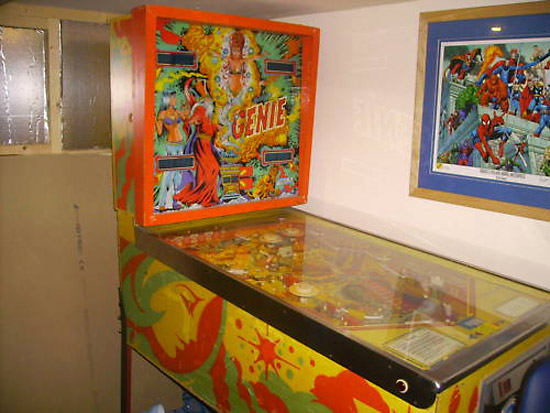
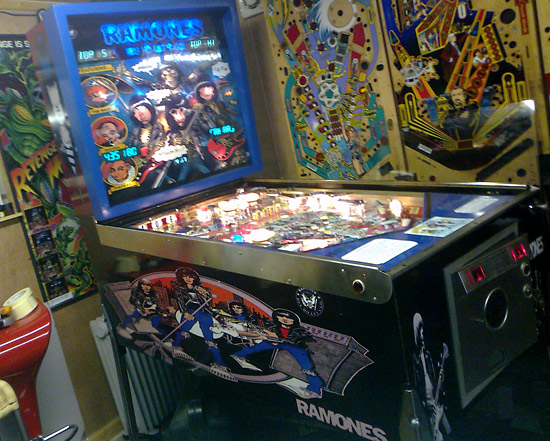
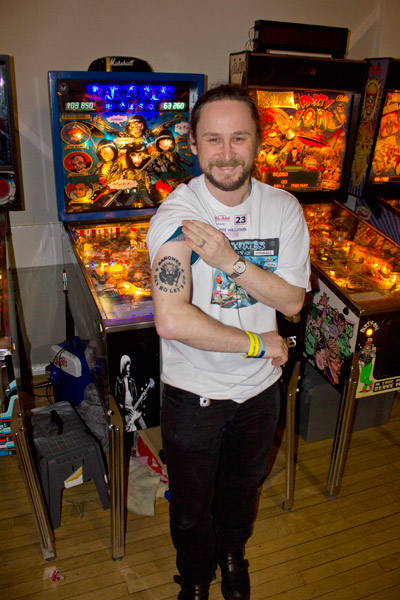
One of the stars of this year's South Coast Slam was a custom Ramones pinball created by Chris Williams (a.k.a. Poibug). With the public debut of The Rolling Stone also taking place, this was a clearly a music-themed show, so we just had to learn more about the Ramones pinball and find out how the game came into existence. What better way than to get Poibug to tell the story himself? Here's his retrospective diary of the making of Ramones Pinball.
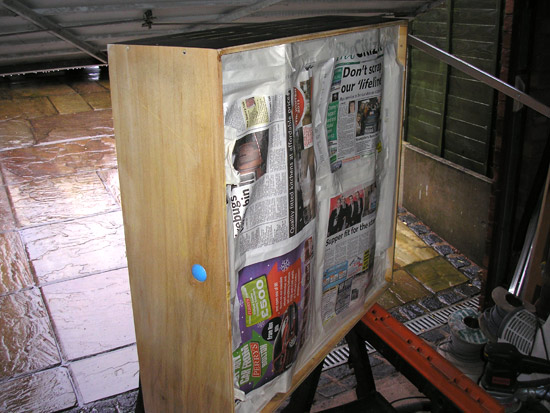
Originally, the first thought came when Stern were doing the Elvis pin. I did an R.G.P. post saying 'yo do a Ramones pin instead'. That was back on June 29th 2004. Roll forward to January 2010 and a UK event - the first ever South Coast Slam. There, Gary Stern did a talk and at the end we could ask questions. I asked if a Ramones pin would ever be done - hey you can’t blame a guy for trying. Sadly that was as dead as a dodo. You can hear it about 70% of the way into Gary's talk here: So over the coming months the idea pops in my head more and more, but only for very short periods of time. The only thing I had ever really come to a conclusion about was that I loved the Road To Ruin artwork and it should be on a Ramones pin ANYONE ever did!! I keep an eye on Ebay as I always do, and see if anything good or anything pin related comes up. Fast forward a few more months to mid-October and I notice a Gottlieb Genie on Ebay. Looking at it, I thought how it could work as a Ramones pin. Good gameplay and the machine was fully working – it even had a Pascal Janin board in. Over the coming days it starts becoming clear this would definitely be a good pin to re-theme. Seven targets too for R-A-M-O-N-E-S Many problems flash before by eyes now. How could I do the plastics,sound,translite etc etc? More important was a bigger problem - zero space. I decide to make a phone call. “Yo Daz, need a favour!” Daz quickly gets on board, says no problem and he wants to help. Daz is very good at woodwork and re-decalling cabs, so one problem is already sorted. Well, sorta. I have no artwork, ideas or decals, but at least I have a bloke that can sort the cab out! So, I turn up on Saturday October 24th with Daz and my trusty pin hauler – a Honda Jazz (or Fit in the States) - at a place called Lancaster in the UK. We're off down into the basement - down nice steep right angles stairs – nice. Daz and I look at each other with a 'this will be a PITA to move out' kind of look. Ironic, since Ramones sang I don't wanna go down to the basement, whereas I most certainly did! So there it was, pretty much working with only minor niggles. A repaired backglass, dinged cab and playfield with wear, but it should make a great donor. So, £300 lighter and after careful manoeuvring, we squeeze pin out of the house. The owner comments with the usual ”you’ll never fit that in that car”. “Sure I will, I've moved loadsa pins in it", I say So we TRY and put it in, but something ain't right. It ain't quite going in lengthwise. It’s then I realise what a mammoth size game it is. So after moving seats forward, it finally goes in.
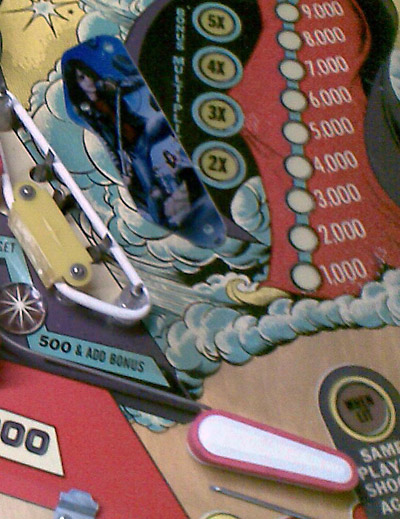
The playfield was a bit worn and 'repainted' by a previous owner.
Over the coming days, much time is spent reading up on how to make plastics, decalling, trawling through all my multitude of Ramones stuff and looking at ANYTHING Ramones. A few days after getting the pin I caught a lucky break when I remembered there was a workmate who I thought had a mate that was a printer. Tenuous, eh? It turns out he was not only a printer, he had his own print business. Result! So I asked him if his mate could do a large decal about 1.5m x 0.5m. “What’s a decal?”, says my workmate. So I decide which artwork to use after being given a VERY good price. I think I am all sorted as I have design in mind; caricatures of the Ramones on the side of cab. Then, at the last moment I change my mind, due to concerns over quality and thinking what I was going use would not work. I then resize what was gonna be the translite, add some lettering and finally decide on side art before sending the picture off at the end of October. After that, more and more time is spent with me starting to make plastics and coming up with what I want on the playfield. I always felt I had to have an awesome Dee Dee pic on what I call the mini playfield, so I order one from an online company Diginate on October 26th. This same company then get used for various other decals such as the backbox, apron and targets. A few days later on 28th October I get the decals for the sides of the cab from my workmate. WOW! They blew me away and totally exceeded expectations. I progressed with the plastics. Here's how I did the Ramones plastics:- I bought some 2mm thick Lexan off Ebay, such as: Then I took the image, reversed it and printed it onto a clear decal, such as clear transparent adhesive PVC. It was then stuck onto the underside of the Lexan (or you can cut out the holes on the Lexan first) - just make sure the Lexan plastic film is removed from that side first! I got as many of the air bubbles out as I could by rubbing the decal down with a piece of felt. Note: some air bubbles were left but weren't visible when backlit. My Ramones pin has little air bubbles on most of the plastics, but apparently no one notices them :) Any excess decal was trimmed off with a knife. I sprayed the decal part with PlastiKote white matt spray- 1 1/2 to 2 coats. Then I sanded off the plastic edges with 320 or similar wet/dry. It's good to do whilst playing on a turn based game on X-box Live! Finally, I removed the top plastic protective film plus any white overspray.
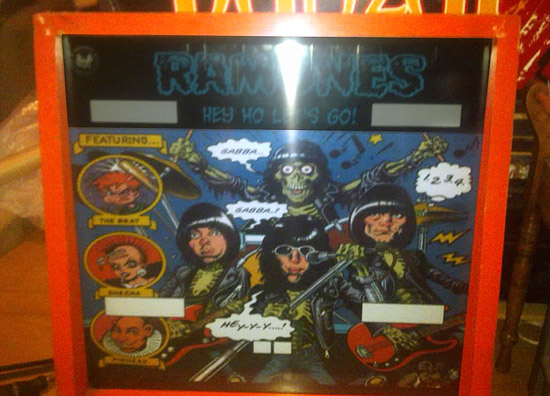
Also at that time, I needed to sort something out for the translite and I finally decided which picture to use. I got various quotes of around £60 for backlit film. I then ordered for £50 what I thought would be a plastic-style translite (like a modern translite) from a company hundreds of miles away. But when it turned up at the end of October, it seems one of us got our wires crossed. I figured this would show every bubble and just look a bit naff. Back to the drawing board. The decal is dumped in a corner and forgotten about. Then two days later I find out that the local printer who did the cab side decals thinks he knows what I am after with regards to a translight, and can do it for me . I take along the Genie backglass, showing him what it is replacing to help give him an idea of it’s function. He loves the Genie glass – “no ya can’t have it”, I say. “I am gonna frame it”. He looks upset, but fully understands. :) He asks “what are those things?” and I explain the cut outs for displays and various lit areas for 'TILT','GAME OVER' etc. He says how he can put in the 'GAME OVER' and 'TILT' for me, and that they should only be visible when lamp is lit. Nice! I explain how I will cut out rectangles for the displays. He says he can mark areas off in white to make it easier for me . Cool, make it easier I thought. Suddenly, I change my mind on the picture. This indecision is becoming a habit. I thought, "oh well, let’s wing it!" I then point out new pic I wanna use – thankfully a very good quality one that I had on hand. We add some lettering, changing this and that on the fly, and I leave a few hours later. Leaving him the Genie glass for measurements, I was praying it did not get smashed. Changed my mind again over a little something to add to translite, and forwarded it to the printer later that day; Nov 5th. The next day I shoot off to an arcade/video show to drop off some of the cabinet decals to Daz and play some vid games - and pins of course - with my son. At this stage my son has no idea what is going on (only me, Daz and my mate Mark do at this stage) so Mark Northern has to babysit my son round the show for quarter of an hour whilst I give Daz the stuff and show him various other bits and bobs. Daz is well impressed with the main cab decals; so am I. :) He takes some 2mm lexan off me (another ebay purchase) ready for when I plan to come up in a few weeks. The good thing about this is; Daz now thinks maybe he could make a Tomb Raider pin! We’ll see if it ever happens. Hope so. Roll forward a few days to the 9th November and I receive an e-mail from Daz with the header 'Genie no more'. What? Noooo! What’s happened? Has it been nicked? Blown up? Has one of his cigarettes set it alight? Severe palpitations now, cold sweats…… Oh, he’s just emailing me to let me know he has started sanding the cab. Blimey, pictures attached too. He has been busy I thought. Sanded and filled – using half a tub of filler. I did say it was dinged, didn’t I? Well that really is the point of no return, I thought.
A few days later, more e-mails saying "just a teaser”. Blimey he’s got some decals draped on cab already to give an idea. Not stuck, but just for effect. It's looking sweeeet.
Too sweeeeeet! NICE! I start feeling self-imposed pressure here, as I feel I need the rest to look even nearly as good. What started off as a realistic goal of it not looking really bad, has now changed to it needs to look reasonably good. Sounds strange, but that was what was running round my head. Better up my game. Decide to order the perspex for the translite the next day. £25. Sure it coulda been cheaper, but self imposed rushing. Don’t wanna waste an hour to save a few £s and then spend more time doing what I already spent a lot of time doing. Looking at images and Ebay, I stumble across a Johnny Ramone mini signed guitar. Click! £22.90. Click-bought-sorted. "Crikey, hope it fits", I thought. "Where’s it gonna go?" Oh well, we’ll see. :) Just a few days later,17th Nov, more pics from Daz. Backbox started and decals started to be applied. Result!
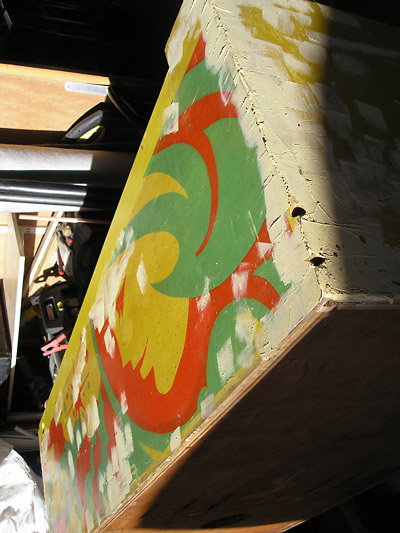
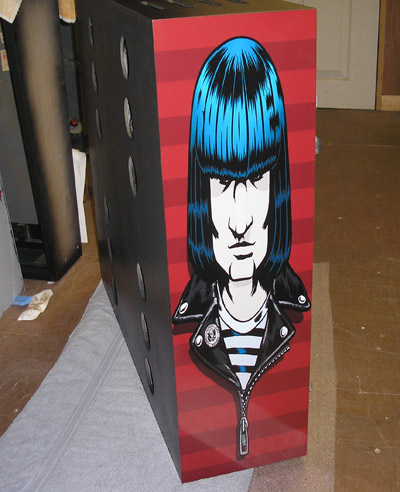
The first problem occurs when I realise I cannot leave front of cab just black. It just wouldn’t look right, especially with wood grain showing (see below).
I was gonna leave it black. Now I need to sort out more pics and get some ideas sorted for front of the pin. Send an e-mail to Daz for his opinions on my options for front decal. Then phone him up and we both agree on one of the three designs I had shown him. Not sure where, but I am more of a kinaesthetic person!! Send pics off to printer, hoping he gets 'em done in a week or two. A realistic goal, I thought. Another Mark (Mark S), had found out about my project that day as I needed to run ideas past him on how to integrate some audio. He mentioned he had used an answerphone-style recorder PCB to put more audio on a Paragon. More on that PCB later. I get a phone call the next day from my mate. “In the pub. Have your Ramones picture glass thing here”. What? I zoom straight down there. It was my birthday, and boy was I gonna get a nice pressie! Not only was the translite done, but so was the front decal. He even did me two front decals so I have one spare. They were very nice indeed. I thanked them profusely (after getting strange looks from the punters in the pub when I looked at the items). I even turned down the offer of a pint - not like me as anyone who knows me will attest, but I was so buzzing. Bought them a beer. It was a good day as my wife had got me pin stuff for the project too - mylar, lane guides, etc. I wanted to get home and tell someone – although hardly anyone knew about the project (only about 3 pinheads at this time).
I decided to tell another two local pinheads, as my annual pinmeet meet/drink fest was coming up - Taffstock. That meet/beer session was great. I was able to run some more ideas past “babysitter” Mark Northern and Daz. I was able to show 'em the translite and front decal. They were well impressed. I was being very critical of a mistake I had not noted on translite pic before printing. It was winding me up. So bloody obvious now. How did I miss it? Felt DUMB and angry. They calmed me down and told me it looked really good. The pep talk helped. Incidentally, Mark Northern is roped in to help on the Ramones pin too. Another straight-talking guy who offered to help, including using his vinyl cutter. Heaven help him for offering help. Hope he doesn’t regret it. My meet was a great distraction from the Ramones pin, but it was also difficult not telling some of my best mates who were there, what I was up to with the RAMONES pin. I even hid the W.I.P. stuff. I was bursting inside. I also find out it is Daz’s wife' s birthday, but he has managed to come to my meet. Blimey, I am beginning to owe this guy BIG time. Incidentally at the Taffstock meet, you won’t believe the fun that two grown men get by playing with my neodymium magnets (very strong). It must have been the beer and tiredness, eh Mark and Aid? "We have enough metal from cans and bottle tops to make a boat!", was my comment in the Taffstock aftermath. My wife and son have still not been told of my project, although my son was beginning to say I was obsessed with the Ramones as I was always looking at pics of them! Want to wait till it is all done to surprise them. Anyhoo,back to the pin…. Using other Mark (Mark S’s) sound board idea - I looked around various places and bought an answerphone recorder style PCB, that had 5 switches on it. When a switch was activated, it would then play back whatever was recorded on that line. I thought this may make it easier to playback as these switches could be put in certain areas and be activated either by the ball or from an existing switch. This was now November 29th.Seller was electronics123. Another $34.18 spent. I start running through ideas for the sound integration on which songs to use. I have some ideas sorted. Playing:
Then I wait a few weeks for the darn PCB to arrive. Beginning of December, carry on as usual. End up buying more tat on Ebay. This time, plastic guitar playing picks. Think they will look good on the the top RH metal arch,which has now been sprayed PlastiKote black – the original yellow colour would not work. At this point have an idea of putting a decal of an inkpot on the arch. Why? 'Cos of the songs “Carbona not glue” and “Now I wanna sniff some glue”. Sounds stupid, but something a Ramones fan might get I thought. I finish work early this December and buy myself a pressie - a platinum Ramones vinyl LP. This is off the first Ramones album. Think it’ll look good behind the pin when (or if) it ever gets complete. It’s a made one, not an original, but I think it’ll look sweet. It’s an original Ramones LP electrically dip-plated.
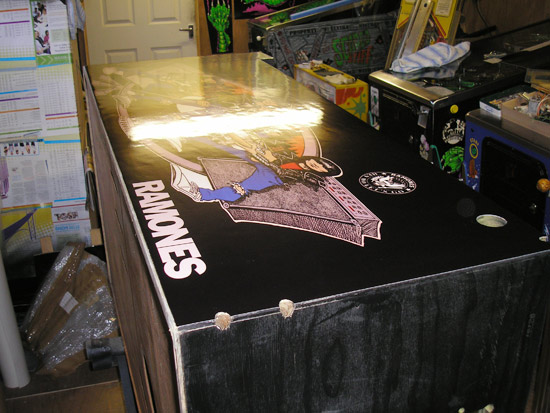
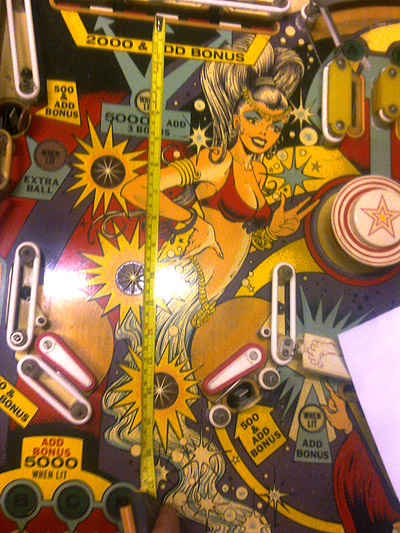
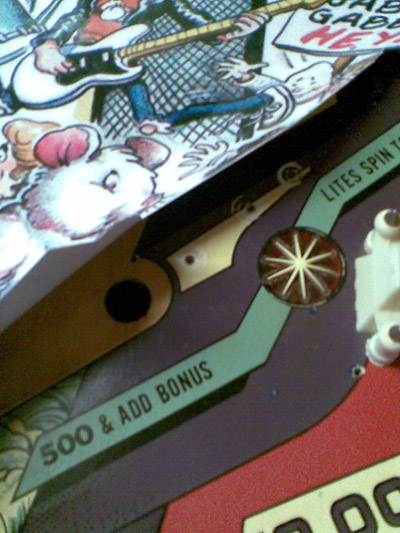
Finally get up to Daz's, with Mark Northern there too. We get various things done that day, including lots of tea drinking. Plus, me 'n Daz eating half a pig in a bacon buttie. Not Mark though – he’s a veggie. The project now starts becoming more and more visible as a Ramones pin when the Dee Dee decal from diginate.com finally gets laid down on the playfield. This was a vinyl sticker with a spot gloss varnish. It was sized slightly bigger than the mini playfield area. The final resting place was not cast in stone - this was decided on the fly. As I said, some of this project is “wing it and see”. It felt more fun and spontaneous that way .Sometimes you can overthink something and just get confused. This may seem unconventional,but in hindsight it was definitely the best way to do it. The good thing about this area of the playfield was the fact there were only a few inserts/rollovers there. These inserts/rollovers were heated up and knocked out. Then the playfield was cleaned with panel wipe and the decal positioned, after much deliberation! Then the insert holes were felt, and cut out with a blade. Think Daz enjoyed that bit. A strange moment. It was great to start seeing the pin look more “Ramonsey”, but a bit sad to see the original playfield being covered up. Especially as it was the gorgeous artwork of the Genie. It was then that I decided that I must retain some of the original artwork on the playfield. To this day I am not 100% sure why. Maybe out of respect for the original? To make it look “old”? Who knows. It just seems “right”, even though there is some wear. But it did look good – really good. One problem with doing this decal method was that on the Genie, the playfield has lots of writing, saying what that part of the playfield scores – Extra Ball, 5000 points, etc.
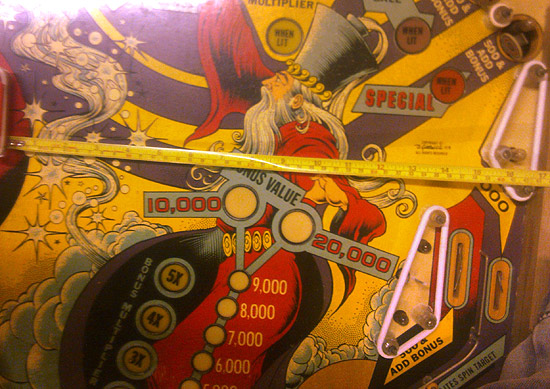
I also put a Johnny picture on the spinner, as can be seen in the photo above. The biggest problem now was, what to do with the rest of the playfield? This problem had been around for a while, but was now more prominent as it was all progressing so nicely. Problem was, the Wizard artwork on the playfield was massive. One idea was to put artwork of a guitar fret board over it, using the small bonus lights as the guitars fret markers. Mark Northern said he could do one on his vinyl cutter. I was thinking of leaving part of the wizards cloak on playfield as,to me at least, it looked like a bomb with wisps of smoke trailing up, as if Johnny’s fast guitar playing made it burn.
Another idea was to use the pinhead skull. There was a decal of this for sale on Ebay, so on Dec 16th I bought it on a whim after asking them to change the size and shape, as it was sold as a wheel cover.
I figured that it would look good and be appropriate, as it was a pinhead decal after all. Next day I am wondering on how to amplify the sound from the answerphone recorder PCB and wondering whether to use original amp, or to buy/make one. Then find a 400 watt (PMPO) amp that can have multiple inputs and surround sound outputs. It can also be an FM receiver, as well as play mp3s from an SD card or a USB.
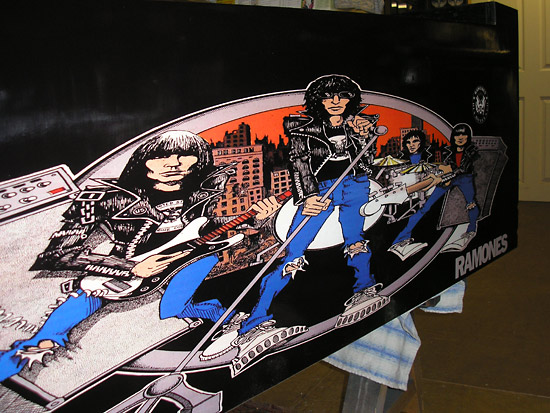
A few days later I was in a local pub - as they have a pin in there - and bump into the guy who did two of my tattoos. I ask him how much for a Ramones logo tattoo. "The size of an orange", I said. "£65-£80", he said. Now I only ever have a tattoo when I am 100% sure I want one. I had been at 99% on wanting a Ramones one, and decided there and then that I was now 100% sure I wanted one. A few days later on December 21st I had it done and posted the pic on UKpinball Group. Still never mentioned the Ramones pin though. Get some Ramones goodies for Christmas, including a head knocker that will be the pin's topper. January 2011. New year but old problem of covering the playfield wizard has still not been resolved. Stumped. Really stumped. More pressure now as me, Mark Northern and Daz had decided we will endeavour to get it finished for the great UK show - The South Coast Slam - in early February. Only five weeks away. Gulp!! Hang on, I still have that lightbox decal. It is quite big. I wonder… I start measuring it and compare it with the playfield measurements I have (don’t forget, the machine is still 80 minutes away at Daz’s). I begin to realise this could work. I phone Daz to get clarification on the playfield area sizes, send him an e-mail of the pic and say “How we join it with Dee Dee? Gawd knows!” So I decide this is the way to go as it looks good, is an interesting picture, has the band on it, and it means what was originally a £50 translite has now, flukily, become a playfield decal! Like I said, lots of this was winging it and doing stuff on the fly. Strange way to do it, but creative (or is it just lucky?). With inspiration from Monster Bash, I decide it has to have a mosh pit. Do that decal in various sizes and colours, and reverse print them on the trusty HP printer onto the PVC sticky film. Attach the glue pot decal to the arch. Get to Daz’s. Marks there too. Gonna be a long day. Mark Northern has been busy doing the 'Hey Ho Let’s Go' letters using his vinyl cutter, and various other lettering jobs for me. The pic below was taken before they were spayed white underneath. You can also see some of the other plastics were tried in place to enable us to see if they “work”. They did.
I annoy the guys as I play The Ramones ALL day, using the new amp with bodged-in power supply and speakers. I decide the sound, for now at least, is gonna just be a jukebox. How and where it will all go in game is undecided at this point. It ends up being something like a 10 hour day, and I rope Mark into doing some more decals with his vinyl cutter. Red and white rectangles and letters R.A.M.O.N.E.S, and some more letters for the apron which has just been sprayed blue that day. At home I make some instruction cards that are relevant to the game.
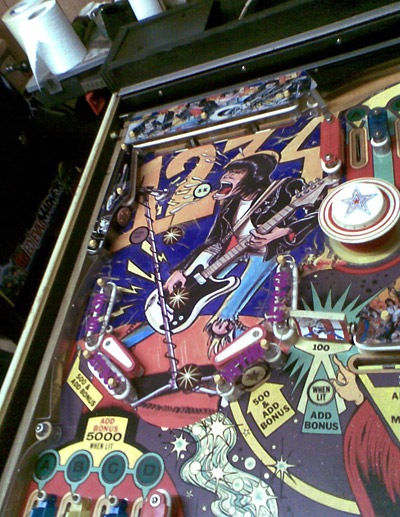
I polish up the side rails with my trusty polishing kit as they were looking old. Get up to Daz’s again a few days later and take a load of stuff with me: side rails, decals, the amp, speakers, etc. etc. Notice he has painted the wooden backbox translite surround – one less job to do. We knock out all the playfield light inserts after heating them up slightly with a heat gun. This same process has to be done for some of the bonus inserts as over the machine's 31 year life they have become slightly dished. The playfield then got cleaned with panel wipe as well as being sanded down where necessary. The main playfield art was a Rock 'N Roll High School picture. We moved the decal around and after an awful lot of deliberation, decide on how to do it. Easier said than done. Don’t forget this decal was made to be the translite. It was now being adapted for a different purpose. It had Rock 'N Roll High school lettering on it that had to be preserved, as well as ensuring no inserts went through any band member faces and, where possible, through other characters. Tied in with that was wanting to keep the 'Gabba Gabba Hey' sign,the big mouse etc. A difficult job, but compromises were made. Then the moment of truth. Daz was tasked with this due to his cab decal experience, with me assisting (which was needed). Trying times indeed, but it went down pretty good. Not perfect, as in hindsight I had made an error. The playfield was far from fully stripped, and somehow some dust got under the decal. Oh well, no biggie. It was never going to look like a 'bought' pin. Disappointing, but I knew there would be moments like this. My fault. Daz did an awesome job getting the decal down so well though.The inserts holes, flipper bat holes, etc. were felt and then cut-out using a knife. The hard bit was finding the tiny lane guide holes - that took ages and ages. Note to self, DO NOT assume all guides are the same – that made it much harder to find the tiny holes.
The inserts were then put back in place and glued, and then the relevant decal was added (Lettraset for the 1 – 9 bonus inserts). Whilst cleaning the new playfield decal, I realised that it really did not take much for the decal ink to start rubbing off the main decal. At this stage only one thing could be done - fitting mylar. Neither Daz nor I really wanted to do this as we both felt mylar is a PITA to put down, but we had no choice. To be honest, it went down pretty good, well for mylar anyway. Now we were going well. It's starting to look more like a Ramones pin now. This was fun. Then we start putting on more plastics, side rails, apron decals and the mosh pit decal. We also put the band logo decal (again from Diginate) on the target near the Dee Dee playfield. Looks good. This ends up being a 13½ hour day, but we get loads done. We even get to try it out and noticed a few lamp issues, the odd switch and a machine gun flipper. Put some LEDs in backbox to enhance the 'RAMONES' lettering on the translite. Getting lamp bleed-through in backbox. Try and minimise it with bulb condoms. The machine looks much better. Something has to be done at the top rollovers, though.
At home come up with idea to minimise bleed through on the translite - by spraying lamps white. Makes it a bit better Turn up again at Daz’s on Sunday 16th January with the South Coast Slam pinshow looming. The pressure is on – although it's still self imposed. Start day the usual way; tea and bacon butties. Perfect! A productive day as we re-decal top rollovers area. The decal goes down well, but in hindsight it is the worst bit on the pin. It does not align well but I made decision to fit it anyway due to The Slam. We fix the machine gun flipper – hold wire had snapped off. I have just enough length to reattach it after I bend holding lug 90 degrees. Added the amplifier and speakers. Thanks to Nigel, for his permanent loan of his old laptop power supply to give the 12v 2amp needed for the amplifier. Speakers were from an old VW Fastback of mine, and had been in my garage for 10 plus years! Well, we are supposed to recycle.
Fit another decal to the apron as well as some decals to the main playfield glass – Little touches, but they look great.
Daz was also busy on the Saturday in between these days. He added 6 extra lamp holders to the backbox to enhance areas of the translite. Ta bud. I get the 7 bank decalled using the letters/backing from Mark Northern. Think it looks great.
Another late session but we’re pretty much ready in time for the South Coast Slam.
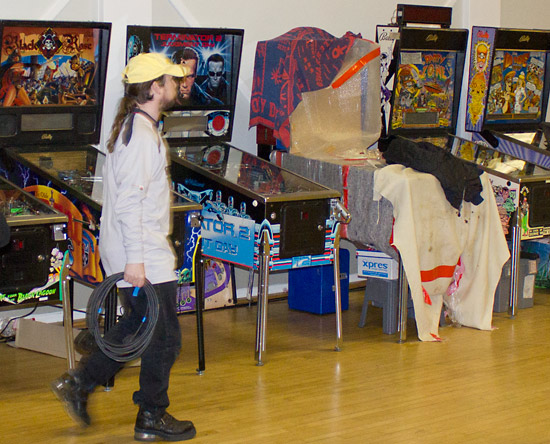
Somehow we did it in time for The Slam. Daz promised me that after playing it a bit he would wrap it up nicely for the show. Roll forward to Feb 4th and we get to the show. We set it up but still leave the covering blankets on it. I power up the amp and leave it playing music - though to throw people off I play Teenage Bottlerocket, NOT The Ramones. I get the odd “Which pin is that?” question. I say to wait till Saturday.
I unwrap it Saturday and get some awesome responses from many people – friends and strangers. So there were two new music pins there at the show. Rolling Stones and my Ramones. The machine was reliable barring one point where the amp got stuck in a loop on one song. A turn off/on fixed that. It may have just been a rogue IR signal. Seems no one was anywhere near as bothered about the muck ups/bad bits as I was. Phil of the Forbidden Planet team explained that you are always harsher on your own creations! I added a Joey Ramone bobble head topper on the Saturday night at the show. It had glued threaded inserts put in on the Thursday night and I wanted to be 100% sure the 24hour Araldite had gone off. This will stop it falling off – he headbangs well. Joey Is A Headbanger Also bought some Great Lakes star post LEDs to enhance the darker playfield areas such as near the mini playfield flippers. I will do this later in February when off work. I loved the show,and thanks for all the kind comments about the Ramones pin. Cheers to all who helped, but especially Mark and Daz – without them I would have gone insane and it would not have got done. Thanks to Joey, Johnny, Dee Dee, Tommy, Marky, Ritchie and CJ Ramone. Also thanks to my wife and son. Lessons learned for next time (if there is a next time), and still have things to do/redo. It came in about its budget. Waaay less than £1k, including the donor machine with the Pascal Janin board (awesome board, BTW). Heaven knows all the hours it took, maybe 130 hours at a very vague guess, although a reasonable bit of that is going through/changing/trying various art pictures. If a few guys like me,Mark and Daz can do it anyone else can. Really. We are not super skilled, or arty or clever. It just takes time (and money). Those lessons learned?
© Pinball News 2011 |