|
|

|
SHARP SHOOTER
|
| That's the problem with pinball games. The more you play them, the more they wear out. Things break and parts become worn. It's not all doom and gloom of course because replacement parts are often available and you can defend susceptible areas with hole protectors, ramp protectors, plastic protectors and clear mylar for areas of artwork. Now though, there's a way to cover this area and protect it from further damage - the Shooter Lane Overlay from PinWest.
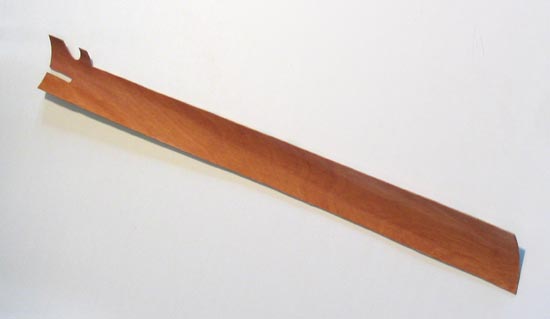
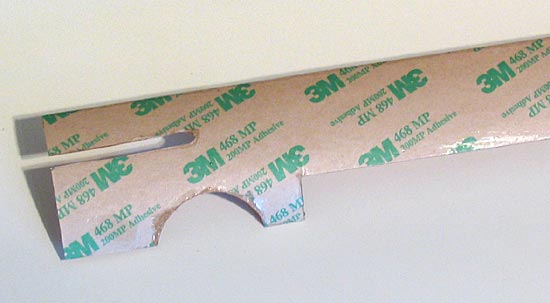
We got one of these overlays and put it through its paces. The overlay arrives in a tube with an instruction sheet. The overlay is made from birch veneer which is stained and varnished. On the rear is an adhesive coating to stick it to the existing shooter lane area.
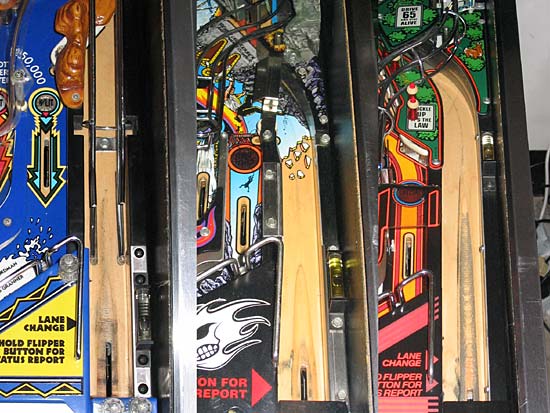
It's much longer than you may expect but this makes it suitable for the maximum number of games as it's easily trimmed to the correct length with some scissors. At the shooter rod end, the overlay is pre-cut with a groove for the switch and a side extension to take it up to the trough exit so you shouldn't see any of the existing wood. So, armed with the overlay we went out to the game room to fit it. The first question was - which game would be the recipient? That question answered itself as nearly all the games were unsuitable, either because they had existing artwork on the shooter lane, because they had very short lanes or had curved lanes.
The short lanes could have been used but wouldn't properly show off the new overlay so ultimately only Fish Tales made the grade, so we set to work on that.
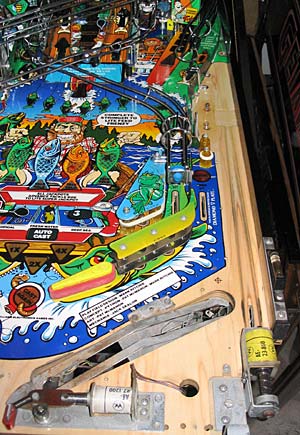
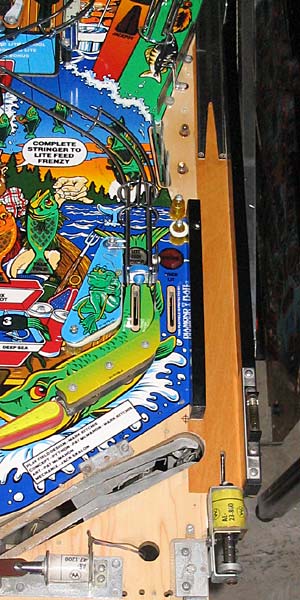
With the playfield pulled out, the hardware around the shooter was removed - that's the apron, the trough guides, the shooter solenoid and the shooter lane ramp. To do the job properly we also took out the left hand wall and the metal guide above it. This last stage may prove unnecessary but it could also allow these pieces to clamp the overlay to the playfield when reinstalled.
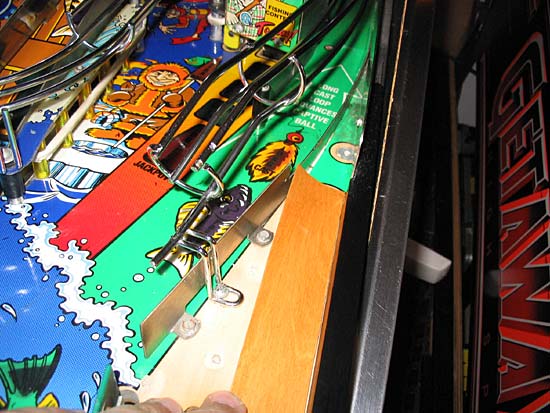
The shooter lane and surrounding areas were cleaned with Novus 2 and then with a degreasing window spray. Then it was time to see how closely the overlay fitted. The length didn't matter since the end of the lane is covered by a metal ramp but a corner needed to be trimmed off to make it fit.
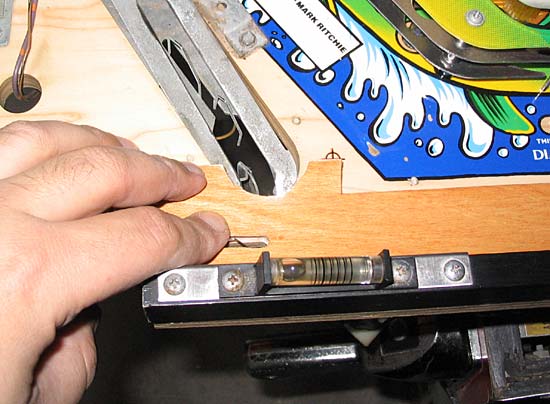
The shooter end was a little more problematic. A thin slither needed to be cut off the switch groove to line it up correctly and give the best fit for the trough kickout hole.
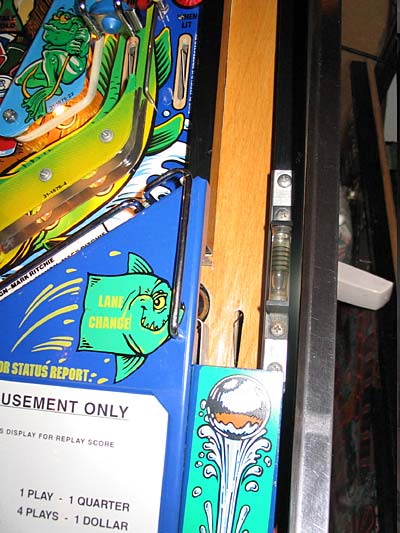
With the right side of the overlay hard up against the side wall there was still a slight overlap over the trough hole. If it wasn't removed the overlay would be lifted every time a ball was kicked out. A very sharp knife or scalpel is needed to shape the overlay and a small file to clean up the edges. Once that was done it was time to stick the overlay down.
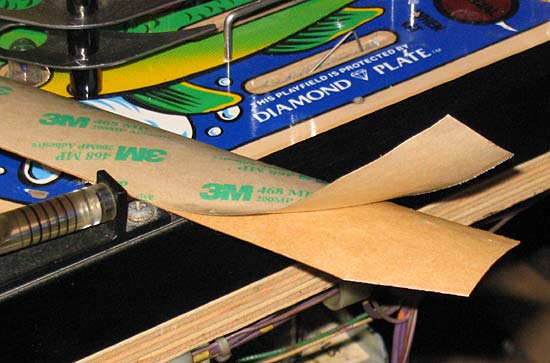
The protective backing was peeled away and it was pressed down into position. There was a slight cracking sound as the overlay took shape but it seemed to adhere well and accurately.
Finally the apron was replaced and the playfield put back in the game.
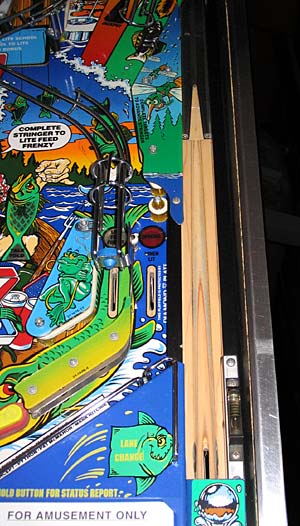
There's no disputing the overlay looks very smart. It's different to a factory fresh game because it's not cut through the wood grain in the same way a shooter lane is, but it's definitely clean and bright and a perfect fit. The shade of stain also matches the colours used on the Fish Tales playfield so although it was a darker shade than the original wood it still looks like it was intended. Speaking of colouring, the protector can also be ordered unstained so it should be possible to get a much closer match if needed. When play-testing the overlay we were concerned the extra height may lead to the plunger not hitting the ball dead-centre and reducing the strength of the ball launch. We needn't have worried. In fact, the reverse was true. We now had a much improved plunge strength - better than it had ever been. This probably won't be the case of most games but the overlay is pretty thin so should have minimal impact. The whole process took us two hours from start to finish but that included documenting and photographing every step and cleaning up the dirt under the apron, so it shouldn't take much over an hour to install another one.
Was it worth it? Definitely yes. It's a non-destructive process (the overlay can be removed again at any time) and gives an almost instant improvement to the game's appearance. Time will tell how well the overlay wears but one thing's for sure - the original wood underneath is protected against further damage.
|