 HAND
SOLDERING
HAND
SOLDERINGSEMINAR
| Sponsored by
&
SAFETYSafety first - always!Always remove the power before work on a board! When soldering or disordering, always wear safely glasses and do NOT breathe the fumes. A small fan can be used to vent fumes away from you. To keep yourself from the voltage of charged capacitors on the board you are working on; always handle the board by its edges.
SOLDERINGDefinition Soldering is the process of joining two (similar or dissimilar) metals with liquid metal and allowing the joint to harden. Though technical soldering is an art.
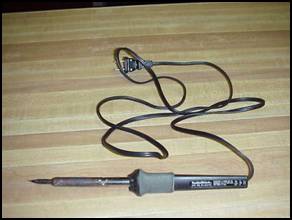
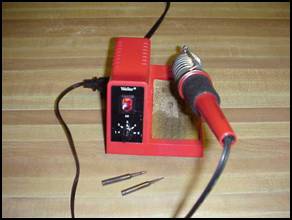
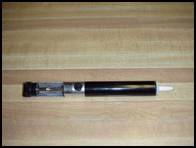
Process In order to make the best quality joint, you must have both a good mechanical and electrical connection. Once the connection point is clean, the joint is wetted by the molten metal. The now mobile metal moves across and into every crevice of the joint by capillary action. The mobile/molten metal travels with the heat as it travels into and across the junction. For soldering on most pinball circuit boards, a small pencil type soldering iron is usually used. But, a small ESD safe soldering station with selectable temperature and replaceable tips is recommended.
Though the UK is a leader in making the world a better place, there is a worldwide push for the Reduction of Hazardous Substances - RoHS. Because of this push, lead-free solders are becoming more common. But, I recommend using solder with about: 60% lead (Pb), 39% tin (Sn), and 1% silver (Ag) - or similar. Silver solder takes a little more heat to melt than lead-tin solder. But silver solder it is more durable than standard lead-tin solder when it cools. NEVER use acid flux solder. Acid will eat boards and assemblies. As a general rule, heat each single pin no longer than 5 seconds. And, allow each pin to cool to room temperature before continuing to the next pin.
Instruction After you have prepared the junction to be soldered, you must keep both components of the joint completely still. And, you must be prepared to compete the following in quick succession and in as little time a possible. When proficient, you should be able to make a perfect solder joint in less than 5 seconds.
Once cooled, a perfect solder joint will be: clean, smooth, and shiny. And, it will conform to the individual components.
DESOLDERING
|
 |
 |
 |
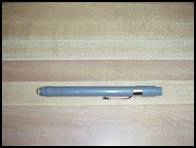
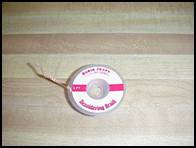
Solder Wick |
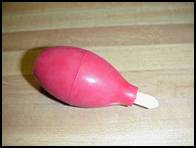
Solder Bulb |
Solder Sucker |
It is easier for / less stress on a circuit board to undergo heat stress rather than prying/mechanical stress.
Instruction
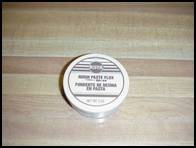
- Make sure both areas are clean. If needed, clean with a fiber eraser, rubber eraser, and/or flux. Again, NEVER use acid.
- Then, apply a very small amount of solder to the very tip of the soldering iron. This tiny amount of solder is used to bridge the gap between the soldering tip and the joint to be desoldered. This will allow heat to more easily flow into the junction.
- Next, put the side of the tip with the freshly applied fill solder against the joint. The tip should barely touch the joint. You should be exerting very little pressure with your soldering iron. This way you will not bind any component you are going to remove.
- Now, keep looking at the joint to see if it is hot enough. You will know that the joint is hot enough when the solder flows but stays in place.
- Now that the solder is once again molten, and only at this point, use a small tool to quickly remove the component or pin. Do NOT splash any solder during the removal! Keep the soldering tip in place while you are making the removal. If you would have touched the removal tool to the component before this time, you would have started to heat the tool and over heat the joint; this is something to avoid whenever possible.
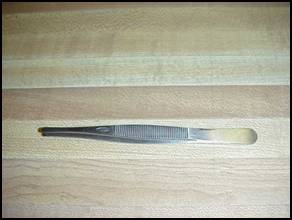
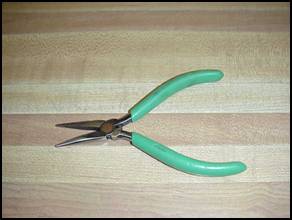 Small TweezersSmall Needle Nose Pliers
- Now that the old component is out of the way, the old solder must be removed before the new component and new solder can be used. Apply a tiny amount of solder to the tip of the soldering iron, as before, and heat the now exposed joint.
- While the solder is still liquid, use your desoldering tool to clear the remaining old solder from the site.
- Finally, ensure that you have the proper part and proper parts placement, and solder the new component into the board as instructed in the soldering section. Do NOT forget to remove the flux!
HANDS ON
As you will probably be working on an already assembled (populated) and soldered (processed) board, we will start with removal and juxtapose affixing.
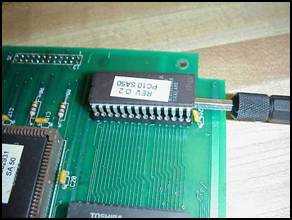
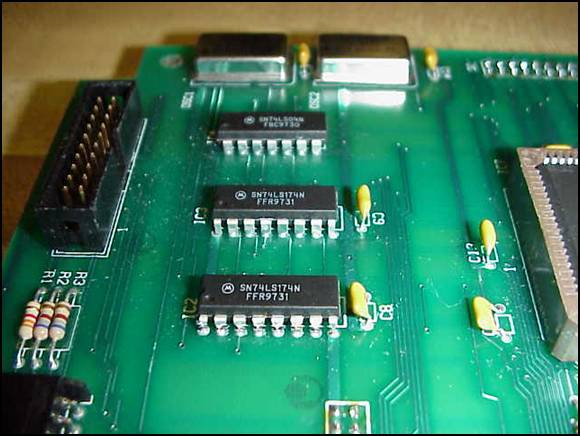
IC CHIPS
Remove
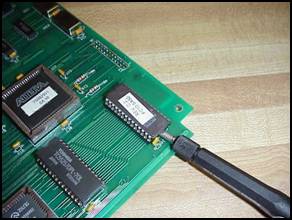
Slide a small standard (flat bladed) screwdriver under center of chip and gently remove entire chip with one gentle pop. Use your fingers on top to stabilize.
 |
 |
Small Screwdriver Under Center of Chip |
Chip Gently Pried out of Socket |
The preferred method is use of an integrated circuit (chip) removal tool. Some chips can't be removed without the use of a special tool. Put the tips of the chip removal tool under both ends of the chip and gently lift the entire chip straight up.

Chip Gently Lifted out of its Socket. (Note: This is the preferred method.)
Once the chip is out, if needed, the frame of the old socket can sometimes be lifted over the pins. Then the pins may then be easily removed one at a time. If possible, replace old sockets with machine pin sockets.
Unsolder
It is easiest to remove bad chips by first cutting their legs. Next, remove the detached bodies. Finally, the individual legs can easily be desoldered and removed one-at-a-time.
The legs on the forward side have been individually cut with a small side cutter.
Small scissors may also work for this purpose.
But, chips may also be removed by heating one entire side and gently lifting that side until resistance is felt. Then heating the other side and gently lifting. Then by repeat this heating and lifting process as necessary.
Solder
First, ensure proper orientation, than start by soldering two opposite corners first, then fill-in opposite pairs until complete. This method will disburse the concentration of heat to the chip.
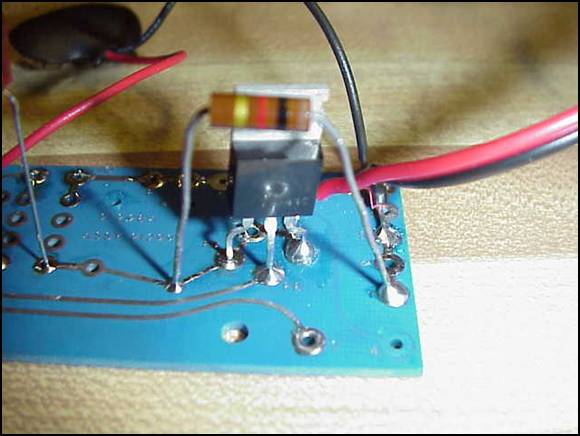
REGULATORS / FLAT TRANSISTORS
Remove
Slide a small standard (straight) screwdriver under center of chip and gently remove entire device with one gentle pop. Use your fingers on top to stabilize.
Unsolder
Usually the body of the device is one of its electrical components and it is also the device's main mechanical connection. Remove the hardware first. You may have to melt the solder on the hardware before removal. Then, heat one pin and gently lift the component. Next heat the other pin and gently lift the other side of the component in the other direction. Lather, rinse, repeat.
Solder
First, ensure proper orientation, than reattach the hardware before you solder. For home use, there is no need to resolder the attaching hardware. Finally, solder the pins.
UPRIGHT (SOLDIER) TRANSISTORS
 |
 |
Pictured is a single upright (soldier) transistor. |
The legs of the transistor are bent until they break. |
Remove
Most, if not all, transistors on pinball boards will have to be unsoldered.
Unsolder (See picture above)
Like chips, transistors can have their bodies first removed to make for easy removal of the legs. The body can be repeatedly bent at he legs until the metal fatigues and the legs break. Or, the legs can be cut with a small cutter.
Solder
First, ensure proper orientation, than start by soldering two opposite sided first, then fill-in remaining pins until complete. This will disburse the concentration of heat to the amplifier, driver or transistor.
INTERNET LINKS
The following are Internet links, in order of appearance, used thus far in this article.
- Pinball Renaissance (http://www2.bitstream.net/~miekoa/pinball/)
- SS Billiards (http://www.ssbilliards.com/)
- Soldering (http://en.wikipedia.org/wiki/Soldering)
- EDS (http://www.esda.org/)
- RoHS (http://www.rohs.gov.uk/)
LEARN TO SOLDER KITS
The following are Internet links, for places to buy kits which are used to teach soldering. I strongly recommend that you practice on one of these kits BEFORE you work on any pinball board.
- Carl's Electronics
(http://www.electronickits.com/new/specials/ak100.htm)
You can also search for other kits.
- Electronic Goldmine (http://www.goldmine-elec-products.com/)
Enter learn in the search box.
- IASCO (http://www.iasco-tesco.com/)
Click the 2006-2007 online catalog link and then click the index.
- Kit U.S.A. (http://www.kitsusa.net/phpstore/index.php)
Click Learn to Solder Kits from the category index.
- Toys RUs (http://www.toysrus.com/shop/index.jsp?categoryId=2255956)
Enter solder in the search box.
SOLDERING SEMINAR TEST
This following fifteen-question test is PASS or FAIL. You must get thirteen (87%) or more answers correct to pass. Read each question carefully then circle the CORRECT answer. This is an open book test.
- ( Convenience / Safety ) ( first / last ) - ( always / never )!
- Capacitors ( can / can't ) hold a charge.
- ( Always / Never ) use acid flux or acid core solder.
- ( Always / Never ) clean the area around the joint before you solder.
- A quality solder-joint ( should / should not ) form around the soldered components.
- ( True / False ) The bigger the glob, the better the job.
- You can tell that a solder joint is good quality when it is ( dull / shinny ).
- Desoldering tools are used to ( spray / suck ) old molten solder from a junction.
- It ( is / is not ) acceptable to leave solder spills on the board.
- ( Always / Never ) clean old flux.
- ( True / False ) Socketed chips can usually be gently pried out of their sockets.
- The legs of an upright transistor can be ( bent / ripped ) to remove the transistor.
- A large failed component, like a bridge rectifier with lugs ( is / is not ) best removed by heating then lifting one side of the component, then switching to the other side, and repeating as necessary.
- It is ( easy / hard ) to remove the pins of vertically installed transistor once the body has been gently flexed or cut from it's legs.
- ( Always / Never ) thoroughly wash you hands after soldering or desoldering.
SOLDERING SEMINAR ANSWERS
The CORRECT answers for the solder seminar test are in BOLD .
- ( Convenience / Safety ) ( first / last ) - ( always / never )!
- Capacitors ( can / can't ) hold a charge.
- ( Always / Never ) use acid flux or acid core solder.
- ( Always / Never ) clean the area around the joint before you solder.
- A quality solder-joint ( should / should not ) form around the soldered components.
- ( True / False ) The bigger the glob, the better the job.
- You can tell that a solder-joint is good quality when it is ( dull / shinny ).
- Desoldering tools are used to ( spray / suck ) old molten solder from a junction.
- It ( is / is not ) acceptable to leave solder spills on the board.
- ( Always / Never ) clean old flux.
- ( True / False ) Socketed chips can usually be gently pried out of their sockets.
- The legs of an upright transistor can be ( bent / ripped ) to remove the transistor.
- A large failed component, like a bridge rectifier with lugs ( is / is not ) best removed by heating then gently lifting one side of the component, then switching to the other side, and repeating as necessary.
- It is ( easy / hard ) to remove the pins of vertically installed transistor once the body has been gently flexed or cut from it's legs.
- ( Always / Never ) thoroughly wash you hands after soldering or desoldering.
This ends the soldering seminar at the October 7th, 2006 Pinball Circus.
Editor's note:
You can download a printable Word version of Todd's seminar by clicking here.

© Pinball News 2006