|
|

|
PIN-REPAIR TOOL KIT
|
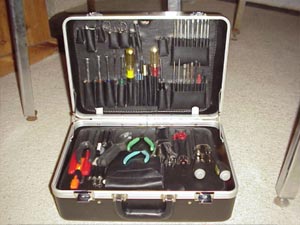
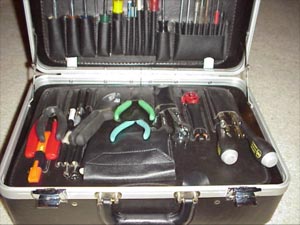
Article by Todd "PinTed" Andersen I have used my pin-repair tools and reported my work in previous technical articles I have written for Pinball News. Several people have asked me what tools I used to make pin-add-ons and which I consider best for a pin-technician to carry. This has also been a somewhat popular question on the pinball news group, Rec.Games.Pinball RGP. Only hand tools are needed for working on small circuit boards and for refurbishing/repairing pinball machines. Though I have two battery-powered tools, all of the tools in my repair kit are hand tools. First off, I recommend that you select the brand of tools you prefer and can afford. When possible, buy the best quality tools. You will use tools you like and quality tools will last longer. ESD tools are recommended but not every tool in your kit needs to be ESD ready. And, because you would NEVER work on you game with power applied, high voltage or insulated tools are not required. I bought my first tool kit for use at school when I attended Northwestern Electronics Institute - NEI. My very basic tool kit had even fewer pieces than even this kit. I found my original tool kit somewhat lacking in both the scope and range of hand tools. Because of their affordability, reputation for quality and lifetime replacement warranties, I started my in-home pinball repair toolkit with Craftsman hand tools from Sears. I have added other tool brands, including Wiha tools, to replace old tools and supplement my repair needs. I have kept my tool selection to just the most useful tools which would easily fit in one tool case. I mainly work on American made pinball machines, so I have few metric tools in my case. Because I have to lug my tool kit and parts from location to location, I have learned through experience which tools are only the most useful for repairing pinball machines. I will list all of the tools and supplies that I have in my final version of a traveling pinball repair tool kit and provide some notes to explain the reason I chose specific tools.
Nut Driver Set
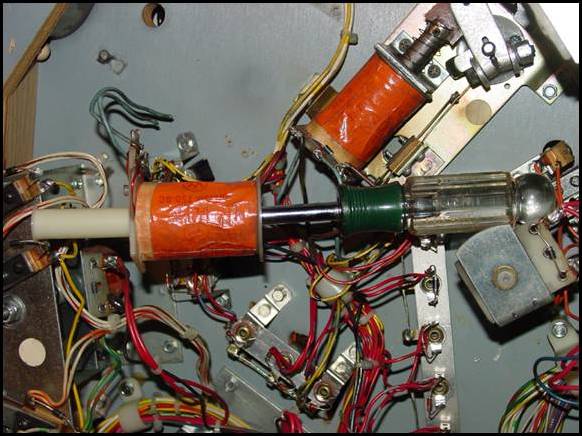
The sizes in this seven piece set range from 3/16 1/2 inch. The list of color-coded drivers (pictured from right to left) is: 3/16, 1/4, 5/16, 11/32, 3/8, 7/16 and 1/2 inch. From a previous article, you can see that I sometimes use the 11/32 inch driver in an unconventional way. I sometimes use the driver to help remove old coil sleeves.
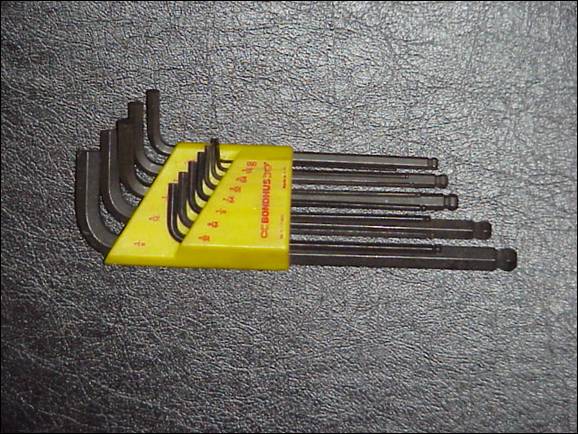
The sizes in the standard balldriver hex wrench (or L wrench) thirteen piece set range from 0.050 3/8 inch. The list of sizes stamped into the wrenches is: .050, 1/16, 5/64, 3/32, 7/64, 1/8, 9/64, 5/32, 3/16, 7/32, 1/4, 5/16, and 3/8 inch. The case of the set can be used to increase leverage and provide comfort while applying torque to remove or tighten screws. The balldriver ends are useful for getting into tight spaces. The balldriver ends are also very useful to start screws. But, I try to use the opposite chamfered ends as much as possible. The chamfering makes the wrenches easier to seat in the screw head.
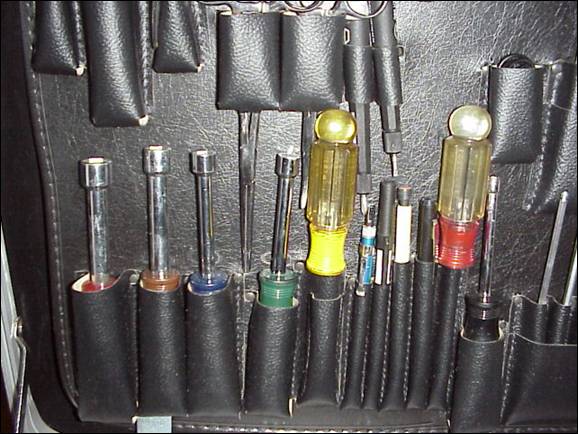
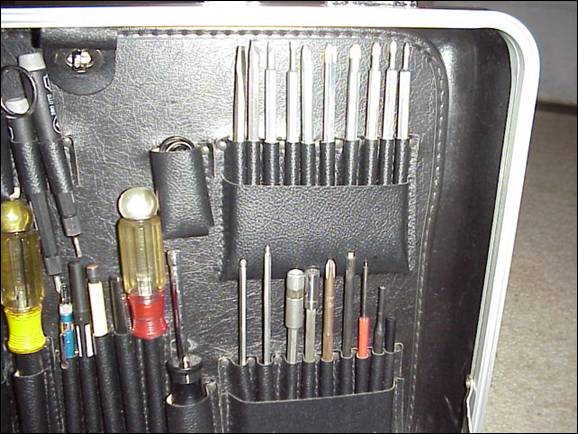
My screwdrivers are more a bit set than screwdriver set. This keeps the number and weight of tools to a minimum. Especially with a portable toolkit, both restrictions are appreciated. The bits in this twelve piece set are straight (flat or slotted), Phillips (x or +), Pozi Drive (for stripped screw heads), and 1/4 hex. The four straight bits are: 4, 5, 6, and 8 mm. And the four pieces of the obit Phillips set are numbers: 0 ,1 , 2, and 3. The orbit style gives me the advantage of a 20° angle of drive. The Pozi Drive are #2 and #3. I have three handles for the entire set. The tow standard handles allow the bits to extend or retract into them. This variable length allows the drivers to easily fit where they are needed; therefore giving them greater usability. The palm handle drive gives me the sometimes-needed mechanical advantage of increased torque. For extremely hard to reach places, the extension bit is sometimes used.
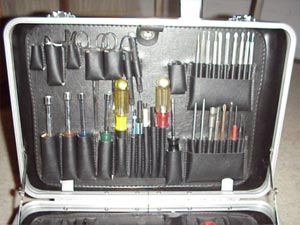
On the top right side of the picture are nineteen security bits. I have ten Torx bits: T7 T40: T7 (X2), T8, T9, T10, T15, T20, T25, T27, T30, and T40. My nine TR - Hex bits range from 5/64 1/4": 5/64, 3/32, 7/64, 1/8, 9/64, 5/32, 3/16, 7/32, and 1/4".
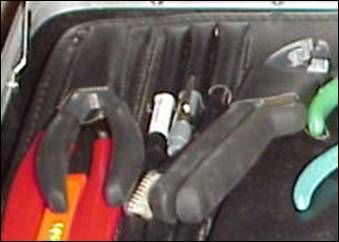
On the bottom right side of the picture are twelve 22 mm long standard bits. All of my standard bits are coated. I have five slotted bits: 4.5, 5.5 (standard), 5.5 (thick), 6.5, and 8.0 mm. I have three Phillips bits: #1, #2 and #3. And I also have three Pozi bits: #1, #2 and #3. Besides occasionally needing the Pozi bits, from working on previously worked-on games, I have found the added gripping action of tungsten carbide coated tips especially useful. You may have noticed the extra #2 Phillips bit. That bit is diamond coated. I only have one diamond coated bit because I have found the carbide coating superior for gripping. 1/4 Hex Drive Bits (pictured above) On the left side of the picture are: 3 long 1/4 hex magnetized extension bit, 3/8 magnetized nut driver, 1/4 magnetized nut driver, and 1/4 hex to 1/4 square converter drive bit. Battery Powered Screw Driver I can use any of the bits from either my security or standard bit sets in my small battery powered screwdriver. The same battery works in both my screwdriver and my cut-off tool. I mainly use the power screwdriver for stripping playfields. I do NOT recommend using a battery-powered screwdriver to reinstall hardware back onto playfields. The batteries from my electric screw driver and cut off tool (See Cut-Off Tool below) will work in either tool. Hammer Though not pictured because my wife thinks that it's cute (therefore hers), I usually have a small 6.0 Oz. claw hammer in my tool kit. The hammer comes in useful for removing nails and other stubborn objects; and, for opening nuts. Slip Joint Pliers (pictured below) The OXO brand slip joint pliers, along with the needle nose pliers, were given to me as a gift. I found that I appreciate them better that any other pliers set I have ever used.
Needle Nose Pliers (pictured above) As with the slip joint pliers above, the grip of these needle nose pliers makes them a joy to work with. And, the griping action of the jaws makes them ideal for use in repairing pinball machines.
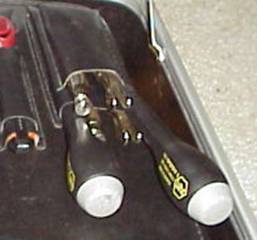
From experience, I decided to include two locking pliers in my mobile pinball repair tool kit. The larger is useful for many things; especially adjusting bending coin door lock cams, to take the play out of the doors. The thinner is most useful when stubborn leg levelers need to be adjusted.
As with my locking pliers, I carry two side cutters. The smaller one is useful for cutting the leads of electronic components.
I use the larger cutter on: cable ties (tie wraps or zip ties), playfield wiring, and springs.
Again, as with my locking pliers, I have found the need to carry two hemostats. Each hemostat has it own uses for reaching where my fingers can't.
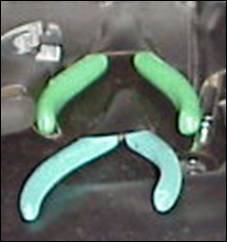
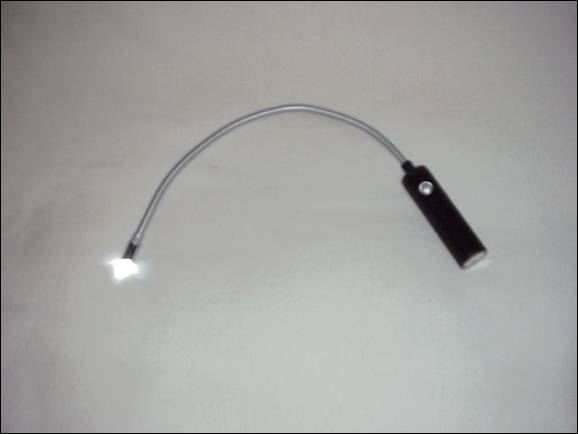
Though not currently in my tool parts kit, again, like my locking pliers, I have found the need to carry two grabbers. The three-fingered grabber (which needs to be replaced) is a great screw retriever and starter. The business end of this grabber had a phalange of three metal fingers spaced 120° apart. This claw-type grabber speeds the replacement of under playfield lamps; when the sockets have to be temporarily removed, in order to be repopulated with a new lamp. I need to replace my three-fingered grabber because I had to occasionally adjust the angle of the fingers. Adjusting lead to readjusting, which lead to the tips eventually breaking. I work on more pins than the average collector / enthusiast. So, I am looking for new grabber that will hold small screws, but won't have to be replaced every year or two. For general use, many of this type of grabber should last for several years. Another gift is my lighted magnetic grabber. I'm sure that most of us have experienced a situation where one finds a screw loose in the cabinet. And, lifting the playfield to retrieve that screw only makes it errant. Or, a situation where the playfield has to be crooked at such an angle, that the position makes it impossible to reach inside the game. Not only does my magnetic grabber give me and additional two feet (61 cm) of reach, it lights the way to the target for me; making it easier for me to retrieve otherwise hard to reach lost screws.
Besides a small set of jewel's files, I keep a small battery powered cut-off tool and a small collection of tips in my tool kit. This tool is great for dressing mushroomed plungers; when replacements aren't readily available.
Though some of the more circuit board repair specific tools and supplies were not covered in this article, I hope this article has helped you choose the tools necessary for repairing your pinball machine. Remember that a tool kit, like a life partner (who hopefully uses your tool on a regular basis), is a personal reference.
|

