PINBALL EXPO 2006
| Welcome to day two of the Pinball Expo seminars which began bright and early at 8:15am on Friday morning with some opening remarks by organiser Rob Berk, formally welcoming everyone to Expo and announcing the schedule of events. After that it was on with the first of Friday's seminars. Amazing Field Engineering Stories - "Dr Scott" Sheridan & Ron Coons Jr. Scott Sheridan owns and runs his pinball superstore in Maumee, Ohio where, together with ace technician Ron Coons Jr, they have over 100 pinball games set up.
To maintain his supply of machines, Scott imports containers of games from overseas and so today's seminar looked at the unusual problems found during the restoration process and the ingenious methods used by previous owners and operators to keep their games running and earning. The first item they showed was a coin door from a dutch game with a coin mech that would take any coins inserted.
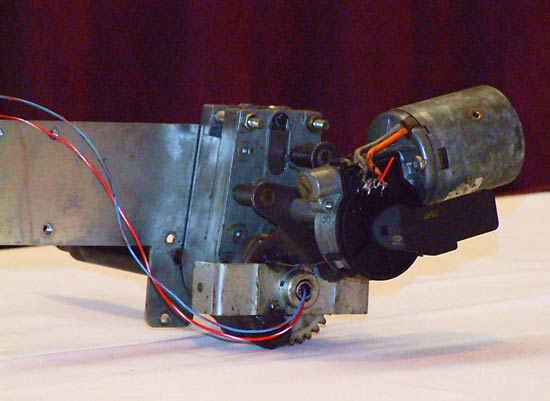
Next was an example of how, rather than replace the whole unit, one technician had used their ingenuity to repair a blown speaker cone on a Dracula game by using hot glue to stick it back together. Ron suggested a better emergency alternative would to be to use nail polish or varnish which would maintain the rigidity of the paper cone. Scott explained how almost every Addams Family game they get from the containers has the same problem - a broken bookcase turntable. Reproductions of these are available but what happens when an operator doesn't have a reproduction or quick access to one? The answer was shown - a workshop-produced replacement turntable made from sheet metal. Turning to the frequent problem of blown fuses, some operators take the easy way out and replace the fuse with a bolt, ignoring the reason why the fuse blew in the first place, or in other cases, wrap the blown fuse in tin foil for the same effect. Scott recalled how he had seen the effects of someone foil wrapping a fuse on a Williams Taxi's high voltage section. It destroyed the board and the displays causing about $300 of damage. In a more sensible approach, Scott and Ron showed how a fuse of the wrong size was wired and then soldered onto a blown fuse of the correct size in a piggy-back fashion. One problem almost all pinball technicians face is a broken flipper rubber and so it's a must-carry item on all location service calls. But what happens when you run out and don't have one? A machine imported from Japan included a carefully crafted solution where someone had hand-stitched the rubber back together. Worn or snapped rubber rings are also a perennial problem, sometimes replaced with vacuum cleaner drive belts but in one example shown, someone used underwear elastic to fix a motor drive belt. No explanation was offered about how the elastic was obtained. Scott moved on to talk about the problem of replacing bridge rectifiers - those square block of epoxy containing four rectifier diodes which seem to fail so often causing games to either stop completely or exhibit strange behaviour such as seemingly random resets. Once again, the problem of what to do when you don't have the correct part was addressed. In this instance shown by Scott and Ron, one technician had carefully drilled into the epoxy of a bridge rectifier, to destroy a (presumably) shorted diode and had then soldered a replacement single diode into place to "fix" the fault. The new bridge continued to work for a while in the Super Mario Bros but the diode subsequently failed - probably due to overheating. Electronic pinball machines often require batteries to keep set-up and high score data in volatile RAM. Batteries leak over time and can destroy either the holder or the board they are mounted on. In the next demonstration of technician ingenuity, Scott and Ron showed some examples of how AA cells had been wired and soldered together to make impromptu battery packs. Along with flipper rubbers, the other most common part to wear in a game is the shooter rod tip. Again, a staple part of any tech repair kit but what happens when you don't have one. The solution shown was how someone had taken the tip off the end of a pool cue and fixed that to the shooter rod. It worked in its own way, but would be difficult to chalk. DMD displays commonly fail with lines or columns missing or through contamination of the elements resulting in dimming and fuzziness. You can get two types of replacements, either the whole unit, or just the glass which can then be soldered onto a working board. Scott said only once had he been cheap enough to only buy the glass and that was on the harder to find Data East 128x16 displays. Replacing the glass is not a trivial task, so it was interesting to see one owner's solution to a failed 128x32 display - putting the new glass over the top of the old one and running dozens of wire links from the top glass to the bottom one. It must have taken ages to make and solder all those links but presumably someone thought it worthwhile. After audience discussions about the perils of buying games from eBay and problem with people trying to break into games from the underside, Scott turned to the issue of motors in pinball games. A few years ago it would have been much harder to get any of the various motors fixed or to buy replacements, but now companies like Multiproducts and on-line resellers offer replacement motors and gearboxes for many games. Once again though, if you don't have one and can't wait to buy one, what is the nearest thing available to make the repair and get the game running again and earning money? In their final example, Scott and Ron showed this Judge Dredd Deadworld driver.
It looks more or less normal except the rather large motor driving the gearbox for the planet. That's because this motor is actually a wiper motor from a Volkswagen car. There were then several stories about what various people have found inside games, including the remains of a dead cat and a live cockroach, and the problems when customers try to fix games themselves, fail and then call out the repair guy. Two such instances were related, one involving someone spraying the entire underside of the game with WD40 to try to fix whatever problem they were having, making the game a pile of junk. The second revolved around someone spraying the game with contact cleaner but not waiting for the flammable solvents to disburse before starting the game. When at first spark occurred, the gasses ignited scorching the whole underside, charring all the wires. To put out the fire, the owner then sprayed it with a dry powder extinguisher, thus totally wrecking whatever parts might have survived the fire in the game. With a warning against leaving cleaning rags used with oil-based products inside a game in case of fire and a final plug for the Pinball Hall of Fame in Las Vegas, Scott and Ron concluded their seminar.
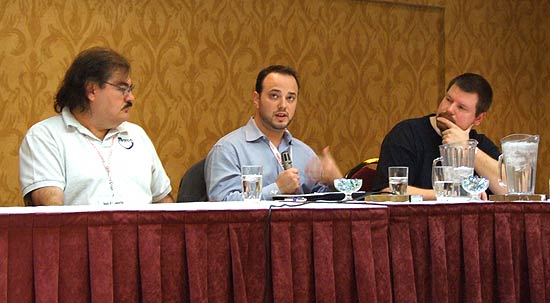
Next onto the podium were... DIY Pinball - Cabin Fever - Jeff Mathews & Lee Taylor
Jeff and Lee are two software guys who were interested in pinball. Jeff has two young daughters who enjoyed playing the games he has at home but the machines are really too big for them, so they decided to build a game of their own which was a better size. They built the cabinet, designed the playfield and control system and wrote the software for it. In this seminar they were going to tell us how they did it.
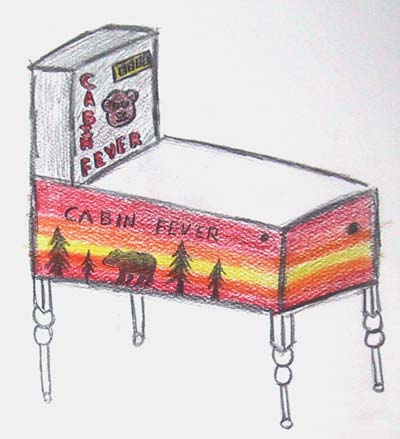
Because the game is three-quarters size, they couldn't use stock parts for many of the fixtures and fittings such as the cabinet, legs, rails, lock bar, glass, backbox and the Jeff said the game took six months to build and they wanted it to be obvious that they had built it from scratch. On the underside, many of the main assemblies - the flippers, bumpers and the ball kickout - are NOS parts as used on regular games but some pieces - such as the ball guides and the spinner - needed to be fabricated. And of course the control system and software needed to be made. Jeff said he and Lee wrote the majority of the code needed to run the game over about two days. The game's dimensions are based on a Gottlieb Black Hole but scaled down so the cabinet is 19 inches wide - a more suitable size for kinds. The theme and rules also had to be suitable for youngsters, so it's friendly looking and the rules are not overly complicated. The original design goals were for the game to be authentic and nostalgic feeling and looking, using a full size ball and a wooden cabinet. Jeff says he thinks they achieved that as it sounds and feels like a real game. In fact, they wanted it to be usable in an arcade, so it includes a real lock down bar and a coin door complete with coin mechs. This is the preliminary sketch of the game:
Jeff said he originally wanted table legs because he's not very good working with metal, and this design continued for a while but eventually he bowed to pressure and put on the metal legs used on the final product.
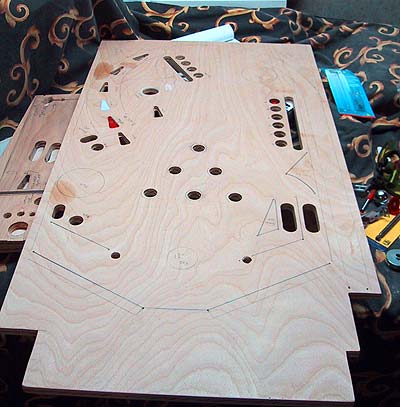
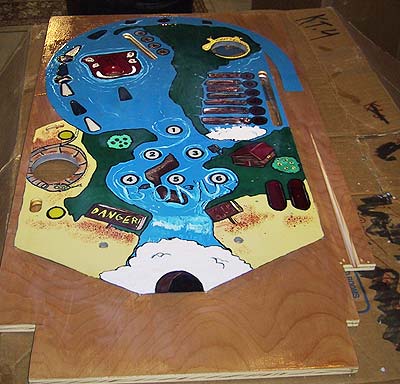
The image above shows the partially routed playfield while below is the same playfield when fully routered including the inserts and with artwork applied.
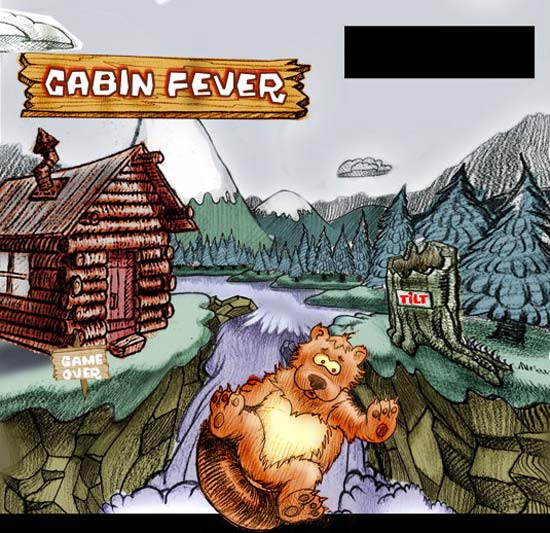
The artwork in the game is actually by two different artists. One did the playfield but did not feel confident enough to do the backglass, so a second artist created the main game image.
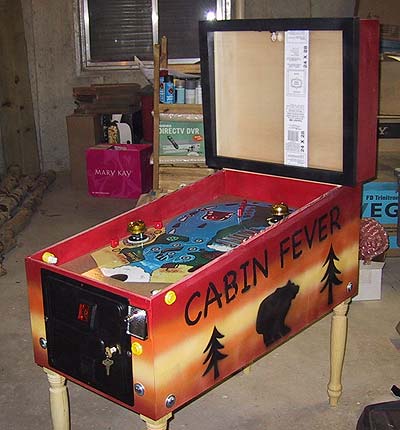
As work got underway on the cabinet, the decision was made to include a coin door. This was not previously part of the plan and its inclusion was not as easy as expected because, Jeff said, of the number of game elements vying for the space at that end of the cabinet. There's the shooter mechanism, the flipper controls, the start button and the lock down bar architecture.
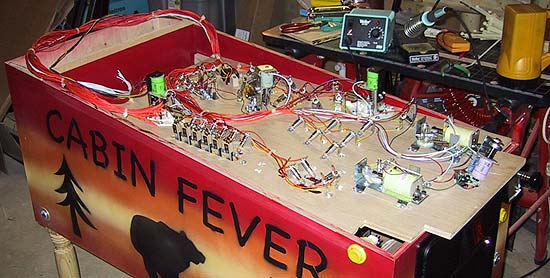
The picture above is the game in August 2006, while below you can see the wiring under the playfield.
There are 10 high current solenoid drivers, 28 switches and over 40 lamps all individually connected to the game's controller. There is no lamp or switch matrix - everything has its own control cable, which resulted in around 800 feet of wiring being used.
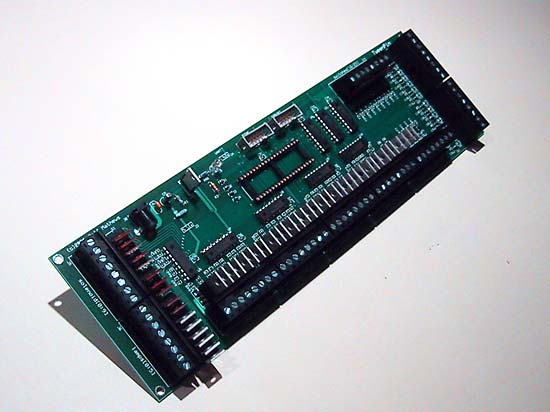
The controller board is about 4 inches by 12 inches and does everything except sound. So it senses all the switches, controls the lamps and solenoids, drives the score display and runs the game code to implement the rules. There are nine microprocessors in total on the board, eight to control all those inputs and outputs and one is the central processor to control the game code. There are additional microprocessors on the display board and on the sound board (which was not fitted on this machine). The display is LEDs, so there is no requirement for a high voltage supply. The design of the power switching - using low resistance MOSFETs - also means there is no need for heatsinks anywhere in the game. The controller board sits in the backbox which makes removing that backbox difficult, as all the terminal blocks need to be removed. This is something Jeff and Lee will be looking to address in the near future.
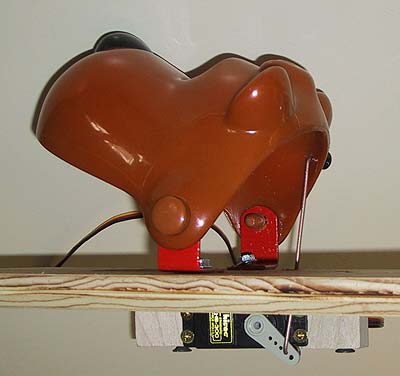
Cabin Fever's main toy is the moving bear head which is driven by a hobby servo motor of the type commonly used to control model aircraft. Jeff said they are so easy to use he couldn't understand why they aren't used more in pinball since they are mass produced and cheap, plus they give positional feedback to the game so it can keep track of how far the motor (and the mechanism attached to it) has moved. As the game is smaller than a regular game, they fabricated the cabinet from half-inch ply instead of the more usual three-quarter-inch. This became a problem later in the development when several of the standard parts - the side rails and the shooter mechanism for instance - all expect the thicker wood. So they had to make their own side rails and trim some Data East glass guides to make them fit. Other custom parts were the metal apron at the bottom of the playfield and the spinner, which uses a magnet on the spinner and a hall effect switch to sense rotation without any parts making contact. This leads to low friction with long spin times and should prove very reliable in the long term. Jeff said there are a large number of things you learn about pinball when you actually build a machine yourself. The placement of the targets and how to avoid dead spots on the playfield, for instance, and how the printed plastics change the look of the game and can hide areas you thought visible. Looking to the future, Jeff and Lee aren't planning to mass produce Cabin Fever. Instead they want to take the knowledge and experience they have gained and put it towards developing more custom games and perhaps marketing kits to enable people to build and customise their own game. You can read more about their work at their website: www.diypinball.com
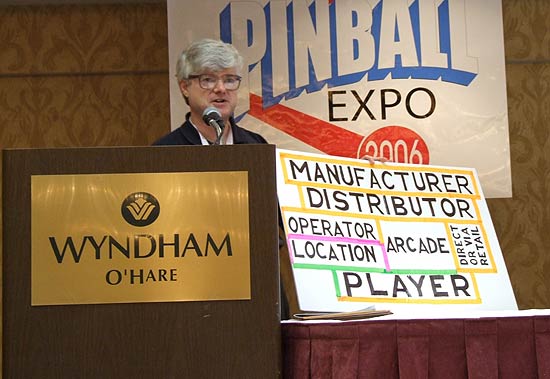
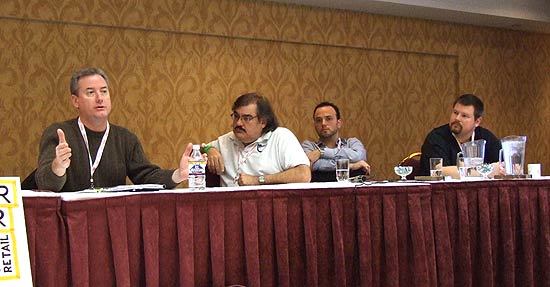
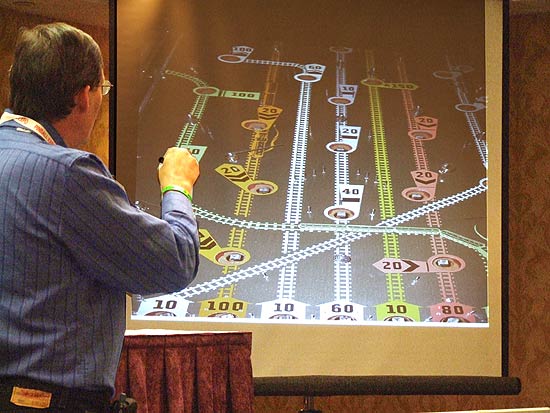
How Can We Find Good Pinball Machines On Location For this seminar, Dave Marston sought ways to boost pinball's profile and earnings by making it easier to find and play well-maintained games and hence encourage these operators to keep up their good work.
He began by showing a chart of the current market sectors for pinball and how they all filter down to the player.
He said he had added to the chart recently to reflect the growing trend for distributors to sell direct to home buyers. Dave then introduced the panel who were going to explore the problems and opportunities in these different areas.
Don has been an operator of pinball on location for many years, Ryan works for Betson - one of the largest distributors in the US - and runs the Barcade website, while Dave is from the Twin Cities Pinball Enthusiasts who organise regular meeting at various pinball locations around the Minneapolis - St Paul area. Dave Marston said during the previous day's factory tour, Gary Stern had said how 25% of sales of Pirates Of The Caribbean had gone straight to the home, and while that was an encouraging figure, Dave said it was vital that players continue to leave their homes and go out to play on location if the greater part of the business was to survive. Dave asked Don to give an example of a great location to play pinball on his route. Don chose The Cave at 452 1/2 W Franklin St., Chapel Hill, North Carolina - a location well known in the area as a showcase for new bands, where the owner allowed him to make holes in the low ceiling to accommodate the backboxes of the pins. Dave then asked about the TCPE and did they organise tournaments? Dave Slabiak said they are much more about organising regular meetings to provide a fun and friendly environment than leagues or tournaments. They meet at different locations every three weeks and sometime call ahead to let the operator know they will be there so any problems with the games can be fixed. They have also provided feedback to operators after the event to let them know of any significant issues with the games. Ryan then spoke about the Barcade website and how it was set up by Betson to promote awareness of locations and inform potential players of upcoming games. Ryan himself comes from an arcade owning family and said he has been involved in just about all aspects of the pinball business as shown on Dave's chart. Dave talked about how sites like Barcade are important because they have sprung up from a major business investing in the promotion of locations and their games. Some other sites - he cited the Internet Pinball Database - have evolved from enthusiasts getting together, talking through ideas and actually going ahead and doing something themselves with no funding or assistance from any pinball business. He then moved on to the subject of what he called world class locations - the kind of place people would drive to from all around to play pinball, such as SS Billiards, Shorty's, Lyons Classic Pinball and the Pinball Hall Of Fame amongst others, and asked if there were locations looking to move up to world class level or any places just wanting to expand their pinball business? Dave Slabiak spoke of one place in the Twin Cities area - Blainbrook Bowling Center, 12000 Central Ave NE, Blain, MN - where the operator had contacted their group to get them to visit and boost the pinball presence at the location. Don talked about players contacting operators to report faults. The main thing he wanted was for players not to report problems to the location but to contact him directly. Messages left at the location become garbled and cause annoyance whereas an e-mail direct to the operator means they get the full message and know the problem is sufficiently important to warrant a player taking the time to write an e-mail. Both he and Dave Slabiak stressed the importance of treating the operator with respect and not to report really minor issues otherwise they may decide pinball is more trouble than it's worth. Building a rapport with the operator means they will take your comments seriously and listen to your concerns. Don also mentioned the concern in publicising his locations. Dave asked whether there are any problems when players promote good locations without the involvement of the operator and Don said he deliberately doesn't publicise his games as belonging to him to try to prevent other operators stealing the location. Ryan said that's exactly why Barcade doesn't include information about the operator in each location's entry. He continued by saying how the amusement industry generally never promoted their games to the players. The manufacturers push their games at the distributors who in turn advertise to the operators and arcades but nobody was promoting the games to the people who actually play them, and that's one of the reasons for Barcade's existence. Dave listed several other pinball location sites in the US, discussing their merits and how they differ from each other. He urged players to enter details of the locations they know about to help potential players find somewhere to play near them and website owners to look at ways to share data so updates to any one site is shared across the others. Dave then asked if the panel could think of examples of locations who are proud of their pinball and promote it. Dave Slabiak cited SS Billiards and also the mini-golf center at Spring Lake Amusement Park, 1066 Hwy 10 NE, MN while Ryan spoke again about Shorty's at 2222A Second Avenue, Seattle, WA and the tables in the booths which are made out of old '50s pinball machines. Don said nearly all his other locations are single game sites only but he suggested local newspapers and magazines that run a "best of the city" type of ballot should include a "best place to play pinball" category. Dave reiterated the need to not only go out and play pinball on location but tell others about these places both verbally and through internet resources to make it easier for people to find them.
At this point, the missing fourth member of the panel - Joe Blackwell of Stern Pinball - arrived. He explained how, as a manufacturer, Stern cannot apply pressure to operators to respond to player concerns other than to impress on them how important regular preventative maintenance is in ensuring the games continue to work correctly and keep earning. Operators tell Joe the main problem is players simply not reporting faults, so telling them directly - without going through the location - is a good idea but cut them some slack as they are most likely very busy working on their games. Joe said although Stern are constantly looking at way to improve reliability, right now, some of those - such as LEDs instead of incandescent lamps - are cost prohibitive and to implement them would mean spending less on playfield features which is what draws players to the game in the first place. Dave concluded by stressing how, when talking to operators, to understand how many of them are one the verge of giving up on pinball and treat them accordingly by not reporting trivial problems but suggesting ways they can improve the take they get from the game.
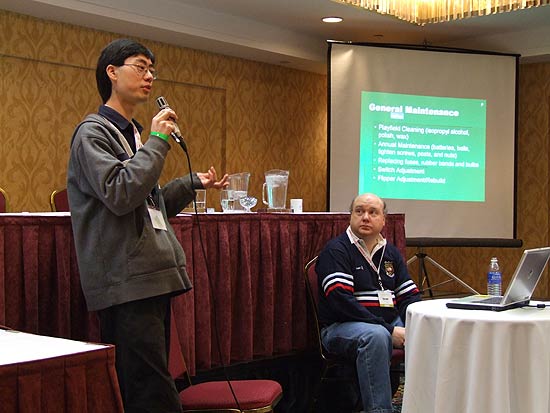
Pinball Restoration 101 - Pat Choy & Rich Huff Rich began this seminar by explaining it was aimed at those new to restoring a game and also anyone who may have bought an overseas game and found some unusual challenges.
The first thing any pinball restorer needs to do is assemble a set of tools. The basic collection recommended was:
Rich then listed the cleaning products that they use:
Sometime you need to stick parts or cabinets back together so Rich described the various products they use in their business and what they are used for.
Rich said one of the best buys he ever made was a parts tumbler. Intended to clean up gun shell casings, the tumbler has found favour amongst pinball fans for its ability to clean up small metal and plastic parts with almost no effort. He recommended crushed walnut shells as the main media for most metal parts and said crushed corn husk works for brass but not other metals. He spoke about mylar and it's main use as a playfield protector but said it can also be used to repair flat plastic parts when combined with crazy glue and to hold together or protect broken or cracked plastic ramps. When applying mylar to protect the playfield, Rich recommended thoroughly cleaning and waxing the playfield before applying the mylar. That way, he said, if you need to remove the mylar in the future, it should come up more easily. Another suggestion was to use felt pads between the legs and the cabinet where a decal has been applied. Clay spoke from the audience to suggest running a razor blade on the decal around the legs so if they do cause any wrinkles or movement, it will be confined to the decal under the legs and not affect the surrounding areas. Rich's final thought for this section was to make sure you change the batteries in your games every year to prevent leakage damaging both the battery holder and the board, and to change the batteries with the power on to keep all the settings and scores.
At this point, Pat took over and spoke about the likely problems to be found when shopping a Williams/Bally, with particular reference to games from overseas. He began by suggesting the general illumination connectors J115, J120 & J121 are often burned and so both the plugs and the pins should be replaced if any charring or overheating is found. On older games, he said, you should check the fuse holders as they become loose over time and stop making a good electrical contact causing all kinds of problems. They can be made tight again by squeezing with needle-nose pliers. Re-imported games often need to be re-jumpered from 220V to 110V and sometimes this is not done properly with the correct connections, leading to overheating around the transformer. Once that problem has been resolved, these games should also have the fuse changed from 5A to 8A. On games that have been shipped or worked on a lot, the two playfield support bolts at the side of the cabinet can work loose. As these are the only support for the playfield at the back, make sure to re-tighten them with a flat blade screwdriver. Pat spoke about using the Gorilla Glue Rich referred to earlier to glue cabinets back together. He said he sometimes uses a rubber mallet to increase the gaps between the cabinet panels so he can get the glue in properly, then clamps the cabinet using plywood to prevent marking the surface and pipe clamps to hold it tight while the glue expands. Clay suggested using shipping tape to wrap the plywood since the glue doesn't stick to the tape and the overspill should then be easier to remove. Pat then looked at regular maintenance - changing balls and cleaning the playfield, adjusting switches and replacing the rubbers. He said alcohol is very good for cleaning white rubbers where they have either become dirty from play or have yellowed over time. Clay recommended using Naptha - lighter fluid - as a better solution than alcohol for cleaning rubbers. Turning to flipper adjustments and rebuilds, Pat said the coil stops and the flipper linkages often have quite a large tolerance and so vary in dimension considerably. He suggested getting a gauge or micrometer and measuring the lengths of a few to get the best pairs to use in the same game to make sure the flippers are well matched. Clay said he prefers to bend the flipper bracket slightly to get matched distances of travel between the two flippers. Rich listed a number of resources to find information about games. For general information:
Pat moved on to some more advanced repair and maintenance methods starting with mylar removal. There are traditionally two ways to go about getting old mylar from a playfield - the hot or the cold methods. Pat said he prefers to use freezer spray to freeze the mylar and the glue as it is pulled away to separate it from the playfield surface. Next was the topic of removing siderails from games. Pat thought it wasn't as hard to remove the siderails as people often think it is. He conceded it can be tricky on games with artwork decals on the sides, but in these instances if a razor blade is run along the decal just underneath the side rail, the potential for damage is vastly reduced. To remove the side rails Pat said he works from the lock bar end and uses a chisel under the rail, working along towards the backbox and pushing a putty knife under the rail from the front as he goes. He doesn't use any heat to soften the adhesive as he doesn't think it necessary. One questioner from the audience asked about fixing inserts where the surface had curved producing a cupped effect. Clay answered this saying he would take a socket of the correct diameter and tap the insert out and if there is no artwork on it, just sand it down and refit it. If there is artwork on it, he said to build up thin layers of water-thin super glue until the surface was flat - or even slightly curved the other way - and then sand it flat without risking any damage to the graphic. A final comment from the audience advised how walnut media for the tumbler Rich spoke about earlier was readily available from pet stores as it is used as a cage lining material for exotic birds.
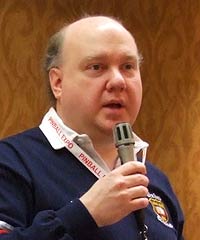
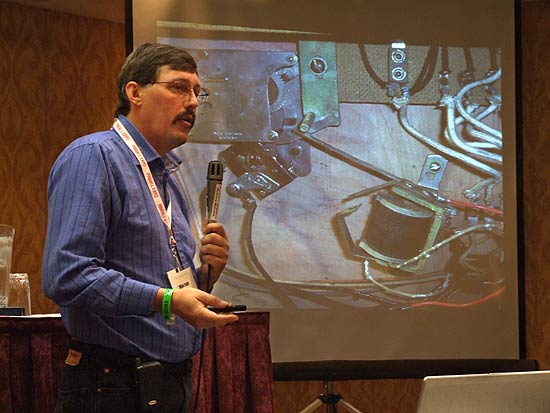
Behind The Scenes At Bally - Allan Reizman It's confession time! After heading to the sports bar for lunch with the Twin Cities guys, and despite bailing out before actually ordering any food to get back to the seminars, I'm afraid I missed the start of Allan's talk. Sorry Allan, but here's the majority of it...
So the same sounds were used from Lost World in 1978 through to Paragon in 1979 when the first changes were made. Subsequent changes were also made for Harlem Globetrotters.
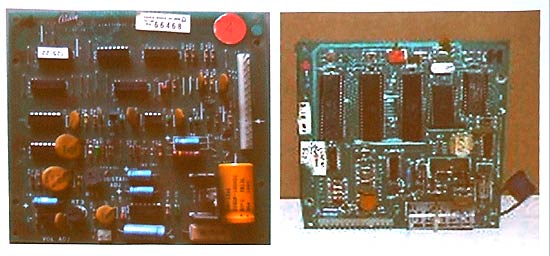
But it was Williams' use of speech on Gorgar that really turned the sound around and forced Bally to come up with a microprocessor-controlled sound system built around the Motorola 6802 chip with onboard memory. The Motorola rep said they had a stockpile of memory chips, so why didn't they use the cheaper 6808 processors without the built-in memory and Bally could have the external memory chips for free. So that was what they went with, although it is possible to replace the 6808 with the 6802 and it will still work. Later in they redesigned the board to make it less expensive, a board subsequently christened "Cheap Squeak". Allan said he is asked a lot of questions about Xenon and how that came about. He said the game had been sitting around at Bally for some time. Greg Kmiec had the idea for a tube to transport the ball above the playfield but it was a radical idea and Bally were notoriously conservative, so the concept wasn't developed for some time until Williams came out with the multi-level game Black Knight. That spurred Bally into action and Xenon was developed, and with it came the Vocalizer sound board. Suzanne Ciani recorded all the moans and groans for Xenon as well as writing the music for the game. Allan recalled how a tape was brought into the Engineering Lab and they were asked to put all the sounds onto the new Vocalizer board. The tape was about 45 minutes long with 10-20 minutes of actual usable quotes - mostly the moans and groans - far too much to fit on the board, so for two-and-a-half days the team sat in a conference room whittling down the sounds to those that could fit in the available memory. In its current form Allan thought the game was pretty boring, so for fun he put a second ball onto the playfield and found it much more exciting. He called over Greg to see and suggested they make it a multiball game. Bally had invented multiball but had dropped it because European distributors didn't like the feature. But again Steve Ritchie at Williams led the way with Firepower and its multiball, so Bally followed by adding it to Xenon. The Vocalizer board was only used on Xenon, Allan said. It was going to be used on the next game - Flash Gordon - too, but the Squawk & Talk board came along in time, so that was used instead.
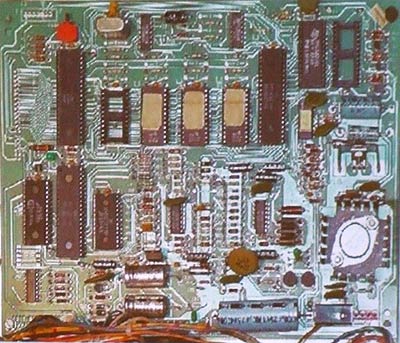
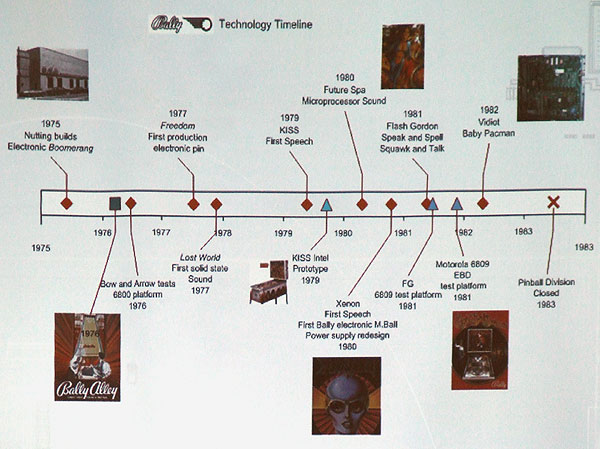
The name "Squawk & Talk" was derived from the hugely popular Speak & Spell toy, which used the same Texas Instruments voice chip and was coined by Lance Chantry. The board was designed to use a digital volume control but that feature was never implemented apart from on a few test games. Allan said the second most common question he is asked is why the Bally power supplies fail so often. He explained how, when they first found problems they concluded it was because the main board was mounted right on top of the power supply and the connectors were getting too hot. So they redesigned it with the board mounted differently, and the connectors would still overheat and melt. They tried changing to the new style of connectors - with three sides of contact called Trifurcon - with the same problem. Eventually, the European distributors threatened to boycott Bally games unless the problem was resolved and that's when Alan and a colleague developed the newer power supply used on Xenon which fixed the problem. The most often asked question he hears is about the backup batteries on the circuit boards and didn't they know the batteries would leak eventually? Allan said simply, no they didn't - there had been no research done on the longevity of these NiCd devices and they thought a rechargeable battery had to be better than the disposable ones in Williams games. Allen then spoke about the Baby Pacman game which has put on the production line during the quiet summer period. The game featured a new board driving the video monitor called the Vidiot. This timeline presented by Allen shows when the various technical developments and innovations took place at Bally from Dave Nutting's first microprocessor controlled game (Flicker) and Bally's own version (Boomerang) through to the closure of the Bally pinball division in 1983.
When the pinball division closed at the end of 1983 they merged the Bally team with the Midway team to produce Bally Midway which continued making pinball games until their later absorption by Williams in 1988. Allen said Midway thought they could just produce pinball game as easily as they were making video games but the expertise lost when Bally closed meant they never really got any momentum going. He returned to the point where Bally were still using the analogue sound chip and explained how it needed a good game and a lot of begging to get the chip modified and a new raft of sounds became available for all subsequent games. Before too long, though, all the good sounds had been used and the designers were pushing for a new set. Meanwhile, with Williams introducing microprocessor-generated sound, the possibilities became almost limitless and people began to think the playfield and other aspects no longer mattered as long as it had cool sounds, despite the fact that in most arcades you couldn't hear the sound. In response to a question from the audience about Bally trying different materials for the playfield, Allan said Kiss had a different playfield and in fact the first 300 machines (serial numbers 1000 - 1300) in each run were the pilot games in which different playfield materials were often tried, including composites, fibreglass and various types of plastics. Bally also owned part of Lenc-Smith, the company which produced the wooden playfields and didn't work with these alternative materials, so any move away from wood would damage a business they part owned, so wood remained the material of choice. Looking at alternative cabinet formats in response to an audience question, Allan recalled how Norm Clarke came up with a sit-in cabinet for a Playboy machine and also a restaurant table format - like a cocktail game but for use as a restaurant table which people could play while waiting for their meals to arrive. He said they were trying anything to get more business. Allan described the Rapid Fire game as another rush, panic job. He said it was a terrible game and nobody liked it, and it was a desperate attempt to ape Williams with their Hyperball game. The management thought it would sell like wildfire and ordered so many parts for the game Allan said he thought there were still parts in stock. Of course it didn't sell well and the left over cabinets and those bought back from distributors had to be used for Eight Ball Deluxe Limited Edition and Centaur 2. When the Bally pinball division closed up shop, Allan said nobody working there was especially surprised. Williams had spent money investing in new ideas for their pinball games while Bally's management had refused to do that and so slowly the business stagnated while the employees were looking ahead to their next career.
Bet Your '30s Pinball - Mike Eady Mike is a big collector of 1930s pinball games but they're not the only ones in his collection. He also has a number of DMD and early 1970s EM machines plus numerous cocktail games and most of the Atari pinball games. In fact he has over 300 machines in total.
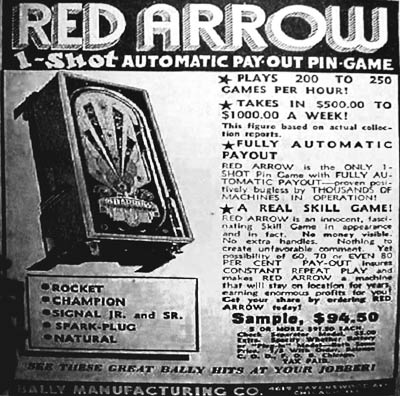
The early payout games have a special name because unlike today's games where you get 3 balls or 5 balls, these games only gave you a single ball and are known as "one balls". It was these payout games that - ironically - both popularised the game and also got pinball banned in so many American cities. Legislators decided they were games of chance just like slot machines and so were outlawed until as recently as the mid '70s in some areas of the US. Mike recalled how Roger Sharpe was instrumental in overturning the ban on pinball in New York, something you can read and hear about in our Fireside Chat article. When Bally started - it was set up by Ray Maloney who was being subcontracted by Williams to make games since their factory couldn't make them fast enough, who decided to set up his own company instead of working for Williams - they very soon began making the one ball gambling games. This was in the middle of the Great Depression, when money was virtually non-existent in large sections of society, and these one ball games were being sold on advertising claiming they could be played 200+ times an hour.
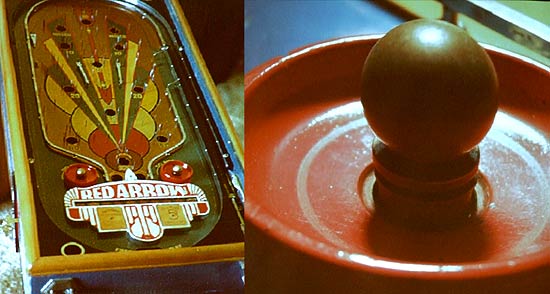
With a retail price of $95, it wasn't long before they paid for themselves and started making real money. One advertisement asked potential buyers if they could imagine earning $1,000 a week and the company even offered to buy the machine back if it didn't bring in $90 a week for the first three weeks. So anyone with $95 in their pocket would be buying one and operating it, earning $90 a week at a time when a qualified doctor was earning just $61 a week, he said. These games were marketed as a game of skill, not chance, with the tempting prospect of turning your nickel into a dollar through the automatic payout system if you got the ball in the right hole. So, although it was very clearly a gambling game, it was sold solely as a skill game. Mike contrasted the plush look of the game and the money spent on the appearance with the pervious speaker's stories about how, in the company's latter days, Bally wouldn't spend on research and developing new ideas. Obviously, with the possibility of winning decent cash prizes, the game had to be protected from abuse and Bally fitted two separate tilt mechanisms.
The mechanism consisted of a metal ball sitting in a saucer. When the game was started, a small plunger would raise the ball up so it was sitting on the tip of the plunger as shown above. If the game was nudged too hard, the ball would be dislodged from the plunger and make contact between the plunger and the saucer, tilting and ending the turn. To make it harder, some operators filed down the plunger making the balance of the ball even more delicate almost to the point of making the game unplayable With the operator's earnings at stake, they didn't make it any easier to win on the playfield either. The arrangement of the pins was deliberately set to guide the ball away from the higher scoring holes and down into the "MISS" hole or holes where no money was won. Looking at the pins it's sometimes hard to imagine just how the ball could ever end up in the most lucrative (to the player) holes. Although these games were electrically powered, in the 1930s most homes or businesses didn't have a mains electricity outlet available to run them, so they were often battery powered using telephone cells. That inevitably meant the battery would run down over time and the longer the ball time on each game, the fewer games could be played. So a timer mechanism was often employed to limit the duration of play. Once play was started, the timer would count down and if the game wasn't completed in the allocated time, the turn would end. Once AC became more widespread, these timers were often left in the game because they had the benefit of restricting the time available for anyone to cheat or exploit any faults in the game.
Because the payout games became so popular, Bally revisited many of their non-payout pinballs and produced payout versions of them rather than design new layouts and themes. But Bally didn't have the market to themselves. Mills were one company wanting a slice of that pie and they were already in the gambling market with their slot machines but couldn't get such obvious gambling games into many locations. So when they moved into payout pinball, their first attempt was a hybrid slot/pinball where the player first played the slot part and if they got a winning line they played the pinball part to determine their payout. Of course that hybrid game didn't fool anyone and didn't get the the access to the more restrictive markets they were looking for. So they developed a different system starting with Tycoon and then this Railroad game.
This was a breath of fresh air for players fed up with Bally's restrictive tilt and numerous pins deflecting the ball away from the good scores. Railroad had a much more open playfield but only the selected lines paid out making it much harder than it appears. Although there were fewer of them on the playfield, the difficulty of the game could be changed by the addition or removal of those pins in much the same way as outlane widths can be adjusted today to to optimise ball time. And Mills were much more circumspect than Bally about publicising the payout from these games. Where Bally put the payout scoop right up front and out in the open, Mills had a hidden drawer where the coins were dispensed. These were not gambling games remember! Another way to circumvent the gambling laws was the payment of winnings in "checks". These were coins with hole through the centre which could be exchanged at the bar for goods or sometimes for cash, depending on the location. In other instances the game would dispense tickets as proof of winning and given to the location owner who (if you weren't part of the law enforcement community) would unlock a door on the machine and give you your winnings. Mike then spoke about two Jennings games - Pearl Harbor and Sportsman - describing their features and characteristics, and explaining how he tries to restore the games back to their factory set-up as shown in the flyer or in trade advertisements. Because many of the spares for games from the '30s are simply not available any more, he has a machine shop where he makes many of those parts needed to restore them. The 1930s were a special time in pinball, he said, because there were more manufacturers and more pinball games being made than at any other time in history. Furniture manufacturers who weren't making money saw these pinball games and the profits they were bringing in, not just for the operators but for the makers, and realised they had the workshops and facilities to make them too. So the number of pinball manufacturers soared, even if some of them only made a couple of models. He urged everyone to find their own individual type or style of game they enjoy and start collecting them to preserve pinball history for future generations before it's too late.
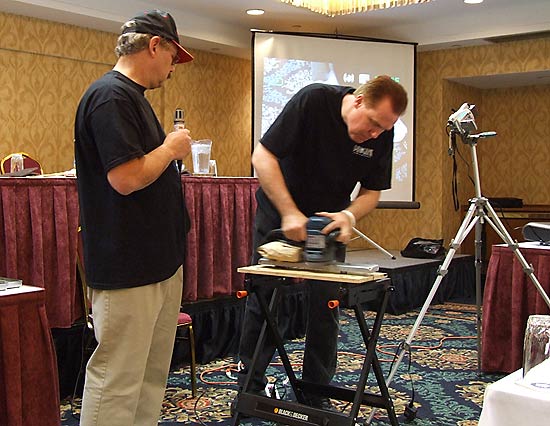
Restoring Lockbars & Other Stainless Pin Parts - Mark and Don are something of Pinball Expo seminar stalwarts as they are regular speakers in this Friday afternoon slot and always have something new to show the audience and usually manage to finish their presentation with a prize quiz.
They were at pains to stress how their method is not the only way but it's one which involves minimal physical work and is adaptable to a number of different finishes. They began with "When Bad Things Happen To Good Lockbars" - a section looking at the problems that arise when a lockbar is repaired with welds, pop rivets or carriage bolts and when it is damaged, bent or scratched. Mark explained how, for WPC games, there are a few people selling replacement lockbars - both the regular and widebody sizes - so before undertaking significant repairs to a lockbar, you might like to consider saving your time and just getting a new one. Don continued, saying how nearly every lockbar in people's collections would benefit to some extent from polishing and/or re-graining. When someone tries to pry the lockbar off a game using a screwdriver or similar implement, the steel in the lockbar can split, especially around the corners. Other times, people drill holes in the lockbar or need to re-attach the clasps underneath. In all these cases, welding may be the answer. Mark said the type of welding used is TIG (Tungsten Inert Gas) and they suggest using 347 alloy wire. Welding leaves a discolouration on the metal and just as importantly, either a bump or a dip where the weld took place. For a lockbar, Don & Mark showed how a vice or a Workmate could be used to hold the part in place providing access to the top, left, right and front surfaces. To get rid of a welding "bump" you need to use an angle grinder with a flexible grinding disc. Don said the use of the angle grinder is an art and requires practice to get the best results. You may not be doing the welding or grinding though, so the main subject is polishing and re-graining. This needn't be a hugely time-consuming business though with Mark and Don estimating less than an hour for a lockbar and a coin door could be taken off the game, polished and refitted in around two hours. The main tool used is a random-orbital (also called "Dual-Action") electric sander along with sanding discs of grades; 60,150,220,400,600,1000 and 1200. Hardware stores sell the coarser grades but for the finer paper you may have to resort to a woodworking shop. You'll also need some Scotch-Brite hand pads in the three medium grits. If you've got gouges or deep scores on the lockbar, you need to start off with one of the coarser sand papers and the sander. The wider the score, the coarser the paper. They don't recommend going down to the 60 grade unless it's absolutely necessary because the stainless steel used for lockbars is quite soft - softer than some hardwoods in fact - so it's quite easy to find yourself removing too much. Provided there are no bad gouges, you should start with a 220 grade paper and work your way up to the finest grade to get a mirror finish ready for your final surface of choice. A very smooth finish will show up finger marks but look good when clean whereas a grained finish will keep its clean looks while still being attractive. To get all the marks and scratches out, you use the appropriate paper on the sander and use a technique called "flying in, flying out" whereby you start with the sander above the surface at one end and bring it into contact while moving it along the surface until you reach the end and lift it off, all in one smooth, continuous motion.
The same technique should then be used for the sides and the ends. If you don't use the fly-in, fly-out motion, you can end up with swirl marks in the metal where the sander leaves the surface. To get the desired brushed finish, use the Scotch-Brite pads wrapped around a wooden block and unlike with the electric sander, you're working from the finest to the coarsest and working in a straight line until, you achieve the effect you want. For coin doors, Don said to first make sure you are working on a stainless steel coin door. If it's got rust or is a plated door, don't try this technique. But assuming it is stainless steel, first disassemble and remove the door. The try to knock out any dents using a block of wood to spread the hammer's force and prevent any new dents. Before sanding, put the door on a rubber mat or piece of carpet to protect it and wrap the plated hinge with duck tape to protect that too. Then you use the same technique described above for the lockbar, gradually using finer and finer grades of paper and then regrain using the Scotch-Brite pads. Moving on to side rails, the same techniques are used and they can be performed in-situ. If doing this, the top surface is easy enough but some precautions are needed on the sides to prevent damage to the cabinet artwork. Or you can avoid using the sander altogether and just use the Scotch-Brite. For metal ramps with ball tracks, it's unlikely you'll need to sand them but remove them in any case and place on the same protective mat as above and using the Scotch-Brite pad, move in a straight line to replicate the original finish and get the tracks out. Despite the work you put into removing the ball tracks on ramps, the soft nature of the stainless steel means, unfortunately, they won't be gone for long. But if your stainless steel part needs more severe repair work and you don't have access to a welder, what else can you do to make an effective repair? One solution is an automotive panel bonding adhesive of the type used by car makers to stick sundry parts of the bodywork to the chassis such as 3M's Automix. The trouble with that is the high cost of around $40 a tube and $75 for the applicator gun. So an alternative is J-B Weld, a two part liquid steel/epoxy resin product costing under $5. It's not a perfect solution but for home use it should be perfectly adequate and it's cheap and easy to apply too. Don then set up a lockbar in a Workmate and did a live demonstration of sanding the metal to show how the surface improved as he moved through the different grades of paper ending up with the 1200 grade to give a near mirror finish. He then used the Scotch-Brite pads to give the final surface finish. In response to audience questions, Don suggested using Duck Tape to protect the spring steel ramp flaps when working on a ramp and wearing eye and breathing protection while doing the sanding. After that, they began the draw for the quiz questions. All audience members had been given a numbered ticket and numbers were drawn at random. Those holding the winning ticket had the choice of question on pinball or rock-n-roll. Each question had two possible answers shown on the projector screen. If the contestant chose the correct answer they got to choose a prize from an assortment of translites, flyers, sanding discs etc. Losers got a pack of mini M&Ms. Thankfully, this reporter got his pinball question correct and collected a Starship Troopers translite. After all the questions had been answered and all the prizes had been given away Mark and Don's seminar drew to a close.
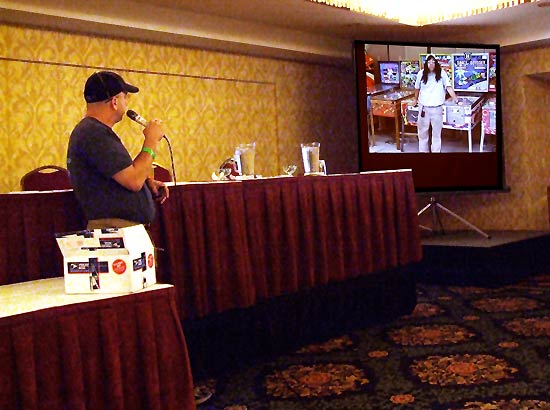
The Norm & Shaggy Show with Clay Clay is another old hand at Pinball Expo seminars where he talks about, and presents clips from, his upcoming video releases.
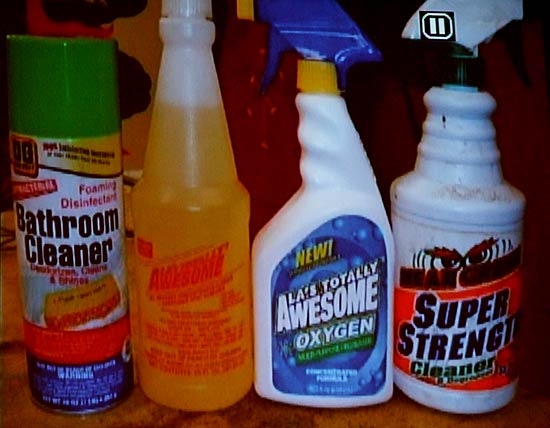
He started off by explaining how people are always asking him what the next TOP video will cover and how he's never able to answer that because he always has several productions in the works but problems crop up which make it impossible to publish any kind of release timetable. After relating a story about repairing a shuffle alley game en route to Pinball Expo, Clay told the audience how he has been going to people's homes and filming their game rooms and many of them have highly interesting games, some worth considerable sums of money. In his first video presentation he introduced Shaggy who - after a little to and fro with Clay - was to be the guide around the gameroom of Pinball Expo co-organiser Rob Berk. Between them, they looked at the 60 games in Rob's basement gameroom, picking out the most interesting models, his firework collection and a special look at Lambie with an explanation of how that particular item came about. It's now time for the second confession of the day. Sometimes during the Pinball Expo seminars, it's all too easy to get enthralled in the presentation and lose awareness of what else is happening around you. In this instance, I was totally unaware of the fact that I had somehow pulled the microphone cable out of my laptop computer and was now recording a rather classy and high quality silence. Fortunately this only lasted about 10 minutes but it does mean I don't have any notes about the second gameroom Clay showed. However, the presentation soon moved on to the highlight of the seminar, clips from the new TOPs video about ball bowlers and shuffle alleys. Clay described how the video details the history of bowlers and looks at the numerous different types of bowler - 20 in total - as well as explaining how to restore and repair them and how the mechanics of the games also apply in part to pinball games of the same era. Starting with an example of one bowler he restored, he chastised the smokers in the audience for the disgusting nicotine stains all over the cabinet and the extra work he had to put in to remove them. He recommended a product range called LA's Totally Awesome and their degreaser and carpet cleaner (centre-right and centre-left below) available from a number of dollar stores - see the product's website for locations. Clay said normally they would use Mean Green but in this case it was ineffective against the nicotine coating on the game's cabinet.
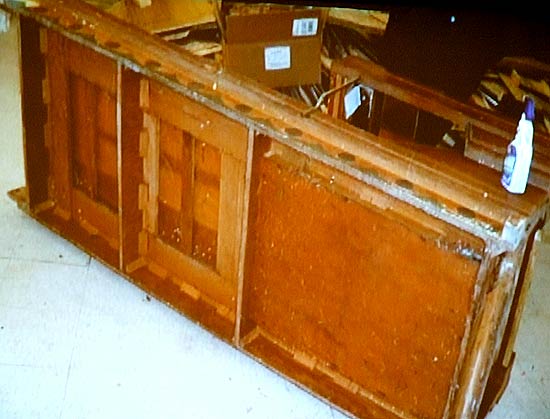
He also suggested using the Dollar General bathroom cleaner (left, above) as it's much more effective compared to the Dow equivalent at removing nicotine on pinballs. The picture below shows the bowler before cleaning had begun.
Clay said the game doesn't have a credit counter unit and thus can't be set for free play, so he modified the coin return switch to add a credit when pressed. He said bowlers never seem to come with all the legs and this one was no exception. It had two legs but Clay made a third and took the fourth from another bowler before fitting wheels to all four legs to make moving the game easier. After cleaning, the restoration continued by checking the rollover switches and the switch mechanisms, cleaning out the cable conduit from the back to the front, which Clay termed the mouse hole since rodents love to set up home in there, followed by checking the cable connectors and the foam strips to cushion the pins as they rise to prevent breakage. He went on to describe problems commonly found with the pin reset mechanism and how they can lead to the motor burning out and what to do to prevent that happening. Despite being a fairly simple game to play, this specific model contains 14 stepper units and 18 score reels - far more than any normal EM pinball game. Over time, the grease applied to the stepper units to lubricate them breaks down into a gel which gunges up the mechanisms and prevents them from working. So they need to be stripped, cleaned and re-lubricated which is not a quick job. Both backglasses needed replacing due to ball damage and when the game was finally in a playable condition, Clay said he had spent a solid week working on it, and that's when it's done by someone who is experienced in restoring bowlers.
After an interjection from the screen by Shaggy, Clay showed a section from the TOPs video covering a 1960 Bowl-a-rama contact bowler from United - an unusual game where the ball actually hits the pins and is a minimum of 20 feet long. Norm and Shaggy explained how the various mechanisms in the game work from the pin hit sensors to the reset and the score displays. Clay said people tend to prefer contact bowlers since the ball or puck actually hits the pins but he said that makes the pins break far more often and in his opinion they are more trouble than they are worth as replacement pins are hard to find and most reproductions are too inflexible to last long. After that came a United multi-game rolldown bowler, so called because there are several different ways to play and because the lane slopes down towards the pins so any ball will automatically roll down to the back of the game. They explained how the various games available on the bowler differ and how the rules of each of them work. They looked at several more different bowlers and shuffle alleys, each of which has its own unique features and works in a slightly different way. Shaggy then said when Norm isn't around he takes the bowlers out for a drive and showed some footage showing what looked like a bowler being driven around. The video continued with Duncan Brown showing his United's Bonus bowler and telling the story of how he came to buy it from the family of the guy who did the wiring at United. Shaggy explained why the video is about bowlers and not shuffle alleys. The reason he said is that mechanically, they are more or less identical but bowlers are so much more fun than shuffle alleys and worth far more once restored. He claimed that if you have one in your game room people will pass up the chance to play all your top notch pinball games and head straight for the bowler and play that all night because, while they may not know all the rules to each individual pinball game, everyone knows how to bowl. Clay told the audience to be aware how most bowlers you buy for restoration have been sat in someone's basement for 10 years and in the kind of condition shown above. But the upside to that is people just want them gone and don't want much money for them. Finally, Shaggy introduced the audience to the delights of Dandy. At last year's presentation we got to meet Candy who had a special talent polishing shooter rods. Well, Dandy is Candy's scantily-clad sister who is the ball bowler girl, and she got to test the restored ball bowler. You can probably imagine the rest and if you can't, tough because most of it's not in the TOP video and was just for the Expo audience. But there's plenty of great stuff in TOP8 and you can buy it from Clay's site at: www.marvin3m.com/top/ And that ended the Norm and Shaggy Show for 2006.
Clay's presentation brought Friday's seminars to a close. This year, there were some additional seminars on Saturday and we'll bring you those and the banquet events in our next report.
© Pinball News 2006 |