|
|

|
TEN THINGS MOTHER
TAUGHT YOU ABOUT REBUILDING FLIPPERS |
|
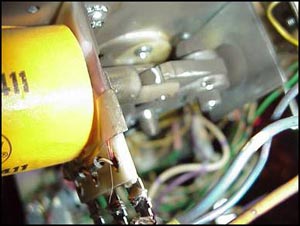
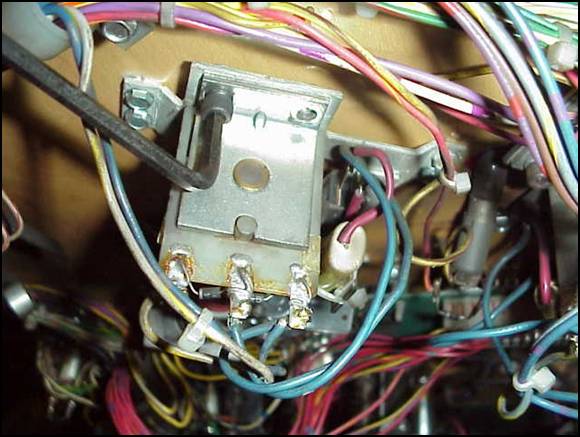
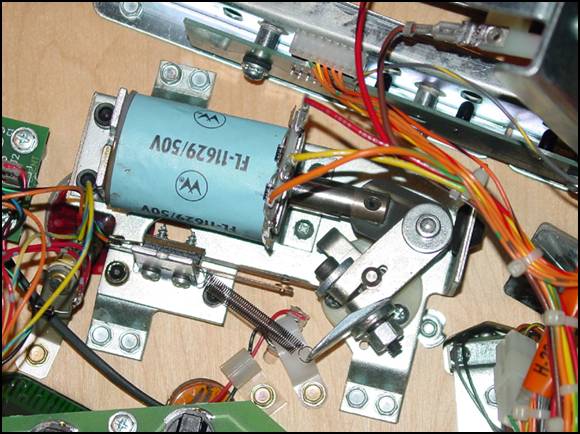
By Todd "PinTed" Andersen The following is a list of ten things your mother taught you, but never told you applied to rebuilding pinball flippers. This is something I had to learn the hard way. I learned it on the street - while working on a coin-op route. 1) Safety First! 2) A KISS Usually Makes It Better Always look for broken: brackets, diodes, and wires on the assembly you are having trouble with. First look for shorted brackets or diodes on the assembly you are having trouble with. Verify that the assembly will not allow the coil's lugs to short out against something nearby. The lug of the coil was intermittently shorting against the playfield rail until Lloyd isolated the lug. (LTG) After first looking at the suspect assembly, check the voltage with a meter. Then, if the incorrect voltage is found, depower, pull and electrically check the associated fuse. Lastly, use your meter to verify that the suspect assembly's wiring is complete over to an associated assembly and/or back to its board. Only now have you limited the possibilities of a problem to the associated circuit board. 3) Your Eyes Are Your Best Feature Look for tell-tail signs such as excessive: dirt, dust, or lubrication. Look for problems such a: binding, broken, cracked, crooked, loose or incorrect parts and/or assemblies.
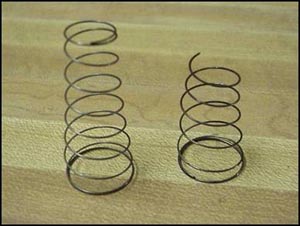
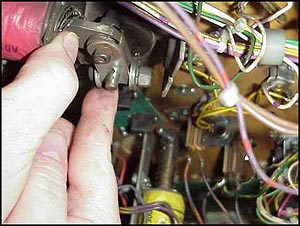
Yes, this open was rigged just to get this picture, but it's still a good example. Links can be gently twisted to expose cracks or fatigue. This technique is especially useful on flipper links. I don't remember how many of Lloyd's games I had to look in before I found this. And even then, this crack was not visible until the link was flexed. Push the plunger at a 45° angle when checking for drag due to a mushroomed plunger end. Push four points around the plunger. If you are not sure if you feel drag/resistance, disassemble the flipper assembly and start over again with a visual inspection. The plunger on the left is new. The end of plunger on the right has flattened so much that it has just started to mushroom and scrape against the coil sleeve. The stationary parts of every assembly should be tight. There should be no play or slop. 5) You Can Keep It Together Yes, yes another rigged picture. But, you get the point don't you? (LTG) If the spin technique does not work, you probably missed the fact that either one piece of the assembly is bent/warped or it is broken/cracked. In such cases, a rebuild is necessary.
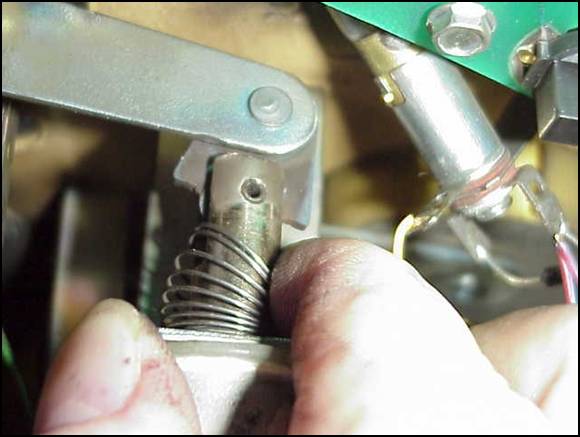
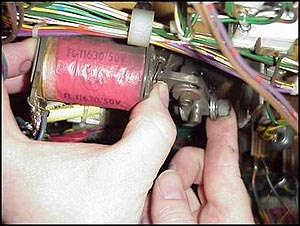
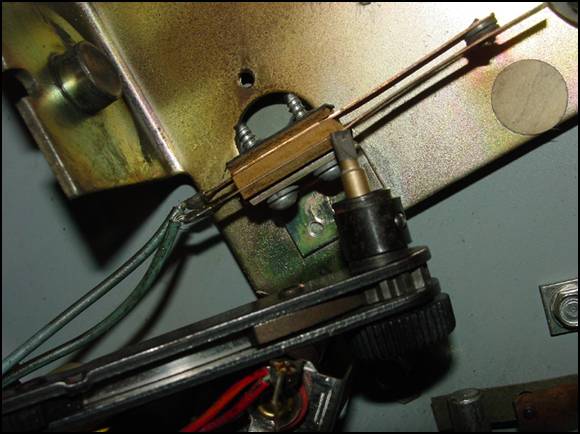
Pictured below, courtesy of LTG, is the proper way to check for slop of a flipper link. First fully actuate only the metal plunger with your finger. Listen and feel for the plunger to hit and seat against the coil stop. No not use any other part of the flipper for this test! If the plunger does not seat, you need not go any farther; it is time for a rebuild. If the plunger does seat, it is time to check for excessive play in the flipper link. Keep the plunger firmly held against the stop. Then, push down and pull up on the pawl. If you can easily move the link more than 1/8 inch, it is time for a rebuild.
If your active inspection proves the flipper parts to be sound, it is time to look at the leaves of the End of Stroke (EOS) switch. If your EOS is normally closed, the spacing between the now open tungsten contact points should be 1/8 inch. If your EOS is normally open, the gold points should start 1/8 inch apart and should have traveled at least another 1/8 inch after the contacts first closed. With either type of EOS switch, there should be no contact with the cam on the pawl when the flipper is at rest. Both EOS switches should have at least 1/8 inch travel at the very end of the flipper stroke. The starting and finishing requirements of the EOS allow the contact to burnish one-another, thusly self-cleaning the points. Slowly actuate only the metal plunger to verify correct and proper operation of either type of EOS. If you can verify that the plunger assembly is actuating properly, but if the EOS is not working properly, it is time to adjust the stationary blade of the EOS. You must verify that the EOS is tight before you can adjust it. The proper way to tighten a switch stack is to start with the screw closest to the contacts first. Then tighten the other screw. Because this tightening my bring the spacing of your EOS back into spec, go back and re-actuate, again, only the plunger. If the EOS is still out of spec, stat by adjusting the stationary blade as needed. Then, and only if needed, adjust the moving blade of the EOS.
Something like a PinPan , which JoePinball sells, can be very useful in keeping parts organized and in keeping them from getting lost in the machine.
Do as Bryan (AKA: Mr. Pin-Footie) says and does - put parts on a different table. That way you won't have to waste time looking for a part which you dropped or misplaced.
In Game
On Line
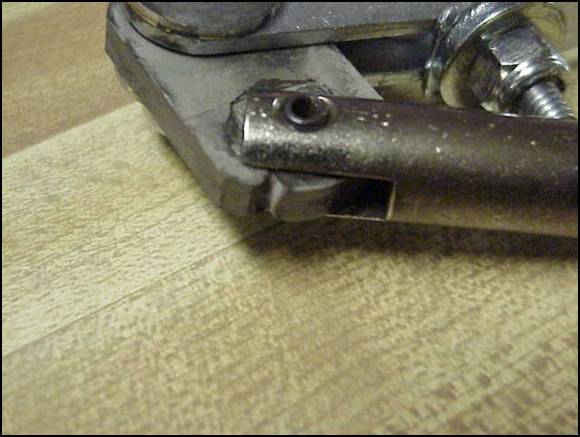
A 1/4 inch, right angle driver is very useful when working in confined/small spaces. For this very same reason, hemostats are also very useful tools for use in pinball machines.
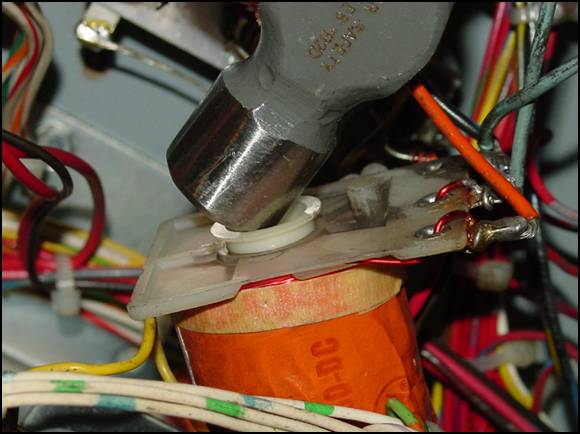
A 11/32 inch nut driver can be used to remove an old coil sleeve. Gently tap the driver with a small hammer to chase out the old sleeve.
Parts can be seated or tightened by gently tapping them with a small hammer. This can, and even should, be done with a new coil sleeve. But, if a new coil sleeve won't fit when very gently tapped with a hammer, try another sleeve. Due to standard manufacturing variation such as differences in: outside diameter, part rigidity, and wall thickness, one sleeve may fit when a seemingly identical sleeve did not. If the different sleeve still doesn't fit, it's time to change the coil.
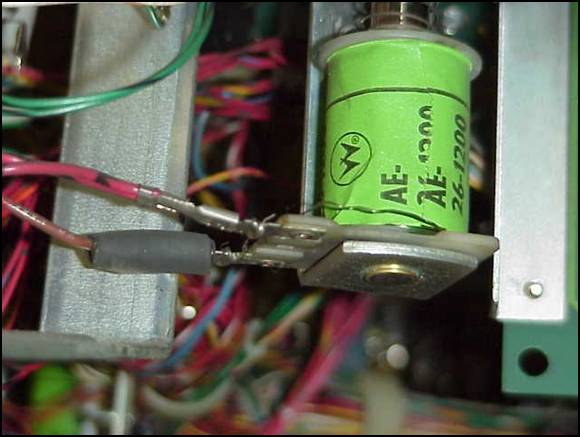
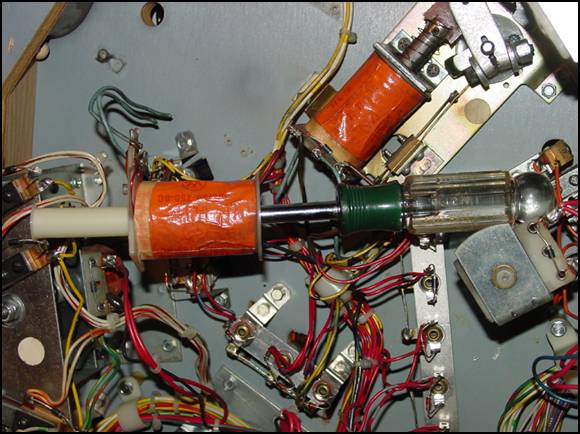
Whenever possible, position flipper coils so that the lugs are in the center of flipper assembly rather than towards the stop bracket. This will lessen the vibration going to the attaching points and will help with the longevity of the connections to the diodes and wires.
Picture This
© Pinball News 2006 |